【人脸检测】试用python版本Dlib人脸检测、关键点、对齐、识别
主要参考两篇:
https://blog.csdn.net/liuxiao214/article/details/83411820
https://www.jianshu.com/p/577af31ced74
0.环境
windowspython3.6Dlibnumpy==1.14.5globopencv-python==3.4.3.18
安装Dlib参考:https://blog.csdn.net/qq_35975447/article/details/109802787
0.1 文件结构
│ .gitignore│ faceAlignment.py│ faceDetect.py│ faceLandmarks.py│ faceRecognition.py│ file.txt│├─data│ │ test_1988.jpg│ ││ ├─candidate-faces│ │ liushishi.jpg│ │ liuyifei.jpg│ │ tangyan.jpg│ │ tongliya.jpg│ │ yangzi.jpg│ │ zhaoliying.jpg│ ││ └─faces│ tangyan.jpg│ zhaoliying.jpg│├─models│ dlib_face_recognition_resnet_model_v1.dat│ mmod_human_face_detector.dat│ shape_predictor_5_face_landmarks.dat│ shape_predictor_68_face_landmarks.dat│└─results├─alignment│ test_1988_0_Align68.jpg│ test_1988_1_Align68.jpg│ test_1988_2_Align68.jpg│ test_1988_3_Align68.jpg│ test_1988_4_Align68.jpg│ test_1988_5_Align68.jpg│├─detect│ test_1988_HOG.jpg│ test_1988_MMOD.jpg│├─landmarks│ test_1988_5Landmarks.jpg│ test_1988_68Landmarks.jpg│└─recongnitionrecognition_reslut.txt
0.2 模型下载
https://github.com/davisking/dlib-models
0.3 我的代码
https://download.csdn.net/download/qq_35975447/13129563
1.人脸检测两个方法对比
两种方法主要包括:Dlib自带与调用深度学习模型的方法。
1.1 时间
| HOG | MMOD |
| 1.437422513961792s
| 106.82666826248169s |
1.2 效果
原图:

HOG效果:

MMOD效果:

1.2 代码
这里代码主要参考第一个链接中的,然后根据Dlib自带与调用深度学习模型的方法,循环执行测试时间,并保存图片到results/detect/目录下:
# encoding:utf-8import dlibimport cv2import osimport timedef rect_to_bb(rect): # 获得人脸矩形的坐标信息x = rect.left()y = rect.top()w = rect.right() - xh = rect.bottom() - yreturn (x, y, w, h)def resize(image, width=1200): # 将待检测的image进行resizer = width * 1.0 / image.shape[1]dim = (width, int(image.shape[0] * r))resized = cv2.resize(image, dim, interpolation=cv2.INTER_AREA)return resizeddef detect(isHOG=False):image_path = "./data/"image_file = "test_1988.jpg"startTime = time.time()if isHOG:detector = dlib.get_frontal_face_detector() # 基于HOG+SVM分类else:model_path = "./models/mmod_human_face_detector.dat" # 基于 Maximum-Margin Object Detector 的深度学习人脸检测方案detector = dlib.cnn_face_detection_model_v1(model_path)image = cv2.imread(image_path + image_file)image = resize(image, width=1200)# image = resize(image, width=600)gray = cv2.cvtColor(image, cv2.COLOR_BGR2GRAY)rects = detector(gray, 1)print("{} method, detect spend {}s ".format(("HOG" if isHOG else "MMOD"), time.time()-startTime))for (i, rect) in enumerate(rects):if isHOG:(x, y, w, h) = rect_to_bb(rect)else:(x, y, w, h) = rect_to_bb(rect.rect)cv2.rectangle(image, (x, y), (x + w, y + h), (0, 255, 0), 2)cv2.putText(image, "Face: {}".format(i + 1), (x - 10, y - 10), cv2.FONT_HERSHEY_SIMPLEX, 0.5, (0, 255, 0), 2)cv2.imshow("Output", image)savePath = "./results/detect/"if not os.path.exists(savePath):os.makedirs(savePath)if isHOG:saveName = image_file[:-4] + "_HOG.jpg"else:saveName = image_file[:-4] + "_MMOD.jpg"cv2.imwrite(savePath + saveName, image)cv2.waitKey(10)if __name__ == "__main__":isHOG = Truedetect(isHOG)if isHOG:isHOG = not isHOGdetect(isHOG)
2.人脸关键点检测两种对比
两种主要包括:5个关键点与68关键点。都需要调用模型。
2.1 时间
| 68Landmarks | 5Landmarks |
| 0.011994600296020508s | 0.0030002593994140625s |
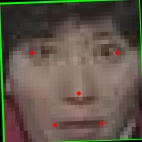
2.2 性能效果
5个landmarks

68个landmarks

2.3 代码
这里代码主要也是参考第一个链接,分别执行两种方法,然后将结果保存至./results/landmarks/下:
# encoding:utf-8import dlibimport numpy as npimport cv2import osimport timedef rect_to_bb(rect): # 获得人脸矩形的坐标信息x = rect.left()y = rect.top()w = rect.right() - xh = rect.bottom() - yreturn (x, y, w, h)def shape_to_np(shape, is68Landmarks=True, dtype="int"): # 将包含68个特征的的shape转换为numpy array格式if is68Landmarks:landmarkNum = 68else:landmarkNum = 5coords = np.zeros((landmarkNum, 2), dtype=dtype)for i in range(0, landmarkNum):coords[i] = (shape.part(i).x, shape.part(i).y)return coordsdef resize(image, width=1200): # 将待检测的image进行resizer = width * 1.0 / image.shape[1]dim = (width, int(image.shape[0] * r))resized = cv2.resize(image, dim, interpolation=cv2.INTER_AREA)return resizeddef feature(is68Landmarks=True):image_path = "./data/"image_file = "test_1988.jpg"detector = dlib.get_frontal_face_detector()if is68Landmarks:predictor = dlib.shape_predictor("./models/shape_predictor_68_face_landmarks.dat")else:predictor = dlib.shape_predictor("./models/shape_predictor_5_face_landmarks.dat")image = cv2.imread(image_path + image_file)image = resize(image, width=1200)# 1200gray = cv2.cvtColor(image, cv2.COLOR_BGR2GRAY)rects = detector(gray, 1)shapes = []startTime = time.time()for (i, rect) in enumerate(rects):shape = predictor(gray, rect)shape = shape_to_np(shape, is68Landmarks)shapes.append(shape)(x, y, w, h) = rect_to_bb(rect)cv2.rectangle(image, (x, y), (x + w, y + h), (0, 255, 0), 2)cv2.putText(image, "Face: {}".format(i + 1), (x - 10, y - 10), cv2.FONT_HERSHEY_SIMPLEX, 0.5, (0, 255, 0), 2)print("{} method, detect spend {}s ".format(("68Landmarks" if is68Landmarks else "5Landmarks"), time.time()-startTime))for shape in shapes:for (x, y) in shape:cv2.circle(image, (x, y), 2, (0, 0, 255), -1)cv2.imshow("Output", image)savePath = "./results/landmarks/"if not os.path.exists(savePath):os.makedirs(savePath)if is68Landmarks:saveName = image_file[:-4] + "_68Landmarks.jpg"else:saveName = image_file[:-4] + "_5Landmarks.jpg"cv2.imwrite(savePath + saveName, image)cv2.waitKey(10)if __name__ == "__main__":is68Landmarks = Truefeature(is68Landmarks)if is68Landmarks:is68Landmarks = not is68Landmarksfeature(is68Landmarks)
3.人脸对齐
本来这里也要测试两种方法的,但是5个关键点的好像不太好改,就放弃了,不过参考代码还是放在里面了,可以自行删去。
3.1 时间
| Alignment |
| 0.04295229911804199s |
3.2 效果
由于图太模糊了,挑出几张来:


3.3 代码
这里的关键点是根据:

结果会保存至./results/alignment/:
# encoding:utf-8import dlibimport cv2import numpy as npimport mathimport osimport timedef rect_to_bb(rect): # 获得人脸矩形的坐标信息x = rect.left()y = rect.top()w = rect.right() - xh = rect.bottom() - yreturn (x, y, w, h)def resize(image, width=1200): # 将待检测的image进行resizer = width * 1.0 / image.shape[1]dim = (width, int(image.shape[0] * r))resized = cv2.resize(image, dim, interpolation=cv2.INTER_AREA)return resizeddef face_alignment_68(faces):# 使用68点关键点模型,根据关键点信息求解变换矩阵,然后把变换矩阵应用到整个图像上。predictor = dlib.shape_predictor("./models/shape_predictor_68_face_landmarks.dat") # 用来预测关键点faces_aligned = []global startTimestartTime = time.time()for face in faces:rec = dlib.rectangle(0,0,face.shape[0],face.shape[1])shape = predictor(np.uint8(face),rec) # 注意输入的必须是uint8类型order = [36,45,30,48,54] # left eye, right eye, nose, left mouth, right mouth 注意关键点的顺序,这个在网上可以找for j in order:x = shape.part(j).xy = shape.part(j).ycv2.circle(face, (x, y), 2, (0, 0, 255), -1)eye_center =((shape.part(36).x + shape.part(45).x) * 1./2, # 计算两眼的中心坐标(shape.part(36).y + shape.part(45).y) * 1./2)dx = (shape.part(45).x - shape.part(36).x) # note: right - rightdy = (shape.part(45).y - shape.part(36).y)angle = math.atan2(dy,dx) * 180. / math.pi # 计算角度RotateMatrix = cv2.getRotationMatrix2D(eye_center, angle, scale=1) # 计算仿射矩阵RotImg = cv2.warpAffine(face, RotateMatrix, (face.shape[0], face.shape[1])) # 进行仿射变换,即旋转faces_aligned.append(RotImg)return faces_aligneddef face_alignment_5(rgb_img, faces):startTime = time.time()faces_aligned = []for face in faces:# RotImg = dlib.get_face_chip(rgb_img, face)RotImg = dlib.get_face_chip(np.uint8(rgb_img), np.uint8(face))# RotImg = dlib.get_face_chip(rgb_img, face, size=224, padding=0.25)faces_aligned.append(RotImg)return faces_aligneddef demo(isAlignment_5=True):image_path = "./data/"image_file = "test_1988.jpg"im_raw = cv2.imread(image_path + image_file).astype('uint8')# detector = dlib.get_frontal_face_detector()model_path = "./models/mmod_human_face_detector.dat" # 基于 Maximum-Margin Object Detector 的深度学习人脸检测方案detector = dlib.cnn_face_detection_model_v1(model_path)im_raw = resize(im_raw, width=1200)gray = cv2.cvtColor(im_raw, cv2.COLOR_BGR2GRAY)rects = detector(gray, 1)src_faces = []for (i, rect) in enumerate(rects):(x, y, w, h) = rect_to_bb(rect.rect)detect_face = im_raw[y:y+h,x:x+w]src_faces.append(detect_face)cv2.rectangle(im_raw, (x, y), (x + w, y + h), (0, 255, 0), 2)cv2.putText(im_raw, "Face: {}".format(i + 1), (x - 10, y - 10), cv2.FONT_HERSHEY_SIMPLEX, 0.5, (0, 255, 0), 2)if isAlignment_5:faces_aligned = face_alignment_5(im_raw, src_faces)else:faces_aligned = face_alignment_68(src_faces)print("{} method, detect spend {}s ".format(("Alignment_5" if isAlignment_5 else "Alignment_68"), time.time()-startTime))cv2.imshow("src", im_raw)savePath = "./results/alignment/"if not os.path.exists(savePath):os.makedirs(savePath)if isAlignment_5:saveName = "_Align5.jpg"else:saveName = "_Align68.jpg"i = 0for face in faces_aligned:cv2.imshow("det_{}".format(i), face)cv2.imwrite(savePath + image_file[:-4] + "_{}".format(i) + saveName, face)i = i + 1cv2.waitKey(10)if __name__ == "__main__":isAlignment_5 = Falsedemo(isAlignment_5)if isAlignment_5:isAlignment_5 = not isAlignment_5demo(isAlignment_5)
4.人脸识别
这个地方的时间花的比较多,主要出现识别不好时,没有沉下心来去分析代码,这里根据参考一中的代码进行了修改,无需人为去设置candidate列表,只需要我们自己将candidate-faces文件夹中的候选人库以可区分的该人命名就好。
4.1 准备过程
(1)候选人库candidate-faces,就是我们去这个库查询,是已知的、且有正确身份的。


(2)候选人库candidate-faces图片命名:

(3)待查询的faces:
 tangyan.jpg
 zhaoliying.jpg
(4)结果
Processing file: ./data/candidate-faces\liushishi.jpgNumber of faces detected: 1Processing file: ./data/candidate-faces\liuyifei.jpgNumber of faces detected: 1Processing file: ./data/candidate-faces\tangyan.jpgNumber of faces detected: 1Processing file: ./data/candidate-faces\tongliya.jpgNumber of faces detected: 1Processing file: ./data/candidate-faces\yangzi.jpgNumber of faces detected: 1Processing file: ./data/candidate-faces\zhaoliying.jpgNumber of faces detected: 1c_d :[('tangyan', 0.45614611065543303), ('liushishi', 0.4777414300544273), ('yangzi', 0.520176500668875), ('tongliya', 0.547071465533885), ('zhaoliying', 0.64414064895386), ('liuyifei', 0.669962308077882)]The person_test--./data/faces/tangyan.jpg is: tangyanc_d :[('zhaoliying', 0.4041512584817519), ('liushishi', 0.4681194204229278), ('tangyan', 0.4728928349513442), ('yangzi', 0.47474913579746303), ('tongliya', 0.5446001882500634), ('liuyifei', 0.6104574640831666)]The person_test--./data/faces/zhaoliying.jpg is: zhaoliying
4.2 代码
其中结果会存到./results/recongnition/recognition_reslut.txt文件中。
# encoding:utf-8import dlibimport cv2import numpy as npimport os, globdef resize(image, width=1200): # 将待检测的image进行resizer = width * 1.0 / image.shape[1]dim = (width, int(image.shape[0] * r))resized = cv2.resize(image, dim, interpolation=cv2.INTER_AREA)return resizeddef rect_to_bb(rect): # 获得人脸矩形的坐标信息x = rect.left()y = rect.top()w = rect.right() - xh = rect.bottom() - yreturn (x, y, w, h)def create_face_space():# 对文件夹下的每一个人脸进行:# 1.人脸检测# 2.关键点检测# 3.描述子提取# 候选人脸文件夹faces_folder_path = "./data/candidate-faces/"# 候选人脸描述子listdescriptors = []candidates = []for f in glob.glob(os.path.join(faces_folder_path, "*.jpg")):print("Processing file: {}".format(f))img = cv2.imread(f)# img = resize(img, width=300)img = cv2.cvtColor(img, cv2.COLOR_BGR2RGB)# 1.人脸检测dets = detector(img, 1)print("Number of faces detected: {}".format(len(dets)))candidate = f.split('\\')[-1][:-4]for k, d in enumerate(dets):# 2.关键点检测shape = sp(img, d)# 3.描述子提取,128D向量face_descriptor = facerec.compute_face_descriptor(img, shape)# 转换为numpy arrayv = np.array(face_descriptor)descriptors.append(v)candidates.append(candidate)return descriptors, candidatesdef predict(descriptors, path):# 对需识别人脸进行同样处理# 提取描述子img = cv2.imread(path)# img = io.imread(path)# img = resize(img, width=300)gray = cv2.cvtColor(img, cv2.COLOR_BGR2RGB)dets = detector(gray, 1)dist = []if len(dets) == 0:passfor k, d in enumerate(dets):shape = sp(img, d)face_descriptor = facerec.compute_face_descriptor(img, shape)d_test = np.array(face_descriptor)# 计算欧式距离for i in descriptors:dist_ = np.linalg.norm(i-d_test)dist.append(dist_)# print(dist)return distdef demo():global detector, sp, facerec# 加载正脸检测器detector = dlib.get_frontal_face_detector()# 加载人脸关键点检测器sp = dlib.shape_predictor("./models/shape_predictor_68_face_landmarks.dat")# 3. 加载人脸识别模型facerec = dlib.face_recognition_model_v1("./models/dlib_face_recognition_resnet_model_v1.dat")# 提取候选人特征与候选人名单descriptors, candidates = create_face_space()savePath = "./results/recongnition/"if not os.path.exists(savePath):os.makedirs(savePath)fp = open(savePath + 'recognition_reslut.txt', 'a')predict_path = "./data/faces/*.jpg"for f in glob.glob(predict_path):f = f.replace("\\", '/')# print("f :{}".format(f))dist = predict(descriptors, f)# 候选人和距离组成一个dictc_d = dict(zip(candidates, dist))if not c_d:print(str(c_d) + " is None")continuecd_sorted = sorted(c_d.items(), key=lambda d:d[1])print("c_d :{}".format(cd_sorted))print("The person_test--{} is: ".format(f), cd_sorted[0][0])fp.write("\nThe person_test--{} is: with similar : {}".format(f, cd_sorted[0][0]))fp.close()if __name__ == "__main__":demo()
参考
1.【Dlib】人脸检测、特征点检测、人脸对齐、人脸识别
2.【Tool】Dlib 接口学习和常见功能介绍
3.dlib-models
4.关键点检测——68点图例
5.Dlib提取人脸特征点(68点,opencv画图)


还没有评论,来说两句吧...