vue项目使用electron打包桌面应用程序 exe
客户需求,要求vue做一个桌面应用,很久没碰vue了,这里简单记录下。
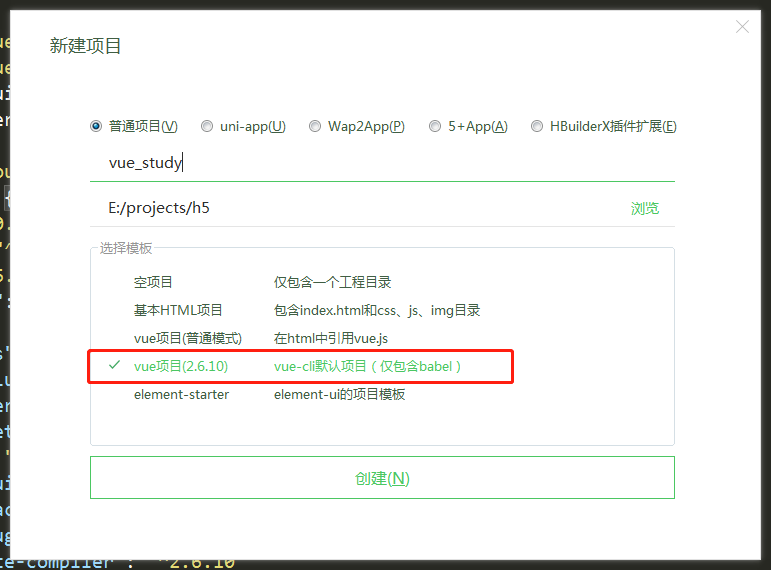
我是用Hbulider X 创建的vue项目,electron打包vue项目为桌面应用。
目录结构:

打包之前需要简单创建几个vue界面,同时安装axios和router,让页面可以正常跑起来。
main.js
import Vue from 'vue';import App from './App.vue';import VueRouter from 'vue-router';import axios from 'axios';import index from './components/index/index';import login from './components/login/login';import register from './components/register/register';Vue.use(VueRouter); //全局注册路由Vue.config.productionTip = false;// 避免每个页面引入axios,所以全局注册Vue.prototype.axios = axios;/* 定义路由页面 */const routes = [// 这里 path: '/' 代表应用首页显示的内容{path: '/',component: index},{path: '/login',component: login},{path: '/register',component: register}];const router = new VueRouter({routes});new Vue({router,render: h => h(App),}).$mount('#app')
当前的package.json
{"name": "web_desktop","version": "0.1.0","private": true,"scripts": {"serve": "vue-cli-service serve","build": "vue-cli-service build"},"dependencies": {"axios": "^0.21.1","core-js": "^2.6.5","vue": "^2.6.10","vue-router": "^3.5.1"},"devDependencies": {"@vue/cli-plugin-babel": "^3.8.0","@vue/cli-service": "^3.8.0","babel-preset-es2015": "^6.24.1","vue-template-compiler": "^2.6.10"}}
根目录下需要创建一个 vue.config.js 为了防止页面一片空白,这里需要设置路径
module.exports = {publicPath: "./"}
接下来 npm run serve 跑起来

ok、运行正常、没有报错、数据请求正常
接下来开始研究打包、之前接触过一个神器:electron
所以这里我们也可以用它,在vue中下载一个插件 vue-cli-plugin-electron-builder
package.json中添加一句、然后执行 npm install 安装,记得先删除 node_modules 、npm如果太慢建议使用cnpm 、记得下载淘宝镜像

"devDependencies": {"@vue/cli-plugin-babel": "^3.8.0","@vue/cli-service": "^3.8.0","electron": "6.0.0","babel-preset-es2015": "^6.24.1","vue-cli-plugin-electron-builder": "^1.4.0","vue-template-compiler": "^2.6.10"}
因为要打包成桌面应用exe、那么一定需要exe的一些设置,package.json中新增mani:background.js
"main": "background.js",
这里build.js是桌面应用的窗口的一些设置,包括宽高、菜单栏、图标等。
此时package.json完整代码
{"name": "web_desktop","version": "0.1.0","private": true,"scripts": {"serve": "vue-cli-service serve","build": "vue-cli-service build"},"main": "background.js","dependencies": {"axios": "^0.21.1","core-js": "^2.6.5","vue": "^2.6.10","vue-router": "^3.5.1"},"devDependencies": {"@vue/cli-plugin-babel": "^3.8.0","@vue/cli-service": "^3.8.0","babel-preset-es2015": "^6.24.1","vue-cli-plugin-electron-builder": "^1.4.0","vue-template-compiler": "^2.6.10"}}
background.js完整代码
import {app,protocol,BrowserWindow} from 'electron'import {createProtocol,installVueDevtools} from 'vue-cli-plugin-electron-builder/lib'const isDevelopment = process.env.NODE_ENV !== 'production'let winprotocol.registerSchemesAsPrivileged([{scheme: 'app',privileges: {secure: true,standard: true}}])function createWindow() {win = new BrowserWindow({width: 800,height: 600,webPreferences: {nodeIntegration: true}})if (process.env.WEBPACK_DEV_SERVER_URL) {win.loadURL(process.env.WEBPACK_DEV_SERVER_URL)if (!process.env.IS_TEST) win.webContents.openDevTools()} else {createProtocol('app')win.loadURL('app://./index.html')}win.on('closed', () => {win = null})}app.on('window-all-closed', () => {if (process.platform !== 'darwin') {app.quit()}})app.on('activate', () => {if (win === null) {createWindow()}})app.on('ready', async () => {if (isDevelopment && !process.env.IS_TEST) {}createWindow()})if (isDevelopment) {if (process.platform === 'win32') {process.on('message', data => {if (data === 'graceful-exit') {app.quit()}})} else {process.on('SIGTERM', () => {app.quit()})}}
接下来,需要设置下 vue.config.js 打包的配置、我这里只需要64位的,
module.exports = {publicPath: "./",pluginOptions: {electronBuilder: {builderOptions: {"win": { //win相关配置"icon": "ui.ico", //图标,当前图标在根目录下,"target": [{"target": "nsis", //利用nsis制作安装程序"arch": ["x64" //64位]}]}}}}}
接下来要去打包,需要先在 package.json 中写两个命令
"electron:build": "vue-cli-service electron:build","electron:serve": "vue-cli-service electron:serve"
此时 package.json 的完整代码
{"name": "web_desktop","version": "0.1.0","private": true,"scripts": {"serve": "vue-cli-service serve","build": "vue-cli-service build","electron:build": "vue-cli-service electron:build","electron:serve": "vue-cli-service electron:serve"},"main": "background.js","dependencies": {"axios": "^0.21.1","core-js": "^2.6.5","vue": "^2.6.10","vue-router": "^3.5.1"},"devDependencies": {"@vue/cli-plugin-babel": "^3.8.0","@vue/cli-service": "^3.8.0","babel-preset-es2015": "^6.24.1","vue-cli-plugin-electron-builder": "^1.4.0","vue-template-compiler": "^2.6.10"}}
接下来、开始打包 执行命令 npm run electron:build
打包前可以先执行预览看看 npm run electron:serve
打包成功


安装到桌面


应用名称和打开后左上角的名称需要在代码中修改


这里需要注意、名称不能是中文否则会报错、如果需要中文名称怎么办、需要更改配置 、还记得 vue.config.js 吗
"productName": "桌面应用",
vue.config.js 的完整代码
module.exports = {publicPath: "./",pluginOptions: {electronBuilder: {builderOptions: {"productName": "桌面应用", //项目名,也是生成的安装文件名 桌面应用.exe"win": { //win相关配置"icon": "ui.ico", //图标,当前图标在根目录下,注意这里有两个坑"target": [{"target": "nsis", //利用nsis制作安装程序"arch": ["x64" //64位]}]}}}}}
修改名称之后重新打包


到此为止基本就搞定了!
但是有几个地方需要注意,一个是打包之后的优化、
打包成功之后,打开应用后、左上角的图标可能会不显示、
这里ico 格式简单说下,我之前的ico是256*256的、但是有点大 264kb、压缩到100kb以内后、左上角图标可以正常显示了。
第二个需要优化的,就是左上角的菜单栏、我这里不需要显示

这里需要在 background.js 中设置
const electron = require('electron')const Menu = electron.MenuMenu.setApplicationMenu(null)
此时 background.js 完整代码
import {app,protocol,BrowserWindow} from 'electron'import {createProtocol,installVueDevtools} from 'vue-cli-plugin-electron-builder/lib'const isDevelopment = process.env.NODE_ENV !== 'production'let winprotocol.registerSchemesAsPrivileged([{scheme: 'app',privileges: {secure: true,standard: true}}])const electron = require('electron')const Menu = electron.Menufunction createWindow() {// 这句话的作用是关闭窗口左上角的菜单栏Menu.setApplicationMenu(null)win = new BrowserWindow({width: 800,height: 600,icon: 'ui.ico',webPreferences: {nodeIntegration: true}})if (process.env.WEBPACK_DEV_SERVER_URL) {win.loadURL(process.env.WEBPACK_DEV_SERVER_URL)if (!process.env.IS_TEST) win.webContents.openDevTools()} else {createProtocol('app')win.loadURL('app://./index.html')}win.on('closed', () => {win = null})}app.on('window-all-closed', () => {if (process.platform !== 'darwin') {app.quit()}})app.on('activate', () => {if (win === null) {createWindow()}})app.on('ready', async () => {if (isDevelopment && !process.env.IS_TEST) {}createWindow()})if (isDevelopment) {if (process.platform === 'win32') {process.on('message', data => {if (data === 'graceful-exit') {app.quit()}})} else {process.on('SIGTERM', () => {app.quit()})}}
优化之后的样子

接下来就是我在打包过程中遇到的比较难受的问题、资源下载的时候要么速度特别慢、要么就是被远程连接强制关闭,github访问的问题也不是一两天了,我比较倒霉吧,别说下载了,打都打不开。
各种搜索,终于在一位大神的博客下找到了下载链接。
加速下载 electron 下载链接
各个依赖包下载路径及安装位置
直接将下载好的文件解压在路径下


下载依赖路径这里参考了一位大佬的博客,完美的解决了我的问题
大佬博客地址:https://juejin.cn/post/6844903873438547976


")

:编写个人页面和配置路由")


还没有评论,来说两句吧...