VUE —— 9、路由(二级路由、路由拦截)、axios
目录
8.二级路由
(1)路由配置
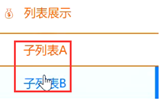
(2)二级路由渲染
9.路由拦截
(12)axios
1.get请求
2.post请求
3.axios全局引入(很少用,用4题的)
4.axios请求拦截封装
5.异步导致数据无法获取的处理方式
8.二级路由
part1**.vue**
<template><h1>part1</h1></template><script>export default {name: "Home",};</script><style scoped></style>
part2**.vue**
<template><h1>part2</h1></template><script>export default {name: "Home",};</script><style scoped></style>
index.js 
{path: '/list',name: 'list',component: () => import('../views/list/index.vue'),},
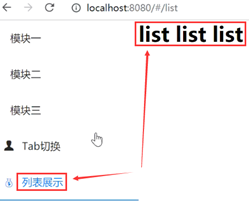
index**.vue**
<template><div><h1>list list list</h1></div></template><script>export default {name: "Home",};</script><style scoped></style>
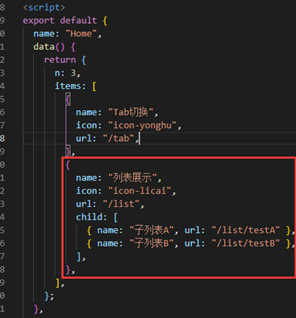
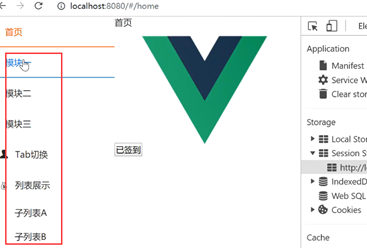
Nav**.vue**
{name: "列表展示",icon: "icon-licai",url: "/list",},
 //写在这个位置
 //正常
//正常
index**.js**
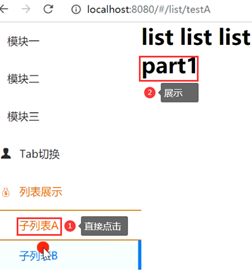
{path: '/list',name: 'list',component: () => import('../views/list/index.vue'),--------------------------------------- 添加 -----------------------------------------------children: [{ //二级路由(子)//path:'testA', //写法是可行的(写法一)path: '/list/testA', //写法二name: 'testA',component: () => import('../views/list/part1.vue')},{path: 'testB',name: 'testB',component: () => import('../views/list/part2.vue')}]--------------------------------------------------------------------------------------------},
Nav**.vue**
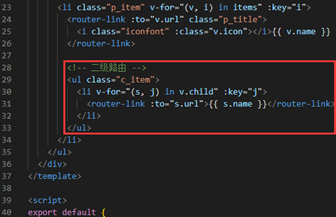
--------------------------------------- 添加 -----------------------------------------------//二级路由<ul class="c_item"><li v-for="(s, j) in v.child" :key="j"><router-link :to="s.url">{{s.name}}</router-link></li></ul>--------------------------------------------------------------------------------------------···{name: "列表展示",icon: "icon-licai",url: "/list",--------------------------------------- 添加 -----------------------------------------------child: [{name: "子列表A", url: "/list/testA"},{name: "子列表B", url: "/list/testB"},],--------------------------------------------------------------------------------------------},

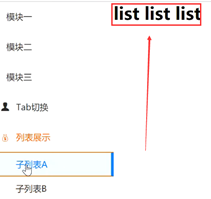 //但是数据未展示出来
index**.vue**
<template><div><h1>list list list</h1>--------------------------------------- 添加 -----------------------------------------------<router-view /> //二级路由出口--------------------------------------------------------------------------------------------</div></template><script>export default {name: "Home",};</script><style scoped></style>
 //解决
//解决

//两种情况
index**.js**

//也可以传参,不过不方便传,说白了就是要传都传最好都传(比较复杂)
============================ 下面可以看下 ==============================
(1)路由配置
const routes = [{path: '/home', component: Home},{path: '/news',component: News,children: [{ //二级路由(子)path: 'login', //news/logincomponent: Login}, {path: 'regist/:name/:pwd', //news/regist/abc/123component: Regist}]},{path: '/', redirect: '/home'} //重定向];
(2)二级路由渲染
<div id="my"><router-link to="/home">Home</router-link><router-link to="/news">News</router-link><div><router-view></router-view> //一级路由出口</div></div>
定义组件
var Home = {template: '#home'}var News = {template: '#news'}var Login = {template: '<h3>Login——获取参数:{{$route.query.name}}</h3>'}var Regist = {template: '<h3>Regist——参数:{{$route.params.name}}</h3>'}//对应的模块内容:<template id="home"><div><h3>组件home</h3></div></template><template id="news"><div><h3>组件news</h3><ul><li><router-link to="/news/login">用户登录</router-link></li><li><router-link :to="'/news/regist/'+name+'/'+id">用户注册</router-link></li></ul>//二级路由出口<router-view></router-view></div></template>
9.路由拦截
定义:路由拦截就是路由在发生变化时需要进行的拦截处理,比如登录拦截、权限拦截等;
写法:
路由拦截 //在跳转之前执行
beforeEach 函数有三个参数:
to:router 即将进入的路由对象
from 当前导航即将离开的路由
next:Function 进行管道中的一个钩子,如果执行完了,则导航的状态就是confirmed(确认的)否则为false,终止导航
afterEach 函数不用传next() //函数
index.js 
···//最下面router.beforeEach(function (to, from, next) {console.log(12345);next() //进入到下一步})
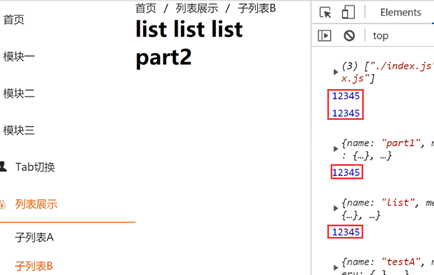
//**点击路由都会打印一次**
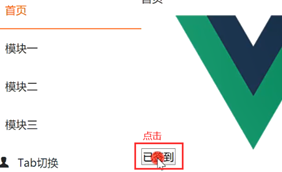
Home**.vue**
<template><div class="home">--------------------------------------- 添加 -----------------------------------------------<button @click.once="sign()">{{ msg }}</button>--------------------------------------------------------------------------------------------<img alt="Vue logo" src="../assets/logo.png" /></div></template><script>import HelloWorld from "@/components/HelloWorld.vue";export default {name: "Home",data() {return {--------------------------------------- 添加 -----------------------------------------------msg: "签到",--------------------------------------------------------------------------------------------};},--------------------------------------- 添加 -----------------------------------------------methods: {sign() {this.msg = "已签到";sessionStorage.setItem("sign", true);},},--------------------------------------------------------------------------------------------components: {HelloWorld,},};</script><style scoped></style>

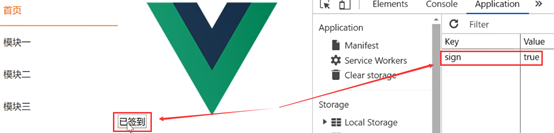 //true
index.js 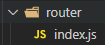
···//最下面router.beforeEach(function (to, from, next) {console.log(12345);--------------------------------------- 添加 -----------------------------------------------if (!sessionStorage.getItem('sign')) { //如果值不存在if (to.path !== '/home') { //另外就是已经在首页了,不能传首页to.path(路由对象)alert('请签到!');next(); //进入到下一步}}--------------------------------------------------------------------------------------------next() //进入到下一步})
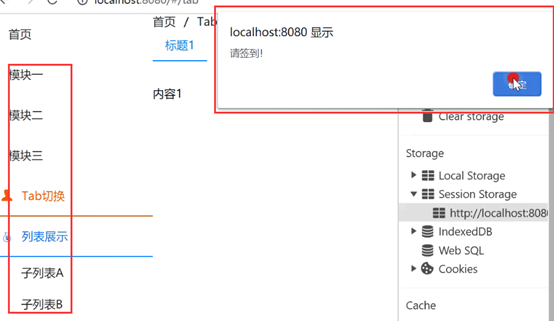
//点击除了首页外的,都会显示请签到

 //这个时候点击其他路由就不会提示请签到
 //但是回到首页时,已签到变成了签到
Home**.vue**
<template><div class="home"><button @click.once="sign()">{{ msg }}</button><img alt="Vue logo" src="../assets/logo.png" /></div></template><script>import HelloWorld from "@/components/HelloWorld.vue";export default {name: "Home",data() {return {msg: "签到",};},--------------------------------------- 添加 -----------------------------------------------mounted() { //挂载后this.msg = !sessionStorage.getItem("sign") ? "签到" : "已签到";},--------------------------------------------------------------------------------------------methods: {sign() {this.msg = "已签到";sessionStorage.setItem("sign", true);},},components: {HelloWorld,},};</script><style scoped></style>

//去掉
 //还是这样
//解决,再次回到首页时,是已签到
=====================================================================
router.beforeEach(function (to, from, next) {next()})
主要是对进入页面的限制;比如判断有没有登录,没有就不能进入某些页面,只有登录了之后才有权限
查看页面
router.beforeEach(function (to, from, next) {if (!localStorage.getItem("username")) {if (to.path !== '/login') {next('/login')}};next()})/*在跳转之后判断*///会在每次路由切换成功进入激活阶段时被调用Vue.afterEach(function (to, form) {console.log('成功浏览到: ' + to.path)})
(12)axios
安装:
npm install —save axios
Nav**.vue**
{name: "axios",icon: "icon-yonghu",url: "/axios",},
index**.js**
{path: '/axios',name: 'axios',meta: {keepAlive: true, //需要缓存title: 'axios'},component: () => import('../views/axios/part1.vue')},
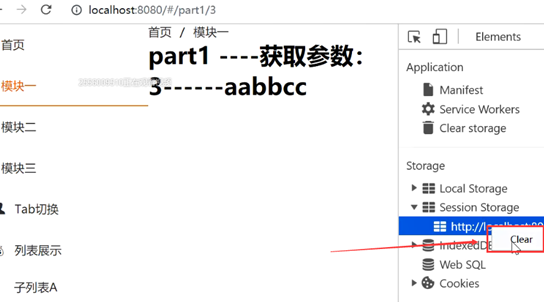
part1**.vue**

<template>--------------------------------------- 添加 -----------------------------------------------<button @click="send()">click</button>--------------------------------------------------------------------------------------------</template><script>--------------------------------------- 添加 -----------------------------------------------import axios from "axios";--------------------------------------------------------------------------------------------export default {name: "Home",data() {return {title: 1,};},methods: {--------------------------------------- 添加 -----------------------------------------------send(){axios({method: "get",url: "http://localhost:3333/get_category",}).then((response) => {console.log("请求成功:" + response);}).catch((error) => {console.log("请求失败:" + error);});},--------------------------------------------------------------------------------------------},};</script><style scoped></style>
part2**.vue**
<template><h1>part2 ----获取参数:{{ $route.query.id }}</h1></template><script>export default {name: "Home",};</script><style scoped></style>

=====================================================================
页面引入及调用:
axios({method: 'get',url: 'http://localhost:3000/map/get'}).then(response=>{console.log('请求成功:' + response);}).catch(error => {console.log('请求失败:' + error);});
1.get请求
传入参数:
http://localhost:3333/get\_table/?id=1&name=jindu
axios.get('http://localhost:3333/get_table/', {params: {name: 'jindu',id: 1}params: this.user}).then(resp => {console.log(resp);}).catch(err => {console.log(err);})
2.post请求
axios({method: 'post',url: 'http://localhost:3000/map/add1',data: {}}).then(function (response) {console.log(response)}).catch(function (error) {console.log(error);})
简写:
axios.post('http://localhost:3000/map/add1', {}).then(function (response) {console.log(response)}).catch(function (error) {console.log(error);})
3.axios全局引入(很少用,用4题的)
main**.js**
import axios from 'axios'Vue.prototype.$http = axios; //axios创建到原型对象中,$http 是变量(下面axios可换)axios.defaults.baseURL = 'http://127.0.0.1:3333/'
part1**.vue**

<template><button @click="send()">click</button></template><script>--------------------------------------- 去掉 -----------------------------------------------import axios from "axios";--------------------------------------------------------------------------------------------export default {name: "Home",data() {return {title: 1,};},methods: {send() {----------------------------------- 换成 this.$http -----------------------------------------this.$http ({method: "get",----------------------------- 去掉http://localhost:3333/ ---------------------------------url: " get_category",--------------------------------------------------------------------------------------------}).then((response) => {console.log("请求成功:" + response);}).catch((error) => {console.log("请求失败:" + error);});},},};</script><style scoped></style>

//**一样**
=====================================================================
main**.js**
import axios from 'axios'Vue.prototype.$http = axios;axios.defaults.baseURL = 'http://127.0.0.1:3333/'
组件中请求的方式为
this.$http({method: 'get',url: 'map/get'}).then(response => {console.log('请求成功:' + response);}).catch(error => {console.log('请求失败:' + error);});
4.axios请求拦截封装
全局处理请求、响应拦截的处理,常见处理请求动画,错误码等
去掉3题所写的代码:
index**.js**

import axios from 'axios'axios.defaults.baseURL = `http://127.0.0.1:3333`;// 添加请求拦截// 在发送请求之前做些什么axios.interceptors.request.use((config) => {return config;})// 添加响应拦截axios.interceptors.response.use((response) => {// 对响应数据做点什么return response}, err => {// 对响应错误做点什么return Promise.reject(err);})export default axios
main**.js**
--------------------------------------- 去掉 -----------------------------------------------import axios from 'axios'Vue.prototype.$http = axios; //axios创建到原型对象中,$http 是变量(下面axios可换)axios.defaults.baseURL = 'http://127.0.0.1:3333/'--------------------------------------------------------------------------------------------
part1**.vue**

<template><button @click="send()">click</button></template><script>--------------------------------------- 添加 -----------------------------------------------import axios from "@/api/index";--------------------------------------------------------------------------------------------export default {name: "Home",data() {return {title: 1,};},methods: {send() {------------------------------------ 换成axios ---------------------------------------------axios({--------------------------------------------------------------------------------------------method: "get",url: "get_category",}).then((response) => {console.log("请求成功:" + response);}).catch((error) => {console.log("请求失败:" + error);});},},};</script><style scoped></style>

//**一样**
也可以:
main**.js**
Vue.prototype.url= "http://127.0.0.1:3333/";
part1**.vue**
<template><button @click="send()">click</button></template><script>import axios from "@/api/index";export default {name: "Home",data() {return {title: 1,};},methods: {send() {axios({method: "get",------------------------------- 添加this.url + ------------------------------------------url: this.url + "get_category",--------------------------------------------------------------------------------------------}).then((response) => {console.log("请求成功:" + response);}).catch((error) => {console.log("请求失败:" + error);});},},};</script><style scoped></style>

=====================================================================
import axios from 'axios'axios.defaults.baseURL = `http://127.0.0.1:3333`;// 添加请求拦截器// 在发送请求之前做些什么axios.interceptors.request.use((config) => {return config;})// 添加响应拦截器axios.interceptors.response.use((response) => {// 对响应数据做点什么return response}, err => {// 对响应错误做点什么return Promise.reject(err);})export default axios
页面调用:
import axios from '@/api/index' //引入方式axios({method: 'post',url: '/map/add1',data: {}}).then(function (response) {console.log(response)}).catch(function (error) {console.log(error);})
5.异步导致数据无法获取的处理方式
1**)添加flag标记**
data(){return {flag: false, //状态变化items: [],}}<ul><li v-for="(item,i) in items" :key="i" v-if="flag">{{ item.name }} </li></ul >mounted(){ //挂载后this.getData()},methods: {getData(){this.$http({method: 'get',url: 'http://localhost:3333/get_table'}).then(response => {if (response.data.code == '200') {this.items = response.data.result;this.flag = true; //请求到数据改变flag的值}}).catch(resp => {console.log('请求失败:' + resp);});}}
2)**监听数据变化**
watch: { //监听值的变化items: function(newValue, oldValue) {this.items = newValue;},}


图形验证码过滤器")


还没有评论,来说两句吧...