WebService学习之旅(三)JAX-WS与Spring整合发布WebService
Spring本身就提供了对JAX-WS的支持,有兴趣的读者可以研究下Spring的Spring-WS项目,项目地址:
http://docs.spring.io/spring-ws/sites/1.5/downloads/releases.html
基于Spring IoC容器发布Web服务,能够大大降低WebService实现过程,也能够更好的与企业级应用进行整合,本文將和大家介绍如何基于Spring和JAX-WS发布WebService。
我们首先需要获取项目所依赖的Jar包,这个过程比较繁琐,笔者采用Maven构建项目,使用Maven进行项目管理的好处是我们只需要在pom.xml文件中配置依赖项目坐标,Maven就会自动將所需要的Jar包下载到本地仓库。
1.新建一个Maven Web项目,在pom.xml中添加如下内容:
<dependency><groupId>org.springframework.ws</groupId><artifactId>spring-ws-core</artifactId><version>2.1.4.RELEASE</version></dependency><dependency><groupId>org.jdom</groupId><artifactId>jdom</artifactId><version>1.1</version></dependency><dependency><groupId>jaxen</groupId><artifactId>jaxen</artifactId><version>1.1.6</version></dependency>
2.新建Web服务接口和实现类,这个过程和前面两篇文中相同。
HelloWorld.java
package com.csdn.ws.recipe03;import javax.jws.WebMethod;import javax.jws.WebService;@WebServicepublic interface HelloWorld {@WebMethodpublic String sayHello(String name);}
HelloWorldImpl.java
package com.csdn.ws.recipe03;import javax.jws.WebService;import org.springframework.stereotype.Component;@Component@WebService(serviceName = "HelloWorldService", endpointInterface = "com.csdn.ws.recipe03.HelloWorld")public class HelloWorldImpl implements HelloWorld {public String sayHello(String name) {return "Hello," + name;}}
不同的是在实现类中添加了注解@Component,该注解用于Spring查找组件。
3.在web.xml文件中添加spring的监听器配置:
<!DOCTYPE web-app PUBLIC "-//Sun Microsystems, Inc.//DTD Web Application 2.3//EN" "http://java.sun.com/dtd/web-app_2_3.dtd" ><web-app><context-param><param-name>contextConfigLocation</param-name><param-value>classpath:beans.xml</param-value></context-param><listener><listener-class>org.springframework.web.context.ContextLoaderListener</listener-class></listener></web-app>
4.新建一个source folder,名为config,在config下新建beans.xml,用于spring bean的配置。
<?xml version="1.0" encoding="UTF-8"?><beans xmlns="http://www.springframework.org/schema/beans" xmlns:context="http://www.springframework.org/schema/context" xmlns:xsi="http://www.w3.org/2001/XMLSchema-instance" xsi:schemaLocation=" http://www.springframework.org/schema/beans http://www.springframework.org/schema/beans/spring-beans.xsd http://www.springframework.org/schema/context http://www.springframework.org/schema/context/spring-context-3.0.xsd"><context:component-scan base-package="com.csdn.ws.recipe03"></context:component-scan><bean class="org.springframework.remoting.jaxws.SimpleJaxWsServiceExporter"><property name="baseAddress" value="http://localhost:8089/services/"/></bean></beans>
context:component-scan标签指定了查找组件的包名,SimpleJaxWsServiceExporter类的baseAddress属性用于指定webservice的根路径,完整的web服务地址=根路径+WebService名称。
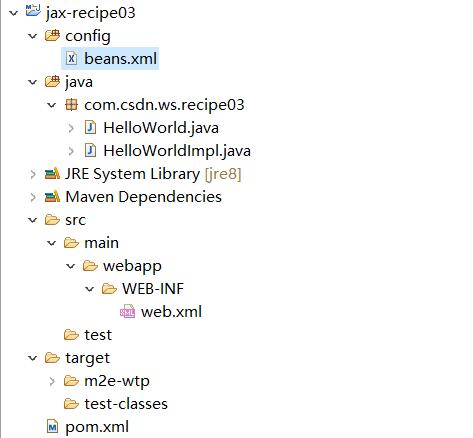
5.完整的项目结构如下图所示:
6.通过地址http://localhost:8089/services/HelloWorldService?wsdl查看WSDL文档。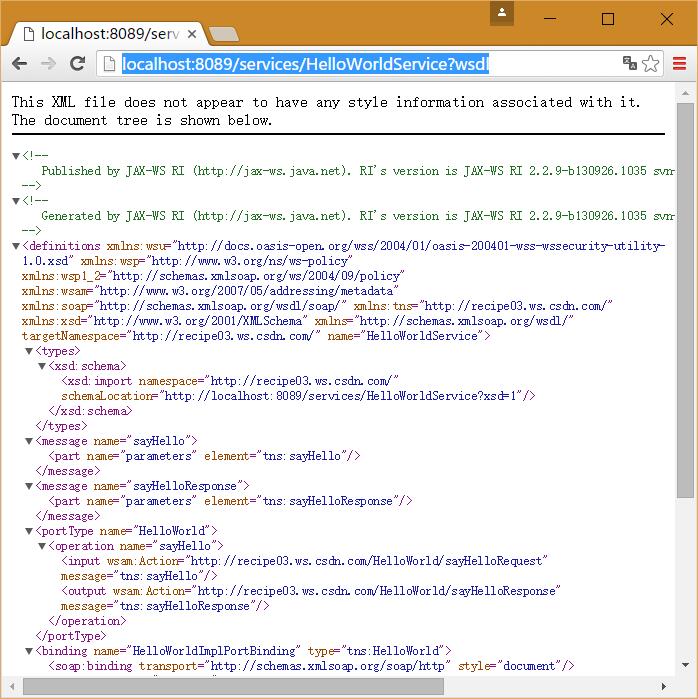
说明WebService发布成功。
7.WebService客户端调用代码请参考WebService学习之旅系列第一篇文章。
下节开始介绍开源WebService框架Apache Axis2的使用。


")


还没有评论,来说两句吧...