Spring整合CXF之发布WebService服务
今天我们来讲下如何用Spring来整合CXF,来发布WebService服务;
给下官方文档地址:http://cxf.apache.org/docs/writing-a-service-with-spring.html
根据官方文档。我们把前面的实例用Spring整合CXF来处理下。会简化很多;
首先我们来建一个Maven项目 WebService_CXF
建好项目第一步,我们打开pom.xml
我们来添加下Spring支持:
1 2 3 4 5 6 7 8 9 10 11 12 13 14 15 16 17 18 19 20 21 22 23 24 25 26 27 28 29 30 31 32 33 34 35 36 37 38 39 40 41 42 43 44 45 46 47 48 49 50 51 52 53 54 55 56 57 | <!— 添加Spring支持 —><dependency> <groupId>org.springframework</groupId> <artifactId>spring-core</artifactId> <version>4.1.7.RELEASE</version></dependency><dependency> <groupId>org.springframework</groupId> <artifactId>spring-beans</artifactId> <version>4.1.7.RELEASE</version></dependency><dependency> <groupId>org.springframework</groupId> <artifactId>spring-tx</artifactId> <version>4.1.7.RELEASE</version> </dependency><dependency> <groupId>org.springframework</groupId> <artifactId>spring-context</artifactId> <version>4.1.7.RELEASE</version></dependency><dependency> <groupId>org.springframework</groupId> <artifactId>spring-context-support</artifactId> <version>4.1.7.RELEASE</version></dependency><dependency> <groupId>org.springframework</groupId> <artifactId>spring-web</artifactId> <version>4.1.7.RELEASE</version></dependency><dependency> <groupId>org.springframework</groupId> <artifactId>spring-webmvc</artifactId> <version>4.1.7.RELEASE</version></dependency><dependency> <groupId>org.springframework</groupId> <artifactId>spring-aop</artifactId> <version>4.1.7.RELEASE</version></dependency><dependency> <groupId>org.springframework</groupId> <artifactId>spring-aspects</artifactId> <version>4.1.7.RELEASE</version></dependency><dependency> <groupId>org.springframework</groupId> <artifactId>spring-jdbc</artifactId> <version>4.1.7.RELEASE</version></dependency> |
接下来添加下CXF支持:
1 2 3 4 5 6 7 8 9 10 11 12 13 14 15 16 17 18 | <!— 添加cxf支持 —><dependency> <groupId>org.apache.cxf</groupId> <artifactId>cxf-core</artifactId> <version>3.1.5</version></dependency><dependency> <groupId>org.apache.cxf</groupId> <artifactId>cxf-rt-frontend-jaxws</artifactId> <version>3.1.5</version></dependency><dependency> <groupId>org.apache.cxf</groupId> <artifactId>cxf-rt-transports-http</artifactId> <version>3.1.5</version></dependency> |
我们在项目里添加下 applicationContext.xml spring配置文件 我们要额外添加下命名路径,因为我们要用新的标签;
1 2 3 4 5 6 7 8 9 10 11 12 13 14 15 | <beans xmlns=“http://www.springframework.org/schema/beans“ xmlns:xsi=“http://www.w3.org/2001/XMLSchema-instance“ xmlns:p=“http://www.springframework.org/schema/p“ xmlns:aop=“http://www.springframework.org/schema/aop“ xmlns:context=“http://www.springframework.org/schema/context“ xmlns:jee=“http://www.springframework.org/schema/jee“ xmlns:tx=“http://www.springframework.org/schema/tx“ xmlns:jaxws=“http://cxf.apache.org/jaxws“ xsi:schemaLocation=” http://www.springframework.org/schema/aop http://www.springframework.org/schema/aop/spring-aop-4.0.xsd http://www.springframework.org/schema/beans http://www.springframework.org/schema/beans/spring-beans-4.0.xsd http://www.springframework.org/schema/context http://www.springframework.org/schema/context/spring-context-4.0.xsd http://www.springframework.org/schema/jee http://www.springframework.org/schema/jee/spring-jee-4.0.xsd http://www.springframework.org/schema/tx http://www.springframework.org/schema/tx/spring-tx-4.0.xsd http://cxf.apache.org/jaxws http://cxf.apache.org/schemas/jaxws.xsd"> |
这里的我是参考官方文档上,添加了 jaxws支持。。大家直接贴下即可;
然后我们再导入下cxf里的一些bean配置,参考官方文档:
1 2 | <import resource=“classpath:META-INF/cxf/cxf.xml”/> <import resource=“classpath:META-INF/cxf/cxf-servlet.xml”/> |
(我看了cxf核心包,其实质疑偶cxf.xml,没有cxf-servlet.xml 估计是兼容前面版本)
我们把前面的类贴到我们这个项目了;
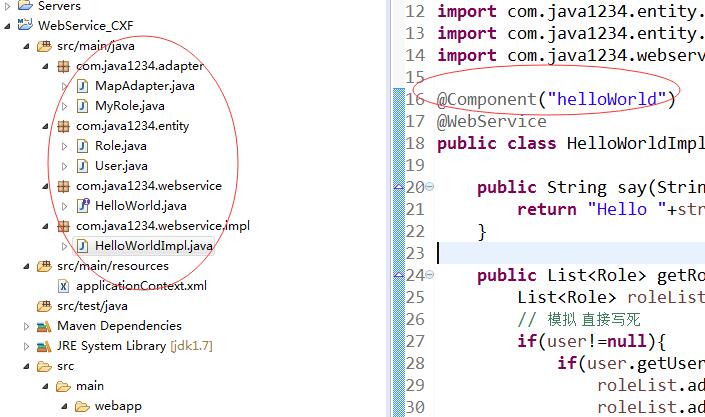
这里的HelloWorldImpl类上,我们加一个 @Component(“helloWorld”)
Spring配置文件里,我加下扫描:
1 2 | <!— 自动扫描 —><context:component-scan base-package=“com.java1234.webservice” /> |
前面搞完后,我们在处理下web.xml文件 首先启动的时候,必须加载Spring:
1 2 3 4 5 6 7 8 9 10 | <!— Spring配置文件 —><context-param> <param-name>contextConfigLocation</param-name> <param-value>classpath:applicationContext.xml</param-value></context-param><!— Spring监听器 —><listener> <listener-class>org.springframework.web.context.ContextLoaderListener</listener-class></listener> |
然后我们要定义一个Servlet,主要是处理WebService请求:
1 2 3 4 5 6 7 8 9 | <servlet> <servlet-name>CXFServlet</servlet-name> <servlet-class>org.apache.cxf.transport.servlet.CXFServlet</servlet-class> </servlet> <servlet-mapping> <servlet-name>CXFServlet</servlet-name> <url-pattern>/webservice/*</url-pattern> </servlet-mapping> |
这里的话,我们所有的 /webservice请求,都交给CXFServlet类处理;
最后一步,我们在Spring配置文件里,定义下webservice接口发布:
1 2 3 4 5 | <!— 定义服务提供者 —><jaxws:endpoint implementor=“#helloWorld” address=“/HelloWorld” ></jaxws:endpoint> |
这里implementor指定webservice接口实现类
address是具体的接口路径
最终完整的applicationContext.xml配置文件如下:
1 2 3 4 5 6 7 8 9 10 11 12 13 14 15 16 17 18 19 20 21 22 23 24 25 26 27 28 29 | <?xml version=“1.0” encoding=“UTF-8”?> <beans xmlns=“http://www.springframework.org/schema/beans“ xmlns:xsi=“http://www.w3.org/2001/XMLSchema-instance“ xmlns:p=“http://www.springframework.org/schema/p“ xmlns:aop=“http://www.springframework.org/schema/aop“ xmlns:context=“http://www.springframework.org/schema/context“ xmlns:jee=“http://www.springframework.org/schema/jee“ xmlns:tx=“http://www.springframework.org/schema/tx“ xmlns:jaxws=“http://cxf.apache.org/jaxws“ xsi:schemaLocation=” http://www.springframework.org/schema/aop http://www.springframework.org/schema/aop/spring-aop-4.0.xsd http://www.springframework.org/schema/beans http://www.springframework.org/schema/beans/spring-beans-4.0.xsd http://www.springframework.org/schema/context http://www.springframework.org/schema/context/spring-context-4.0.xsd http://www.springframework.org/schema/jee http://www.springframework.org/schema/jee/spring-jee-4.0.xsd http://www.springframework.org/schema/tx http://www.springframework.org/schema/tx/spring-tx-4.0.xsd http://cxf.apache.org/jaxws http://cxf.apache.org/schemas/jaxws.xsd"> <import resource=“classpath:META-INF/cxf/cxf.xml”/> <import resource=“classpath:META-INF/cxf/cxf-servlet.xml”/> <!— 自动扫描 —> <context:component-scan base-package=“com.java1234.webservice” /> <!— 定义服务提供者 —> <jaxws:endpoint implementor=“#helloWorld” address=“/HelloWorld” ></jaxws:endpoint></beans> |
我们来启动下项目,然后访问 http://localhost:8080/WebService\_CXF/webservice/
效果如下:

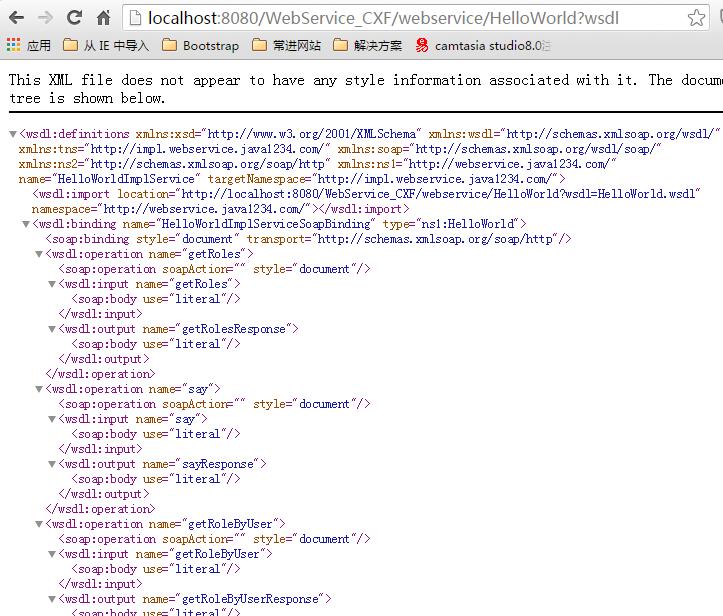
说明已经webservice接口已经发布成功了;
我们可以访问具体的接口: http://localhost:8080/WebService\_CXF/webservice/HelloWorld?wsdl
效果如下:


还没有评论,来说两句吧...