springboot属性配置文件详解
修改端口
application.properties:server.port=8888另外,也可以直接在运行jar包的时候修改java -jar xx.jar --server.port=8888
自定义属性及获取
1.application.properties中[文件改成UTF-8]
teacher.id=1teacher.name=zhangsan
2.@Value(“${属性名}“)获取对应的属性值
@Controllerpublic class SampleController {@Value("${teacher.name}")private String teacherName;@RequestMapping("/")@ResponseBodypublic String home() {return "Hello World!" + this.teacherName;}}
参数引用
application.properties
teacher.id=1teacher.name=zhangsanteacher.info=Teacher ${teacher.name}'s number is ${teacher.id}
随机内容生成
# 随机字符串random.string=${random.value}# 随机intrandom.number=${random.int}# 随机longrandom.long=${random.long}# 1-20的随机数random.b=${random.int[1,20]}
多环境配置
我们在开发应用时,通常一个项目会被部署到不同的环境中,比如:开发、测试、生产等。其中每个环境的数据库地址、服务器端口等等配置都会不同,对于多环境的配置,大部分构建工具或是框架解决的基本思路是一致的,通过配置多份不同环境的配置文件,再通过打包命令指定需要打包的内容之后进行区分打包,Spring Boot也提供了支持在Spring Boot中多环境配置文件名需要满足application-{profile}.properties的格式,其中{profile}对应你的环境标识,比如:
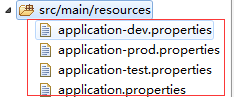
- application-dev.properties:开发环境
- application-test.properties:测试环境
- application-prod.properties:生产环境
至于哪个具体的配置文件会被加载,需要在application.properties文件中通过spring.profiles.active属性来设置,其值对应{profile}值。
比如:spring.profiles.active=dev就会加载application-dev.properties配置文件中的内容
案例:
在dev, test, prod这三个文件均都设置不同的server.port端口属性,如:dev环境设置为8081,test环境设置为8082,prod环境设置为8083
application.properties中设置spring.profiles.active=dev,就是说默认以dev环境设置
总结:
1.application.properties中配置通用内容,并设置spring.profiles.active=dev,以开发环境为默认配置
2.application-{profile}.properties中配置各个环境不同的内容
更多springboot相关知识关注博客[持续更新]
springboot教程目录


还没有评论,来说两句吧...