腾讯云服务器centos搭建fastdfs全过程
首先,为了方便大家安装成功,我把软件的地址贴出来供大家下载 https://download.csdn.net/upload/11391088 现在还在审核中,不知道为什么默认5个c币,也不能设置,如果没有c币的可以私信我
目录
一.安装fasdfs之前首先应该安装依赖库libfastcommon
1.1因为我是安装在腾讯云上的,使用sftp将文件传输上去。
1.2 解压安装libfastcommon
二.安装FASTDFS
2.1 git下载地址:https://github.com/happyfish100/fastdfs.git
2.2 修改配置文件
2.3 启动并测试fastdfs
2.3.1 启动tracker server
2.3.2启动storage server
2.3.3测试上传文件
三,安装Nginx
3.1 安装nignx需要先安装 三个依赖包 openssl,zlib,pcre
3.2 安装nginx
四.安装fastdfs-nginx-module
修改mod_fastdfs.conf
只有一个group默认配置
多个group的配置
创建/M00软连接
安装所需的主要资源如下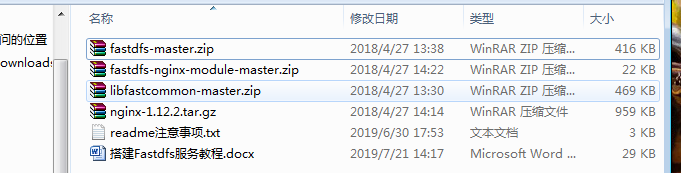
一.安装fasdfs之前首先应该安装依赖库libfastcommon
libfastcommon 可以从git库上下载 https://github.com/happyfish100/libfastcommon.git,也可以从我提供的摘要中的链接地址进行下载。
1.1因为我是安装在腾讯云上的,使用sftp将文件传输上去。

1.2 解压安装libfastcommon
命令
1.2.1 unzip libfastcommon-master.zip
进入libfastcommon目录
1.2.2 cd libfastcommon-master/

1.2.3 ./make.sh
1.2.4 ./make.sh install
二.安装FASTDFS
2.1 git下载地址:https://github.com/happyfish100/fastdfs.git
解压
unzip fastdfs-master.zip
cd fastdfs-master/
./make.sh
./make.sh install
2.2 修改配置文件
2.2.1 进入 /etc/fdfs

2.2.2
将 client.conf.sample, tracker.conf.sample,storage.conf.sample
复制,然后配置:
cp client.conf.sample client.conf
cp tracker.conf.sample tracker.conf
cp storage.conf.sample storage.conf
2.2.3 配置 storage.conf
如下配置需要修改
group_name=group1
base_path=/home/hanzl/fastdfs ———————-注意这里的地址是本机的地址,切不可完全复制
store_path0=/home/hanzl/fastdfs
tracker_server=192.168.1.1:22122 —————————IP如果是腾讯云的话需要公网IP


2.2.4 配置tracker.conf
base_path=/home/hanzl/fastdfs

2.2.5 配置 client.conf
base_path=/home/hanzl/fastdfs
tracker_server=192.168.1.1:22122
2.3 启动并测试fastdfs
2.3.1 启动tracker server
/usr/bin/fdfs_trackerd /etc/fdfs/tracker.conf restart

2.3.2启动storage server
/usr/bin/fdfs_storaged /etc/fdfs/storage.conf restart
2.3.3测试上传文件
/usr/bin/fdfs_test /etc/fdfs/client.conf upload 1558275514.png
如下图表示上传成功

三,安装Nginx
3.1 安装nignx需要先安装 三个依赖包 openssl,zlib,pcre
configure: error: You need a C++ compiler for C++ support.[系统缺少c++环境] 这个错是在安装过程中会遇到的,先提出来解决,需要先执行如下命令 yum install -y gcc gcc-c++
3.1.1 安装openssl
下载openssl
wget http://www.openssl.org/source/openssl-1.0.2j.tar.gz
我这都下载到了nginx的解压目录下

执行命令
./config
make
make install
3.1.2 安装pcre
wget https://netix.dl.sourceforge.net/project/pcre/pcre/8.40/pcre-8.40.tar.gz
执行命令
cd pcre-8.40/
./configure
make
make install
3.1.3 安装zlib
wget http://www.zlib.net/zlib-1.2.11.tar.gz
cd zlib-1.2.11/
./configure
make
make install
3.2 安装nginx
cd nginx-1.12.2/
执行命令: ./configure
执行命令: make
执行命令: sudo makeinstall, 安装成功之后,默认会在/usr/local 下创建nginx 目录
修改目录权限
chmod a+rwx -R /usr/local/nginx/logs/
chmod a+rwx -R /usr/local/nginx/
检查nginx的配置文件是否正确
/usr/local/nginx/sbin/nginx -t
如下图所示证明nginx成功
nginx: the configuration file /usr/local/nginx/conf/nginx.conf syntax is ok
nginx: configuration file /usr/local/nginx/conf/nginx.conf test is successful

启动niginx
cd /usr/local/nginx/sbin
./nginx
四.安装fastdfs-nginx-module
首先确定把原先的nginx进程杀死
执行命令 (我把fastdfs-nginx-module放在了我创建的目录下)
cd nginx-1.12.2/
./configure —add-module=/home/hanzl/fastdfs-nginx-module/src
make
make install
修改mod_fastdfs.conf
将/home/hanzl/fastdfs-nginx-module-master/src
里面的mod_fastdfs.conf复制到/etc/fdfs/里面
更改tracker_server的IP如:tracker_server=152.136.173.144:22122
更改store_path0这个要与storaged的配置一致,如:store_path0=/home/hanzl/fastdfs
cd /usr/local/nginx/conf/
vi nginx.conf
只有一个group默认配置
最简单的配置:当mod_fastdfs.conf 配置文件中只有一个group1, 且配置了 url_have_group_name = false 时,即访问地址不使用分组名称,那么只需在nginx的配置文件中增加以下配置即可:
在nginx.conf里面的server{里面添加location /M00……},添加下面的几行:
location /M00 {
root /home/ningqijun/fastdfs/data;ngx\_fastdfs\_module;
}
多个group的配置
当配置多个组,且mod_fastdfs.conf 里面指定了url_have_group_name= true 时,配置方式:
location ~ /group([0-9]) /M00 {
root /home/ningqijun/fastdfs/data;ngx\_fastdfs\_module;
}
比如:在group1上的 nginx 的nginx.conf 配置是
location /group1 /M00 {
root /home/ningqijun/fastdfs/data;ngx\_fastdfs\_module;
}
比如:在group2上的 nginx 的nginx.conf 配置是
location /group2 /M00 {
root /home/ningqijun/fastdfs/data;ngx\_fastdfs\_module;
}
创建/M00软连接
命令:ln -s /home/hanzl/fastdfs/data /home/hanzl/fastdfs/data/M00
将解压缩的文件下的http.conf和mime.types拷贝到fdfs文件加下
cp /root/fastdfs-master/conf/http.conf /etc/fdfs/
cp /root/fastdfs-master/conf/mime.types /etc/fdfs/
重新启动nignx
/usr/local/nginx/sbin/nginx -s stop
/usr/local/nginx/sbin/nginx
五.重新上传图片访问


还没有评论,来说两句吧...