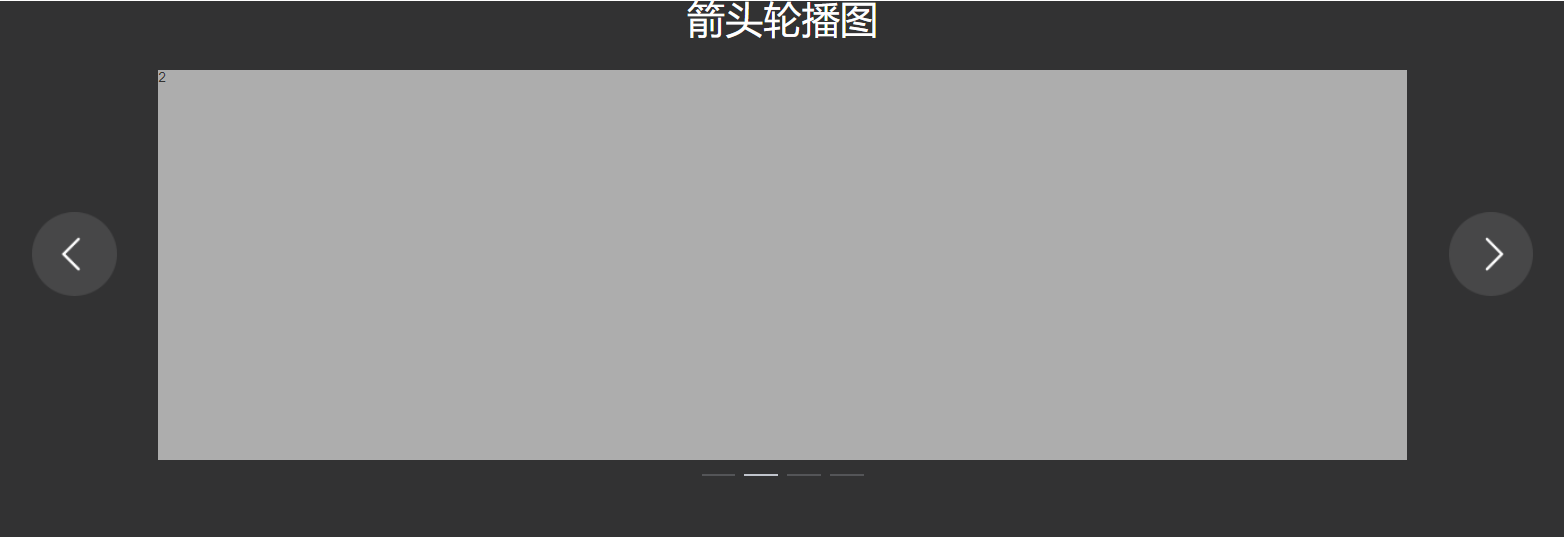
ElementUi Carousel 走马灯轮播图,el-carousel左右箭头位置调整
效果如下:
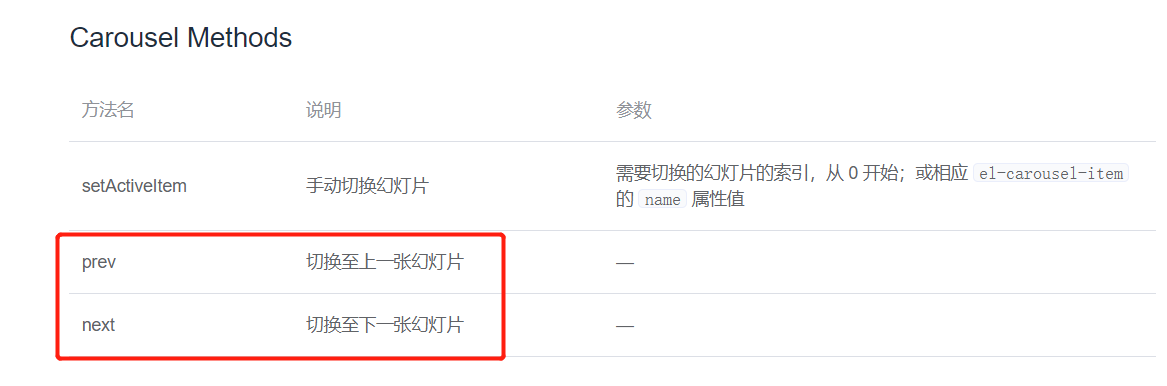
原理:
手动切换
<template><section class="excellentCases"><p class="title">箭头轮播图</p><div class="baseContent"><div class="prev"><img src="~/assets/images/solution/wisdomGov/prev.png" @click="arrowClick('prev')" /></div><div class="carousel"><el-carousel :autoplay="false" arrow="never" indicator-position="outside" ref="cardShow" ><el-carousel-item v-for="(item, index) in 4" :key="index"><h3>{{ item }}</h3></el-carousel-item></el-carousel></div><div class="next"><img src="~/assets/images/solution/wisdomGov/next.png" @click="arrowClick('next')"/></div></div></section></template><script>export default {data() {return {};},created() {},mounted() {},methods: {arrowClick(val) {if(val === 'next') {this.$refs.cardShow.next()} else {this.$refs.cardShow.prev()}},},};</script><style scoped lang="scss">.excellentCases {max-width: 1426px;height: 530px;margin: 0 auto;background: #323233;.title{font-size: 34px;font-weight: 500;line-height: 34px;color: #FFFFFF;text-align: center;margin: 56px 0 27px 0;}.baseContent{position: relative;.prev{position: absolute;left: 46px;top:34%;img{width: 75px;height: 74px;}}.next{position: absolute;right: 46px;top:34%;img{width: 75px;height: 74px;}}.carousel{width: 1110px;// height: 347px;margin: 0 auto;background-color: #cccc;/deep/.el-carousel__container{height: 347px;}/deep/ .el-carousel__indicators--outside{background-color: #323233;;}}}}@media screen and (max-width: 992px) {}</style>
如果要完全手写,也可以参考我另外一篇文章
https://blog.csdn.net/qq_35430000/article/details/118111225


还没有评论,来说两句吧...