Spring学习:四、 在web开发中使用spring框架
6. 在web开发中使用spring框架
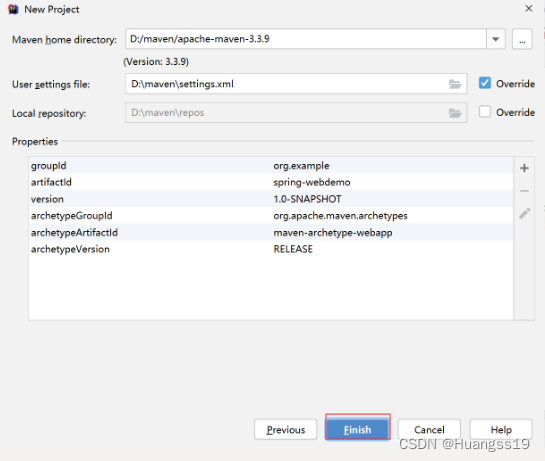
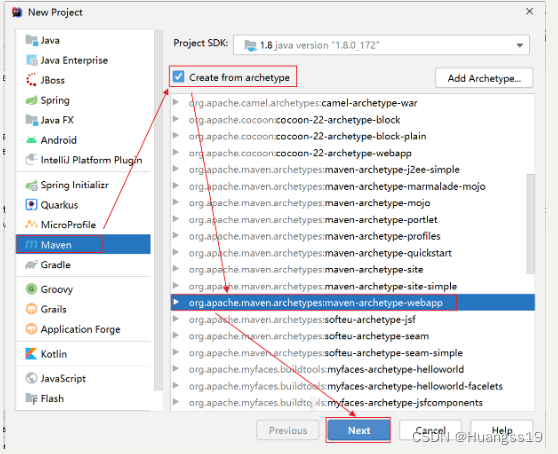
- 创建一个web项目
导入相关依赖
<?xml version=”1.0” encoding=”UTF-8”?>
4.0.0
org.example
spring-webdemo
1.0-SNAPSHOT war
spring-webdemo Maven Webapp http://www.example.com
UTF-8
1.8
1.8
5.3.21
org.springframework
spring-context
${spring.version}
org.springframework
spring-test
${spring.version}
org.springframework
spring-web
${spring.version}
javax.servlet
javax.servlet-api
3.1.0
provided
javax.servlet.jsp
jsp-api
2.1
provided
junit
junit
4.12
test
org.slf4j
slf4j-log4j12
1.7.36
org.projectlombok
lombok
1.18.24
javax.inject
javax.inject
1
<build><finalName>spring-webdemo</finalName><pluginManagement><!-- lock down plugins versions to avoid using Maven defaults (may be moved to parent pom) --><plugins><plugin><artifactId>maven-clean-plugin</artifactId><version>3.1.0</version></plugin><!-- see http://maven.apache.org/ref/current/maven-core/default-bindings.html#Plugin_bindings_for_war_packaging --><plugin><artifactId>maven-resources-plugin</artifactId><version>3.0.2</version></plugin><plugin><artifactId>maven-compiler-plugin</artifactId><version>3.8.0</version></plugin><plugin><artifactId>maven-surefire-plugin</artifactId><version>2.22.1</version></plugin><plugin><artifactId>maven-war-plugin</artifactId><version>3.2.2</version></plugin><plugin><artifactId>maven-install-plugin</artifactId><version>2.5.2</version></plugin><plugin><artifactId>maven-deploy-plugin</artifactId><version>2.8.2</version></plugin></plugins></pluginManagement></build></project>
在web.xml文件中配置监听器,用于监听web服务器的启动, 创建Spring容器
<!--spring监听器--><listener><listener-class>org.springframework.web.context.ContextLoaderListener</listener-class></listener>如果没有配置监听器,那么Spring默认加载 WEB-INF/applicationContext.xml,而我们的spring的配置文件是位于
使用
<context-param>配置spring的配置文件路径:
<!--指定spring的配置文件--><context-param><param-name>contextConfigLocation</param-name><param-value>classpath:applicationContext.xml</param-value></context-param>通过上面配置的spring的监听器,那么在tomcat启动时,spring工厂进行创建 !
创建Servlet,在Servlet中获取Spring容器对象,通过getBean()获取service层的对象
package com.suke.web;
import com.suke.service.UserService;
import org.springframework.context.ApplicationContext;
import org.springframework.web.context.WebApplicationContext;
import org.springframework.web.context.support.WebApplicationContextUtils;import javax.servlet.ServletException;
import javax.servlet.annotation.WebServlet;
import javax.servlet.http.HttpServlet;
import javax.servlet.http.HttpServletRequest;
import javax.servlet.http.HttpServletResponse;
import java.io.IOException;@WebServlet(name = “UserServlet”,value = “/userServlet”)
public class UserServlet extends HttpServlet {
protected void doPost(HttpServletRequest request, HttpServletResponse response) throws ServletException, IOException {
}protected void doGet(HttpServletRequest request, HttpServletResponse response) throws ServletException, IOException {//1.第一种方式://ApplicationContext applicationContext = (ApplicationContext) this.getServletContext().getAttribute(WebApplicationContext.ROOT_WEB_APPLICATION_CONTEXT_ATTRIBUTE);//2.第二种方式ApplicationContext applicationContext = WebApplicationContextUtils.getWebApplicationContext(this.getServletContext());UserService userService = applicationContext.getBean("userService", UserService.class);userService.addUser();}}
![>\[外链图片转存失败,源站可能有防盗链机制,建议将图片保存下来直接上传(img-lXyPOVPl-1670413867380)(assets/image-20220801192505321.png)\]](https://img-blog.csdnimg.cn/949326572e344b399471adcc9f376a40.png)


")

")

")
")


还没有评论,来说两句吧...