Android Fragment详解
一、Fragment概述
1、定义:Fragment,中文意思:碎片,与activity相似。在一个activity中描述一些行为或一部门用户界面
2、Fragment的生命周期:一个Fragment必须嵌入到一个Activity中,其生命周期受该activity的生命周期影响。
返回栈:一组Activity的集合,按先进后出的方式放置一系列的Activity,在进行Fragment转换时,可把Fragment放入返回栈中,用户就可以使用返回操作了。
3、创建Fragment
创建一个Fragment的子类,即extends Fragment或继承自已存在的Fragment的子类。
ListFragment.java文件
public class ListFragment extends Fragment{@Nullable//为Fragment加载所使用的的布局文件@Overridepublic View onCreateView(LayoutInflater inflater, ViewGroup container, Bundle savedInstanceState) {View view=inflater.inflate(R.layout.fragment_list,container,false);return view;}}
fragment_list.xml文件
<?xml version="1.0" encoding="utf-8"?><LinearLayout xmlns:android="http://schemas.android.com/apk/res/android"android:orientation="vertical" android:layout_width="match_parent"android:layout_height="match_parent"><TextViewandroid:layout_width="wrap_content"android:layout_height="wrap_content"android:text="Fragement内容"/></LinearLayout>
二、在Activity中添加Fragment
两种方法:
- 直接在布局文件中添加Fragment。
- 在Activity运行时动态添加Fragment。
1、直接添加
代码列表:
效果:
ListFragment.java与DetailFragment.java文件
//List:public class ListFragment extends Fragment{@Nullable@Overridepublic View onCreateView(LayoutInflater inflater, ViewGroup container, Bundle savedInstanceState) {View view=inflater.inflate(R.layout.fragment_list,container,false);return view;}}//Detailpublic class DetailFragment extends Fragment{@Nullable@Overridepublic View onCreateView(LayoutInflater inflater, ViewGroup container, Bundle savedInstanceState) {View view=inflater.inflate(R.layout.fragment_detail,container,false);return view;}}
List和Detail的xml文件
//List<?xml version="1.0" encoding="utf-8"?><LinearLayout xmlns:android="http://schemas.android.com/apk/res/android"android:orientation="vertical" android:layout_width="match_parent"android:layout_height="match_parent"><TextViewandroid:layout_width="wrap_content"android:layout_height="wrap_content"android:text="List_fragment"/></LinearLayout>//Detail<?xml version="1.0" encoding="utf-8"?><LinearLayout xmlns:android="http://schemas.android.com/apk/res/android"android:orientation="vertical" android:layout_width="match_parent"android:layout_height="match_parent"><TextViewandroid:layout_width="wrap_content"android:layout_height="wrap_content"android:text="Detail_fragment"/></LinearLayout>
activity_main.xml文件
<?xml version="1.0" encoding="utf-8"?><LinearLayout xmlns:android="http://schemas.android.com/apk/res/android"xmlns:tools="http://schemas.android.com/tools"android:layout_width="match_parent"android:layout_height="match_parent"android:orientation="horizontal"android:paddingBottom="@dimen/activity_vertical_margin"android:paddingLeft="@dimen/activity_horizontal_margin"android:paddingRight="@dimen/activity_horizontal_margin"android:paddingTop="@dimen/activity_vertical_margin"tools:context="com.mingrisoft.demo.MainActivity"><!--添加两个fragment,name为fragment的来源。 --><fragmentandroid:layout_width="match_parent"android:layout_height="wrap_content"android:name="com.mingrisoft.demo.ListFragment"android:id="@+id/list"android:layout_weight="1"></fragment><fragmentandroid:layout_width="match_parent"android:layout_height="wrap_content"android:name="com.mingrisoft.demo.DetailFragment"android:id="@+id/detail"android:layout_weight="2"></fragment></LinearLayout>
2、动态添加
Detail和List的java,xml文件不变。
activity_main.xml文件
<?xml version="1.0" encoding="utf-8"?><LinearLayout xmlns:android="http://schemas.android.com/apk/res/android"xmlns:tools="http://schemas.android.com/tools"android:layout_width="match_parent"android:layout_height="match_parent"android:orientation="vertical"android:paddingBottom="@dimen/activity_vertical_margin"android:paddingLeft="@dimen/activity_horizontal_margin"android:paddingRight="@dimen/activity_horizontal_margin"android:paddingTop="@dimen/activity_vertical_margin"tools:context="com.mingrisoft.demo.MainActivity"><TextViewandroid:layout_width="wrap_content"android:layout_height="wrap_content"android:text="Activity"/><FrameLayoutandroid:layout_width="match_parent"android:layout_height="wrap_content"android:id="@+id/fl"></FrameLayout></LinearLayout>
Mainactivity.java文件
package com.mingrisoft.demo;import android.app.Fragment;import android.app.FragmentTransaction;import android.support.v7.app.ActionBarActivity;import android.os.Bundle;public class MainActivity extends ActionBarActivity {@Overrideprotected void onCreate(Bundle savedInstanceState) {super.onCreate(savedInstanceState);setContentView(R.layout.activity_main);//实例化DetailFragment对象DetailFragment detailFragment=new DetailFragment();//获取FragmentTransaction实例FragmentTransaction ft=getFragmentManager().beginTransaction();//第一个参数用于指定Fragment放在哪个容器中,通常为ViewGroup对象,可用android提供的//content,第二个参数要添加的对象。ft.add(R.id.fl,detailFragment);//调用commit来提交事务ft.commit();}}
实例:实现模拟微信界面中的Tab标签切换功能。
代码列表:
效果:
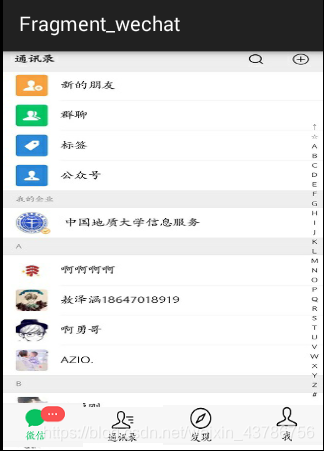
4个Fragment的内容和上相似。
四个Fragment.xml文件(内容相似,只列出一个)
<?xml version="1.0" encoding="utf-8"?><RelativeLayout xmlns:android="http://schemas.android.com/apk/res/android"android:layout_width="wrap_content" android:layout_height="match_parent"><ImageViewandroid:layout_width="match_parent"android:layout_height="match_parent"android:src="@drawable/we4"android:scaleType="fitXY"/></RelativeLayout>
activity_main.xml文件
<?xml version="1.0" encoding="utf-8"?><RelativeLayout xmlns:android="http://schemas.android.com/apk/res/android"xmlns:tools="http://schemas.android.com/tools"android:layout_width="match_parent"android:layout_height="match_parent"tools:context="com.mingrisoft.fragment_wechat.MainActivity"><!-- 放fragment的地方,默认wechat--><fragmentandroid:layout_width="wrap_content"android:layout_height="wrap_content"android:name="com.mingrisoft.fragment_wechat.Wechat_Fragment"android:id="@+id/fragment"/><!-- 下方的4个图标 --><LinearLayoutandroid:layout_width="match_parent"android:layout_height="50dp"android:layout_alignParentBottom="true"android:orientation="horizontal"><ImageViewandroid:id="@+id/image1"android:layout_width="0dp"android:layout_height="50dp"android:layout_weight="1"android:src="@drawable/ww1"/><ImageViewandroid:id="@+id/image2"android:layout_width="0dp"android:layout_height="50dp"android:layout_weight="1"android:src="@drawable/ww2"/><ImageViewandroid:id="@+id/image3"android:layout_width="0dp"android:layout_height="50dp"android:layout_weight="1"android:src="@drawable/ww3"/><ImageViewandroid:id="@+id/image4"android:layout_width="0dp"android:layout_height="50dp"android:layout_weight="1"android:src="@drawable/ww4"/></LinearLayout></RelativeLayout>
MainActivity.java文件
package com.mingrisoft.fragment_wechat;import android.app.Fragment;import android.app.FragmentManager;import android.app.FragmentTransaction;import android.support.v7.app.ActionBarActivity;import android.os.Bundle;import android.view.View;import android.widget.ImageView;public class MainActivity extends ActionBarActivity {@Overrideprotected void onCreate(Bundle savedInstanceState) {super.onCreate(savedInstanceState);setContentView(R.layout.activity_main);ImageView image1= (ImageView) findViewById(R.id.image1);ImageView image2= (ImageView) findViewById(R.id.image2);ImageView image3= (ImageView) findViewById(R.id.image3);ImageView image4= (ImageView) findViewById(R.id.image4);image1.setOnClickListener(l);image2.setOnClickListener(l);image3.setOnClickListener(l);image4.setOnClickListener(l);}//由于每一个ImgaeView的单击事件监听器都是相似的,所以我们创建一个单击事件监听器对象。View.OnClickListener l=new View.OnClickListener() {@Overridepublic void onClick(View view) {//FragMent的管理器FragmentManager fm=getFragmentManager();//开启一个事务FragmentTransaction ft=fm.beginTransaction();//创建一个Fragment的空对象Fragment f=null;//判断点击的是哪个图标switch (view.getId()){case R.id.image1:f=new Wechat_Fragment();break;case R.id.image2:f=new Talk_fragment();break;case R.id.image3:f=new Find_fragment();break;case R.id.image4:f=new Me_fragment();break;default:break;}//将f内容显示在R.id.fragment中ft.replace(R.id.fragment,f);调用commit来提交事务ft.commit();}};}


还没有评论,来说两句吧...