在github使用hexo搭建静态博客
效果:https://trevor-lan.github.io/
安装前提
安装 Hexo 之前需要先安装下列应用程序:
- Node.js (Node.js 版本需不低于 8.10,建议使用 Node.js 10.0 及以上版本)
- Git
安装hexo
所有必备的应用程序安装完成后,即可使用 npm 安装 Hexo。
npm install -g hexo-cli
使用hexo
安装 Hexo 完成后,请执行下列命令,Hexo 将会在指定文件夹中新建所需要的文件。
npx hexo init <folder>
新建完成后,指定文件夹的目录如下
.├── _config.yml├── package.json├── scaffolds├── source| ├── _drafts| └── _posts└── themes
安装github自动提交工具
npm install hexo-deployer-git --save
配置秘钥访问github
ssh-keygen -t rsa -C "your_email@youremail.com"
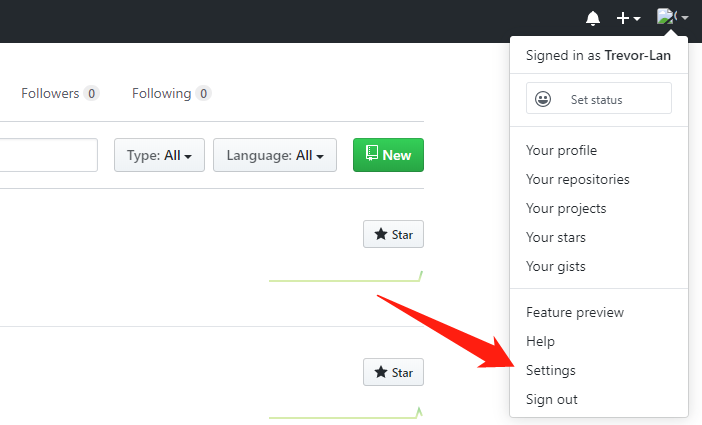
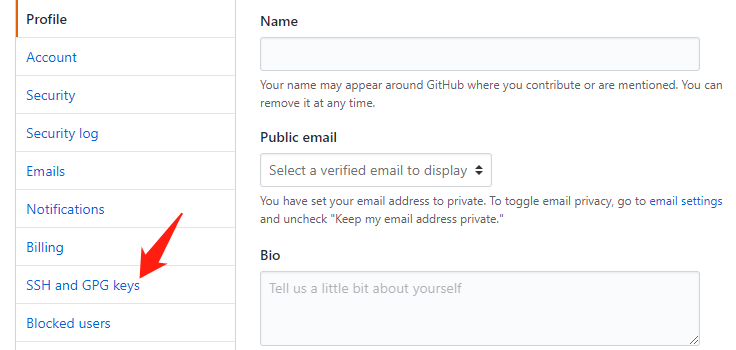
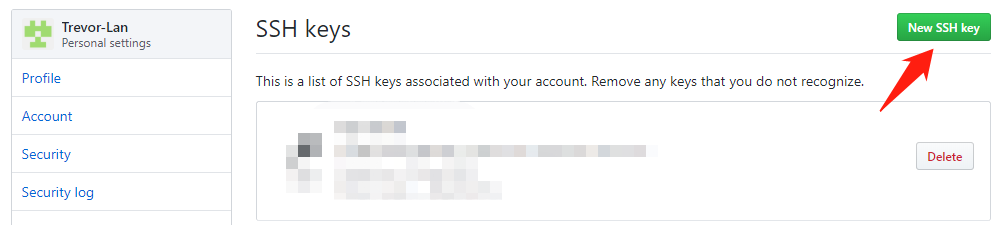
直接按三次回车,可不用输入密码 然后打开C盘查找Users/当前用户目录(Administrator),找到.ssh文件夹 打开文件夹下的id_rsa.pub文件,将里面文字全部复制, 打开github个人主页 (https://github.com/settings/ssh) ,点击 Add SSH Key 按钮,粘贴进去保存即可
在github配置访问公钥
新建文章
hexo new [layout] <title>
生成静态文件
npx hexo g
启动服务
npx hexo s
部署到github
npx hexo d
清除缓存
npx hexo clean
hexo官方文档:https://hexo.io/zh-cn/docs
配置主题
hexo官网有许多主题可以选择,这里笔者使用的是next主题
next主题:https://theme-next.org/
使用的版本为:https://github.com/theme-next/hexo-theme-next
安装next主题
git clone https://github.com/theme-next/hexo-theme-next themes/next
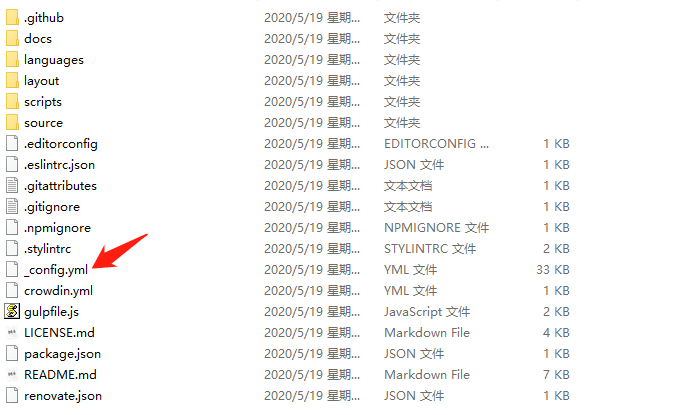
配置hexo的主题为next

# Extensions
## Plugins: https://hexo.io/plugins/
## Themes: https://hexo.io/themes/
theme: next
next的常用配置
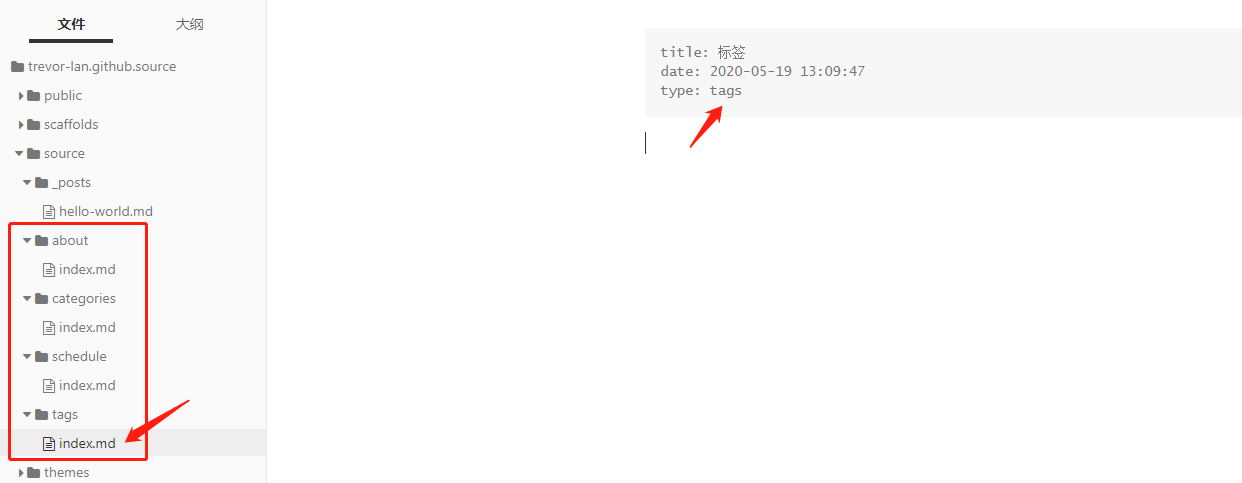
菜单配置

scheme: Mist
menu:
home: / || fa fa-home
about: /about/ || fa fa-user
tags: /tags/ || fa fa-tags
categories: /categories/ || fa fa-th
archives: /archives/ || fa fa-archive
schedule: /schedule/ || fa fa-calendar
sitemap: /sitemap.xml || fa fa-sitemap
侧边栏配置
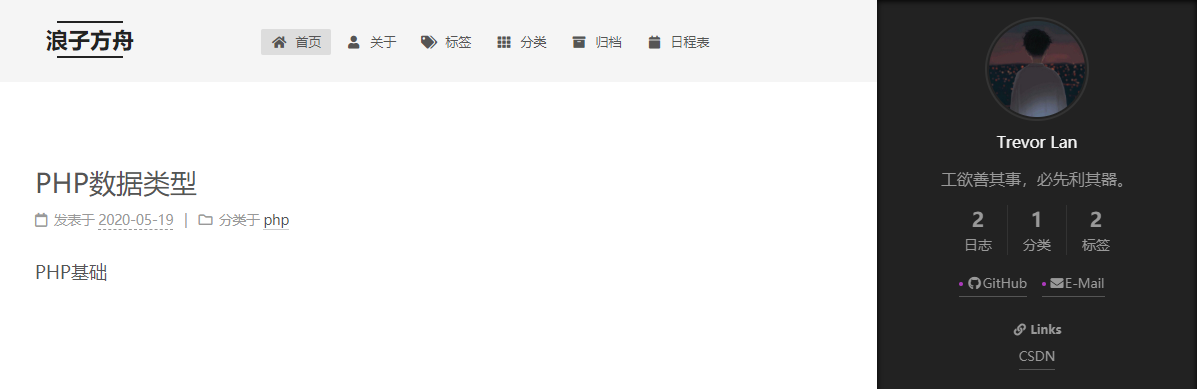
侧边栏定位
sidebar:
# Sidebar Position.
#position: left
position: right
头像
avatar:
# Replace the default image and set the url here.
url: https://avatar.csdnimg.cn/9/A/7/1\_lwqbrell\_1572140047.jpg
# If true, the avatar will be dispalyed in circle.
rounded: true
# If true, the avatar will be rotated with the cursor.
rotated: true
社交
social:
GitHub: https://github.com/yourname || fab fa-github
E-Mail: mailto:yourname@gmail.com || fa fa-envelope
Weibo: https://weibo.com/yourname || fab fa-weibo
Google: https://plus.google.com/yourname || fab fa-google
Twitter: https://twitter.com/yourname || fab fa-twitter
FB Page: https://www.facebook.com/yourname || fab fa-facebook
StackOverflow: https://stackoverflow.com/yourname || fab fa-stack-overflow
YouTube: https://youtube.com/yourname || fab fa-youtube
Instagram: https://instagram.com/yourname || fab fa-instagram
Skype: skype:yourname?call|chat || fab fa-skype
外链
links:
Title: http://yoursite.com
图片预览
# FancyBox is a tool that offers a nice and elegant way to add zooming functionality for images.
# For more information: https://fancyapps.com/fancybox
fancybox: true
一键复制代码
codeblock:
# Manual define the border radius in codeblock
# Leave it empty for the default 1
border_radius:
# Add copy button on codeblock
copy_button:
enable: true
# Show text copy result
show_result: true


:常用函数")

")
、Height()详解")


还没有评论,来说两句吧...