Centos7 openresty使用Lua连接Redis集群(包括单机版redis)
" class="reference-link">
1、新增 lua-resty-redis-cluster 模块
连接redis集群需要用到 lua-resty-redis-cluster模块
github地址: https://github.com/cuiweixie/lua-resty-redis-cluster
网盘:我的代码工程—》jar包—》lua-resty-redis-cluster-master
下载完成之后,只需要用到包中的2个文件rediscluster.lua和redis_slot.c
复制包中的 redis_slot.c 到openresty安装目录的lualib下,rediscluster.lua到lualib下的resty下
.c文件无法在Nginx配置文件中引入,需要编译成**.so**文件,编译命令
# 安装gcc、c++编译器以及内核文件yum -y install gcc gcc-c++ kernel-devel# centos自带lua需要执行此命令再编译,自己安装过lua不需要yum install lua-devel#编译命令gcc redis_slot.c -fPIC -shared -o libredis_slot.so#查看结果ll编辑结果
2、编写redis-lua脚本
结构
nginx.conf配置文件中http下添加
#lua模块路径,多个之间”;”分隔,其中”;;”表示默认搜索路径,默认到/usr/servers/nginx下找lua_package_path "/opt/openresty/lualib/?.lua;;/opt/openresty/nginx/conf/openResty/?.lua;;"; #lua 模块lua_package_cpath "/opt/openresty/lualib/?.so;";include /opt/openresty/nginx/conf/openResty/openResty.conf;nginx.conf完成内容
#user nobody;worker_processes 1;#error_log logs/error.log;#error_log logs/error.log notice;#error_log logs/error.log info;#pid logs/nginx.pid;events {worker_connections 1024;}http {include mime.types;default_type application/octet-stream;#日志格式log_format my_format '$remote_addr^A$msec^A$http_host^A$request_uri';#access_log logs/access.log main;sendfile on;#tcp_nopush on;#keepalive_timeout 0;keepalive_timeout 65;upstream lua.redis.com{server 192.168.164.25:8090;}#gzip on;#lua模块路径,多个之间”;”分隔,其中”;;”表示默认搜索路径,默认到/usr/servers/nginx下找lua_package_path "/opt/openresty/lualib/?.lua;;/opt/openresty/nginx/conf/openResty/?.lua;;"; #lua 模块lua_package_cpath "/opt/openresty/lualib/?.so;";include /opt/openresty/nginx/conf/openResty/openResty.conf;}/opt/openresty/nginx/conf/openResty目录下新增openResty.conf
server {listen 80;server_name lua.redis.com;#单机版redislocation /lua_redis_single {default_type 'text/html';charset utf-8;lua_code_cache off;content_by_lua_file conf/openResty/lua/redis/redis-util.lua;}#集群版redislocation /lua_redis {default_type 'text/html';charset utf-8;lua_code_cache off;content_by_lua_file conf/openResty/lua/redis/redis-cluster.lua;}#redis中k为空则将请求转发到当前后台服务器进行查询location /redis {default_type 'text/plain';proxy_pass http://lua.redis.com;}}/opt/openresty/nginx/conf/openResty/lua/redis目录下新增redis-cluster.lua
local config = {name = "test",serv_list = {{ip="192.168.164.24", port = 7000},{ip="192.168.164.24", port = 7001},{ip="192.168.164.24", port = 7002},{ip="192.168.164.24", port = 7003},{ip="192.168.164.24", port = 7004},{ip="192.168.164.24", port = 7005},}}-- 获取连接local redis_cluster = require "resty.rediscluster"local red = redis_cluster:new(config)--Nginx服务器中使用lua获取get或post参数local request_method = ngx.var.request_methodlocal args = nillocal param = nil--获取url参数的值if "GET" == request_method thenargs = ngx.req.get_uri_args()elseif "POST" == request_method thenngx.req.read_body()args = ngx.req.get_post_args()endparam = args["k"]-- 使用pipeline操作业务-- red:init_pipeline()local result=red:get(param)-- local results = red:commit_pipeline()local cjson = require "cjson"if result == ngx.null then-- 转发到后台tomcat服务器去查询并且缓存local resp = ngx.location.capture("/redis/getV?k="..param)result = resp.bodyendngx.say(cjson.encode(result))red:close()redis springboot工程
/*** 用户测试nginx-lua-redis,当前工程作为后端都服务器工程使用* @param id* @return*/@RequestMapping("/redis/getV")public String getRedis(String k){String v = (String)redisService.get(k);if(StringUtils.isBlank(v)) {v=k+"东哥";redisService.set(k, v);System.out.println("----------tomcat-web-project----------------:"+v);}return v;}测试:
访问 http://lua.redis.com/lua_redis?k=myName 请求lua_redis
[http://lua.redis.com/redis/getV?k=myName][http_lua.redis.com_redis_getV_k_myName] 跳过lua\_redis,直接访问redis springboot工程首先,访问lua_redis
去redis库中查找该key
访问,redis springboot工程,说明后台工程时通的
将springboot工程 kill掉,再访问lua_redis,此时证明lua可以从redis直接get数据
从reids数据库中删除掉 myName这个key
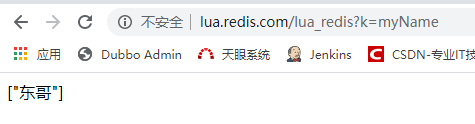
再次访问lua_redis
启动springboot工程,再次访问redis springboot工程,如果没有该值会set该值
补充:连接单机版redis
redis-util.lua
local function close_redes( red )if not red thenreturnend-- 释放连接(连接池实现)local pool_max_idle_time = 10000 -- 毫秒local pool_size = 100 --连接池大小local ok, err = red:set_keepalive(pool_max_idle_time, pool_size)if not ok thenngx.say("set keepalive error : ", err)endendlocal redis = require("resty.redis")-- 创建实例local red = redis:new()-- 设置超时(毫秒)red:set_timeout(2000)-- 建立连接local ip = "192.168.2.110"local port = 6379local ok, err = red:connect(ip, port)if not ok thenreturnendlocal res, err = red:auth("jinku_redis")if not res thenngx.say("connect to redis error : ", err)returnend-- 选择db 3ok, err = red:select(3)if not ok thenngx.say("failed to select db: ", err)returnendred:init_pipeline()red:set("msg1", "hello1")red:set("msg2", "hello2")red:get("msg1")red:get("msg2")local respTable, err = red:commit_pipeline()-- 得到数据为空处理if respTable == ngx.null thenrespTable = {}end-- 结果是按照执行顺序返回的一个tablefor i, v in ipairs(respTable) dongx.say("msg : ", v, "<br/>")endclose_redes(red)


还没有评论,来说两句吧...