LNMP部署
LNMP部署
- 1.准备环境
- 2.安装nginx
- 3.安装mysql
- 4.安装php
- 5.ngnix虚拟主机配置
| 主机 | IP |
|---|---|
| zyy180 | 192.168.30.150/24 |
1.准备环境
#准备工作#安装yum源[root@zyy180 ~]# curl -o /etc/yum.repos.d/CentOS-Base.repo https://mirrors.aliyun.com/repo/Centos-7.repo[root@zyy180 ~]# sed -i 's/\$releasever/7/g' /etc/yum.repos.d/CentOS-Base.reposed -i -e '/mirrors.cloud.aliyuncs.com/d' -e '/mirrors.aliyuncs.com/d' /etc/yum.repos.d/CentOS-Base.repo[root@zyy180 ~]#yum -y install wget[root@zyy180 ~]#wget -O /etc/yum.repos.d/epel.repo http://mirrors.aliyun.com/repo/epel-7.repo安装所需软件yum -y install vim gd-devel pcre-devel openssl openssl-devel gcc gcc-c++ bzip2安装所需工具包[root@zyy ~]# yum groups mark install 'Development Tools'
2.安装nginx
1.创建nginx用户[root@zyy180 ~]#useradd -r -M -s /sbin/nologin nginx2.创建日志文件并更改属主[root@zyy180 ~]# cd /usr/src/[root@zyy180 ~]# mkdir -p /var/log/nginx[root@zyy180 src]# chown -R nginx.nginx /var/log/nginx3.解压[root@zyy180 src]# tar xf nginx-1.18.0.tar.gz -C /usr/local/4.编译安装[root@zyy180 ~]# cd /usr/local/nginx-1.18.0/[root@zyy180 nginx-1.18.0]# ./configure \--prefix=/usr/local/nginx \--user=nginx \--group=nginx \--with-debug \--with-http_ssl_module \--with-http_realip_module \--with-http_image_filter_module \--with-http_gunzip_module \--with-http_gzip_static_module \--with-http_stub_status_module \--http-log-path=/var/log/nginx/access.log \--error-log-path=/var/log/nginx/error.log[root@zyy180 nginx-1.18.0]# make && make install5.做环境变量[root@zyy180 ~]# echo 'export PATH=/usr/local/nginx/sbin:$PATH' > /etc/profile.d/nginx.sh[root@zyy180 local]# . /etc/profile.d/nginx.sh6.启动服务[root@zyy180 ~]# nginx
3.安装mysql
安装mysql安装依赖包[root@zyy180 ~]# yum -y install ncurses-devel openssl-devel openssl cmake mariadb-devel1.创建用户[root@zyy180 ~]# useradd -r -M -s /sbin/no -u 306 mysql2.解压将二进制数据库拖进来[root@zyy180 ~]# tar xf mysql-5.7.30-linux-glibc2.12-x86_64.tar.gz -C /usr/local/3.做链接和改属主[root@zyy180 ~]# cd /usr/local/[root@zyy180 local]# ln -s mysql-5.7.30-linux-glibc2.12-x86_64/ mysql[root@zyy180 local]# chown -R mysql.mysql mysql*4.做环境变量[root@zyy180 local]# echo 'export PATH=/usr/local/mysql/bin:$PATH' > /etc/profile.d/mysql.sh[root@zyy180 local]# source /etc/profile.d/mysql.sh[root@zyy180 local]# cd /usr/local/mysql[root@zyy180 mysql]# ln -s include /usr/include/mysql[root@zyy180 mysql]# vim /etc/man_db.confMANDATORY_MANPATH /usr/local/mysql/man[root@zyy180 mysql]# vim /etc/ld.so.conf.d/mysql.conf/usr/local/mysql/lib[root@zyy180 mysql]# ldconfig5.创建存放目录[root@zyy180 mysql]# mkdir /opt/data[root@zyy180 mysql]# chown -R mysql.mysql /opt/data/6.初始化[root@zyy180 mysql]# mysqld --initialize-insecure --user=mysql --datadir=/opt/data7.编译并安装[root@zyy180 mysql]# cat > /etc/my.cnf <<EOF[mysqld]basedir = /usr/local/mysqldatadir = /opt/datasocket = /tmp/mysql.sockport = 3306pid-file = /opt/data/mysql.piduser = mysqlskip-name-resolveEOF8.配置服务启动脚本[root@zyy180 mysql]# cd /usr/local/mysql/support-files[root@zyy180 support-files]# cp mysql.server /etc/init.d/mysqld[root@zyy180 support-files]# vim /etc/init.d/mysqldbasedir=/usr/local/mysqldatadir=/opt/data[root@zyy180 support-files]# service mysqld start9.修改密码[root@zyy180 support-files]# mysql -urootmysql> set password=password('1');[root@zyy180 ~]# ss -anltState Recv-Q Send-Q Local Address:Port Peer Address:PortLISTEN 0 128 *:80 *:*LISTEN 0 128 *:22 *:*LISTEN 0 100 127.0.0.1:25 *:*LISTEN 0 128 :::22 :::*LISTEN 0 100 ::1:25 :::*LISTEN 0 80 :::3306 :::*
4.安装php
C.安装php下载php源[root@zyy180 ~]# wget http://rpms.remirepo.net/enterprise/remi-release-7.rpm解压[root@zyy180 ~]# tar xf php-7.4.7.tar.xz启动php包[root@zyy180 ~]# rpm -Uvh remi-release-7.rpm下载缓存[root@zyy180 ~]# yum makecache --enablerepo=remi-php74下载所需依赖包[root@zyy180 ~]# yum -y install libxml2 libxml2-devel \openssl openssl-devel bzip2 bzip2-devel libcurl libcurl-devel libicu-devel libjpeg \libjpeg-devel libpng libpng-devel openldap-devel pcre-devel \freetype freetype-devel gmp gmp-devel libmcrypt \libmcrypt-devel readline readline-devel libxslt libxslt-devel \mhash mhash-devel php74-php-mysqlnd1.进到php包[root@zyy180 php-7.4.7]# cd php-7.4.72.编译并安装[root@zyy180 ~]# yum -y install libsqlite3x-devel.x86_64 oniguruma-devel.x86_64./configure --prefix=/usr/local/php7 \--with-config-file-path=/etc \--enable-fpm \--enable-inline-optimization \--disable-debug \--disable-rpath \--enable-shared \--enable-soap \--with-openssl \--enable-bcmath \--with-iconv \--with-bz2 \--enable-calendar \--with-curl \--enable-exif \--enable-ftp \--enable-gd \--with-jpeg \--with-png \--with-zlib \--with-freetype \--with-gettext \--enable-json \--enable-mbstring \--enable-pdo \--with-mysqli=mysqlnd \--with-pdo-mysql=mysqlnd \--with-readline \--enable-shmop \--enable-simplexml \--enable-sockets \--enable-zip \--enable-mysqlnd-compression-support \--with-pear \--enable-pcntl \--enable-posix使用多核心编译[root@zyy180 php-7.4.7]# make -j $(cat /proc/cpuinfo |grep processor|wc -l)[root@zyy180 php-7.4.7]# make install3.环境变量[root@zyy180 php-7.4.7]#echo 'export PATH=/usr/local/php7/bin:$PATH' > /etc/profile.d/php7.sh[[root@zyy180 php-7.4.7]#source /etc/profile.d/php7.sh4.配置服务启动脚本在php解压文件里[root@zyy180 php-7.4.7]# cp php.ini-production /etc/php.ini[root@zyy180 php-7.4.7]# cd sapi/fpm/[root@zyy180 fpm]# cp init.d.php-fpm /etc/init.d/php-fpm[root@zyy180 fpm]# chmod +x /etc/init.d/php-fpm5.配置php-fpm[root@zyy180 etc]# cd /usr/local/php7/etc[root@zyy180 etc]# cp php-fpm.conf.default php-fpm.conf[root@zyy180 etc]# vim php-fpm.conf //优化pm.max_children = 50pm.start_servers = 5pm.min_spare_servers = 2pm.max_spare_servers = 8[root@zyy180 etc]# cd php-fpm.d/[root@zyy180 php-fpm.d]# cp www.conf.default www.conf[root@zyy180 php-fpm.d]# vim www.conflisten = 0.0.0.0:90006.启动服务[root@zyy180 ~]# service php-fpm start[root@zyy180 ~]# chkconfig --add php-fpm[root@zyy180 ~]# chkconfig --add mysqld
5.ngnix虚拟主机配置
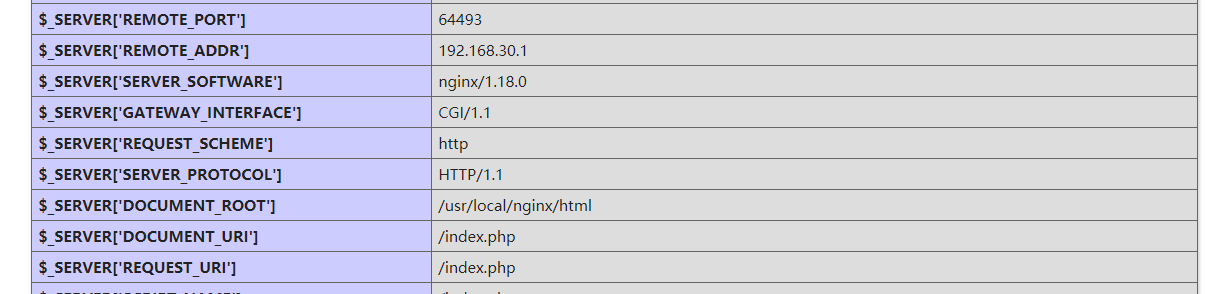
1.进到nginx网站存放目录[root@zyy180 ~]# cd /usr/local/nginx/html/2.写测试文件[root@zyy180 html]# vim index.php<?phpphpinfo();?>3.修改配置文件[root@zyy180 ~]# vim /usr/local/nginx/conf/nginx.conf##取消注释location ~ \.php$ {root html;fastcgi_pass 127.0.0.1:9000;fastcgi_index index.php;fastcgi_param SCRIPT_FILENAME $document_root$fastcgi_script_name;include fastcgi_params;}##加上$document_root##往上翻,加上index.phplocation / {root html;index index.php index.html index.htm;4.重启nginx[root@zyy180 ~]# nginx -s stop[root@zyy180 ~]# nginx重启mysql[root@zyy180 ~]# service mysqld restartShutting down MySQL.. SUCCESS!Starting MySQL. SUCCESS!重启php[root@zyy180 ~]# service php-fpm restartGracefully shutting down php-fpm . doneStarting php-fpm done查看端口[root@zyy180 ~]# ss -anltState Recv-Q Send-Q Local Address:Port Peer Address:PortLISTEN 0 128 *:80 *:*LISTEN 0 128 *:22 *:*LISTEN 0 100 127.0.0.1:25 *:*LISTEN 0 128 *:9000 *:*LISTEN 0 128 :::22 :::*LISTEN 0 100 ::1:25 :::*LISTEN 0 80 :::3306 :::*
http://192.168.30.150


")
浅谈控制反转(IOC)与依赖注入(DI)")


还没有评论,来说两句吧...