lnmp服务一PHP部署
文章目录
- 1.安装依赖于函数库
- 2.安装PHP
- 2.1解压php安装包
- 2.2编译PHP
- 3.配置PHP
- 3.1修改配置文件
- 3.2创建日志目录
- 3.3设置环境变量
- 3.4检查语法,启动php
- 4.整合nginx与PHP
- 4.1修改nginx配置文件
- 4.2检查语法,启动nginx
- 4.3编写php网页测试
- 4.4网页查看
- 4.5测试mysql连接
1.安装依赖于函数库
[root@lnmp ~]# ll libiconv-1.14.tar.gz php-5.3.27.tar.gz-rw-r--r--. 1 root root 4984397 Aug 4 03:16 libiconv-1.14.tar.gz-rw-r--r--. 1 root root 15008639 Aug 4 00:29 php-5.3.27.tar.gz[root@lnmp ~]# yum install zlib gcc-c++ libjpeg freetype \libpng gd zlib-devel libxml2-devel libjpeg-devel freetype-devel \libpng-devel gd-devel curl-devel libxslt-devel openssl-devel -y[root@lnmp ~]# tar xf libiconv-1.14.tar.gz[root@lnmp ~]# cd libiconv-1.14[root@lnmp libiconv-1.14]# ./configure --prefix=/usr/local/libiconv-1.14[root@lnmp libiconv-1.14]# make && make install
2.安装PHP
2.1解压php安装包
[root@lnmp ~]# tar xf php-5.3.27.tar.gz[root@lnmp ~]# cd php-5.3.27
2.2编译PHP
[root@lnmp php-5.3.27]# ./configure --prefix=/usr/local/php \--with-mysql=mysqlnd --with-iconv-dir=/usr/local/libiconv \--with-freetype-dir --with-jpeg-dir --with-png-dir --with-zlib \--with-libxml-dir=/usr --enable-xml --disable-rpath --enable-safe-mode \--enable-bcmath --enable-shmop --enable-sysvsem --enable-inline-optimization \--with-curl --with-curlwrappers --enable-mbregex --enable-fpm \--enable-mbstring --with-gd --enable-gd-native-ttf --with-openssl \--enable-pcntl --enable-sockets --with-xmlrpc --enable-zip --enable-soap \--enable-short-tags --enable-zend-multibyte --enable-static --with-xsl \--with-fpm-user=nginx --with-fpm-group=nginx --enable-ftp[root@lnmp php-5.3.27]# make && make install[root@lnmp php-5.3.27]# ln -s /usr/local/php/ /application/php
3.配置PHP
3.1修改配置文件
[root@nginx php-5.3.27]# \cp php.ini-production /application/php/lib/php.ini[root@nginx php-5.3.27]# cd /application/php/[root@nginx ~]# egrep -v "^$|^;" /application/php/etc/php-fpm.conf|cat -n1 [global]2 pid = /app/logs/php-fpm.pid3 error_log = /app/logs/php-fpm.log4 log_level = error56 rlimit_files = 3276878 events.mechanism = epoll9 [www]10 user = nginx11 group = nginx12 listen = 127.0.0.1:900013 listen.owner = nginx14 listen.group = nginx15 pm = dynamic16 pm.max_children = 102417 pm.start_servers = 1618 pm.min_spare_servers = 519 pm.max_spare_servers = 2020 pm.process_idle_timeout = 15s;21 pm.max_requests = 204822 slowlog = /app/logs/$pool.log.slow23 request_slowlog_timeout = 1024 php_admin_value[sendmail_path] = /usr/sbin/sendmail -t -i -f 1093626742@qq.com
3.2创建日志目录
[root@lnmp php]# mkdir /app/logs/ -p
3.3设置环境变量
[root@lnmp php]# cp sbin/php-fpm /usr/local/sbin/
3.4检查语法,启动php
[root@lnmp php]# php-fpm -t[06-Aug-2018 11:22:37] NOTICE: configuration file /usr/local/php/etc/php-fpm.conf test is successful[root@lnmp php]# php-fpm[root@lnmp php]# netstat -lntup|grep phptcp 0 0 127.0.0.1:9000 0.0.0.0:* LISTEN 6625/php-fpm
4.整合nginx与PHP
4.1修改nginx配置文件
[root@lnmp php]# vim /application/nginx/conf/nginx.conf10 server {11 listen 80;12 server_name www.liang.com;13 root html/www;14 index index.php index.html index.htm;15 location ~ \.php$ {16 root html/www;17 fastcgi_pass 127.0.0.1:9000;18 fastcgi_index index.php;19 fastcgi_param SCRIPT_FILENAME /scripts$fastcgi_script_name;20 include fastcgi.conf;21 }22 }
4.2检查语法,启动nginx
[root@lnmp php]# nginx -tnginx: the configuration file /usr/local/nginx-1.6.2/conf/nginx.conf syntax is oknginx: configuration file /usr/local/nginx-1.6.2/conf/nginx.conf test is successful[root@lnmp php]# nginx -s reload
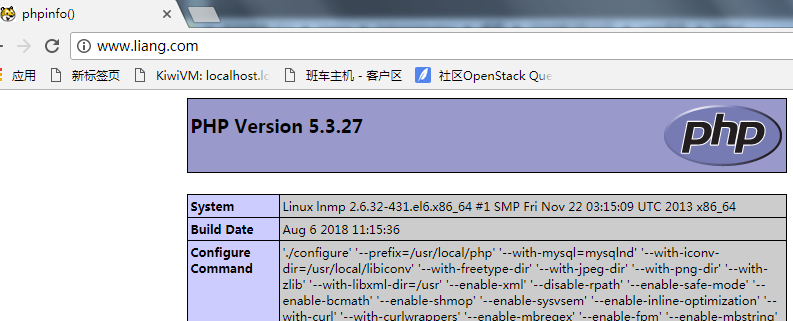
4.3编写php网页测试
[root@lnmp php]# cat /application/nginx/html/www/index.php<?phpphpinfo();?>
4.4网页查看
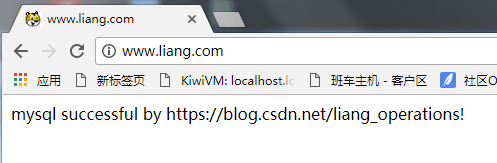
4.5测试mysql连接
[root@lnmp php]# cat /application/nginx/html/www/index.php<?php//$link_id=mysql_connect('主机名','用户','密码');$link_id=mysql_connect('localhost','root','000000') or mysql_error();if($link_id){echo "mysql successful by https://blog.csdn.net/liang_operations!";}else{echo mysql_error();}?>


")
浅谈控制反转(IOC)与依赖注入(DI)")


还没有评论,来说两句吧...