每日一课 | 服务注册与发现
07.
服务注册与发现
大家好,我是营长,上期给大家分享——初识Spring Cloud
本期分享内容:服务注册与发现
本期邀请的是李熠老师(某大型互联网公司系统架构师)为我们分享《Spring Cloud快速入门》专栏。
Spring Cloud
服务注册与发现
我们知道,微服务是一个架构思想,而 Spring Cloud 集成了用以实现微服务架构的方方面面。从本文开始,我将带领大家逐个击破 Spring Cloud 的各个模块。
本课我们先来学习服务的注册与发现,Spring Cloud Netflix 的 Eureka 组件是服务于发现模块。
服务注册与发现模块分为服务注册中心和服务提供者,接下来,我将一一讲解。
服务注册中心
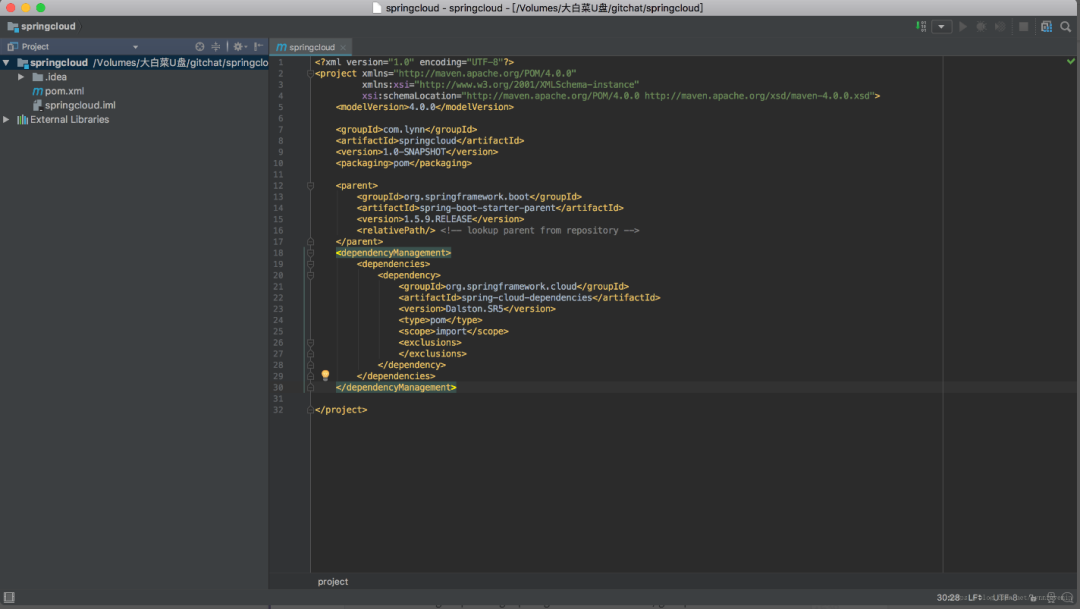
首先,创建一个 Maven 主工程,主工程的 pom.xml 添加如下内容:
<parent><groupId>org.springframework.boot</groupId><artifactId>spring-boot-starter-parent</artifactId><version>2.1.3.RELEASE</version><relativePath/></parent><dependencyManagement><dependencies><dependency><groupId>org.springframework.cloud</groupId><artifactId>spring-cloud-dependencies</artifactId><version>Greenwich.RELEASE</version><type>pom</type><scope>import</scope><exclusions></exclusions></dependency></dependencies></dependencyManagement>
接着,在主工程基础上创建两个 module:一个 module 为服务注册中心,一个 module 为服务提供者(即客户端)。
下面将详细演示如何创建服务注册中心。
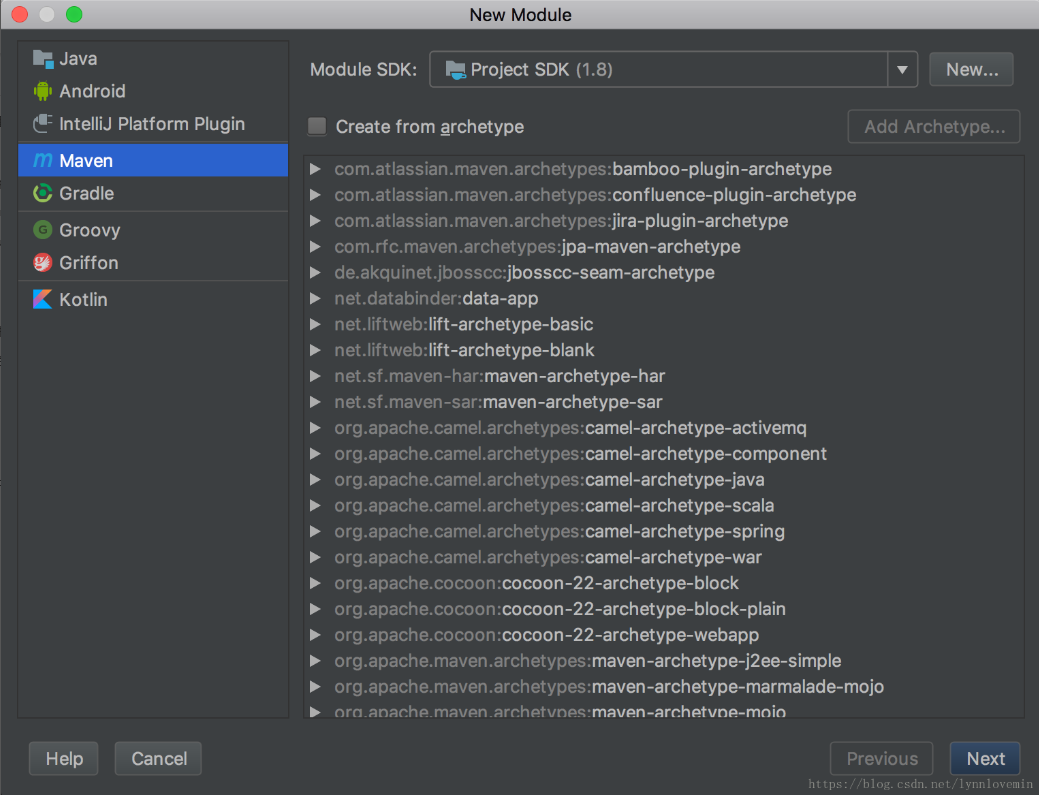
1.右键工程 -> New -> Module,如下图所示:

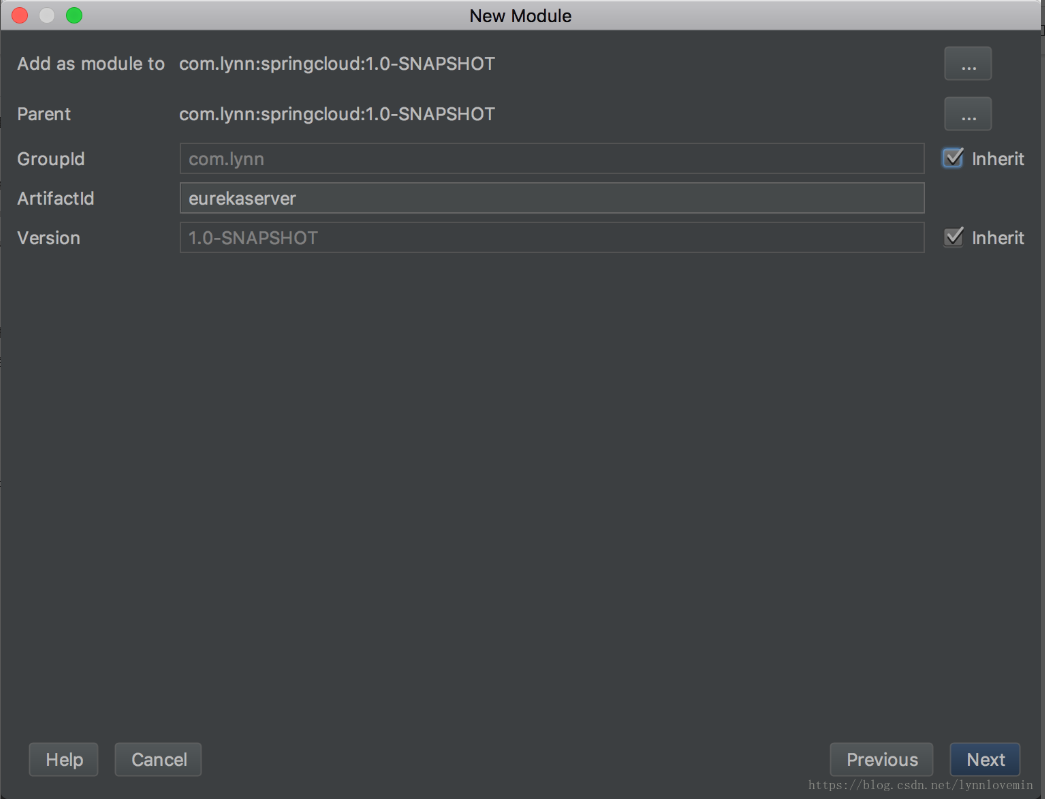
2.选择 next,输入 moudle 名,如下图所示:
3.点击 next -> finish,如下图所示:
4.然后在 pom.xml 添加依赖:
<dependencies><dependency><groupId>org.springframework.cloud</groupId><artifactId>spring-cloud-starter-netflix-eureka-server</artifactId></dependency><dependency><groupId>org.springframework.cloud</groupId><artifactId>spring-cloud-starter-netflix-hystrix</artifactId></dependency><dependency><groupId>org.springframework.cloud</groupId><artifactId>spring-cloud-starter-netflix-eureka-client</artifactId></dependency></dependencies>
其中 hystrix 为熔断器,Eureka Server 默认集成了熔断器,因此必须添加此依赖,否则启动会报错。eureka-client 服务提供者依赖,在这里添加该依赖,说明 Eureka Server 也可以作为服务提供者存在。
创建启动类 Application.java:
@SpringCloudApplication@EnableEurekaServerpublic class Application {public static void main(String[] args) {SpringApplication.run(Application.class, args);}}
这里,我们注意到除了前面提到的 @SpringCloudApplication 外,这个类还增加了一个注解:EnableEurekaServer,这个注解的作用就是标注该应用程序是一个注册中心,只是添加这个注解还不够,还需要增加配置。
在 resources 下面创建 application.yml 并添加如下内容:
server:port: 8761spring:application:name: eurekaserverprofiles:active: devcloud:inetutils:preferred-networks: 127.0.0.1client:ip-address: 127.0.0.1eureka:server:peer-node-read-timeout-ms: 3000enable-self-preservation: trueinstance:prefer-ip-address: trueinstance-id: ${spring.cloud.client.ip-address}:${server.port}client:registerWithEureka: truefetchRegistry: falsehealthcheck:enabled: trueserviceUrl:defaultZone: http://127.0.0.1:8761/eureka/
启动该应用程序,打开浏览器并访问:http://localhost:8761。如果看到如下界面,说明注册中心已经启动起来了:
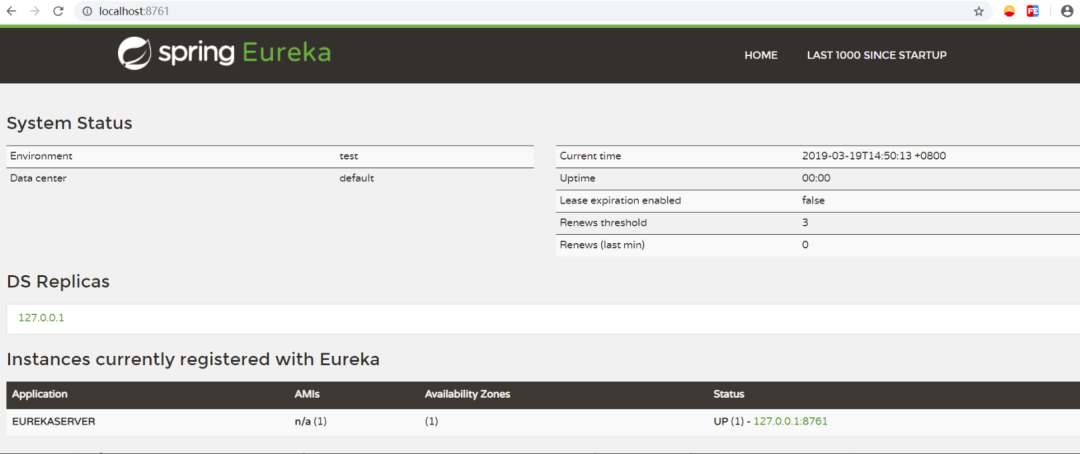
我们可以看到 eurekaserver 将自己也注册进去了。
下面说明一下注册中心各个配置项的含义。
- eureka.server.enable-self-preservation:是否开启自我保护,默认为 true,在开启自我保护的情况下,注册中心在丢失客户端时,会进入自动保护模式,注册中心并不会将该服务从注册中心删除掉。这里我设置为 false,即关闭自我保护。根据我的经验,如果设置为 true,在负载均衡条件下,一个服务挂掉后,注册中心并没有删掉该服务,会导致客户端请求的时候可能会请求到该服务,导致系统无法访问,因此我推荐将这个属性设置为 false。
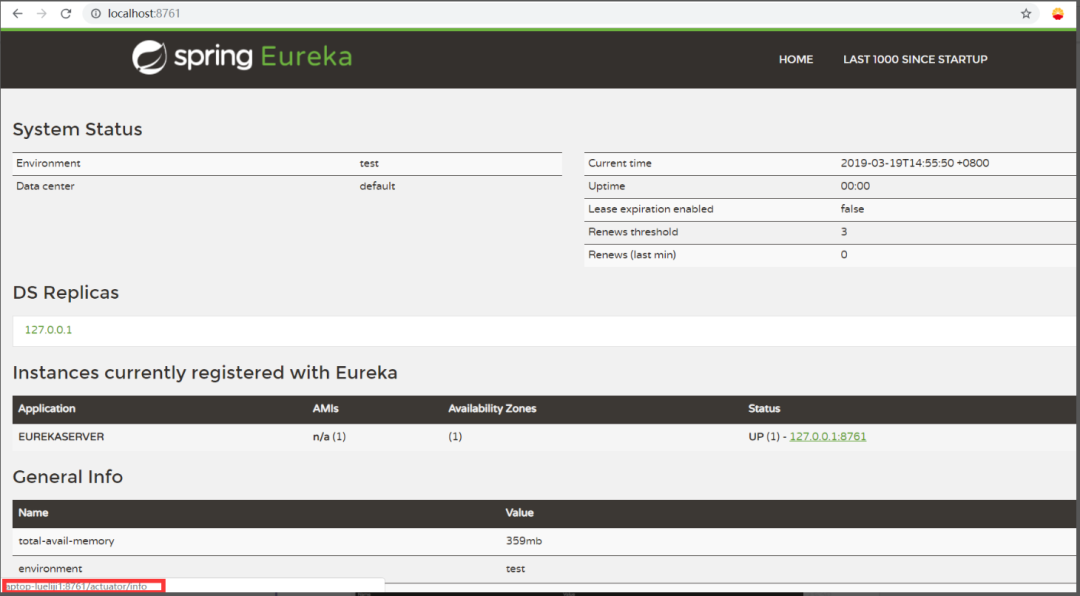
eureka.instance.prefer-ip-address:是否以 IP 注册到注册中心,Eureka 默认是以 hostname 来注册的,如果设置为 false,可以 eurekaserver 管理界面显示的地址为本机 hostname,如图:
当然,我们也可以通过 eureka.instance.hostname 来修改 hostname 的值。读者可以尝试,并查看效果。
- client.serviceUrl.defaultZone:注册中心默认地址。
- eureka.server.peer-node-read-timeout-ms:微服务节点连接超时时间。
- eureka.instance.instance-id:注册限制的实例 ID,即上图显示的 127.0.0.1:8761。
建议读者按照以上的配置项写就行了。
服务提供者
我们有了注册中心,那么就可以创建一个服务提供者(即客户端)注册到注册中心去了。
同样地,按照注册中心的创建方式,创建一个 module,并且在 pom.xml 添加如下内容:
<dependencies><dependency><groupId>org.springframework.cloud</groupId><artifactId>spring-cloud-starter-netflix-eureka-client</artifactId></dependency><dependency><groupId>org.springframework.cloud</groupId><artifactId>spring-cloud-starter-netflix-hystrix</artifactId></dependency><dependency><groupId>org.springframework.boot</groupId><artifactId>spring-boot-starter-web</artifactId></dependency></dependencies>
其中,spring-boot-starter-web 集成了 SpringMVC,在服务提供者,必须添加此依赖,否则无法启动该应用。如图:

然后创建 Application.java:
@SpringCloudApplicationpublic class Application {public static void main(String[] args) {SpringApplication.run(Application.class, args);}}
@SpringCloudApplication 注解包含了 @EnableDiscoveryClient 注解,因此无需显式开启服务发现。
然后创建配置文件 application.yml:
eureka:client:serviceUrl:defaultZone: http://localhost:8761/eureka/server:port: 8762spring:application:name: eurekaclient
其中,spring.application.name 为该服务的名字,eureka.client.serviceUrl.defaultZone 的作用是指定注册中心的地址。
然后启动该工程,重新访问:http://localhost:8761,即可看到如下界面:
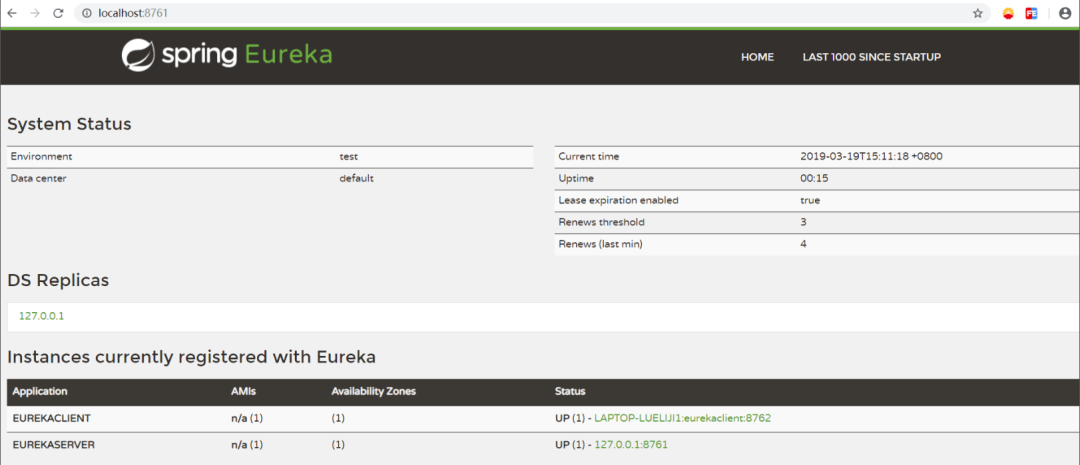
我们可以看到,刚刚创建的服务提供者 eurekaclient 已经被注册到注册中心了。
以上就是本文关于 Eureka 服务注册与发现的内容,仅仅只学习上面的知识还远远不够,我们把所有的模块都学习完后,在第14课将带领大家结合 Spring Cloud 的各个模块实现一套完整的基于 Spring Cloud 微服务架构的实例。
今日内容有get吗,欢迎各位留言讨论!
以上,咱们《Spring Cloud快速入门》七天专栏打卡就结束了,如需了解更多,小伙伴们可识别下方二维码,订阅专栏,咱们下期专栏见!
了解更多详情
可识别下方二维码


还没有评论,来说两句吧...