webpack4.x 第二节
webpack4.x 打包初体验
在根目录下建一个src(源码)目录
在建一个dist(打包后)目录
在src下建一个入口文件,index.js
// index.jsvar oRoot = document.querySelector("#root");oRoot.innerHTML = 'Hello World!';
在dist目录建一个index.html目录
//index.html<!DOCTYPE html><html><head><title></title></head><body><div id="root"></div><script type="text/javascript" src="bundle.js"></script></body></html>这时我们想将index.js打成bundle.js并输出在dist目录下,我们只要在项目根目录输入一下命令即可
-
webpack src/index.js --output dist/bundle.js
" class="reference-link">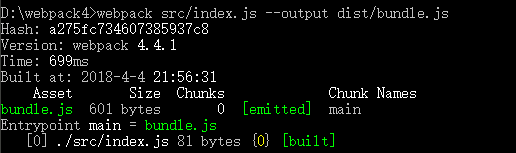
编写webpack的配置文件
webpack.config.js
module.exports = { // webpack首先需要导出一个模块// 入口配置entry:{},// 出口配置output:{},//module.rules (rules就是规则的意思)//loadersmodule:{},// 插件plugins:[],// 开发服务器devServer:{}};
为了实现刚刚打包成bundle.js的功能,我们配置webpack.config.js
module.exports = { // webpack首先需要导出一个模块// 入口配置entry:{a:'./src/index.js'},// 出口配置output:{/*path: 整体打包出去的路径(path必须是绝对路径)__dirname是node里面提供的用来获取全局路径*/path:__dirname+'/dist',filename:'bundle.js'}};这时候只要在控制台运行 webpack 即可
或者将webpack.config.js写成这样
const path = require('path'); //node系统模块module.exports = { // webpack首先需要导出一个模块// 入口配置entry:{a:'./src/index.js'},// 出口配置output:{/*path必须写成绝对路径,如果写成path.resolve(__dirname,'dist')这种形式,那么就要在上面引入const path = require('path');path 表示获取路径resolve 表示合并路成一个整个路径*/path:path.resolve(__dirname,'dist'),filename:'bundle.js'}};
自定义webpack.config.js文件名,那么就要执行
webpack —config hello.config.js(自定义文件名)
如果你想运行 npm run build就执行,那么你需要把webpack —config hello.config.js写到package.json的script里面配置,如下:
{"name": "webpack4","version": "1.0.0","description": "","main": "index.js","scripts": {//需要写成如下配置"build": "webpack --config hello.config.js"},"keywords": [],"author": "","license": "ISC","devDependencies": {"jquery": "^3.3.1"},"dependencies": {"jquery": "^3.3.1"}}
这时候你就可以运行 npm run build 了.
消除警告,将 —mode 加入 package.json的script标签中
webpack --mode developmentwebpack --mode production 文件明显被压缩


还没有评论,来说两句吧...