Shiro手动完成简单用户授权
完整项目代码:https://download.csdn.net/download/zeal9s/10744751
1.新建Maven项目Shiro_02,并设置项目输出文件显示
2.访问apache官网下载地址搜索到shiro,下载shiro的core、web、整合spring的依赖并且导入到项目中的pom.xml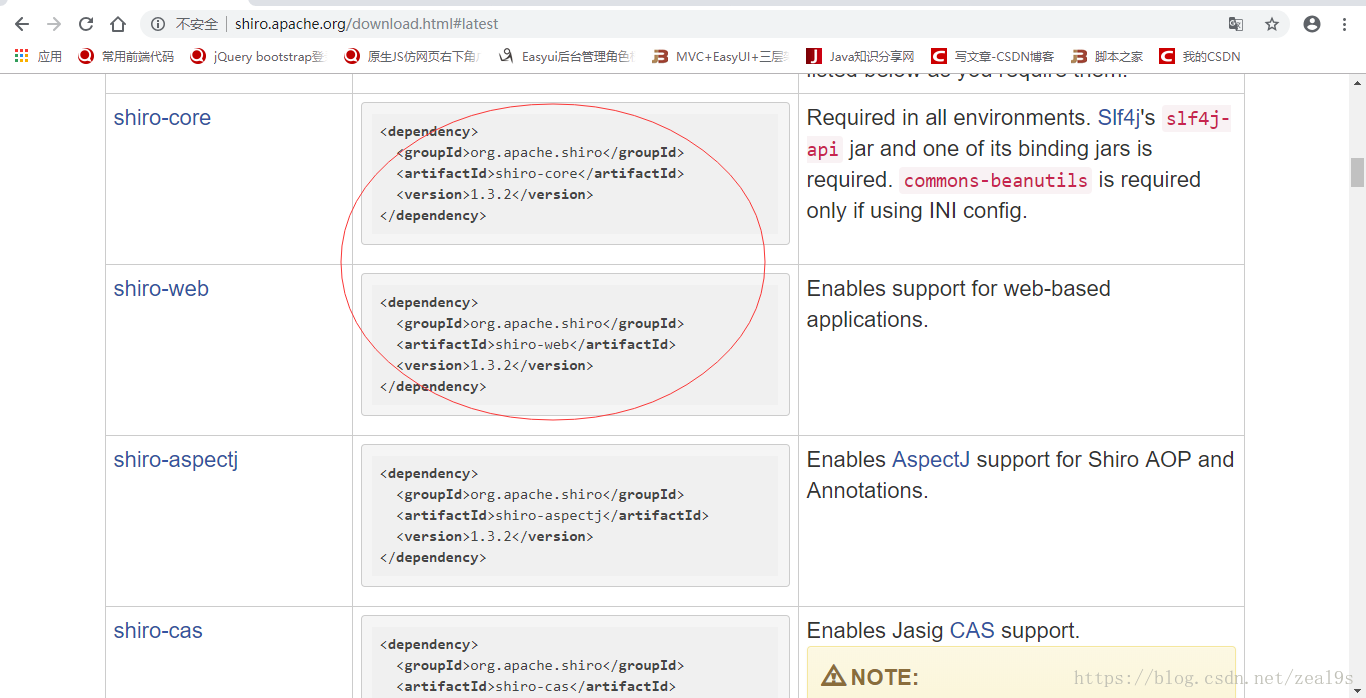 pom.xml
<project xmlns="http://maven.apache.org/POM/4.0.0" xmlns:xsi="http://www.w3.org/2001/XMLSchema-instance" xsi:schemaLocation="http://maven.apache.org/POM/4.0.0 http://maven.apache.org/maven-v4_0_0.xsd"><modelVersion>4.0.0</modelVersion><groupId>Shiro_02</groupId><artifactId>Shiro_02</artifactId><packaging>war</packaging><version>0.0.1-SNAPSHOT</version><name>Shiro_02 Maven Webapp</name><url>http://maven.apache.org</url><dependencies><dependency><groupId>junit</groupId><artifactId>junit</artifactId><version>4.12</version><scope>test</scope></dependency><!--引入servlet依赖:解决jsp页面报错 --><dependency><groupId>javax.servlet</groupId><artifactId>javax.servlet-api</artifactId><version>4.0.0-b07</version><scope>provided</scope></dependency><!--引入shiro的核心依赖 --><dependency><groupId>org.apache.shiro</groupId><artifactId>shiro-core</artifactId><version>1.3.2</version></dependency><!--引入shiro的web依赖 --><dependency><groupId>org.apache.shiro</groupId><artifactId>shiro-web</artifactId><version>1.3.2</version></dependency><!-- https://mvnrepository.com/artifact/commons-logging/commons-logging --><dependency><groupId>commons-logging</groupId><artifactId>commons-logging</artifactId><version>1.2</version></dependency></dependencies><build><finalName>Shiro_02</finalName></build></project>
3.项目的模块图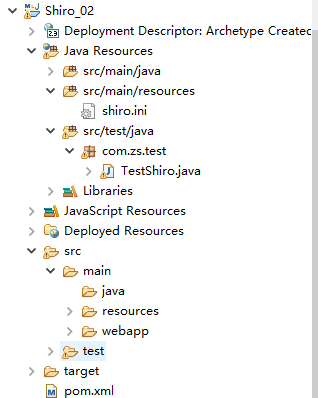
4.新建shiro.ini认证文件
#手动配置用户、角色和权限[users]admin=123,fathersa=456,son[roles]father=add,delete,update,queryson=add
5.在src/test/java目录下新建com.zs.test包,在包下新建TestShiro.java
TestShiro.java
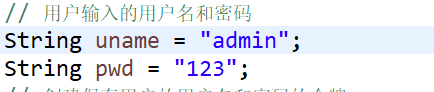
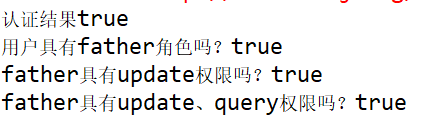
package com.zs.test;import org.apache.shiro.SecurityUtils;import org.apache.shiro.authc.UsernamePasswordToken;import org.apache.shiro.config.IniSecurityManagerFactory;import org.apache.shiro.mgt.SecurityManager;import org.apache.shiro.subject.Subject;import org.apache.shiro.util.Factory;/** * * @ClassName: TestShiro * @Description:手动写用户配置文件shiro.ini完成授权过程 * @author 小思 * @date 2018年10月25日 下午4:14:21 * */public class TestShiro {public static void main(String[] args) {// 认证过程之后的使用// 创建shiro的认证工厂,指定认证的文件Factory<SecurityManager> factory = new IniSecurityManagerFactory("classpath:shiro.ini");// 通过认证工厂,获取认证管理者SecurityManager securityManager = factory.getInstance();// 将安全管理者添加到当前的安全管理环境中SecurityUtils.setSecurityManager(securityManager);// 获取安全管理的项目Subject subject = SecurityUtils.getSubject();// 用户输入的用户名和密码String uname = "admin";String pwd = "123";// 创建保存用户的用户名和密码的令牌UsernamePasswordToken usernamePasswordToken = new UsernamePasswordToken(uname, pwd);try {// 登录认证subject.login(usernamePasswordToken);// 认证结果boolean result = subject.isAuthenticated();System.out.println("认证结果" + result);} catch (Exception e) {}// 授权过程之后的使用// 判断用户是否具有某个角色boolean role = subject.hasRole("father");System.out.println("用户具有father角色吗?" + role);// 角色是否拥有某个权限boolean behave=subject.isPermitted("update");System.out.println("father具有update权限吗?" + behave);// 角色是否拥有某个权限boolean behaves=subject.isPermittedAll("update","query");System.out.println("father具有update、query权限吗?" + behaves);}}
6.运行结果
(1)认证成功:配置文件中的用户名和通过数据库查询的密码和用户在页面输入的用户名和密码一致

(2)认证失败:配置文件中的用户名和通过数据库查询的密码和用户在页面输入的用户名和密码不一致


说在最后的话:编写实属不易,若喜欢或者对你有帮助记得点赞+关注或者收藏哦~


还没有评论,来说两句吧...