放大镜案例:附图
鼠标随着小方框的移动在右边大图显示出来。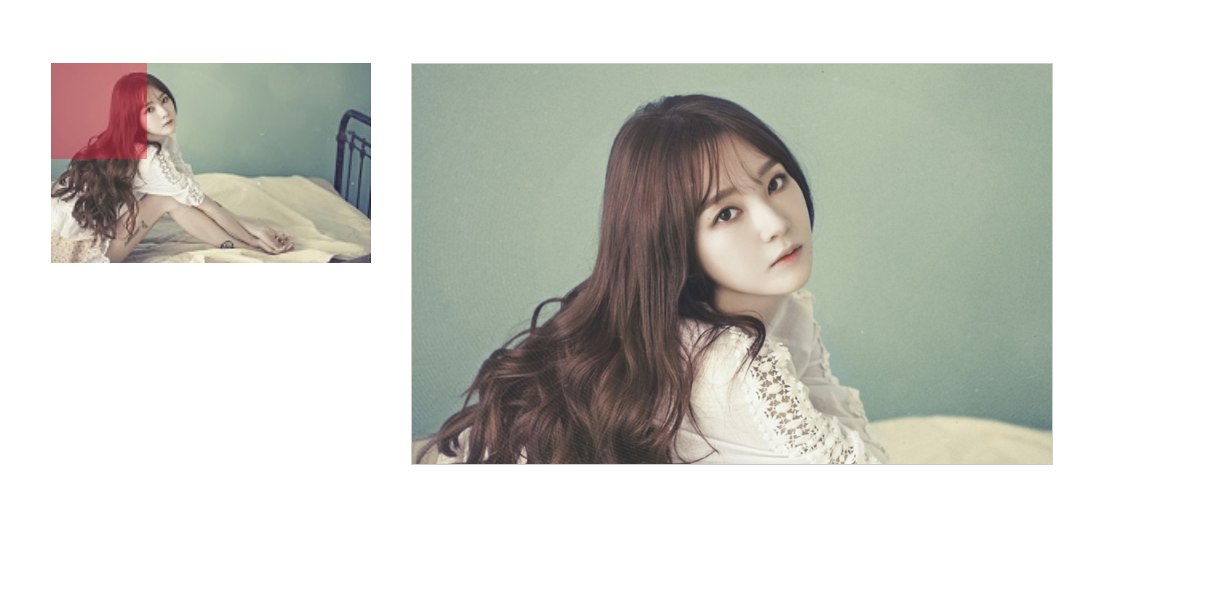
<!DOCTYPE html><html lang="en"><head><meta charset="UTF-8"><title>$美少女战士$</title><style>.smallBox {position: relative;width: 400px;height: 250px;margin-left: 100px;margin-top: 100px;float: left;}.smallBox img {width: 400px;}.bigBox {position: relative;width: 800px;height: 500px;margin-left: 50px;margin-top: 100px;float: left;border: 1px solid #ccc ;overflow: hidden;/* display: none;*/}.move {position: absolute;left:0;top:0;width: 120px;height: 120px;background-color: rgba(234,23,56,0.4);/*display: none;*/}#bigPic {position: absolute;left: 0;top:0;}</style></head><body><!--小盒子--><div class="smallBox"><img src="2-small.jpg" alt="" id="smallPic"><div class="move"></div></div><div class="bigBox"><img src="2-big.jpg" alt="" id="bigPic"></div><script src="获取元素.js"></script><script>/*offsetleft offsetTop有绝对定位属性的: 他获取的是距离父元素左上角的距离值没有绝对定位属性 他获取的是距离body 左上角的距离值* offsetWidth* offsetHeight --->盒模型总高** */// window.onload: 页面加载完成// 一,window.onload的用法:// 因为页面中的代码一般情况下按照,从上到下,从左到右的顺序执行。// 所以当js代码需要获取页面中的元素时,如果script标签在元素的前面,需要加window.onload;如果script放在了元素后面,就不需要加 window.onload。// ---------------------window.onload = function () {var smallBox = my$('.smallBox') //小盒子var move = my$('.move') //运动元素var bigBox = my$('.bigBox') //大盒子var bigPic = my$('#bigPic') //大照片/** 1:阴影块随着鼠标动---》获取鼠标位置** *///鼠标移入显示/*smallBox.onmouseover = function(){//让move和大盒子显示move.style.display = 'block'bigBox.style.display = 'block'}//鼠标移开消失smallBox.onmouseout = function(){move.style.display = 'none'bigBox.style.display = 'none'}*///鼠标在小照片盒子上运动smallBox.onmousemove = function (e) {//将鼠标变为移动样式this.style.cursor = 'move'console.log(e.clientX)//先判断此时偏移量到底满足条件与否 如果不满足不赋值//只需要判断超出边界的情况 水平运动 最小值 0// 最大值 smallBox.offsetWidth-move.offsetWidth//因为鼠标在move中间 所以小move/2var newLeft = e.clientX-smallBox.offsetLeft-move.offsetWidth/2;var newTop = e.clientY-smallBox.offsetTop-move.offsetHeight/2;if(newLeft < 0){newLeft = 0;}if(newLeft > smallBox.offsetWidth-move.offsetWidth ){newLeft = smallBox.offsetWidth-move.offsetWidth}if(newTop < 0){newTop = 0;}if(newTop > smallBox.offsetHeight-move.offsetHeight ){newTop = smallBox.offsetHeight-move.offsetHeight}move.style.left = newLeft +'px'move.style.top = newTop +'px'/******计算比例* 比例=小图宽度/大图宽度 pass* 小盒子/大盒子 pass** (3)宽比例 move的宽度-小盒子的宽度 /大盒子的宽度-大照片的宽度* (4)高比例move的高度-小盒子的高度 /大盒子的高度-大照片的高度** ******/var widthRate = (my$('.move').offsetWidth -smallBox.offsetWidth)/(bigBox.offsetWidth-bigPic.offsetWidth) ;var heightRate = (my$('.move').offsetHeight -smallBox.offsetHeight)/(bigBox.offsetHeight-bigPic.offsetHeight) ;bigPic.style.left = -parseInt(move.style.left) / widthRate +'px'bigPic.style.top = -parseInt(move.style.top) / heightRate +'px'}}</script></body></html>


》一3.3 散列类型")


还没有评论,来说两句吧...