Idea搭建Spring和入门案例讲解
Spring入门
Spring是什么?
Spring是一个分层的JavaSE/EE full-stack(一站式) 轻量级开源框架(不仅可以用来开发se也可以用来开发ee),它解决的是业务逻辑层和其他各层的松耦合问题,因此它将面向接口的编程思想贯穿整个系统应用。
idea搭建Spring
1.创建一个工程
2.新建xml配置文件
这样就用idea完成了创建步骤!接下来就是对Spring的讲解和入门案例分析
Spring的IoC(:Inverse Of Control)和DI(Dependency Injection)
IoC:控制反转,将对象的创建权反转给Spring。
DI:依赖注入,在有IoC环境的前提下,Spring管理这个类时将类的依赖的属性注入(设置)进来。
依赖关系:比如定义一个A类,B类使用的时候要传入一个A类,这就是B依赖A。
先创建一个bean
package test;
public class TestBean {
//姓名private String name;//年龄private int age;public int getAge() {return age;}public void setAge(int age) {this.age = age;}public String getName() {return name;}public void setName(String name) {this.name = name;}/*** 自我介绍*/public void intrduce(){System.out.println("您好,我叫"+this.name+"今年"+this.age+"岁!");}/***初始化*/public void init(){System.out.println("创建!");}/***销毁*/public void destroy(){System.out.println("销毁!");}
}
1.将控制权给Spring(第一行)如下图:
2.DI依赖注入,注入依赖值
3.执行方法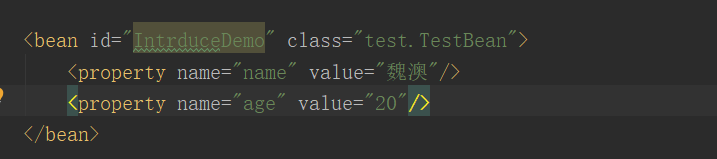

Spring的工厂类
1.BeanFactory(老版本):在调用getBean时加载类的实例
2.ApplicationContext(新版本):在配置xml时加载,是BeanFactory的子类。
实现类:
(1)ClassPathXmlApplicationContext:加载类路径下的配置文件
(2)FileSystemXmlApplicationContext:加载磁盘的配置文件
Spring的配置
Bean的配置
1.bean标签里id和name的区别
(1)id:不能重复,不能出现特殊字符
(2)name:可以重复
2.class是生成的类的全路径
3.生命周期的配置
(1)初始化:init-method ,bean在初始化时执行的方法
(2)销毁:destroy-method, bean在销毁时执行的方法(必须是单例创建,解释在下文的作用范围配置,工厂的关闭方法)
public class test01 {public static void main(String[] args) {//创建Spring工厂ApplicationContext applicationContext = new ClassPathXmlApplicationContext("applicationContext.xml");TestBean testBean = (TestBean) applicationContext.getBean("IntrduceDemo");testBean.intrduce();((ClassPathXmlApplicationContext) applicationContext).close();}}

4.bean作用范围的配置scope
(1)单例:singleton,默认,每次从工厂创建的都是同一个对象,因此地址也相同
<beans xmlns="http://www.springframework.org/schema/beans"xmlns:xsi="http://www.w3.org/2001/XMLSchema-instance"xsi:schemaLocation="http://www.springframework.org/schema/beans http://www.springframework.org/schema/beans/spring-beans.xsd"><bean id="IntrduceDemo" class="test.TestBean" init-method="init" destroy-method="destroy" scope="prototype"><property name="name" value="魏澳"/><property name="age" value="20"/></bean></beans>//单例 初始化两个对象,分别打印地址public class test01 {public static void main(String[] args) {//创建Spring工厂ApplicationContext applicationContext = new ClassPathXmlApplicationContext("applicationContext.xml");TestBean testBean = (TestBean) applicationContext.getBean("IntrduceDemo");ApplicationContext applicationContext1 = new ClassPathXmlApplicationContext("applicationContext.xml");TestBean testBean1 = (TestBean) applicationContext1.getBean("IntrduceDemo");System.out.println("testBean:"+testBean);System.out.println("testBean:"+testBean1);testBean.intrduce();((ClassPathXmlApplicationContext) applicationContext).close();}}

显然是一个创建一个销毁,并且地址相同。
(2)多例:prototype,从工厂中创建不同的对象
<beans xmlns="http://www.springframework.org/schema/beans"xmlns:xsi="http://www.w3.org/2001/XMLSchema-instance"xsi:schemaLocation="http://www.springframework.org/schema/beans http://www.springframework.org/schema/beans/spring-beans.xsd"><bean id="IntrduceDemo" class="test.TestBean" init-method="init" destroy-method="destroy" scope="prototype"><property name="name" value="魏澳"/><property name="age" value="20"/></bean></beans>

还是上个代码块,但是有了两个创建了,没有销毁,所以说销毁是针对于单例模式的(和上文呼应)。
今天的内容主要是讲的是一些入门的基本知识,下一次就接着往后写续集了,我也是新手一枚,如果有不对或者不懂的地方可以一起讨论!!


truffle + web3 + webpack Metcoin 运行")


还没有评论,来说两句吧...