SpringCloud微服务 Apollo分布式配置中心客户端获取配置(一)
前言
本小结之前我们学习了如何定制开发与部署属于我们自己的分布式配置中心,以后的章节我们将陆续学习一下如何客户端获取配置中心中的配置信息。
案例
在apollo-portal的apollo-env-properties中做如下设置:
local.meta=http://localhost:8080dev.meta=http://localhost:8080fat.meta=http://localhost:8080uat.meta=http://localhost:8080lpt.meta=${lpt_meta}pro.meta=${pro_meta}
如上配置说明在本地开启的配置中心只支持dev、fat、uat。至于如何自定义env,请自行参考网上学习文档,本人不推荐使用DEV/FAT/UAT/PRO之外的环境定义。
本地部署好Apollo配置中心,如果好不知道怎么本地部署的请参考前文。这里不做赘述。
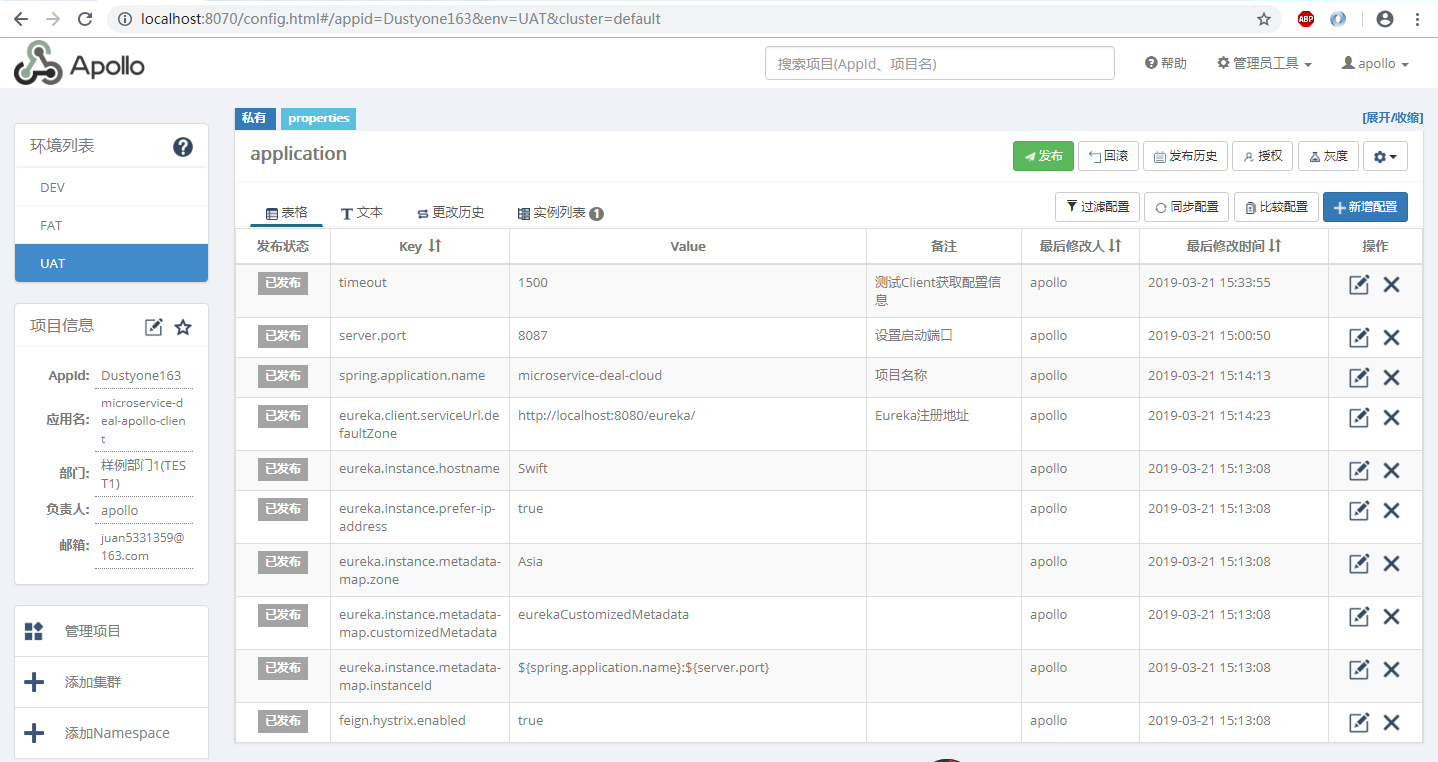
配置好DEV配置属性
timeout = 1500server.port = 8087spring.application.name = microservice-deal-cloudeureka.client.serviceUrl.defaultZone = http://localhost:8080/eureka/eureka.instance.hostname = Swifteureka.instance.prefer-ip-address = trueeureka.instance.metadata-map.zone = Asiaeureka.instance.metadata-map.customizedMetadata = eurekaCustomizedMetadataeureka.instance.metadata-map.instanceId = ${spring.application.name}:${server.port}feign.hystrix.enabled = true
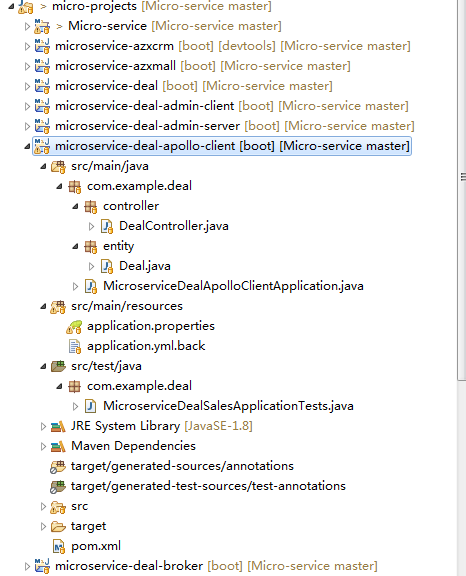
新建项目microservice-deal-apollo-client
- 项目结构
Core Code
application.properties
#与Apollo配置中心的APPID一致app.id=Dustyone163#设置Client的meta即配置中心地址apollo.meta=http://127.0.0.1:8080
MicroserviceDealApolloClientApplication
@SpringBootApplication@EnableDiscoveryClient@EnableApolloConfigpublic class MicroserviceDealApolloClientApplication {public static void main(String[] args) throws Exception {SpringApplication.run(MicroserviceDealApolloClientApplication.class, args);}}
启动类上添加:@EnableApolloConfig
pom.xml
<?xml version="1.0" encoding="UTF-8"?><project xmlns="http://maven.apache.org/POM/4.0.0"xmlns:xsi="http://www.w3.org/2001/XMLSchema-instance"xsi:schemaLocation="http://maven.apache.org/POM/4.0.0 http://maven.apache.org/xsd/maven-4.0.0.xsd"><modelVersion>4.0.0</modelVersion><artifactId>microservice-deal-apollo-client</artifactId><packaging>jar</packaging><name>microservice-deal-apollo-client</name><description>Demo project for Spring Boot</description><parent><groupId>com.example</groupId><artifactId>microservice-deal-parent</artifactId><version>0.0.1-SNAPSHOT</version></parent><dependencies><dependency><groupId>com.ctrip.framework.apollo</groupId><artifactId>apollo-client</artifactId><version>1.3.0</version></dependency><dependency><groupId>com.ctrip.framework.apollo</groupId><artifactId>apollo-core</artifactId><version>1.3.0</version></dependency></dependencies></project>
DealController
@RestControllerpublic class DealController {@Value("${server.port}")private String port; // 注入普通字符串@GetMapping("/deal/{id}")public Deal findById(@PathVariable Integer id) throws InterruptedException {//Thread.sleep(3000);Deal deal = new Deal(id, "Dustyone", "Heyt", 22, 18,port);return deal;}@GetMapping("/dealMock/{id}")public Deal findByIdMock(@PathVariable Integer id) {Deal deal = new Deal(id, "DustyoneMock", "Mock", 92, 18,port);return deal;}@GetMapping("/deal/withoutParams")public Deal findByIdWithoutParams() {Deal deal = new Deal(0, "DustyoneMock", "MockWithouParams", 92, 18,port);return deal;}/*@GetMapping("/{id}")public Deal findById(@PathVariable Integer id) {Deal deal = new Deal(id, "Dustyone", "Heyt", 22, 18,port);return deal;}*/}
@Value(“${server.port}“)中的server.port与Apollo中设置的server.port一致,最好在通过使用@Value获取server.port信息时给server.port一个默认值。以增强代码健壮性。
- 项目结构
运行启动类:MicroserviceDealApolloClientApplication
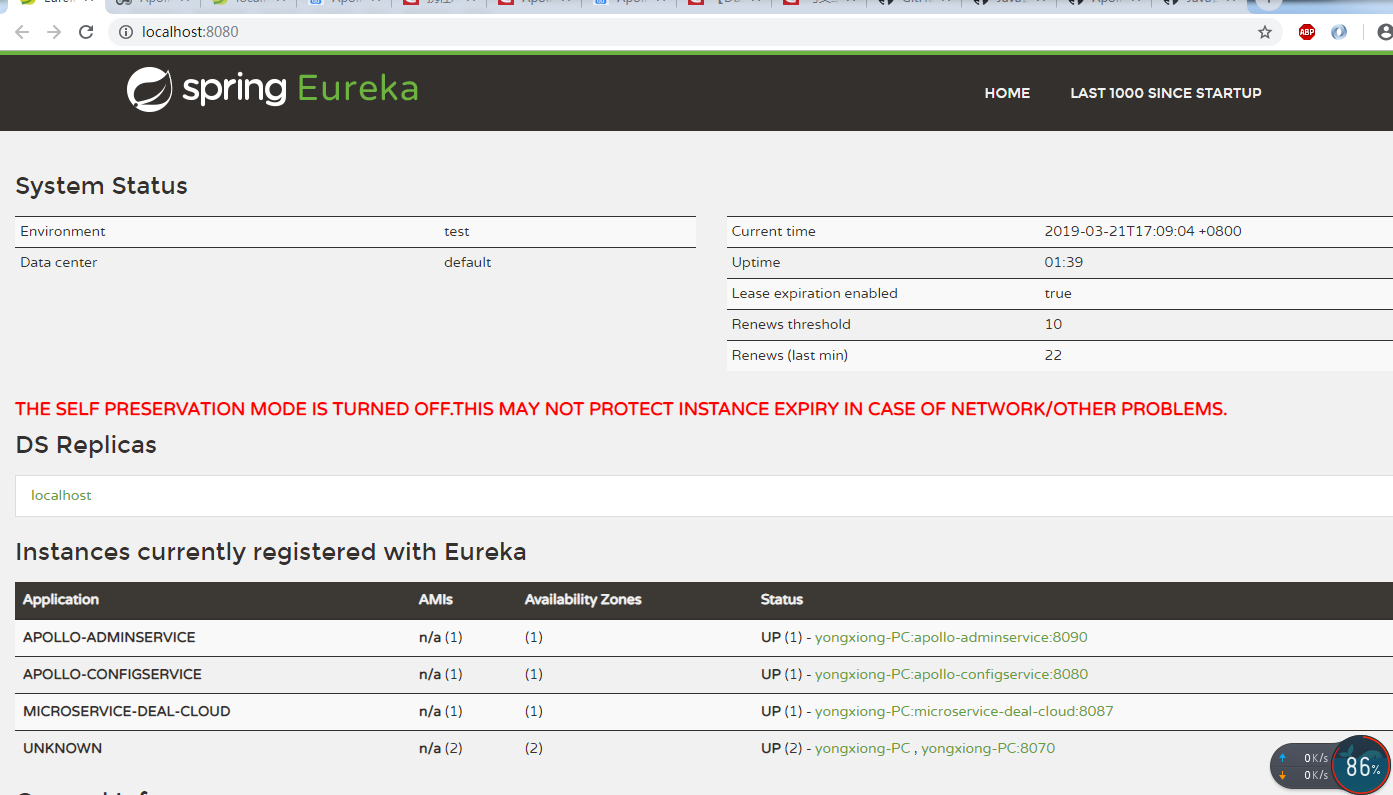
- 本地运行http://localhost:8080/ Apollo Client注册到Eureka中。
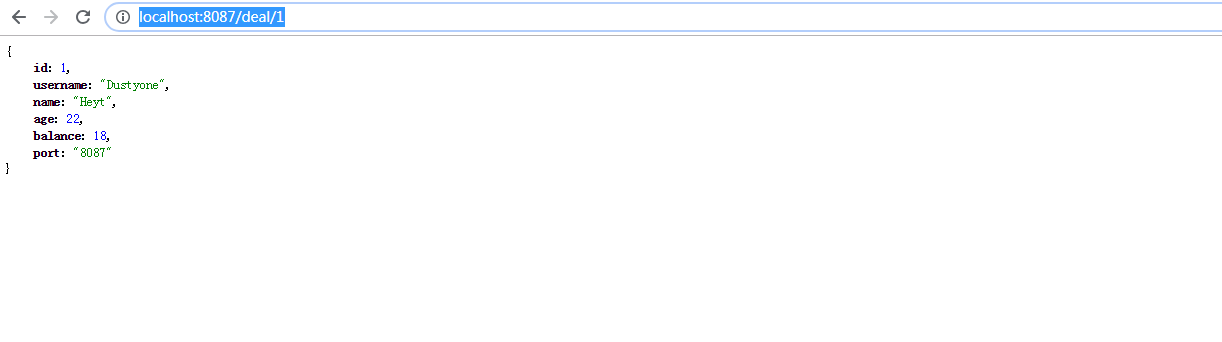
- 本地运行http://localhost:8087/deal/1
- 本地运行http://localhost:8080/ Apollo Client注册到Eureka中。
小结
- 你可以在apollo-portal的apollo-env-properties指定你的meta_url,然后在Client端指定你使用的meta_url。
- 本案例演示的是除Apollo之外的所有配置信息都从Apollo中获取,从而最大程度利用Apollo的功能。


还没有评论,来说两句吧...