Flume集群搭建
1. 概念
集群的意思是多台机器,最少有2台机器,一台机器从数据源中获取数据,将数据传送到另一台机器上,然后输出。接下来就要实现Flume集群搭建。集群如下图所示。

2. Flume搭建
2.1 部署准备
部署主机
192.168.9.139 host14
192.168.9.128 host15host14主机下载flume软件包
cd /opt/tools
wget http://mirrors.tuna.tsinghua.edu.cn/apache/flume/1.7.0/apache-flume-1.7.0-bin.tar.gz
上传解压flume
mkdir -p /apps/svr/flume/
tar -zxvf /opt/tools/apache-flume-1.7.0-bin.tar.gz -C /apps/svr/flume/
2.2 部署Flume
部署的是集群,需要在2台机安装Flume,host14作为push推送数据,host15作为pull获取数据后显示出来。
修改配置文件
cd /apps/svr/flume/apache-flume-1.7.0-bin/conf/
cp flume-env.sh.template flume-env.sh
cp flume-conf.properties.template flume-telent.conf
vim flume-env.sh
export JAVA_HOME=/apps/svr/java/jdk1.8.0_172
host15主机部署Flume
scp -r /apps/svr/flume/ host15:/apps/svr/
验证flume
/apps/svr/flume/apache-flume-1.7.0-bin/bin/flume-ng version
Flume 1.7.0
Source code repository: https://git-wip-us.apache.org/repos/asf/flume.git
Revision: 511d868555dd4d16e6ce4fedc72c2d1454546707
Compiled by bessbd on Wed Oct 12 20:51:10 CEST 2016
From source with checksum 0d21b3ffdc55a07e1d08875872c00523
2.3 Flume集群配置
- 配置push.conf
[host14]
# cd /apps/svr/flume/apache-flume-1.7.0-bin/conf
# vim push.conf
# Name the components on this agenta2.sources= r1a2.sinks= k1a2.channels= c1# Describe/configure the sourcea2.sources.r1.type= spooldira2.sources.r1.spoolDir= /apps/svr/flume/logsa2.sources.r1.channels= c1# Use a channel which buffers events in memorya2.channels.c1.type= memorya2.channels.c1.keep-alive= 10a2.channels.c1.capacity= 100000a2.channels.c1.transactionCapacity= 100000# Describe/configure the sourcea2.sinks.k1.type= avroa2.sinks.k1.channel= c1a2.sinks.k1.hostname= host15a2.sinks.k1.port= 8899
- 配置pull.conf
[host15]
# cd /apps/svr/flume/apache-flume-1.7.0-bin/conf
# vim pull.conf
# Name the components on this agenta1.sources= r1a1.sinks= k1a1.channels= c1# Describe/configure the sourcea1.sources.r1.type= avroa1.sources.r1.channels= c1a1.sources.r1.bind= host15a1.sources.r1.port= 8899# Describe the sinka1.sinks.k1.type= loggera1.sinks.k1.channel = c1# Use a channel which buffers events in memorya1.channels.c1.type= memorya1.channels.c1.keep-alive= 10a1.channels.c1.capacity= 100000a1.channels.c1.transactionCapacity= 100000
- 创建spoolDir目录
[host14]
# mkdir -p /apps/svr/flume/logs
2.4 Flume集群启动
- 启动pull主机
[host15]
# cd /apps/svr/flume/apache-flume-1.7.0-bin/
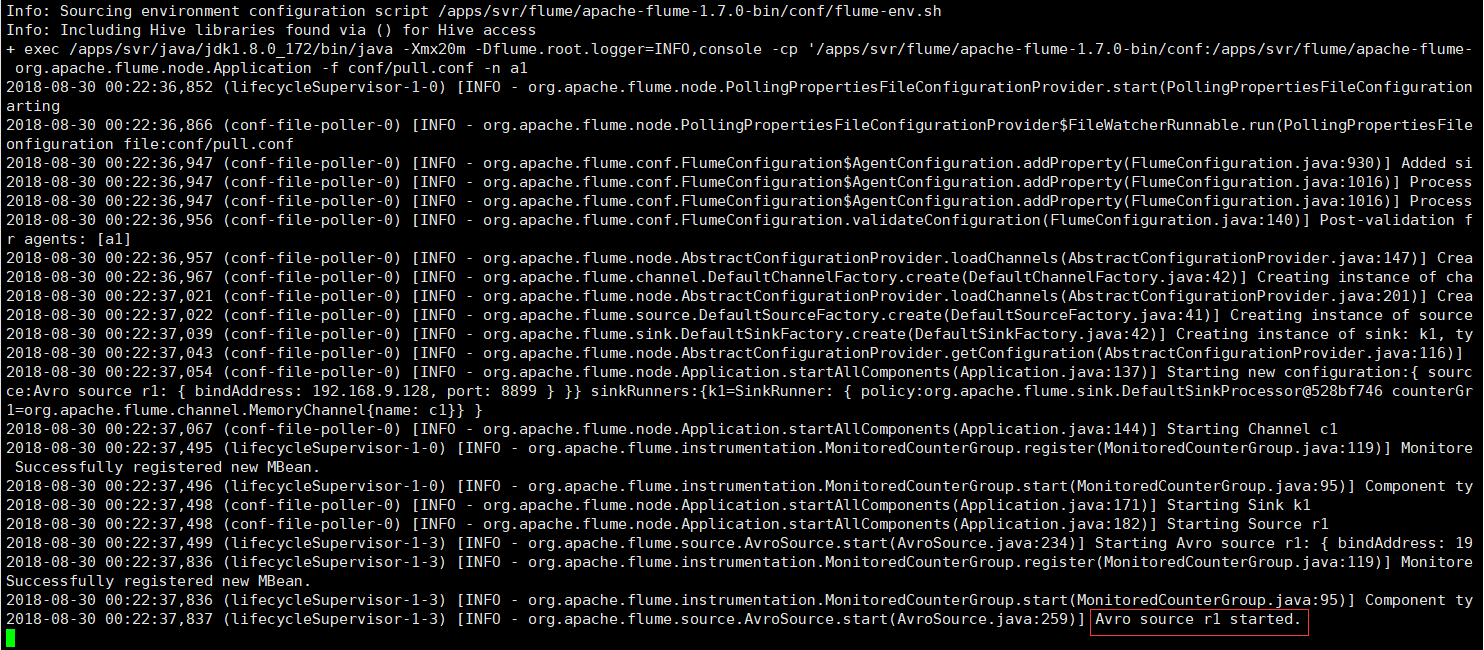
# ./bin/flume-ng agent -c conf -f conf/pull.conf -n a1 -Dflume.root.logger=INFO,console
显示如图所示则为启动成功
- 启动push主机
[host14]
# cd /apps/svr/flume/apache-flume-1.7.0-bin/
# ./bin/flume-ng agent -n a2 -c conf -f conf/push.conf -Dflume.root.logger=INFO,console
显示如图所示则为启动成功

- 验证连接
[host15]
显示如图所示表示连接成功

3. Flume测试
3.1 创建测试用例
[host14]
# cd /apps/svr/flume/logs/
# vim flume-use-case-test.log
HELLO WORLD!!!HELLO FLUME!!!
3.2 验证测试
- pull主机
显示如图所示表示测试成功

- push主机
显示如图所示表示测试成功

结论:用例测试成功,证明Flume集群搭建成功。
原文地址:https://1csh1.github.io/2016/04/21/Flume%E9%9B%86%E7%BE%A4%E6%90%AD%E5%BB%BA/


还没有评论,来说两句吧...