Spring Cloud Alibaba学习笔记:6、Nacos - 配置中心
文章目录
- 引
- 分布式配置中心
- Spring Cloud Alibaba Nacos Config
- 创建配置文件
- 创建Nacos Config 客户端
- 1、 创建一个maven module 项目 `sca-nacos-config-client`
- 2、 pom
- 3、创建应用主类 `ScaNacosConfigApplication`,并实现一个HTTP接口
- 4、 `bootstrap.yml` 配置端口,配置服务名称和Nacos地址
- 5、启动应用程序
- 6、测试验证配置获取和验证动态刷新
引
Nacos除了实现了服务的注册发现之外,还将配置中心功能整合在了一起,通过Nacos的配置管理功能,我们可以将整个架构体系内的所有配置都集中在Nacos中存储
分布式配置中心
在分布式系统中,由于服务数量巨多,为了实现更灵活的管理权限、安全性,实时更新以及一次打包,多处运行,所以需要分布式配置中心组件。
Spring Cloud Alibaba Nacos Config
Nacos 提供用于存储配置和其他元数据的 key/value 存储,为分布式系统中的外部化配置提供服务器端和客户端支持。使用 Spring Cloud Alibaba Nacos Config,您可以在 Nacos Server 集中管理你 Spring Cloud 应用的外部属性配置。
Spring Cloud Alibaba Nacos Config 是 Config Server 和 Client 的替代方案,客户端和服务器上的概念与 Spring Environment 和 PropertySource 有着一致的抽象,在特殊的 bootstrap 阶段,配置被加载到 Spring 环境中。当应用程序通过部署管道从开发到测试再到生产时,您可以管理这些环境之间的配置,并确保应用程序具有迁移时需要运行的所有内容。
创建配置文件
第一步: 进入Nacos的控制页面,在配置列表功能页面中,点击右上角的“+”按钮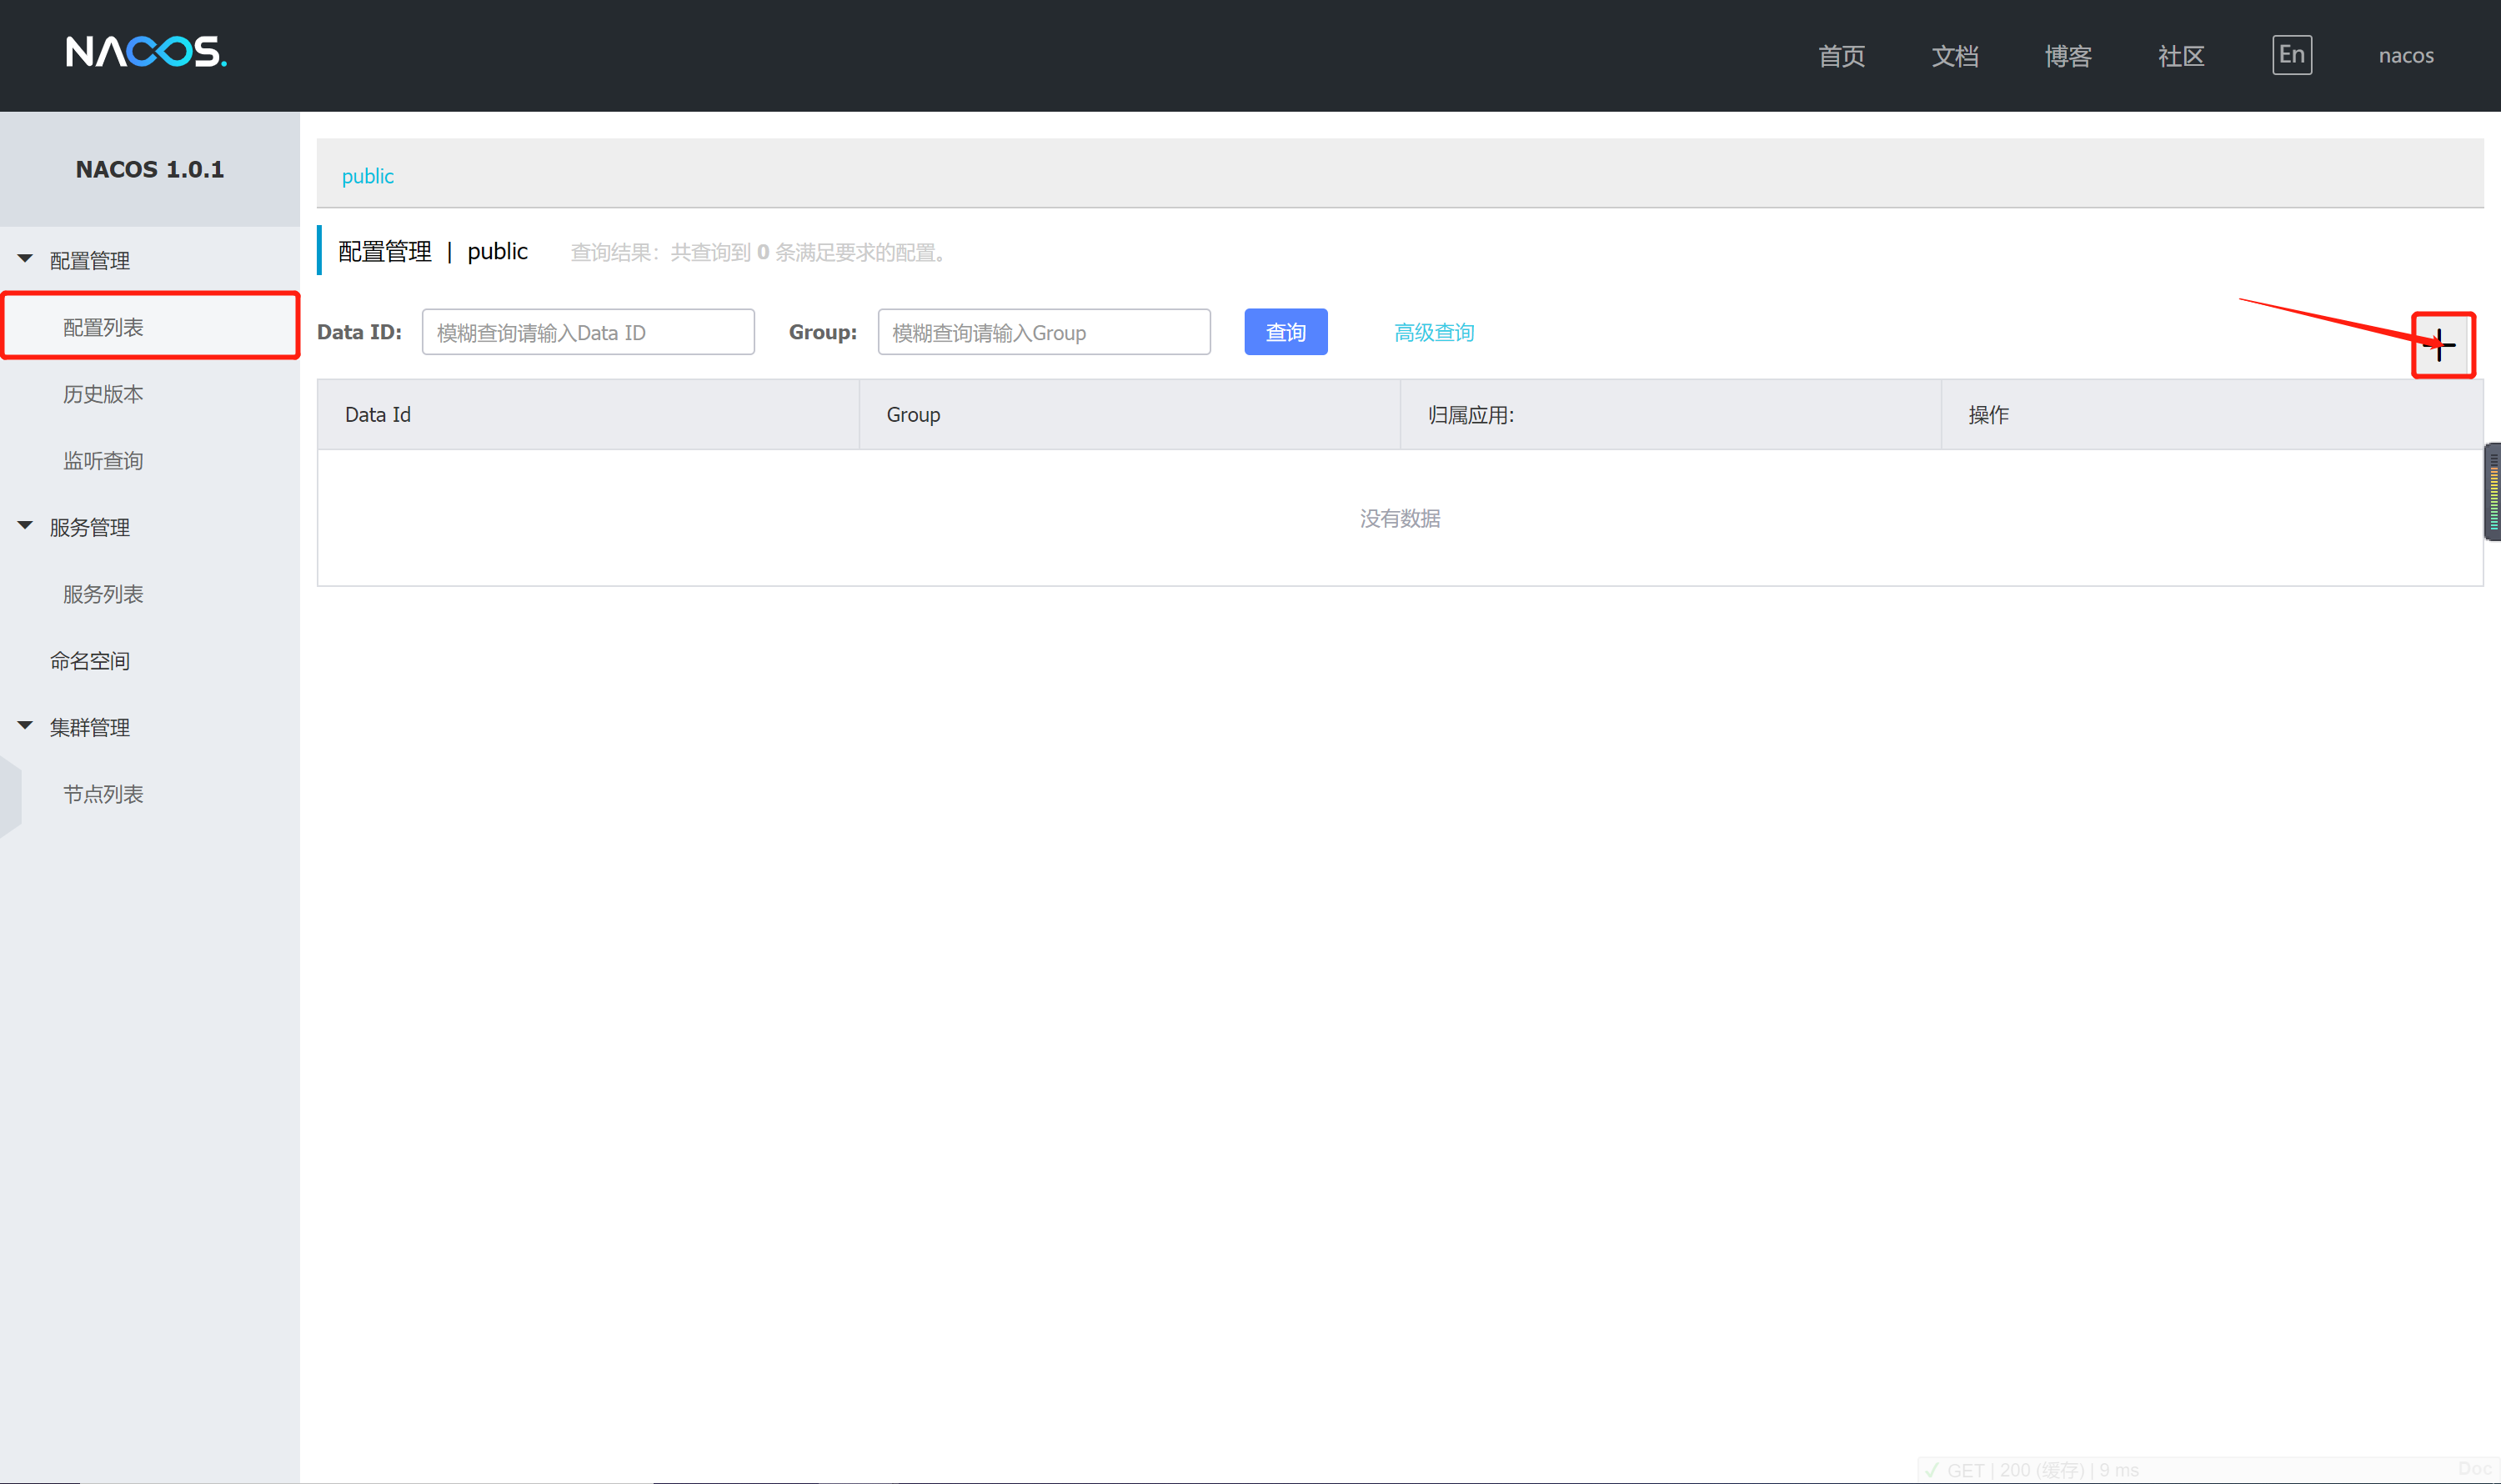
第二步:进入“新建配置”页面,如下图填写内容: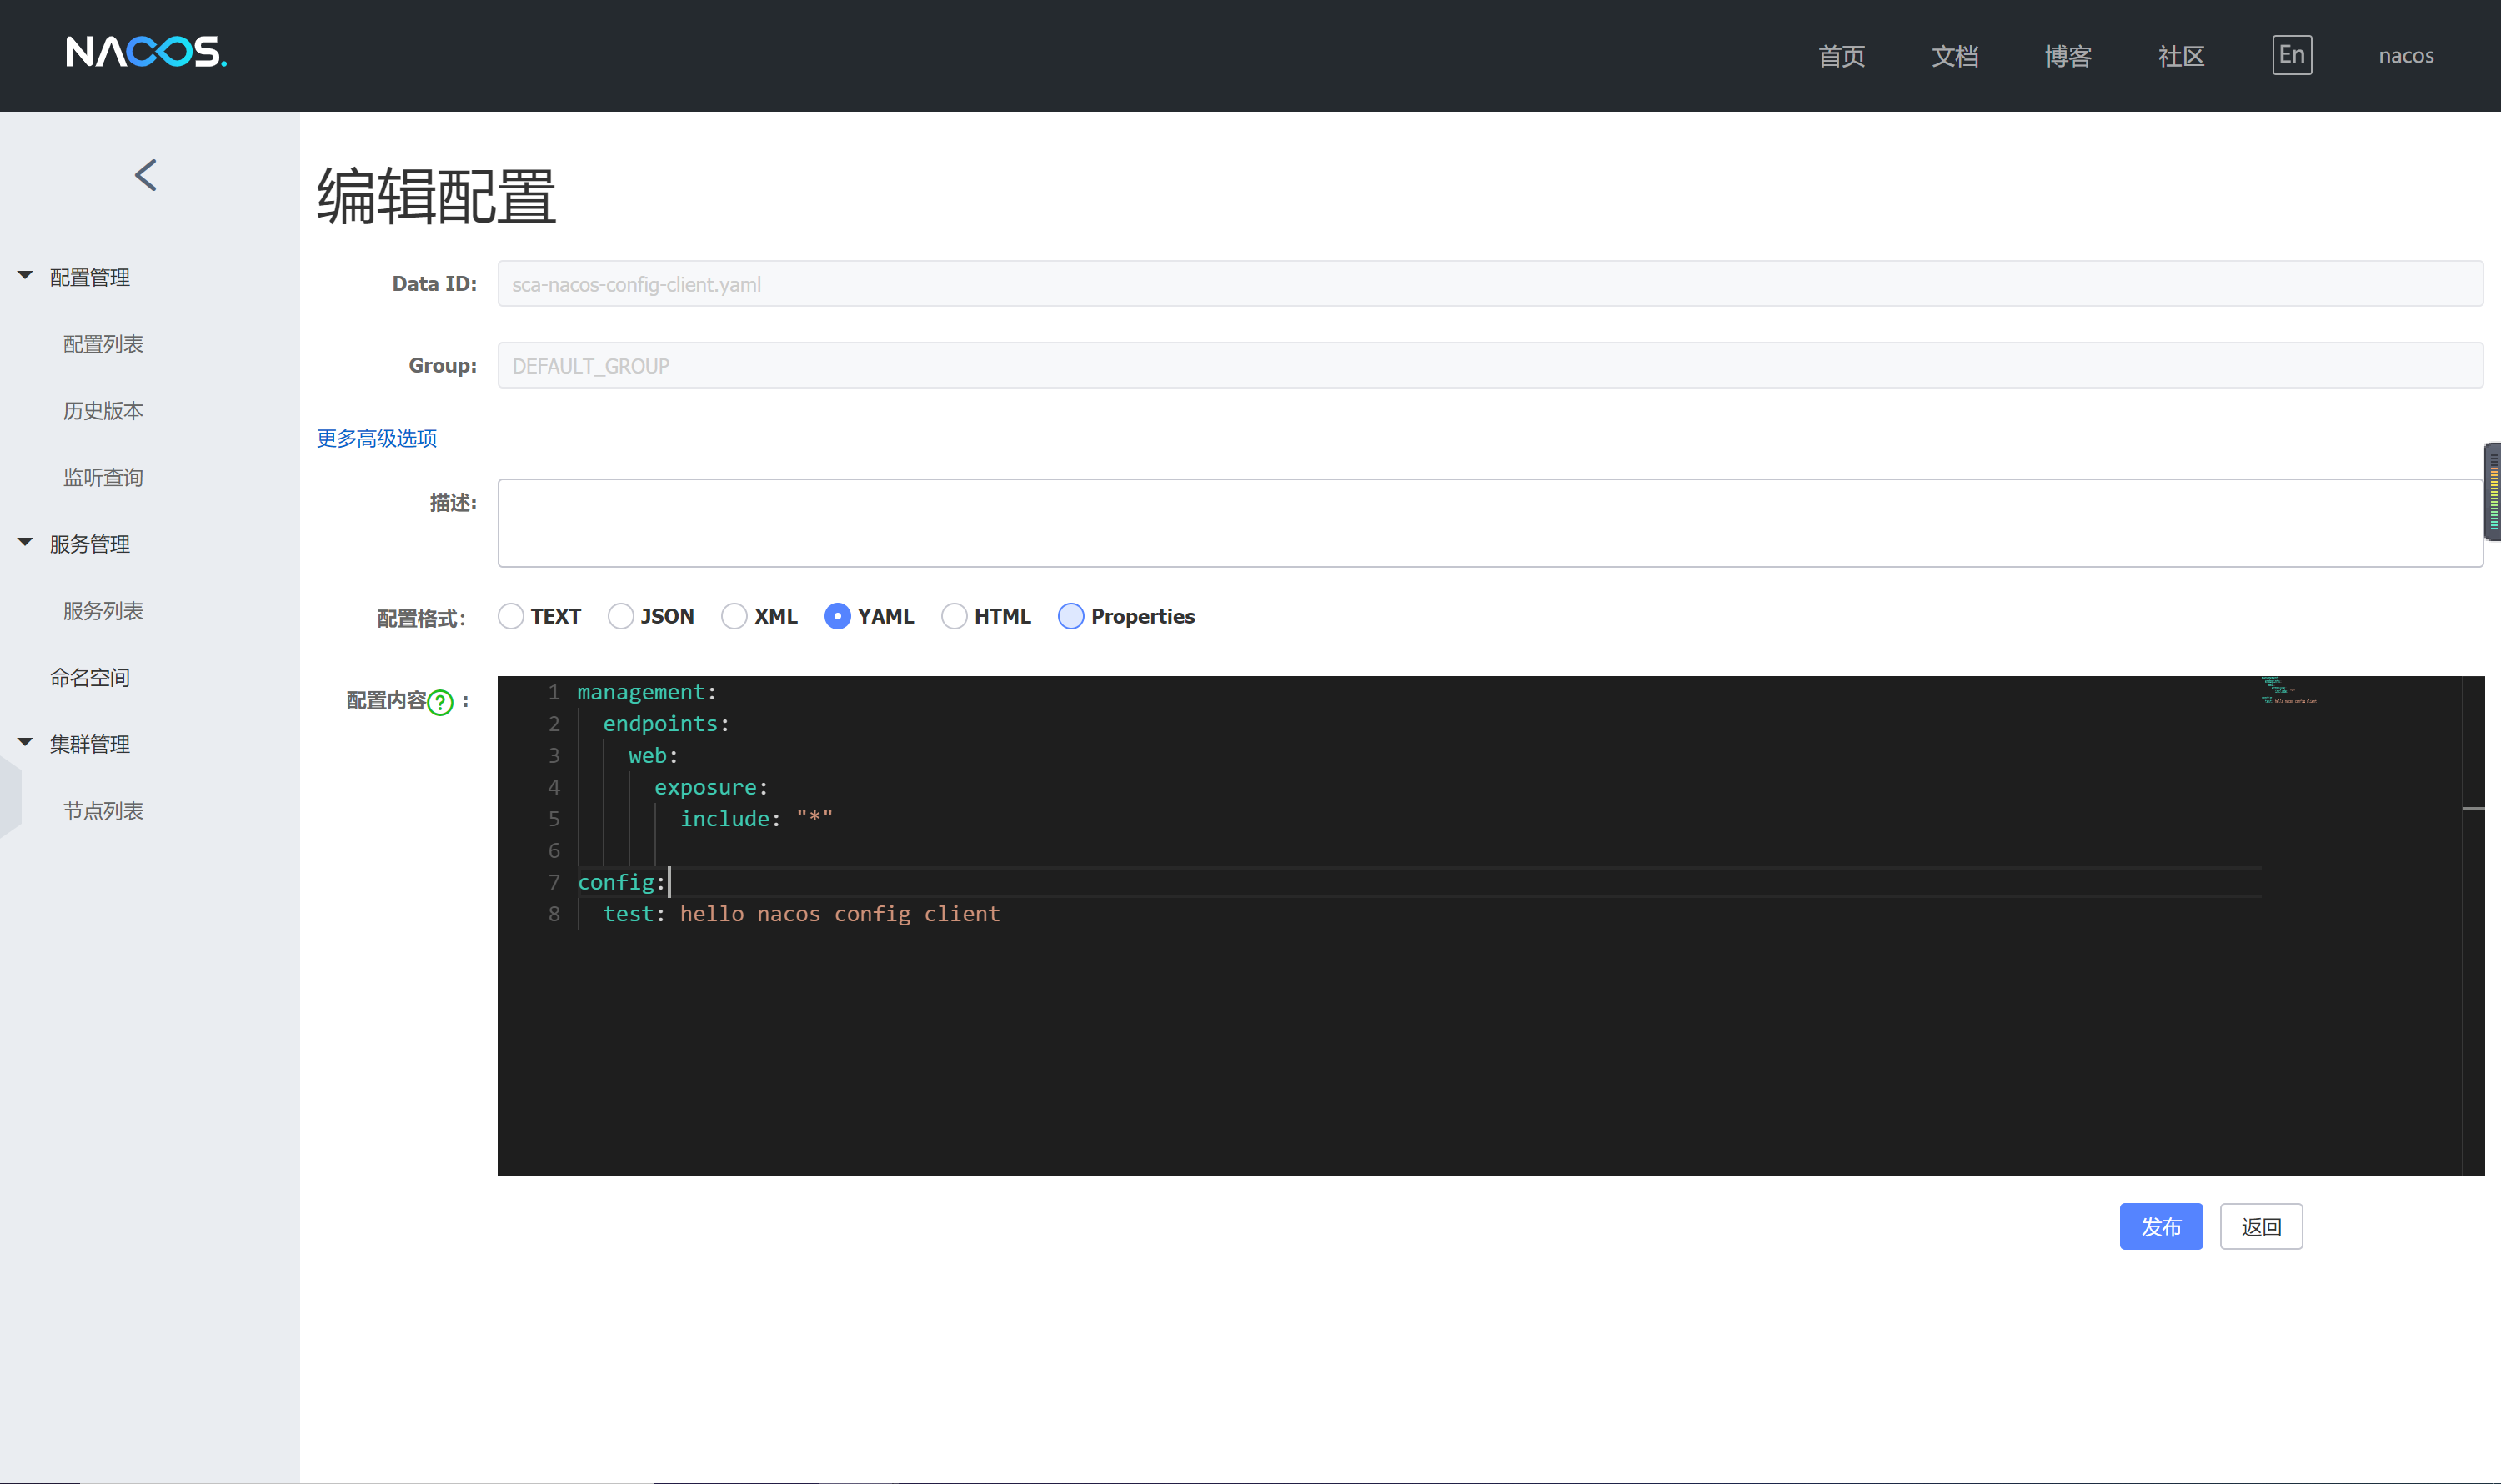
注意:Data ID 的默认扩展名为 .properties ,希望使用 YAML 配置,此处必须指明是 .yaml
第三步: 发布,发布成功后在 “配置列表” 一栏即可看到刚才创建的配置项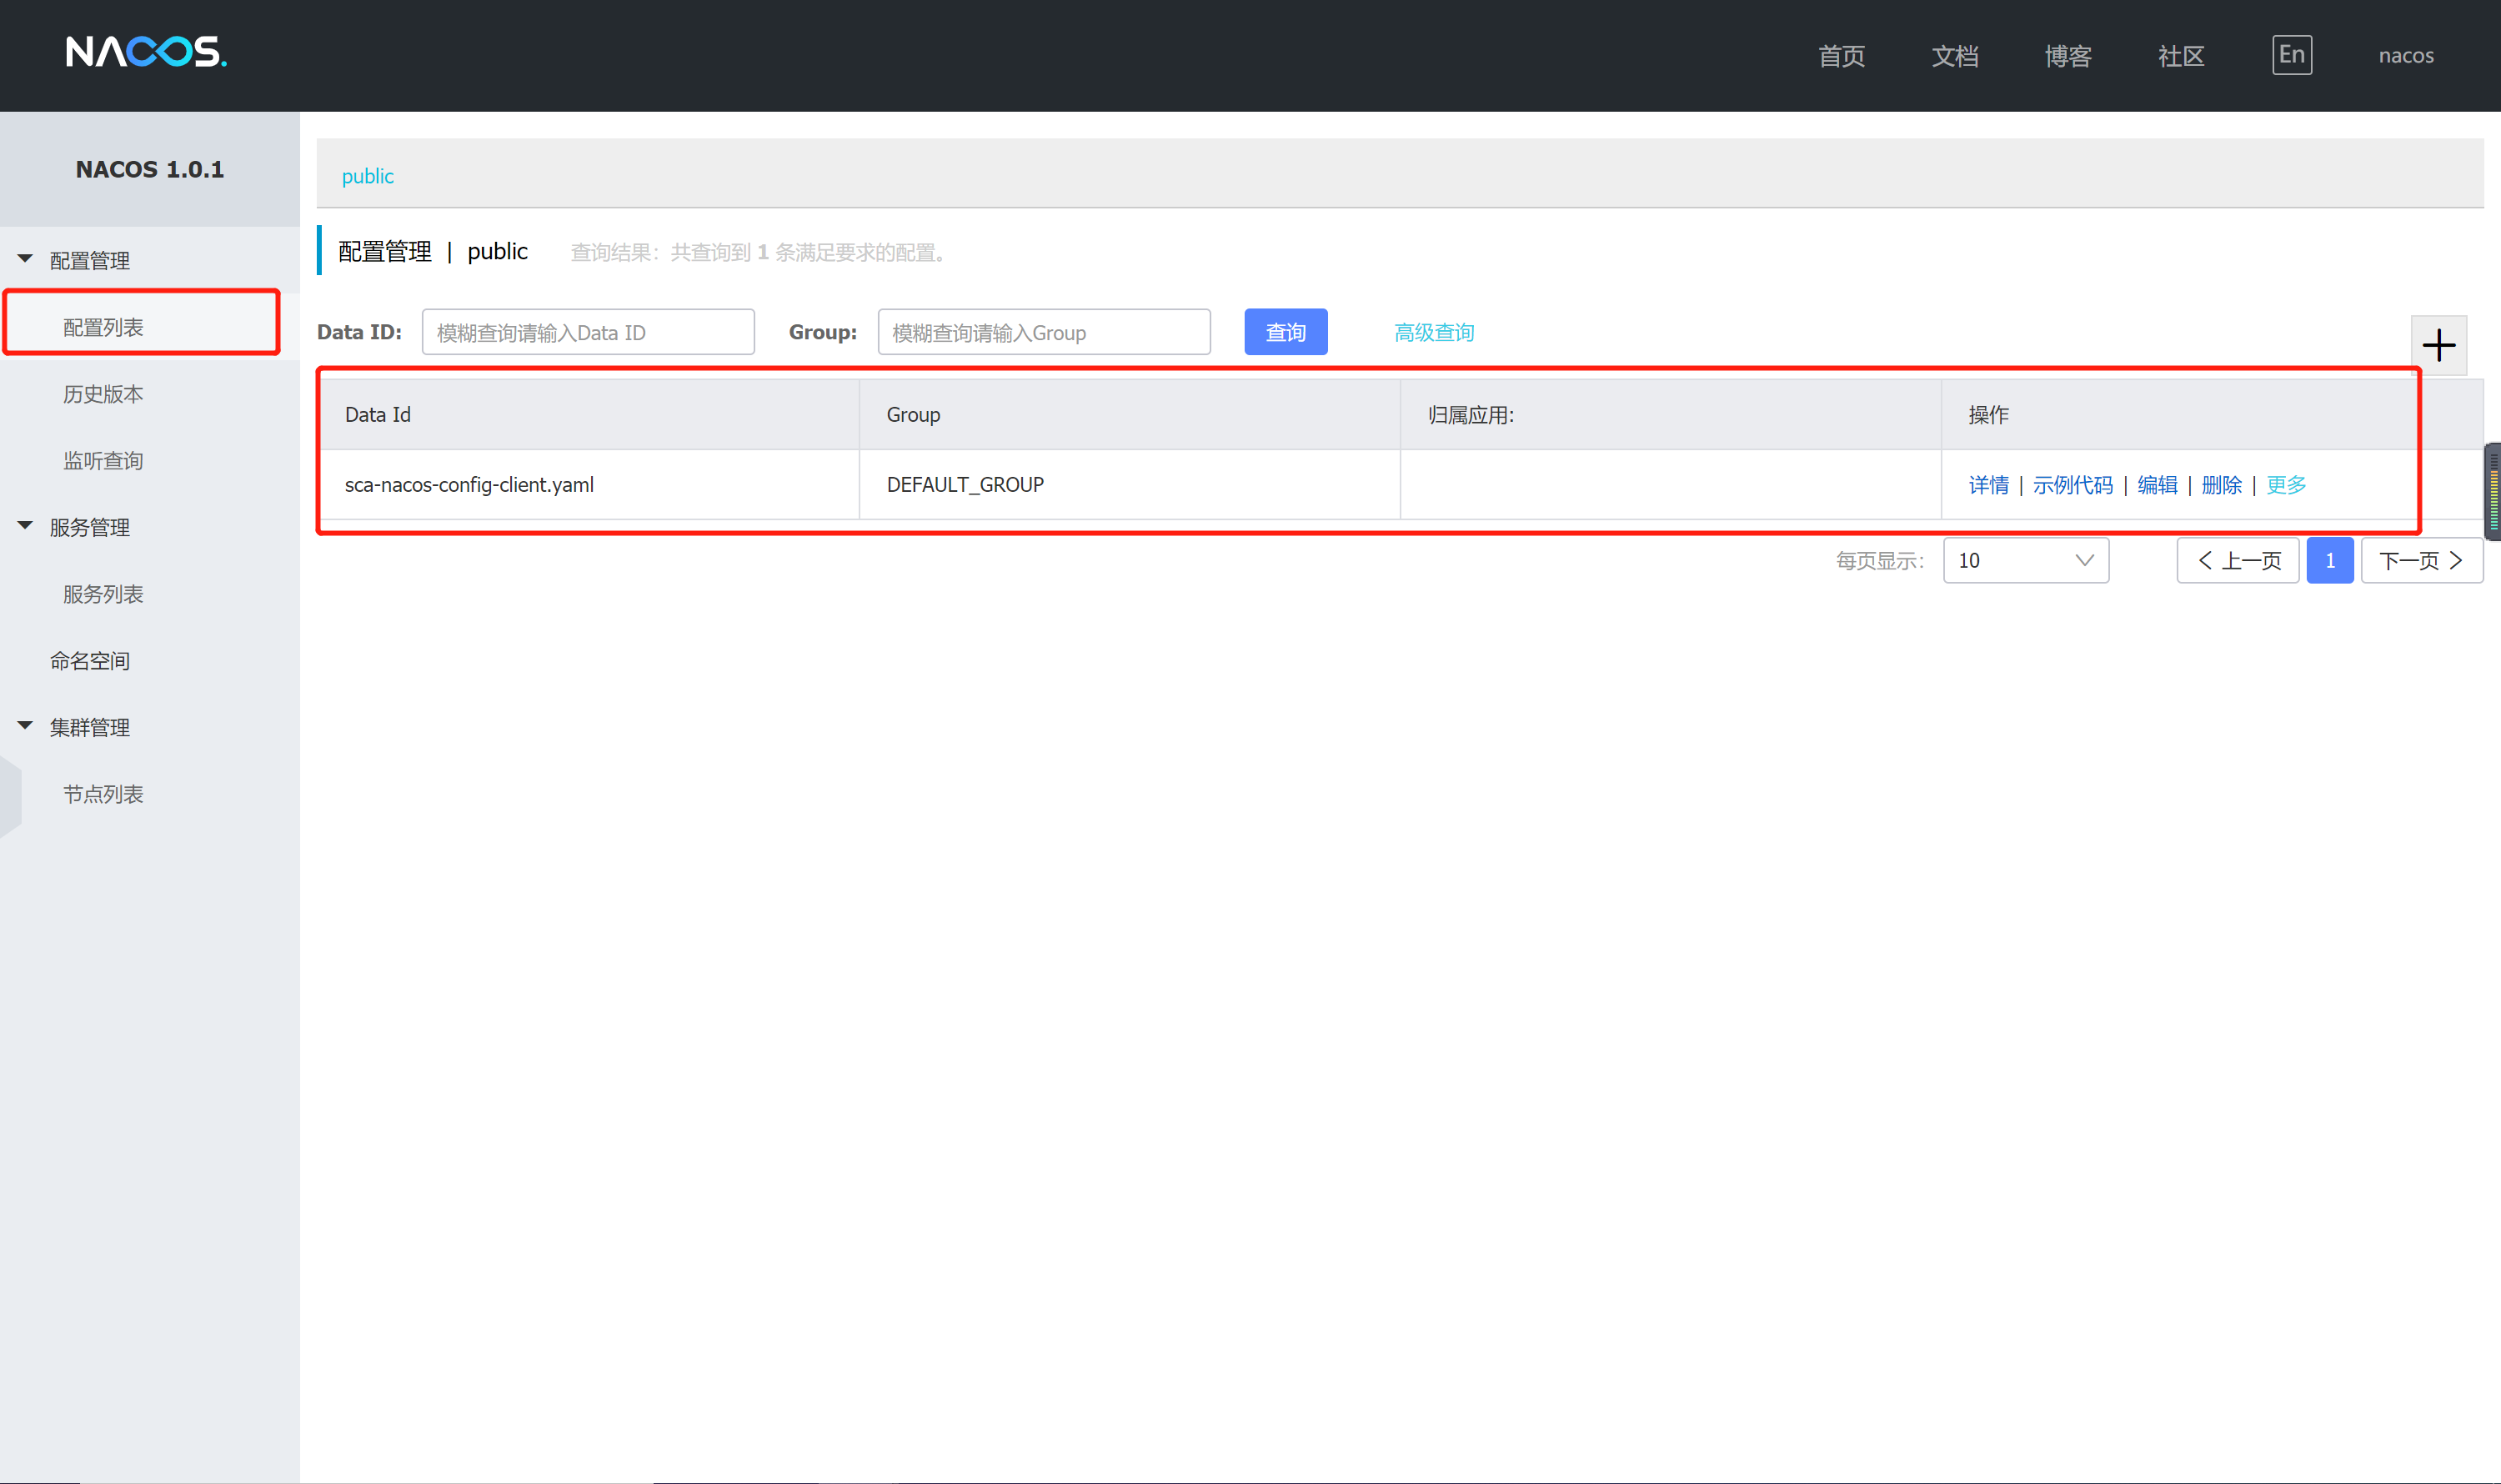
创建Nacos Config 客户端
1、 创建一个maven module 项目 sca-nacos-config-client
2、 pom
<?xml version="1.0" encoding="UTF-8"?><project xmlns="http://maven.apache.org/POM/4.0.0"xmlns:xsi="http://www.w3.org/2001/XMLSchema-instance"xsi:schemaLocation="http://maven.apache.org/POM/4.0.0 http://maven.apache.org/xsd/maven-4.0.0.xsd"><modelVersion>4.0.0</modelVersion><parent><groupId>cn.fxbin.learn</groupId><artifactId>sca</artifactId><version>1.0</version></parent><artifactId>sca-nacos-config-client</artifactId><version>1.0</version><name>sca-nacos-config-client</name><description>Spring Cloud Alibaba Nacos Config Client Service Project</description><properties><java.version>1.8</java.version></properties><dependencies><dependency><groupId>org.springframework.boot</groupId><artifactId>spring-boot-starter-web</artifactId></dependency><dependency><groupId>org.springframework.cloud</groupId><artifactId>spring-cloud-starter-alibaba-nacos-config</artifactId></dependency></dependencies><build><plugins><plugin><groupId>org.springframework.boot</groupId><artifactId>spring-boot-maven-plugin</artifactId></plugin></plugins></build></project>
3、创建应用主类 ScaNacosConfigApplication,并实现一个HTTP接口
package cn.fxbin.learn.sca.nacos.provider;import org.springframework.beans.factory.annotation.Value;import org.springframework.boot.SpringApplication;import org.springframework.boot.autoconfigure.SpringBootApplication;import org.springframework.cloud.client.discovery.EnableDiscoveryClient;import org.springframework.cloud.context.config.annotation.RefreshScope;import org.springframework.web.bind.annotation.GetMapping;import org.springframework.web.bind.annotation.PathVariable;import org.springframework.web.bind.annotation.RestController;@SpringBootApplicationpublic class ScaNacosConfigApplication {public static void main(String[] args) {SpringApplication.run(ScaNacosConfigApplication.class, args);}@RefreshScope@RestControllerpublic class ConfigController {@Value("${config.test}")private String configTest;@GetMapping("/config")public String configTest() {return configTest;}}}
这里要敲黑板,划重点 哈哈,
@RefreshScope,主要用来让这个类下的配置内容支持动态刷新,也就是当我们的应用启动之后,修改了Nacos中的配置内容之后,这里也会马上生效。注意:你可以使用
spring.cloud.nacos.config.refresh.enabled=false来关闭动态刷新
4、 bootstrap.yml 配置端口,配置服务名称和Nacos地址
server:port: 9034spring:application:# 这里的应用名对应 Nacos Config 中的 Data ID,实际应用名称以配置中心的配置为准name: sca-nacos-config-clientcloud:nacos:config:# 指定查找名为 sca-nacos-config-client.yaml 的配置文件file-extension: yaml# Nacos Server 的地址server-addr: 127.0.0.1:8848
注意:Spring Boot 配置文件的加载顺序,依次为
bootstrap.properties->bootstrap.yml->application.properties->application.yml,其中bootstrap.properties配置为最高优先级
5、启动应用程序
启动应用后我们可以通过日志看到,已经成功加载到了配置文件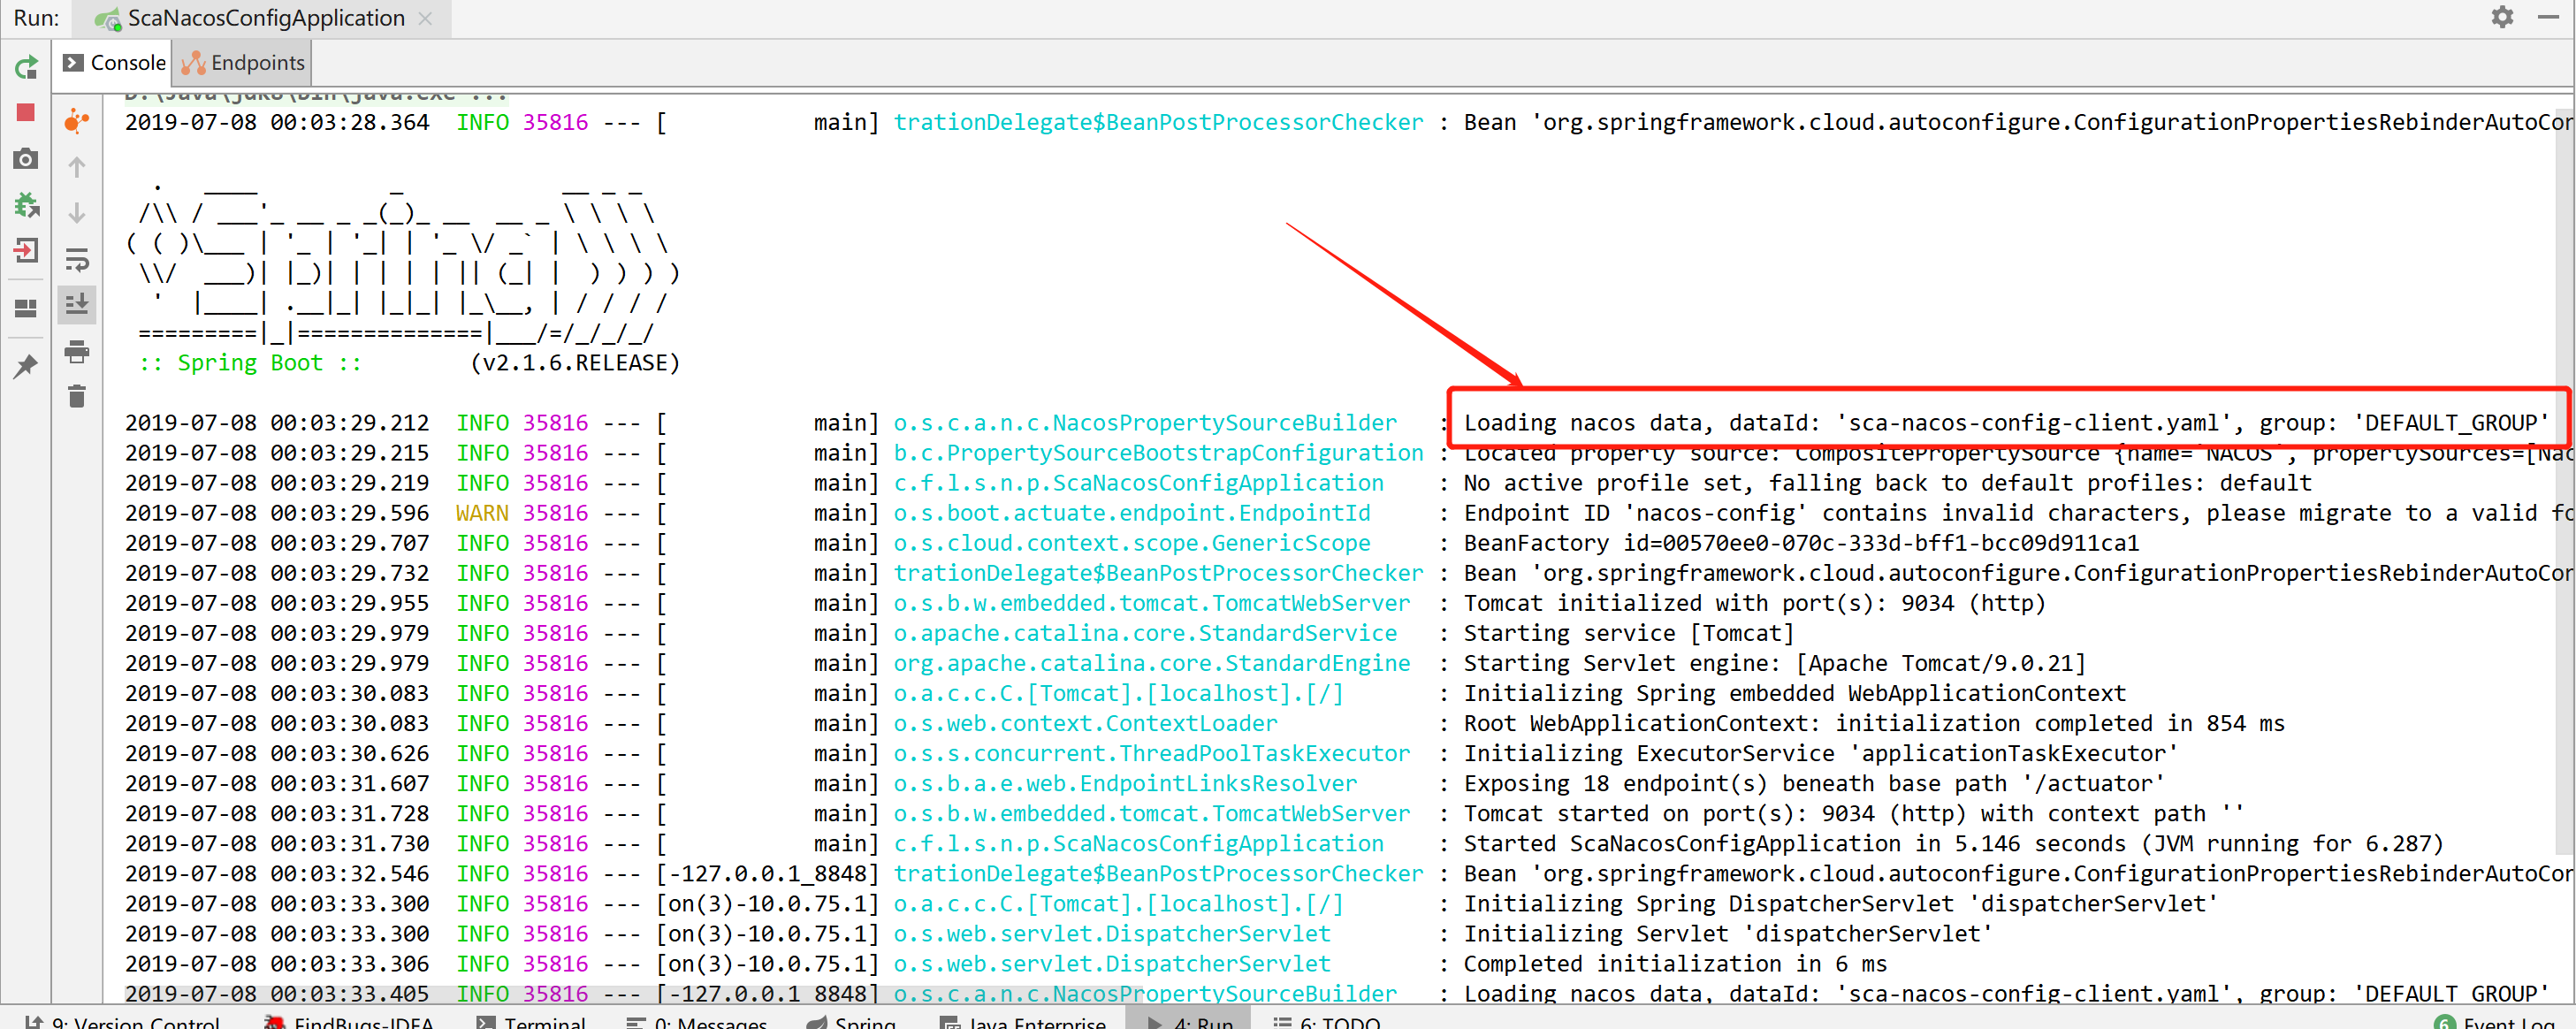
6、测试验证配置获取和验证动态刷新
配置获取
通过postman 请求 http://localhost:9034/config API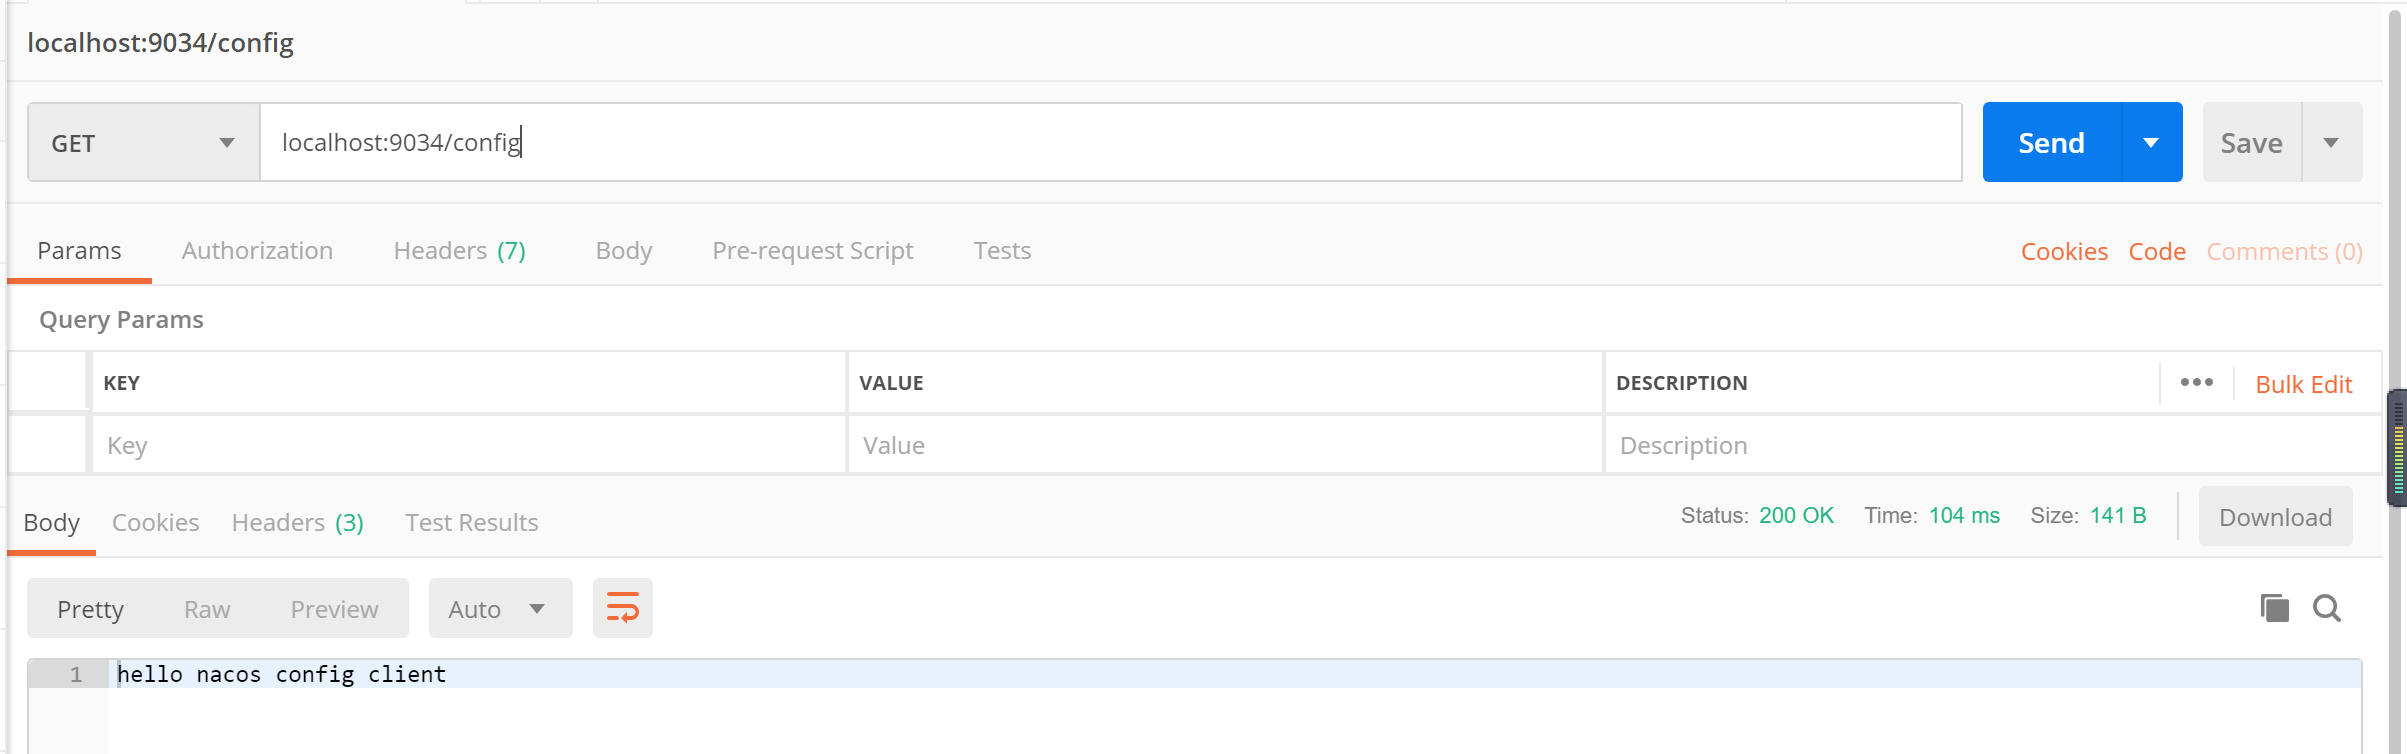
配置动态刷新
在 Nacos 控制台 修改 config.test 值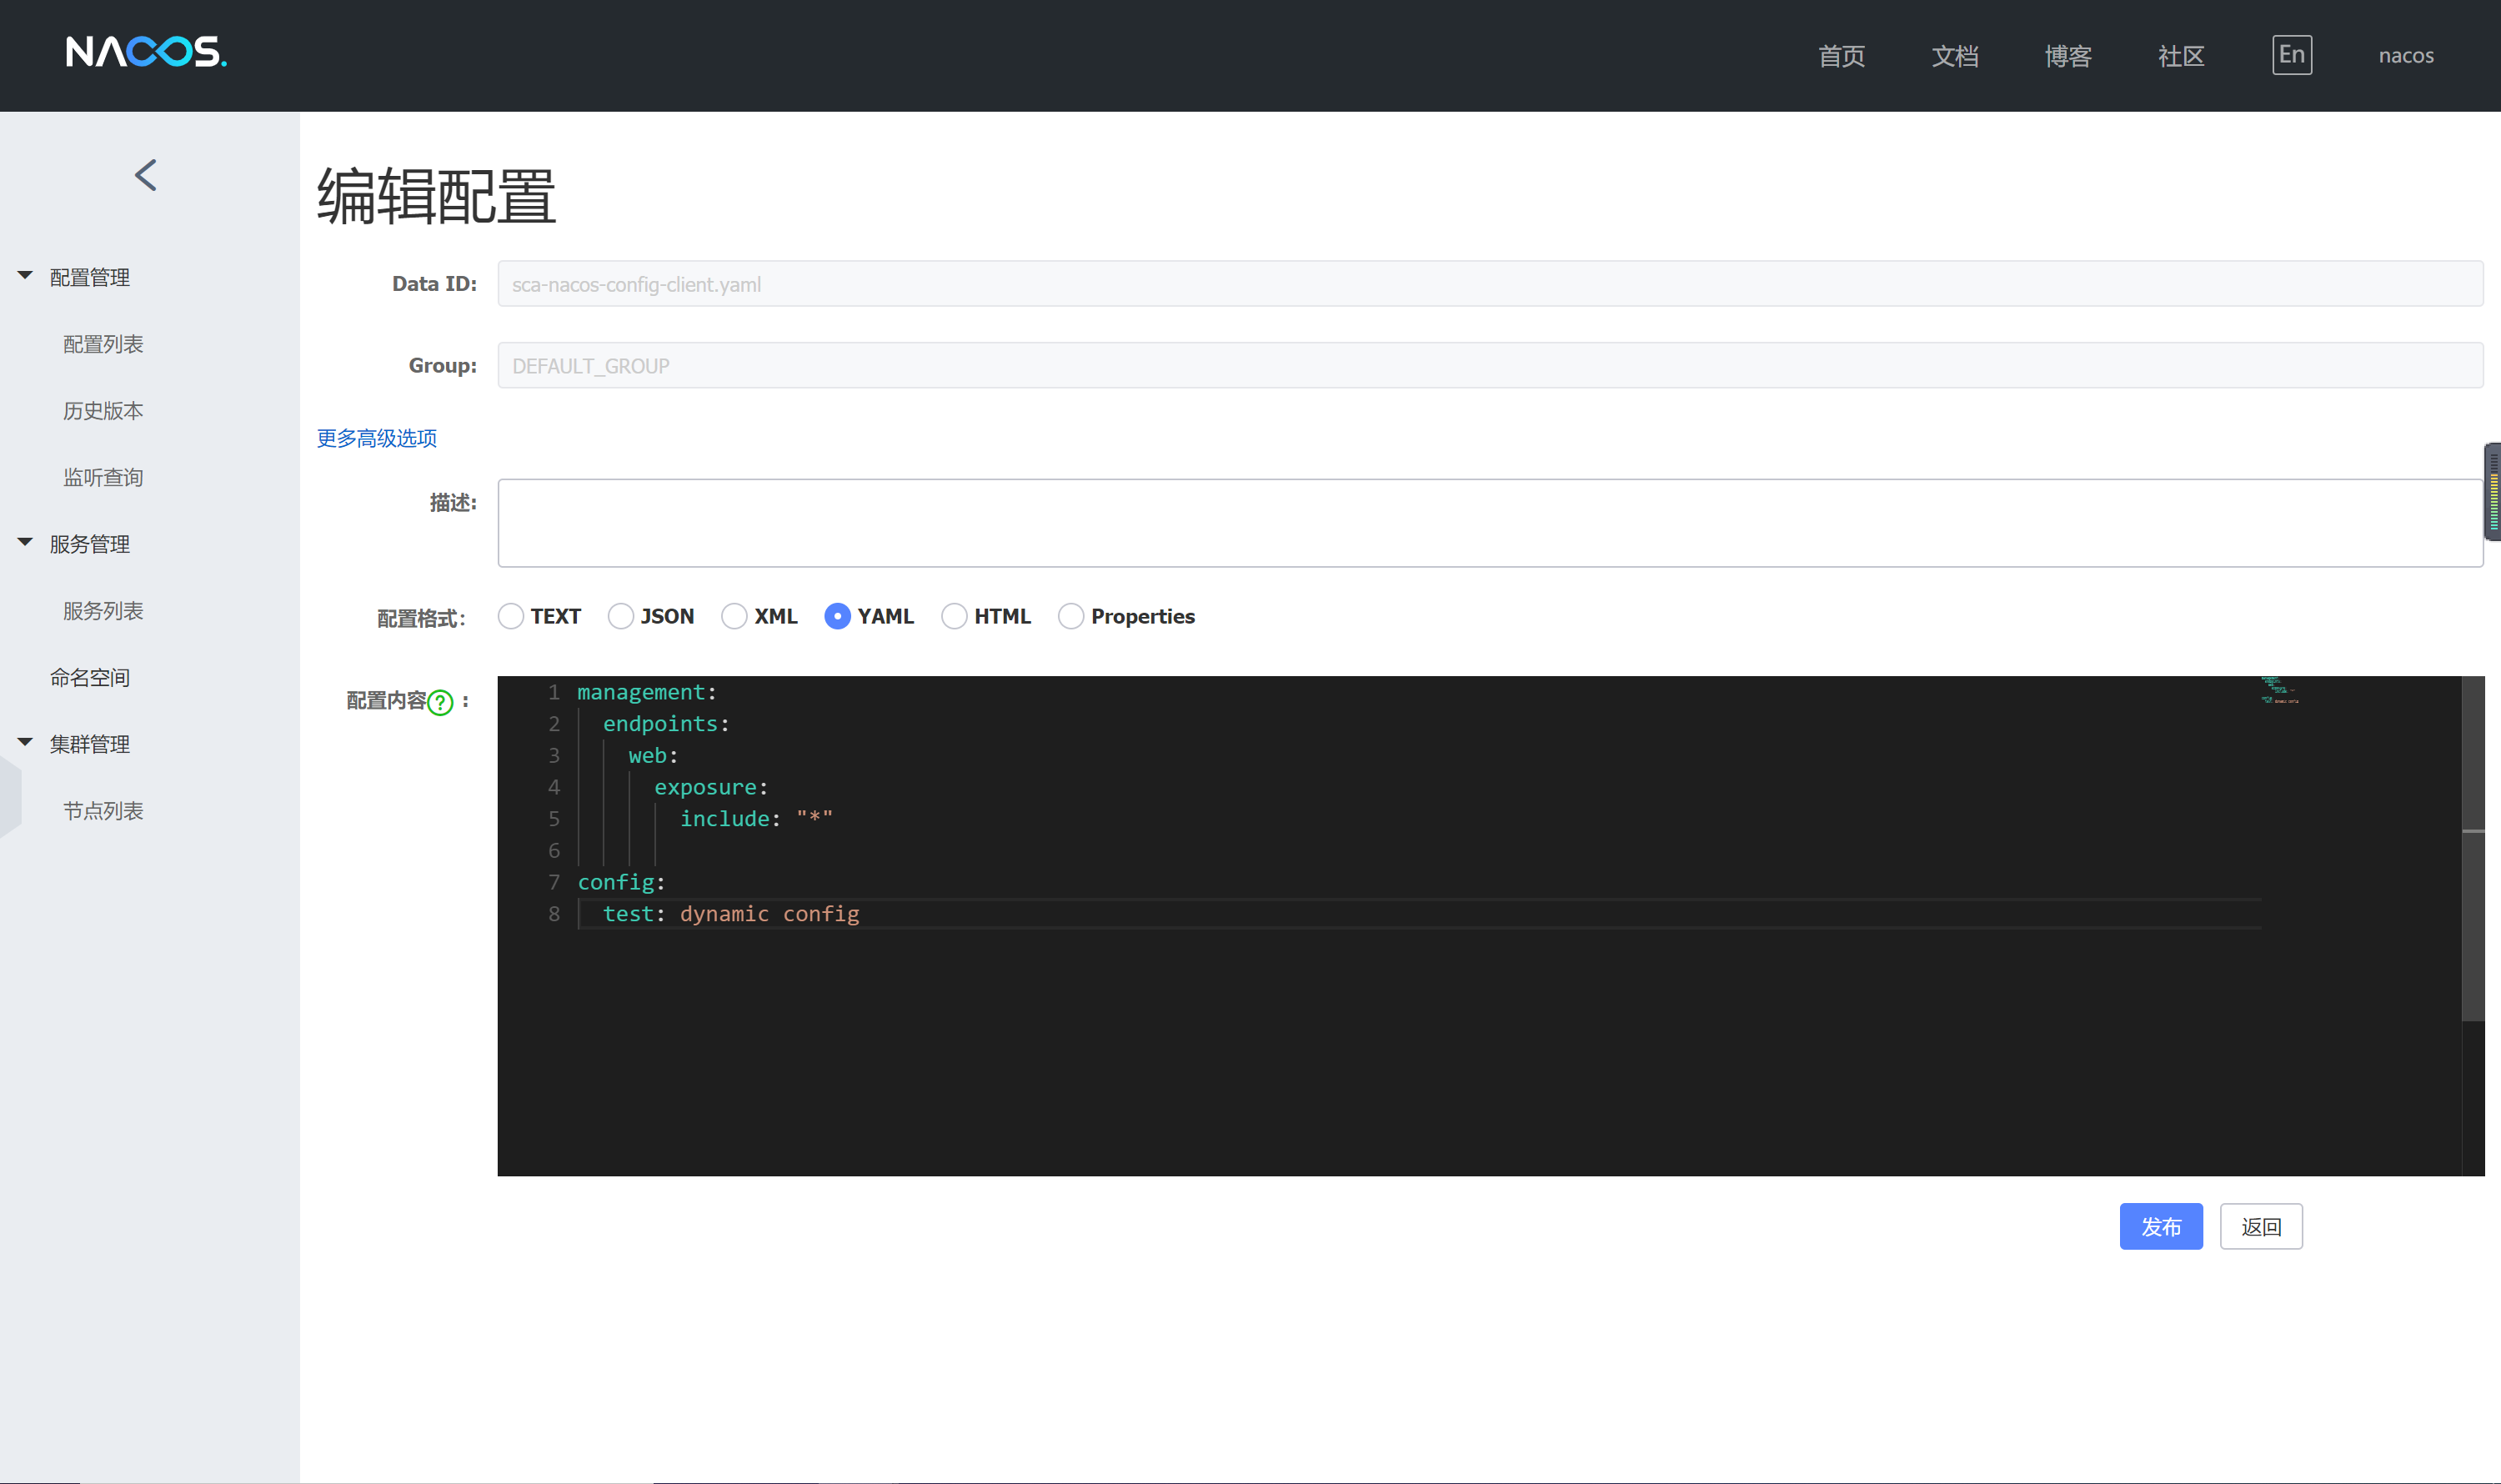
配置修改发布后,应用程序打印如下日志
通过postman 请求 http://localhost:9034/config API, 如下: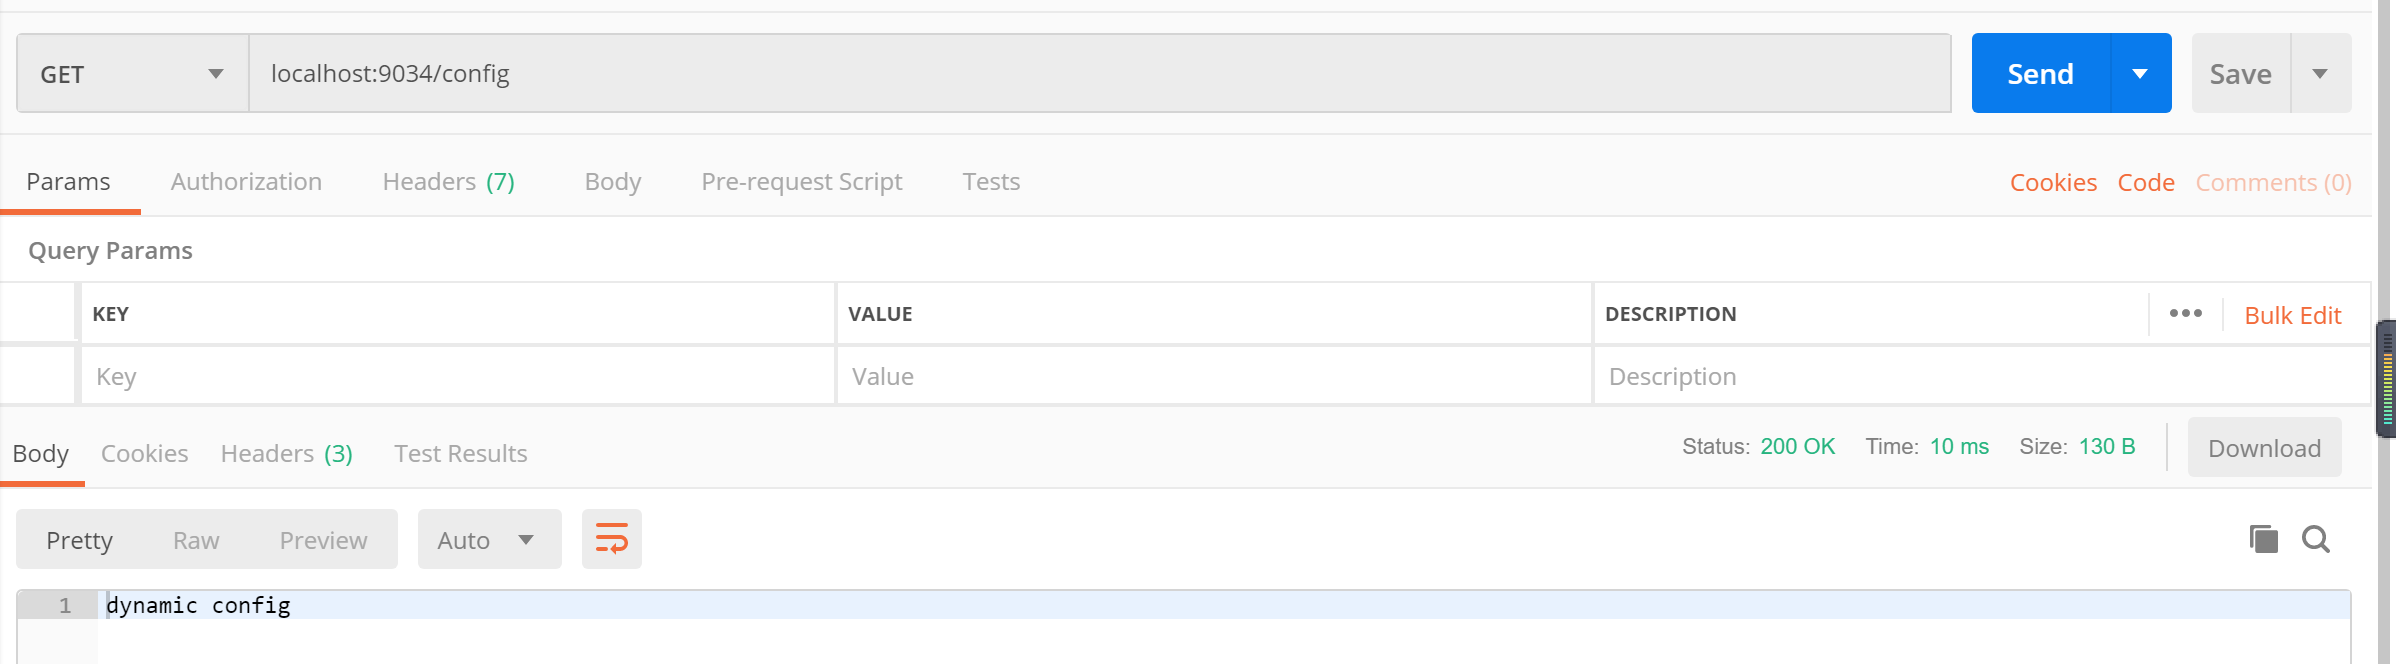
参考资料:
https://github.com/alibaba/spring-cloud-alibaba/wiki/Nacos-config
– end –如有问题,请留言或发送邮件,感谢阅读


")
浅谈控制反转(IOC)与依赖注入(DI)")


还没有评论,来说两句吧...