Hexo博客主题优化

Hexo博客主题优化
添加背景图
在 themes/*/source/css/_custom/custom.styl 中添加如下代码:
body{background:url(/images/bg.jpg);background-size:cover;background-repeat:no-repeat;background-attachment:fixed;background-position:center;}
修改Logo字体
在 themes/*/source/css/_custom/custom.styl 中添加如下代码:
@font-face {font-family: Zitiming;src: url('/fonts/##.ttf.ttf');}.site-title {font-size: 40px !important;font-family: '##' !important;}
文件在 themes/next/source/fonts 目录下,保留字体文件。
本地文章优化
npm install hexo-generator-sitemap --savenpm install hexo-generator-baidu-sitemap --save
站点配置文件_config.yml中添加以下代码
sitemap:path: sitemap.xmlbaidusitemap:path: baidusitemap.xml
站点配置文件_config.yml
## If your site is put in a subdirectory, set url as 'http://yoursite.com/child' and root as '/child/'url: http://你的网站
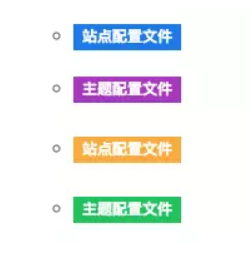
添加文章书写样式
打开themes/next/source/css/_custom 下的 custom.styl 文件
// 黄span#inline-yellow {display:inline;padding:.2em .6em .3em;font-size:80%;font-weight:bold;line-height:1;color:#fff;text-align:center;white-space:nowrap;vertical-align:baseline;border-radius:0;background-color: #f0ad4e;}// 绿span#inline-green {display:inline;padding:.2em .6em .3em;font-size:80%;font-weight:bold;line-height:1;color:#fff;text-align:center;white-space:nowrap;vertical-align:baseline;border-radius:0;background-color: #5cb85c;}// 蓝span#inline-blue {display:inline;padding:.2em .6em .3em;font-size:80%;font-weight:bold;line-height:1;color:#fff;text-align:center;white-space:nowrap;vertical-align:baseline;border-radius:0;background-color: #2780e3;}// 紫span#inline-purple {display:inline;padding:.2em .6em .3em;font-size:80%;font-weight:bold;line-height:1;color:#fff;text-align:center;white-space:nowrap;vertical-align:baseline;border-radius:0;background-color: #9954bb;}
编辑的文章地方
<span id="inline-yellow"> 站点配置文件 </span><span id="inline-blue"> 站点配置文件 </span><span id="inline-green"> 主题配置文件 </span><span id="inline-purple"> 主题配置文件 </span>
头像改成圆形
themes/next/source/css/_common/components/sidebar/sidebar-author.styl中.site-author-image定义
border-radius: 50%;-webkit-border-radius: 50%;-moz-border-radius: 50%;
robots.txt文件
hexo站点的source文件,在source文件夹中新建文件robots.txt
User-agent: * Allow: /Allow: /archives/Disallow: /vendors/Disallow: /categories/Sitemap: http://www../sitemap.xmlSitemap: http://www../baidusitemap.xml# hexo robots.txtUser-agent: *Allow: /Allow: /archives/Disallow: /vendors/Disallow: /js/Disallow: /css/Disallow: /fonts/Disallow: /vendors/Disallow: /fancybox/Sitemap: http://www..com/sitemap.xmlSitemap: http://www..com/baidusitemap.xml
修改内容的宽度
source/css/_variables/custom.styl 文件
// 修改成你期望的宽度$content-desktop = 700px// 当视窗超过 1600px 后的宽度$content-desktop-large = 900px
文章加密
themes/*/layout/_partials/head.swig文件
<script>(function(){if('{{ page.password }}'){if (prompt('请输入密码') !== '{{ page.password }}'){alert('密码错误');history.back();}}})();</script>
文章上
---password: 123456---
添加头像
themes/next下的_config.yml文件
avatar: http://example.com/avatar.png
或者使用本地图片,图片把放入themes/next/source/images下
avatar: /images/vator.png
头像旋转
.site-author-image {display: block;margin: 0 auto;padding: $site-author-image-padding;max-width: $site-author-image-width;height: $site-author-image-height;border: $site-author-image-border-width solid $site-author-image-border-color;// 修改头像边框border-radius: 50%;-webkit-border-radius: 50%;-moz-border-radius: 50%;// 设置旋转transition: 1.4s all;}// 可旋转的圆形头像.site-author-image:hover {-webkit-transform: rotate(360deg);-moz-transform: rotate(360deg);-ms-transform: rotate(360deg);-transform: rotate(360deg);}
点击出现桃心效果
/themes/*/source/js/src下新建文件click.js
!function(e,t,a){function n(){c(".heart{width: 10px;height: 10px;position: fixed;background: #f00;transform: rotate(45deg);-webkit-transform: rotate(45deg);-moz-transform: rotate(45deg);}.heart:after,.heart:before{content: '';width: inherit;height: inherit;background: inherit;border-radius: 50%;-webkit-border-radius: 50%;-moz-border-radius: 50%;position: fixed;}.heart:after{top: -5px;}.heart:before{left: -5px;}"),o(),r()}function r(){for(var e=0;e<d.length;e++)d[e].alpha<=0?(t.body.removeChild(d[e].el),d.splice(e,1)):(d[e].y--,d[e].scale+=.004,d[e].alpha-=.013,d[e].el.style.cssText="left:"+d[e].x+"px;top:"+d[e].y+"px;opacity:"+d[e].alpha+";transform:scale("+d[e].scale+","+d[e].scale+") rotate(45deg);background:"+d[e].color+";z-index:99999");requestAnimationFrame(r)}function o(){var t="function"==typeof e.onclick&&e.onclick;e.onclick=function(e){t&&t(),i(e)}}function i(e){var a=t.createElement("div");a.className="heart",d.push({el:a,x:e.clientX-5,y:e.clientY-5,scale:1,alpha:1,color:s()}),t.body.appendChild(a)}function c(e){var a=t.createElement("style");a.type="text/css";try{a.appendChild(t.createTextNode(e))}catch(t){a.styleSheet.cssText=e}t.getElementsByTagName("head")[0].appendChild(a)}function s(){return"rgb("+~~(255*Math.random())+","+~~(255*Math.random())+","+~~(255*Math.random())+")"}var d=[];e.requestAnimationFrame=function(){return e.requestAnimationFrame||e.webkitRequestAnimationFrame||e.mozRequestAnimationFrame||e.oRequestAnimationFrame||e.msRequestAnimationFrame||function(e){setTimeout(e,1e3/60)}}(),n()}(window,document);
\themes\*\layout\_layout.swig文件末尾添加
<!-- 页面点击小红心 --><script type="text/javascript" src="/js/src/clicklove.js"></script>
修改访问URL路径
Hexo 站点下的 _config.yml 文件
permalink: :category/:title/
创建标签目录
$ cd you-site$ hexo new page tags
创建后,打开you-site/source/tags的index.md
---title: #页面主题date: #当前创建文件时间type: "tags" # 设置页面类型---
RSS
$ npm install hexo-generator-feed --save
Hexo 站点下的_config.yml
# feed# Dependencies: https://github.com/hexojs/hexo-generator-feedfeed:type: atompath: atom.xmllimit: 20hub:content:
文章添加边框阴影
打开 themes/*/source/css/_custom/custom.styl
// 主页文章添加阴影.post {margin-top: 0px;margin-bottom: 60px;padding: 25px;-webkit-box-shadow: 0 0 5px rgba(202, 203, 203, .5);-moz-box-shadow: 0 0 5px rgba(202, 203, 204, .5);}
显示当前浏览进度
themes/*/_config.yml
# Back to top in sidebarb2t: true# Scroll percent label in b2t buttonscrollpercent: true
修改文章间分割线
themes/next/source/css/_common/components/post/下的post-eof.styl
.posts-expand {.post-eof {display: block;// margin: $post-eof-margin-top auto $post-eof-margin-bottom;width: 0%; //分割线长度height: 0px; // 分割线高度background: $grey-light;text-align: center;}}
开启版权声明
主题配置文件下
# Declare license on postspost_copyright:enable: truelicense: CC BY-NC-SA 3.0license_url: https://creativecommons.org/licenses/by-nc-sa/3.0/
带#号的标签
themes/next/layout/_macro/下的post.swig文件
<div class="post-tags">{% for tag in post.tags %}<a href="{{ url_for(tag.path) }}" rel="tag"><i class="fa fa-tag"></i> {{ tag.name }}</a>{% endfor %}</div>
文章字数统计,阅读时长
$ npm i --save hexo-wordcount
themes/next下的_config.yml
# Dependencies: https://github.com/willin/hexo-wordcountpost_wordcount:item_text: true#字数统计wordcount: true#预览时间min2read: true#总字数totalcount: falseseparated_meta: true
连接样式
themes/next/source/css/_custom/下的custom.styl
.post-body p a{color: #0593d3;border-bottom: none;border-bottom: 1px solid #0593d3;&:hover {color: #fc6423;border-bottom: none;border-bottom: 1px solid #fc6423;}}
添加广告
百度SSP和谷歌Adsense
注册,复制代码,在theme/*/layout/_custom/google_ad.swig, AdSense 上的代码粘贴进去,复制一份theme/*/layout/_custom/head.swig
在 theme/*/layout/post.swig添加:
{% include '_custom/google_ad.swig' %}{% block content %}<div id="posts" class="posts-expand">{{ post_template.render(page) }}{% include '_custom/google_ad.swig' %}</div>{% endblock %}
顶部加载条
themes/next下的_config.yml
pace: true# Themes list:#pace-theme-big-counter#pace-theme-bounce#pace-theme-barber-shop#pace-theme-center-atom#pace-theme-center-circle#pace-theme-center-radar#pace-theme-center-simple#pace-theme-corner-indicator#pace-theme-fill-left#pace-theme-flash#pace-theme-loading-bar#pace-theme-mac-osx#pace-theme-minimal# For example# pace_theme: pace-theme-center-simplepace_theme: pace-theme-flash
添加复制功能
下载插件clipboard.js
在themes/next/source/lib/,下新建clipboard文件夹
把src文件夹下的文件拖动到clipboard文件夹
themes/next/source/js/src/,建立custom.js
function createCopyBtns() {var $codeArea = $("figure table");if ($codeArea.length > 0) {//复制成功后将要干的事情function changeToSuccess(item) {$imgOK = $("#copyBtn").find("#imgSuccess");if ($imgOK.css("display") == "none") {$imgOK.css({opacity: 0,display: "block"});$imgOK.animate({opacity: 1}, 1000);setTimeout(function() {$imgOK.animate({opacity: 0}, 2000);}, 2000);setTimeout(function() {$imgOK.css("display", "none");}, 4000);};};$(".post-body").before('<div id="copyBtn" style="opacity: 0; position: absolute;top:0px;display: none;line-height: 1; font-size:1.5em"><span id="imgCopy" ><i class="fa fa-paste fa-fw"></i></span><span id="imgSuccess" style="display: none;"><i class="fa fa-check-circle fa-fw" aria-hidden="true"></i></span>');var clipboard = new Clipboard('#copyBtn', {target: function() {return document.querySelector("[copyFlag]");},isSupported: function() {return document.querySelector("[copyFlag]");}});clipboard.on('success',function(e) {//清除内容被选择状态e.clearSelection();changeToSuccess(e);});clipboard.on('error',function(e) {console.error('Action:', e.action);console.error('Trigger:', e.trigger);});//鼠标$("#copyBtn").hover(function() {$(this).stop();$(this).css("opacity", 1);},function() {$(this).animate({opacity: 0}, 2000);});}}$("figure").hover(function() {//移除之前含有复制标志代码块的 copyFlag$("[copyFlag]").removeAttr("copyFlag");//在新的(当前鼠标所在代码区)代码块插入标志:copyFlag$(this).find(".code").attr("copyFlag", 1);$copyBtn = $("#copyBtn");if ($copyBtn.lenght != 0) {$copyBtn.stop();$copyBtn.css("opacity", 0.8);$copyBtn.css("display", "block");$copyBtn.css("top", parseInt($copyBtn.css("top")) + $(this).offset().top - $copyBtn.offset().top + 3);$copyBtn.css("left", -$copyBtn.width() - 3);}},function() {$("#copyBtn").animate({opacity: 0}, 2000);});$(document).ready(function() {createCopyBtns();});
themes/next/layout/_custom/建立custom.swig
<script type="text/javascript" src="/lib/clipboard/clipboard.min.js"></script><script type="text/javascript" src="/js/src/custom.js"></script>
themes/next/layout/_layout.swig,标签在</body>上面
{% include '_custom/custom.swig' %}
或者
- clipboard.min.js 推荐
保存在下面这个目录.\themes\next\source\js\src目录下,创建clipboard-use.js
/*页面载入完成后,创建复制按钮*/!function (e, t, a) {/* code */var initCopyCode = function(){var copyHtml = '';copyHtml += '<button class="btn-copy" data-clipboard-snippet="">';copyHtml += ' <i class="fa fa-globe"></i><span>copy</span>';copyHtml += '</button>';$(".highlight .code pre").before(copyHtml);new ClipboardJS('.btn-copy', {target: function(trigger) {return trigger.nextElementSibling;}});}initCopyCode();}(window, document);
.\themes\next\source\css\_custom\custom.styl样式
//代码块复制按钮.highlight{//方便copy代码按钮(btn-copy)的定位position: relative;}.btn-copy {display: inline-block;cursor: pointer;background-color: #eee;background-image: linear-gradient(#fcfcfc,#eee);border: 1px solid #d5d5d5;border-radius: 3px;-webkit-user-select: none;-moz-user-select: none;-ms-user-select: none;user-select: none;-webkit-appearance: none;font-size: 13px;font-weight: 700;line-height: 20px;color: #333;-webkit-transition: opacity .3s ease-in-out;-o-transition: opacity .3s ease-in-out;transition: opacity .3s ease-in-out;padding: 2px 6px;position: absolute;right: 5px;top: 5px;opacity: 0;}.btn-copy span {margin-left: 5px;}.highlight:hover .btn-copy{opacity: 1;}
在.\themes\next\layout\_layout.swig文件中,添加引用
<!-- 代码块复制功能 --><script type="text/javascript" src="/js/src/clipboard.min.js"></script><script type="text/javascript" src="/js/src/clipboard-use.js"></script>
我的博客
个人博客?:个人博客
如果看了觉得不错
点赞!转发!
达叔小生:往后余生,唯独有你
You and me, we are family !
90后帅气小伙,良好的开发习惯;独立思考的能力;主动并且善于沟通
简书博客: 达叔小生
https://www.jianshu.com/u/c785ece603d1
结语
- 下面我将继续对 其他知识 深入讲解 ,有兴趣可以继续关注
- 小礼物走一走 or 点赞


还没有评论,来说两句吧...