SWT 遍历图片像素点并处理像素点
1.图像原理
通常图像都是2D,对一副图像,可以看做其宽w*高h的一个二维数组, 即 图像=int[w][h],在w和h位置的每一个 int 值,就是这个点的像素值。
图像处理的本质是:对代表图像二维数组中的值进行重新计算。
2.思路:
将一张图片转化成一个int型癿二维数组
对于每一个像素点大小和颜色进行计算达到图像处理的效果。
在画笔中设置好颜色,填充形状然后将新的图片画出。
3.实现效果
获取像素点方法,首先利用文件imageIO读取图片,然后根据图片长宽进行遍历得到每个像素点的颜色,最后return一个二维数组为处理做准备。
/*** 根据图片路径,获取该该图片的每个像素点并保存到对应的二维数组中* @param path 图片路径* @return 保存像素点的二维数组*/public int[][] getImgPixel(String path){File file = new File(path);BufferedImage buffImg = null; //缓冲图片try {buffImg = ImageIO.read(file);} catch (IOException e) {e.printStackTrace();}int w = buffImg.getWidth();int h = buffImg.getHeight();//定义二维数组,保存像素点int[][] pixelArray = new int[w][h];//读取每个位置的像素点for(int i=0;i<w;i++){for(int j=0;j<h;j++){int pixel = buffImg.getRGB(i, j); //获取每个位置像素值pixelArray[i][j] = pixel;}}return pixelArray;}
原图
根据之前得到的二维数组进行遍历,然后使用Color对象的get方法得到图片颜色,最后再使用画笔画出图像。
//原图public void drawImg(String path, Graphics gr){//得到图片路径int[][] img = getImgPixel(path);for(int i=0;i<img.length;i++){for(int j=0;j<img[i].length;j++){int pixel = img[i][j];//原图颜色不变Color c = new Color(pixel);gr.setColor(c);//使用rectangle填充每一个点gr.fillRect(i, j, 1,1);}}}

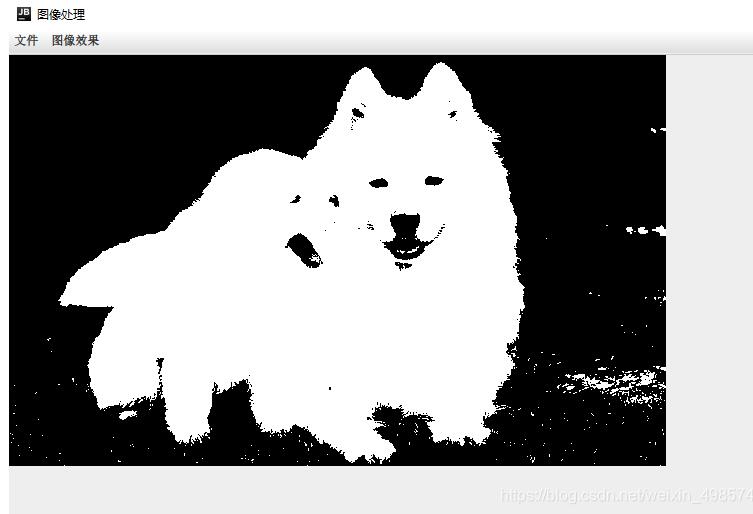
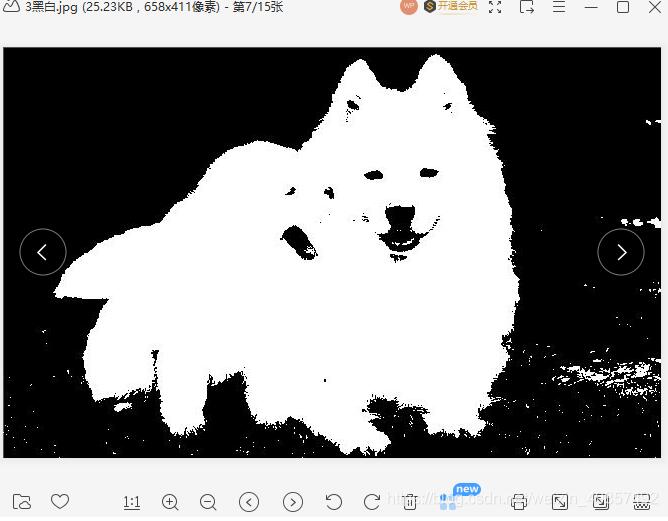
黑白
主要是寻找一个值作为黑白分界线。
//黑白public void drawBw(String path, Graphics gr){int [][] img = getImgPixel(path);// 此处buffG为存储图片做准备buffG = new BufferedImage(img.length, img[0].length, 1);Graphics buff=buffG.getGraphics();for(int i=0; i<img.length; i++){for(int j=0; j<img[i].length; j++){int pixel =img[i][j];Color c = new Color(pixel);int r=c.getRed(); int g=c.getGreen(); int b=c.getBlue();//将小于某一值的颜色作为界限区分黑白if(b<100){buff.setColor(Color.BLACK);}else {buff.setColor(Color.white);}buff.fillRect(i,j,3,3);}}gr.drawImage(buffG,0,0,null);}
马赛克 :
马赛克不用遍历每一个点,主要目的是将像素点模糊,所以可以在原来遍历的基础上i++变成i+10, 每10个像素点获取一个。 然后再将每个像素点放大相应的倍数。
//马赛克实现public void drawPixel(String path, Graphics gr){int[][] pixelArray = getImgPixel(path);buffG = new BufferedImage(pixelArray.length, pixelArray[0].length, 1);Graphics buff=buffG.getGraphics();//减少像素数量for(int i=0;i<pixelArray.length;i+=10){for(int j=0;j<pixelArray[0].length;j+=10){int pixel = pixelArray[i][j];Color color = new Color(pixel);buff.setColor(color);//放大像素点大小buff.fillRect(i, j, 10, 10);}}gr.drawImage(buffG,0,0,null);}

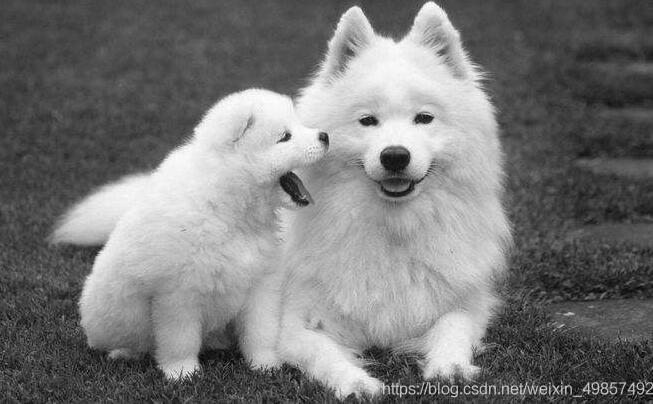
灰度图
主要取原图颜色RGP的平均值设置为新颜色画出。
//灰度图实现public void drawGrayScale(String path, Graphics gr){int[][] img = getImgPixel(path);buffG = new BufferedImage(img.length, img[0].length, 1);Graphics buff=buffG.getGraphics();for(int i=0; i<img.length;i++){for(int j=0;j<img[i].length;j++) {int pixel =img[i][j];Color c = new Color (pixel);// 取rgp平均值int r = c.getRed();int g = c.getGreen();int b = c.getBlue();int sum = (r+g+b)/3;Color newc= new Color(sum,sum,sum);buff.setColor(newc);buff.fillRect(i,j,1,1);}}gr.drawImage(buffG,0,0,null);}
去背景
只画大于某一值的颜色,原图绿色比较多,所以对g进行比较。
//去背景实现public void drawRemoveBg(String path, Graphics gr){int[][] img = getImgPixel(path);buffG = new BufferedImage(img.length, img[0].length, 1);Graphics buff=buffG.getGraphics();for(int i=0;i<img.length;i++){for(int j=0;j<img[i].length;j++){int pixel = img[i][j];Color c = new Color(pixel);//去背景,只画大于某一值的颜色去背景效果int r=c.getRed();int g=c.getGreen();int b=c.getBlue();if(g>150){Color nc=new Color(r,g,b);buff.setColor(nc);buff.fillRect(i, j, 1,1);}}}gr.drawImage(buffG,0,0,null);}

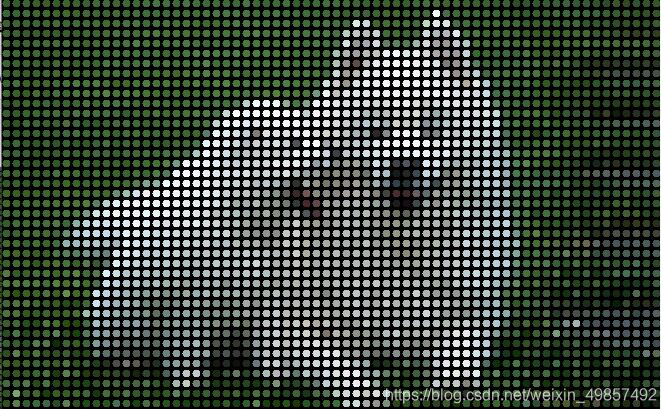
网格化
与马赛克有点类似,改变填充方法为原点
//网格化实现public void drawGrid(String path, Graphics gr){int [][] img = getImgPixel(path);buffG = new BufferedImage(img.length, img[0].length, 1);Graphics buff=buffG.getGraphics();//减少像素数量for(int i=0;i<img.length;i+=10){for(int j=0;j<img[i].length;j+=10){int pixel = img[i][j];Color c = new Color(pixel);int r=c.getRed(); int g=c.getGreen(); int b=c.getBlue();Color nc = new Color(r,g,b);buff.setColor(nc);//放大像素数量buff.fillOval(i, j, 8,8 );}}gr.drawImage(buffG,0,0,null);}
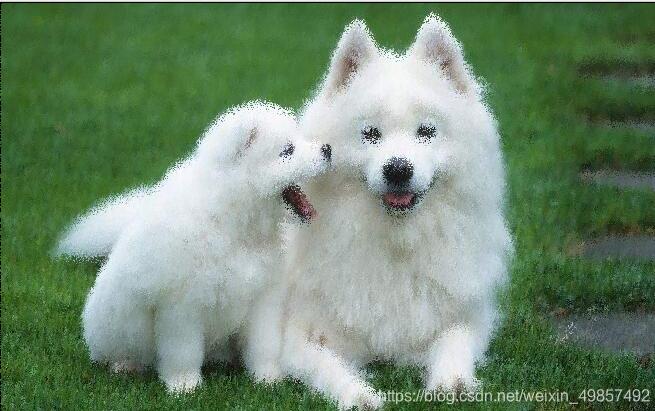
油画
像素点数量不变,主要是填充随机大小癿色块。
//油画效果public void drawPainting(String path, Graphics gr){int[][] img =getImgPixel(path);buffG = new BufferedImage(img.length, img[0].length, 1);Graphics buff=buffG.getGraphics();for(int i=0; i<img.length; i++){for(int j=0; j<img[i].length; j++){int pixel = img[i][j];Color c = new Color(pixel);buff.setColor(c);///填充随机大小癿色块Random random =new Random();int r = random.nextInt(20)+5;buff.fillOval(i,j,r,r);}}gr.drawImage(buffG,0,0,null);}
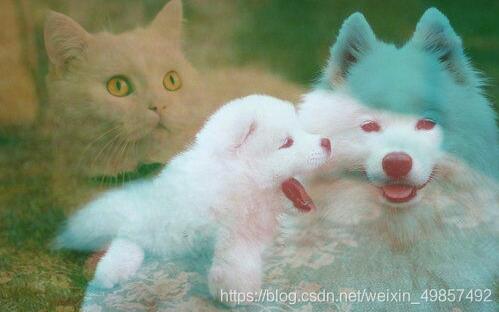
双图合并
选取两张图片,然后从2张图片中获取其长和宽的最小值。之后以更小的图片为大小进行处理,主要对颜色进行透明处理才能更好地得到合并效果。
//双图public void drawDouble(String path1, String path2, Graphics gr ){//选取a,b两张照片, 给颜色不同权值int[][] img1=getImgPixel(path1);int[][] img2=getImgPixel(path2);// 取其宽高癿最小值,防数组越界int w =Math.min(img1.length,img2.length);int h =Math.min(img1[0].length, img2.length);buffG = new BufferedImage(w,h, 1);Graphics buff=buffG.getGraphics();//更大的图片在前循环for(int i=0; i<w; i+=1){for(int j=0;j<h;j+=1){Color c1 = new Color(img1[i][j]);Color c2 = new Color(img2[i][j]);//透明处理int r=(int)(c1.getRed()*0.7+c2.getRed()*0.3);int g=(int)(c1.getGreen()*0.3+c2.getGreen()*0.7);int b=(int)(c1.getBlue()*0.3+c2.getBlue()*0.7);Color cn = new Color(r,g,b);buff.setColor(cn);buff.drawLine(i,j,i,j);}}gr.drawImage(buffG,0,0,null);}
卷积效果
卷积算法,就是对图像二维数组,乘以不同的卷积核,以获取不同的特征图像。
对一幅图像的卷积处理有如下三步:
1.将原图像转为二维数组
2.寻找合适的卷积核二维数组(百度之)
3.按卷积规则,相乘这两个二维数组,得到第三个二维数组即是。
//卷积核癿二维数组:边缘化float[][] kArray= {{-1,-1,-1,-1,-1},{-1,-1,-1,-1,-1},{-1,-1,25,-1,-1},{-1,-1,-1,-1,-1},{-1,-1,-1,-1,-1}};/*** 卷积计算* @param src :图片数组* @param filter :卷积核数组* @return 计算后癿数组*/public static int[][] valide(int[][] src,float[][] filter){int[][]tem = new int[filter.length][filter[0].length];int valideWidth = src[0].length - filter[0].length+1;int valideheight = src.length - filter.length+1;int[][] valide = new int[valideheight][valideWidth];for(int i=0;i<valideheight;i+=1){for(int j=0;j<valideWidth;j+=1){for(int y=0;y<filter.length;y++){for(int z=0;z<filter[0].length;z++){tem[y][z] =(int)((src[i+y][j+z])*(filter[y][z]));}}int kk=0;for(int y=0;y<filter.length;y++){for(int z=0;z<filter[0].length;z++){kk += tem[y][z];}}if(kk<0)kk=0; if(kk>255)kk=255;valide[i][j]=(byte)kk;}}return valide;}//卷积效果public void drawJJ(String path){DrawMouse mouse= new DrawMouse();int[][] ia= mouse.getImgPixel(path);ia=valide(ia, kArray);buffG = new BufferedImage(ia.length, ia[0].length, 1);Graphics buff=buffG.getGraphics();for(int i=0;i<ia.length;i++){for(int j=0;j<ia[0].length;j++){int pixel = ia[i][j];Color color = new Color(pixel);buff.setColor(color);//放大像素点大小 保证减少的倍数与放大倍数相同,否则是网格化buff.fillRect(i, j, 10, 10);}}//在界面上画出ia数组图像,即卷积结果:gr.drawImage(buffG,0,0,null);}

4.关于重绘
jframe 类中的 repaint()方法: 我的理解当窗体尺寸发生变化或者已经移动到屏幕外时或者需要刷新一下界面,此时应该使用重绘。

比如,我的代码是使用了动作监听器,每次点击具体的图像效果或是打开某张图片,那么此时就需要添加重汇到动作监听器中。
5.图片打开
主要使用JfileChooser类中的showOpenDialog对图片进行选择,会弹出文件选择器挑选所要打开的图像,并且对文件后缀进行过滤,只使用jpg文件。
public void openFile(){JFileChooser jfc = new JFileChooser();jfc.setAcceptAllFileFilterUsed(false);//取消显示所有文件过滤选项//后缀名过滤器FileNameExtensionFilter filter = new FileNameExtensionFilter("(*.jpg)", "jpg");jfc.setFileFilter(filter);jfc.setDialogTitle("打开文件");jfc.showOpenDialog(null);File file = jfc.getSelectedFile();if(file!=null){fPath=file.getPath();System.out.print(fPath);drawImg(fPath, gr);}else {System.out.println("未选择文件");}}
6.图片保存
对文件进行保存,之前画在画布上的图片都储存在 BufferedImage buffG里,此时使用JFileChooser类中的showSaveDialog方法,然后选择要保存的路径以及图片名字。
public void saveFile(){JFileChooser jfc = new JFileChooser();//后缀名过滤器FileNameExtensionFilter filter = new FileNameExtensionFilter("(*.jpg)", "jpg");jfc.setFileFilter(filter);jfc.setDialogTitle("保存文件");jfc.showSaveDialog(null);File file = jfc.getSelectedFile();try {ImageIO.write(buffG,"jpg", file);System.out.print("保存成功" );} catch (IOException ex) {ex.printStackTrace();}}
参考文章
https://www.mianshigee.com/note/detail/19827oms/


还没有评论,来说两句吧...