SpringBoot+Thmleaf实现个人博客项目
文章目录
- 1、环境搭建
- 2、数据库搭建
- 3、拦截器配置
- 4、前端页面展示
- 5、后台管理页面展示
1、环境搭建
本项目使用到的主要技术有:SpringBoot框架,MybatisPlus,Thmleaf模板引擎。
pom依赖导入
<dependencies><dependency><groupId>org.springframework.boot</groupId><artifactId>spring-boot-starter-thymeleaf</artifactId></dependency><dependency><groupId>mysql</groupId><artifactId>mysql-connector-java</artifactId><version>8.0.32</version></dependency><dependency><groupId>com.baomidou</groupId><artifactId>mybatis-plus-boot-starter</artifactId><version>3.5.3.1</version></dependency><dependency><groupId>org.springframework.boot</groupId><artifactId>spring-boot-starter-web</artifactId></dependency><dependency><groupId>org.projectlombok</groupId><artifactId>lombok</artifactId></dependency><dependency><groupId>org.springframework.boot</groupId><artifactId>spring-boot-starter-test</artifactId><scope>test</scope></dependency></dependencies>
2、数据库搭建
create database blog;use blog;create table admin(id int auto_incrementprimary key,name varchar(255) not null,pwd varchar(255) not null,phone varchar(255) not null,email varchar(255) not null,status varchar(255) null,repwd varchar(255) not null)auto_increment = 7;create table article(id int auto_increment comment '主键id'primary key,title varchar(255) not null comment '文章标题',summary varchar(255) not null comment '文章简介',type varchar(255) not null comment '文章类型 0-博客 1-话题',read_number tinyint(1) null comment '文章阅读量',thumb_up_number int null comment '文章点赞数',create_time datetime not null comment '创建时间',tag varchar(255) not null)auto_increment = 6;create table article_category(id int auto_incrementprimary key,article_id int not null,type varchar(255) not null,create_time datetime not null);create table article_content(id int auto_increment comment '主键id'primary key,content mediumtext not null comment '文章内容',article_id varchar(255) not null comment '文章信息id',create_time datetime not null comment '创建时间',tag varchar(255) not null);create table category(id int auto_incrementprimary key,type varchar(255) not null,create_time datetime not null,tag varchar(255) not null);create table tag(id int auto_incrementprimary key,name varchar(255) not null,number int not null);create table user(id int auto_incrementprimary key,username varchar(255) null,password varchar(255) null)charset = utf8mb3auto_increment = 5;
这里我们可以自行添加一些数据了。
yml文件
server:port: 8081spring:datasource:url: jdbc:mysql://localhost:3306/blog?useUnicode=true&characterEncoding=UTF-8&serverTimezone=Asia/Shanghai&rewriteBatchedStatements=trueusername: rootpassword: 20020702driver-class-name: com.mysql.cj.jdbc.Driverthymeleaf:cache: falsemvc:format:date: yyyy-MM-ddlogging:level:com.example.mybatis_plus.sys.mapper: debug
这里把自己的mysql地址改上去。
3、拦截器配置
LoginConfig
package com.guo.blog.config;import com.guo.blog.interceptor.UserLoginInterceptor;import org.springframework.context.annotation.Configuration;import org.springframework.web.servlet.config.annotation.InterceptorRegistration;import org.springframework.web.servlet.config.annotation.InterceptorRegistry;import org.springframework.web.servlet.config.annotation.WebMvcConfigurer;@Configurationpublic class LoginConfig implements WebMvcConfigurer {@Overridepublic void addInterceptors(InterceptorRegistry registry) {//注册TestInterceptor拦截器InterceptorRegistration registration = registry.addInterceptor(new UserLoginInterceptor());registration.addPathPatterns("/**"); //所有路径都被拦截registration.excludePathPatterns( //添加不拦截路径"/", //首页路径"/blog/toLogin", //登录路径"/blog/login","/**/*.html", //html静态资源"/**/*.js", //js静态资源"/**/*.css" //css静态资源);}}
UserLoginInterceptor
package com.guo.blog.interceptor;import com.guo.blog.pojo.User;import jakarta.servlet.http.HttpServletRequest;import jakarta.servlet.http.HttpServletResponse;import jakarta.servlet.http.HttpSession;import org.springframework.web.servlet.HandlerInterceptor;import org.springframework.web.servlet.ModelAndView;public class UserLoginInterceptor implements HandlerInterceptor {/** 在请求处理之前进行调用(Controller方法调用之前)*/@Overridepublic boolean preHandle(HttpServletRequest request, HttpServletResponse response, Object handler) throws Exception {System.out.println("执行了拦截器的preHandle方法");try {HttpSession session = request.getSession();User user = (User) session.getAttribute("login");if (user != null) {return true;}response.sendRedirect(request.getContextPath() + "/blog/toLogin");} catch (Exception e) {e.printStackTrace();}return false;//如果设置为false时,被请求时,拦截器执行到此处将不会继续操作//如果设置为true时,请求将会继续执行后面的操作}/** 请求处理之后进行调用,但是在视图被渲染之前(Controller方法调用之后)*/@Overridepublic void postHandle(HttpServletRequest request, HttpServletResponse response, Object handler, ModelAndView modelAndView) throws Exception {System.out.println("执行了拦截器的postHandle方法");}/** 整个请求结束之后被调用,也就是在DispatchServlet渲染了对应的视图之后执行(主要用于进行资源清理工作)*/@Overridepublic void afterCompletion(HttpServletRequest request, HttpServletResponse response, Object handler, Exception ex) throws Exception {System.out.println("执行了拦截器的afterCompletion方法");}}
到这里其实就可以直接运行了。不过我的项目是做了拦截器的,如果不想用也可以把它删掉。
具体位置: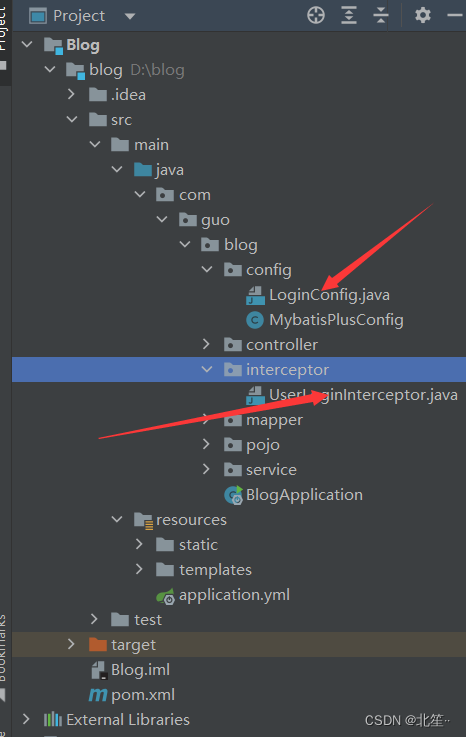
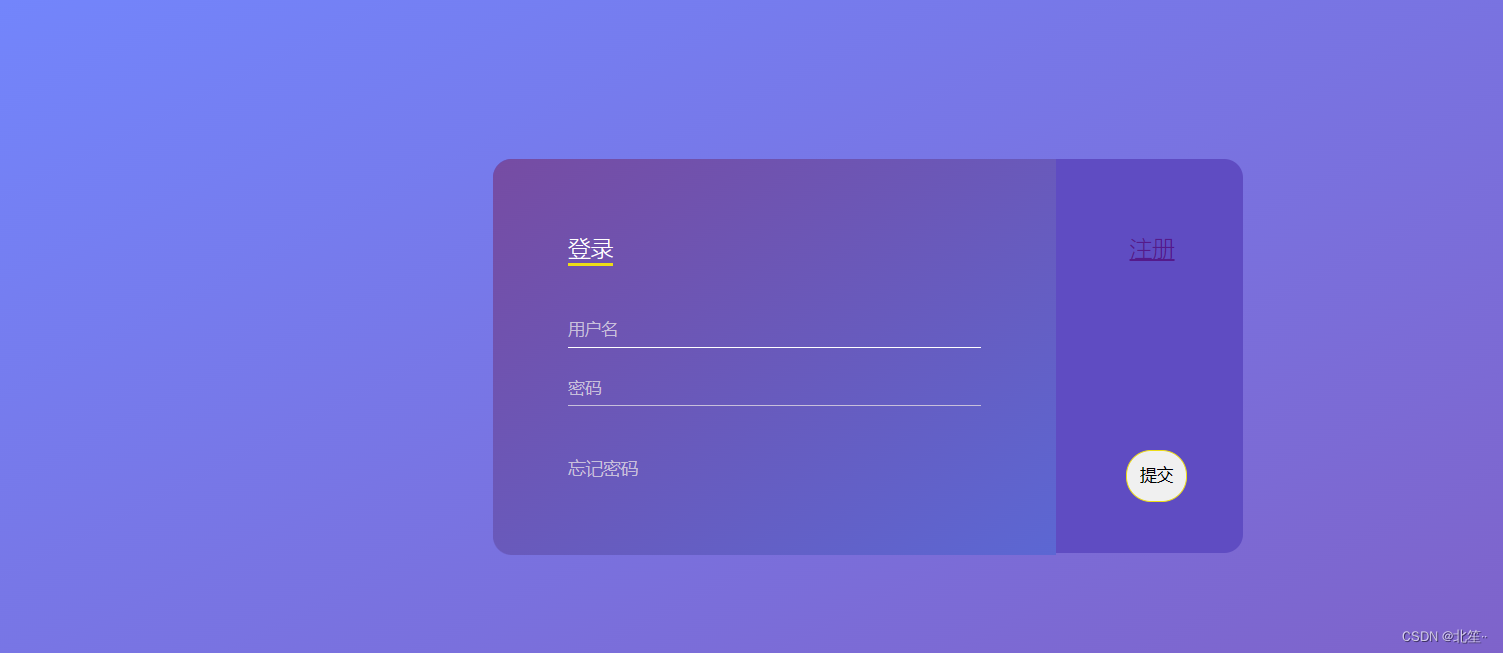
4、前端页面展示
首页 index.html
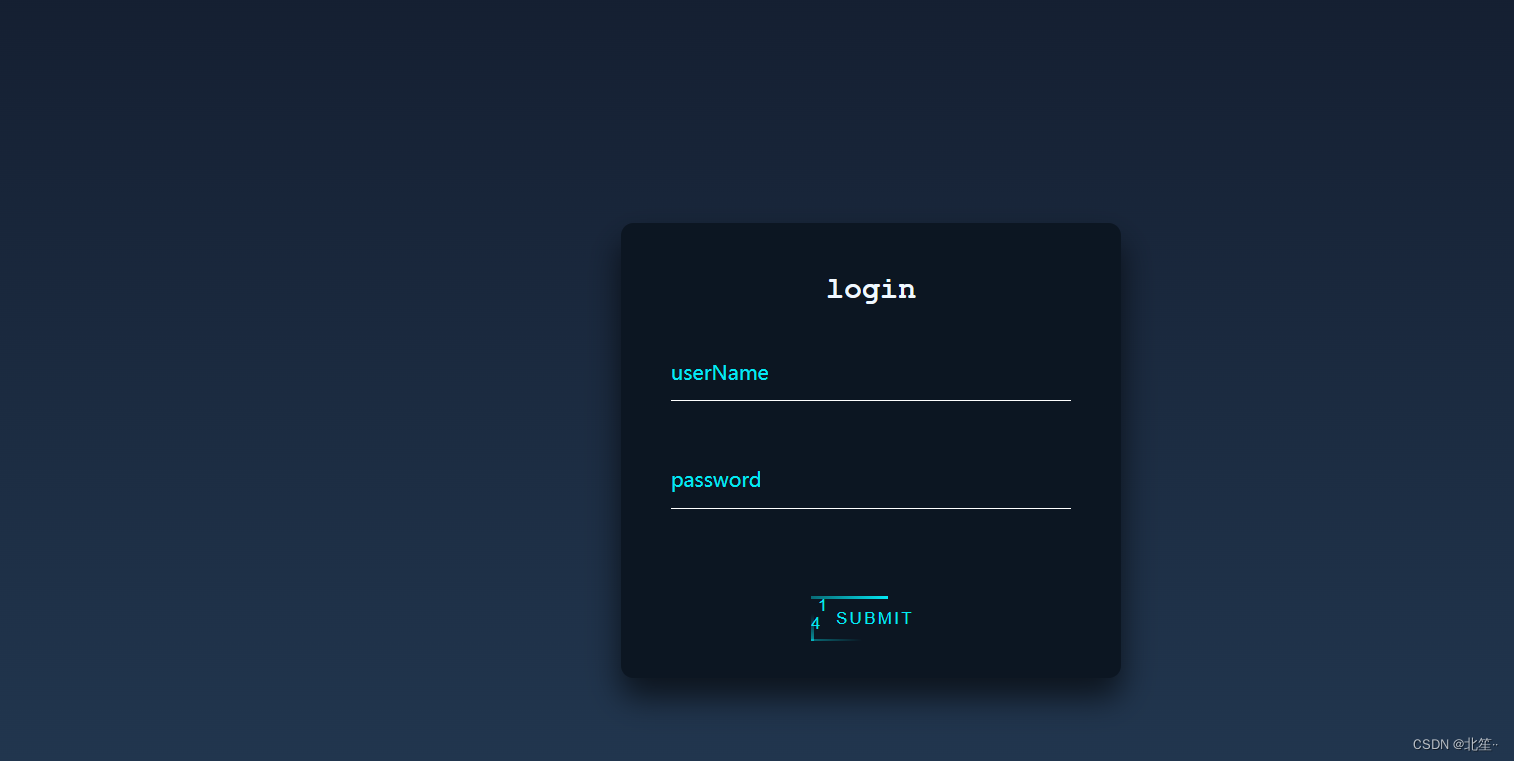
登陆页面
进入博客主页
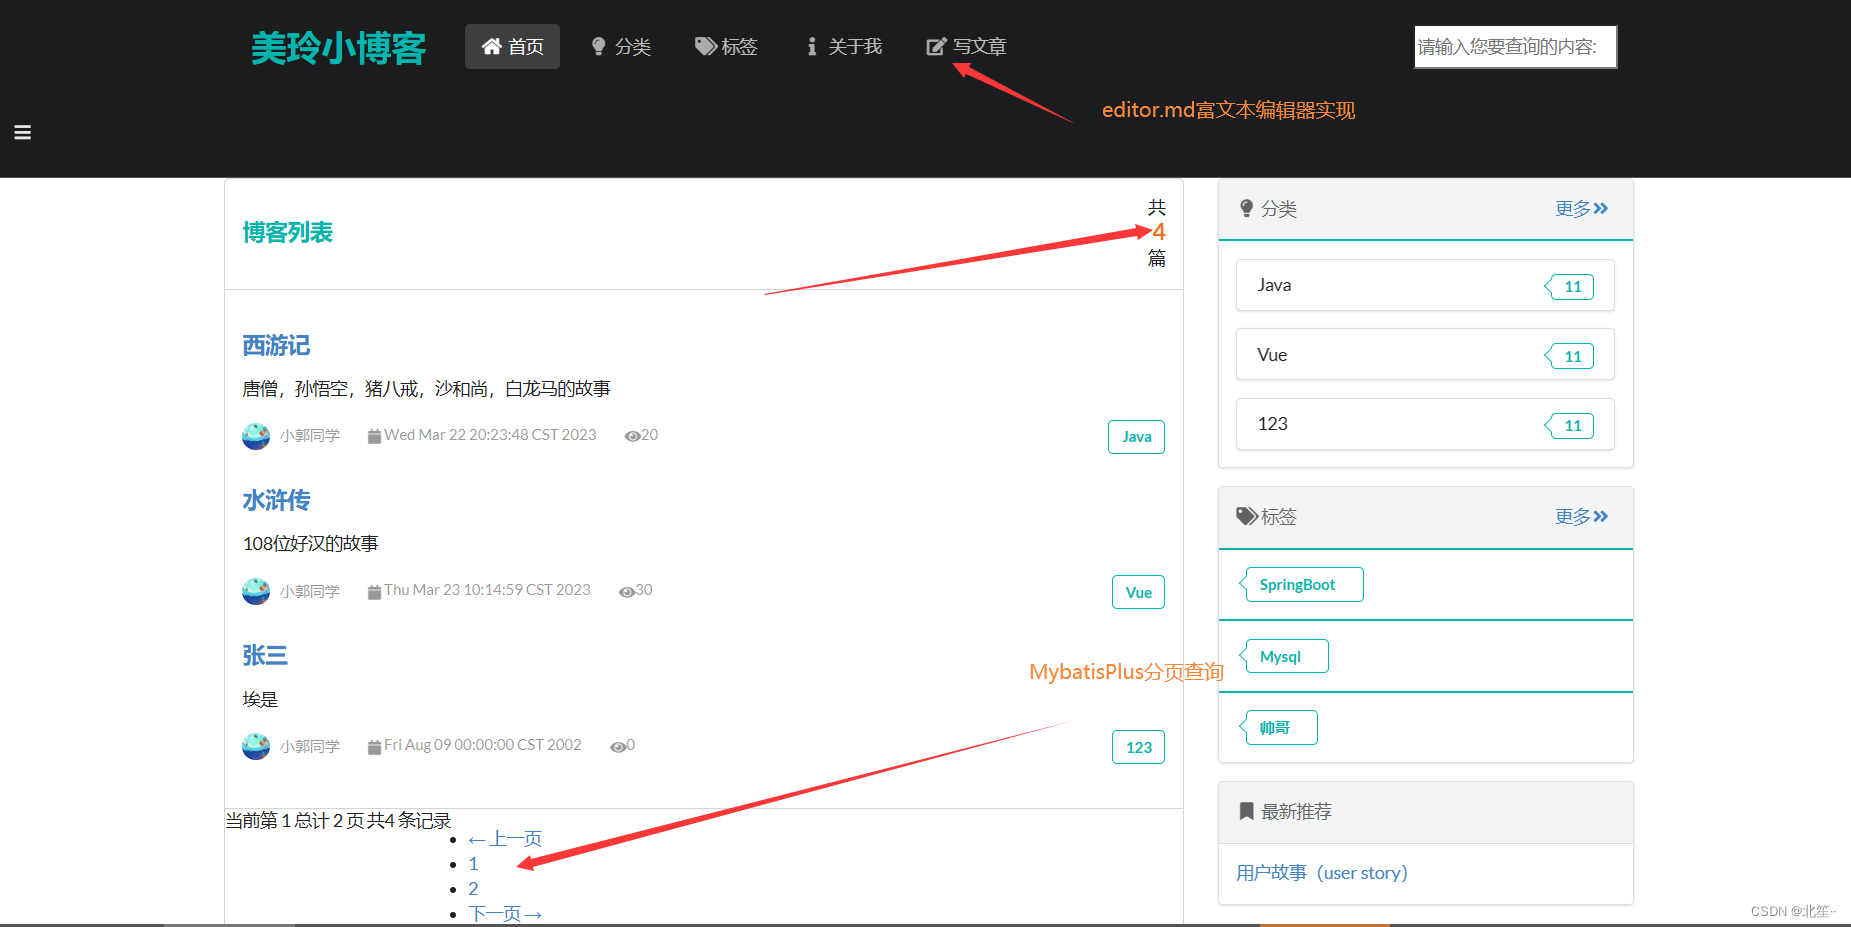
文章分类
这里可以自己美化一下。功能是实现的,不过就是简单粗糙了一点 哈哈~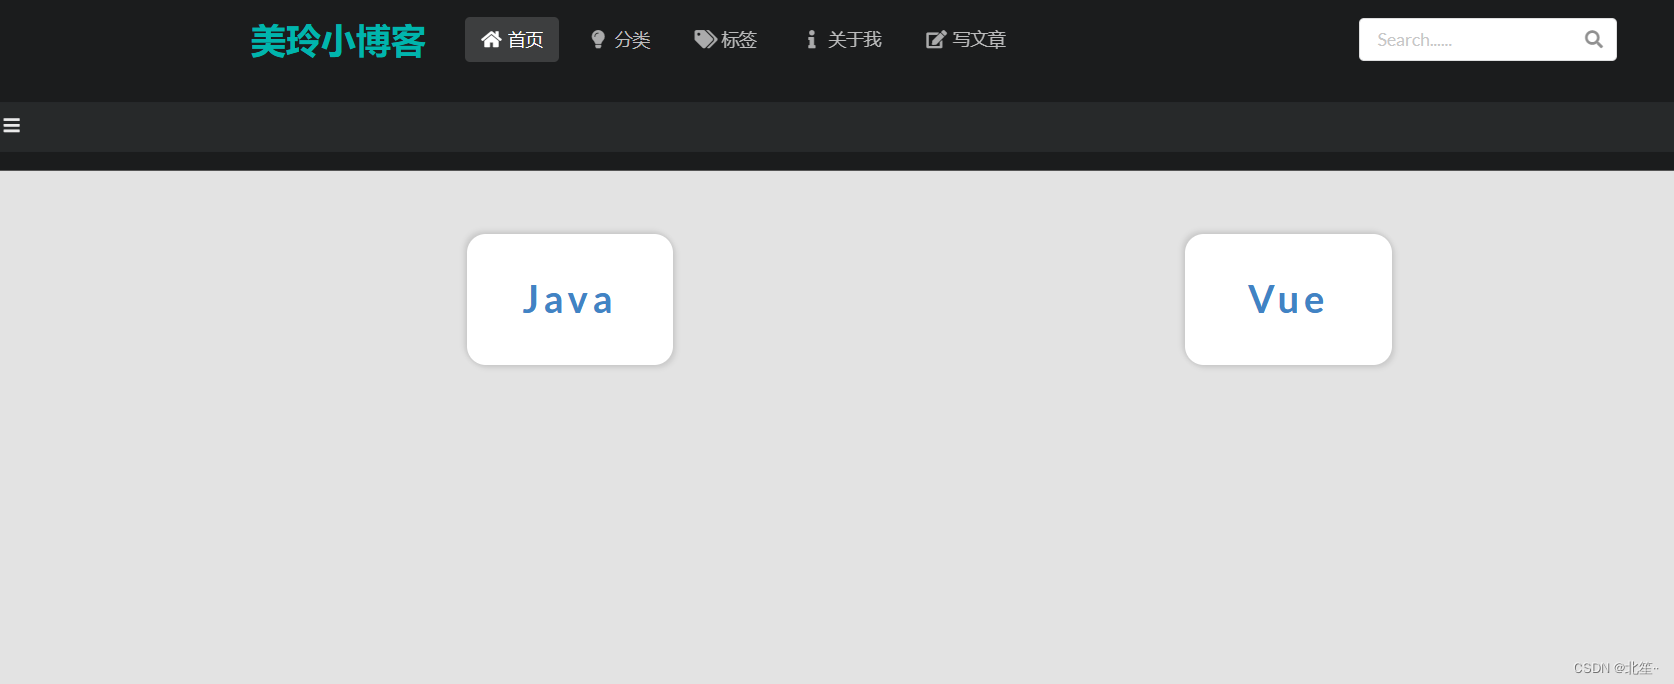
写文章
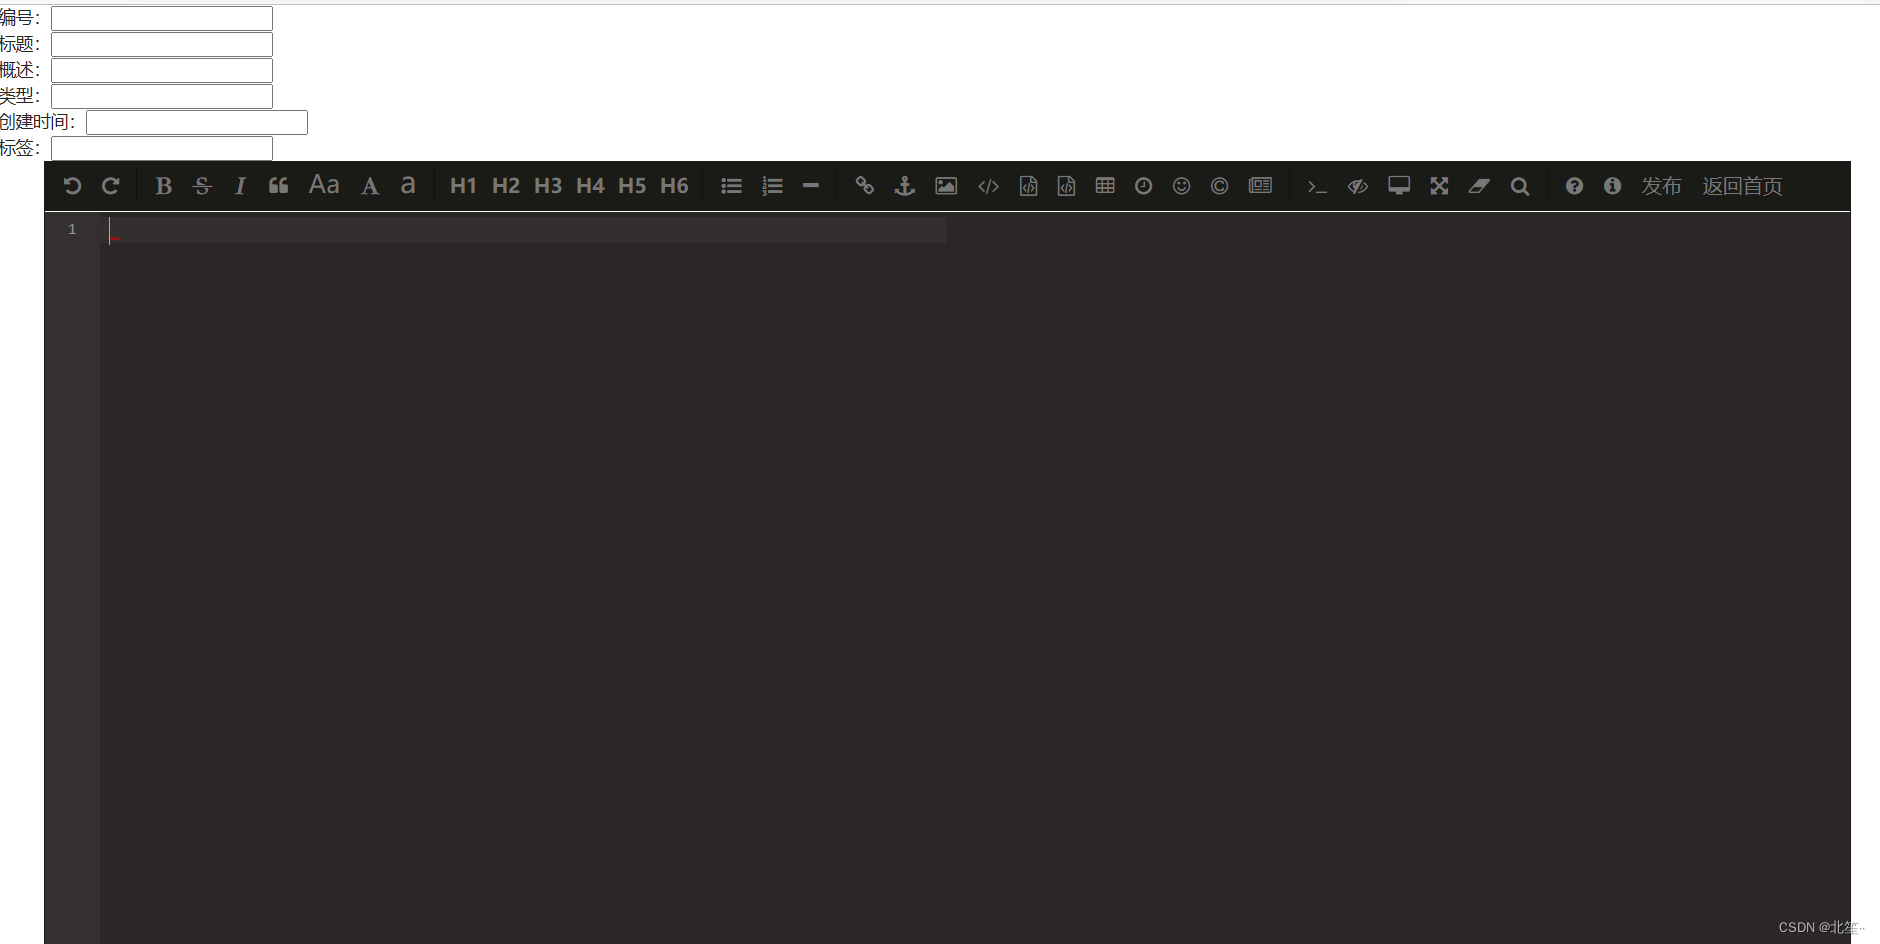
这个表格的话也得美化一下,这都是我以后要慢慢更新的方向。可以持续关注我哟!
5、后台管理页面展示
后台登录
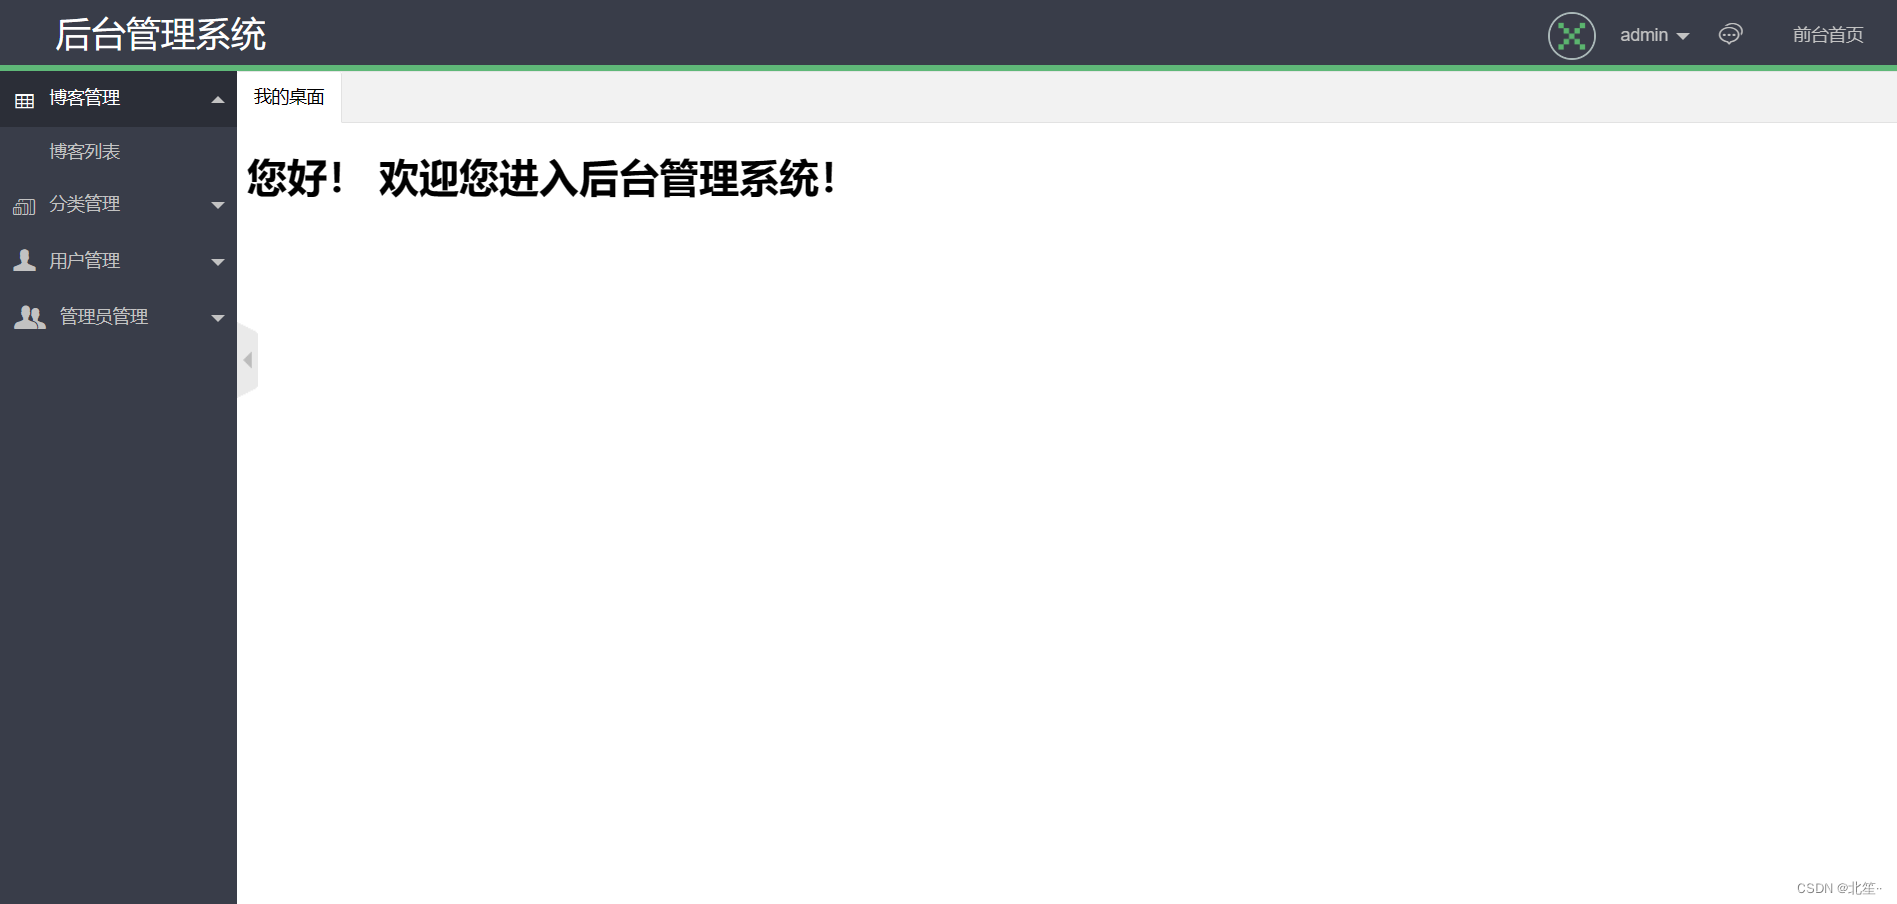
登录成功后进入主界面
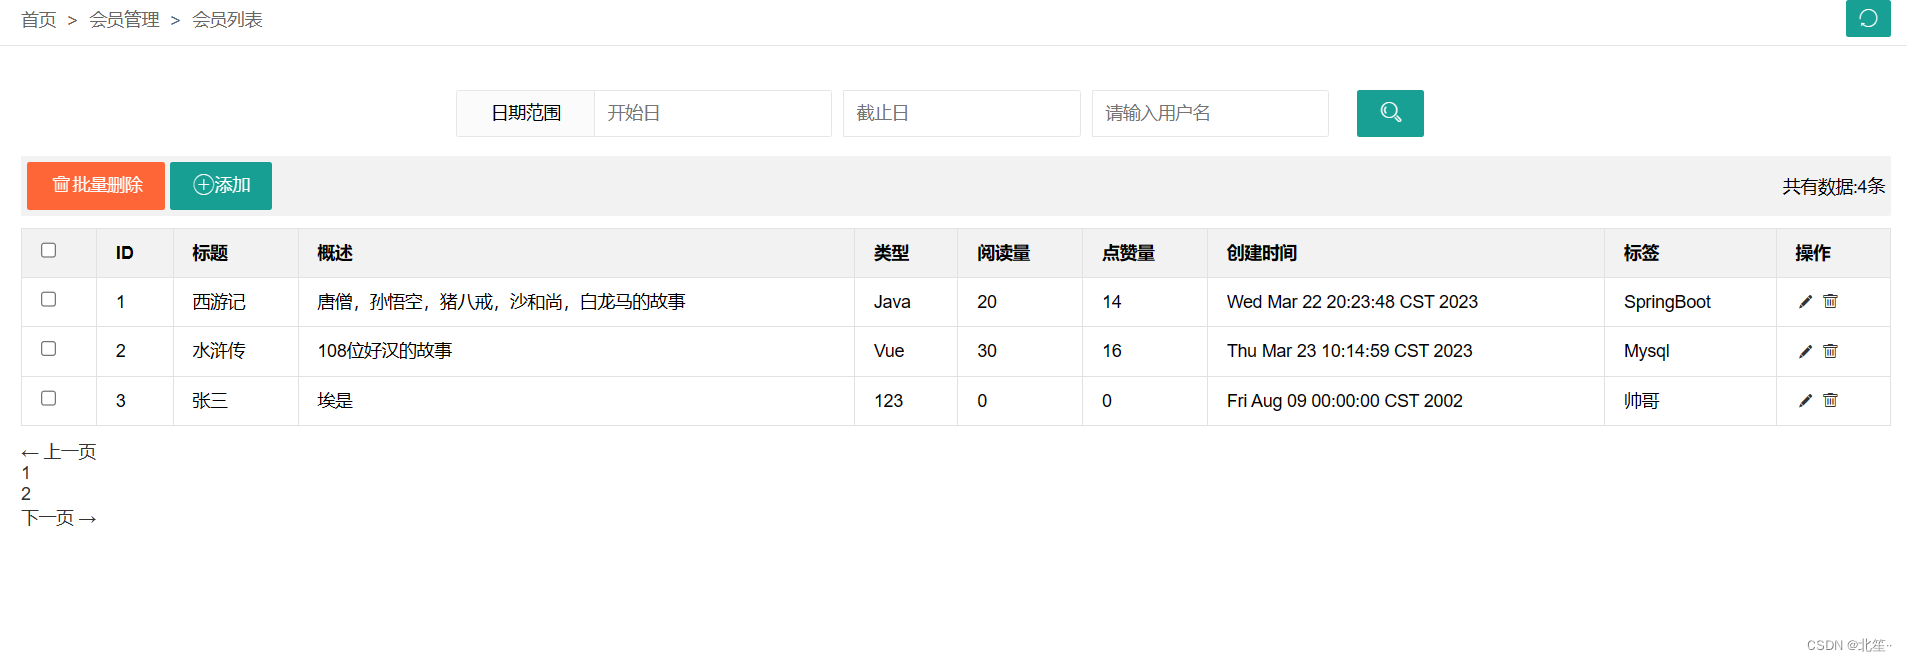
博客列表
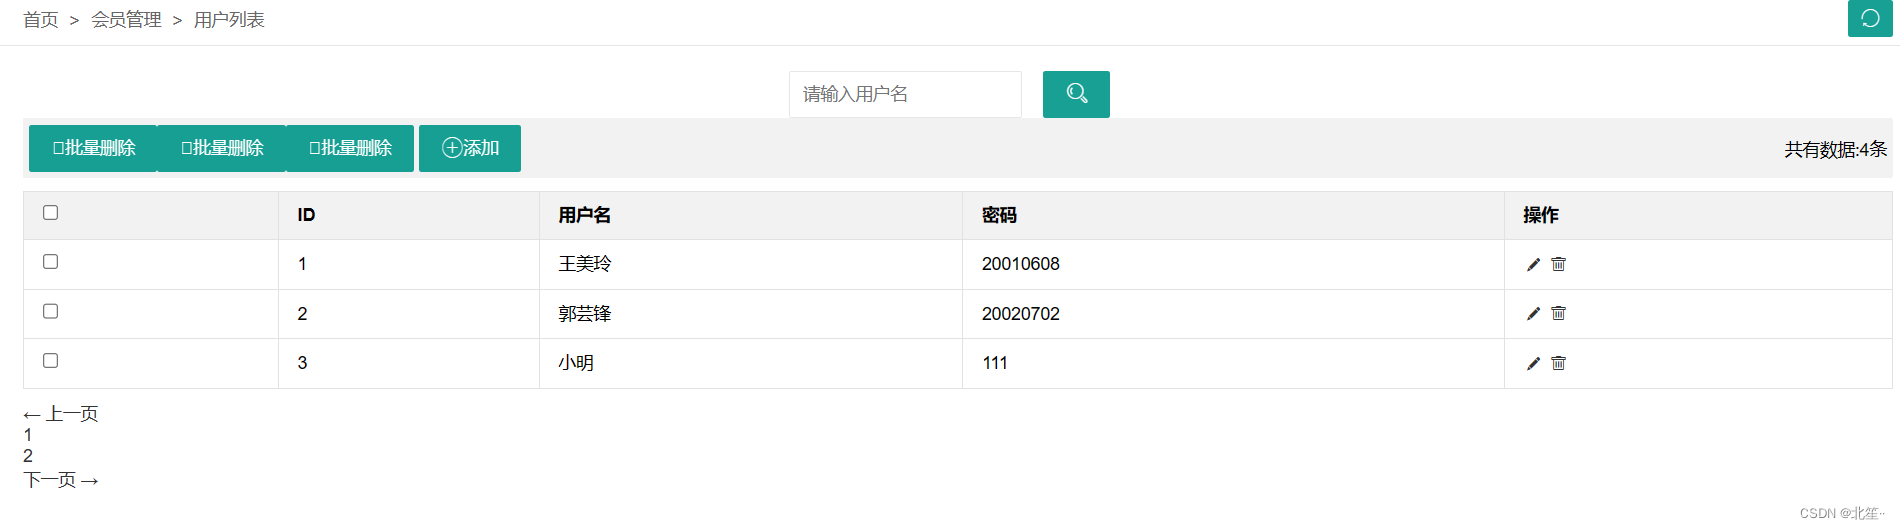
用户列表
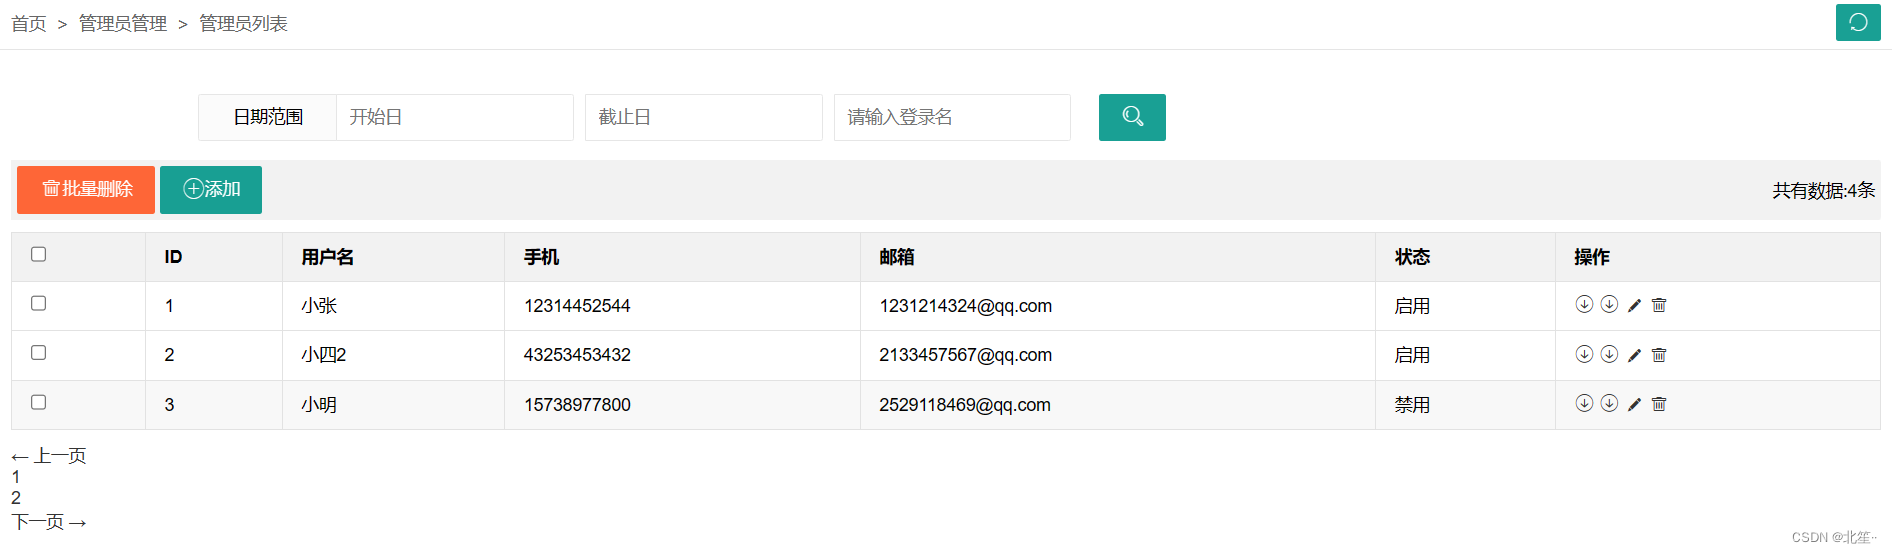
管理员列表
管理页面以后还会添加一些新的功能比如说管理员的权限,角色,超级管理员等功能。
还有列表展示方面加些具体数据页面。
项目源代码地址 //github.com/guo0929/SpringBoot-thmleaf-
感兴趣的小伙伴可以下载看看,真的是下载即用哦!
加油叭 程序猿


还没有评论,来说两句吧...