SpringBoot - 用maven-dependency-plugin插件将项目代码与依赖分开打包
SpringBoot - 用maven-dependency-plugin插件将项目代码与依赖分开打包
写在前面
通常基于SpringBoot框架的项目,在发布打包时会将项目代码和所有依赖文件一起打成一个可执行的、一体化的JAR包,如果项目的依赖包很多,那么这个JAR包就会非常大,如果想把项目依赖的JAR从项目一体化的JAR包中分离出来,该怎么办呢?
具体步骤
①. 修改打包插件
将原来的打包插件:
<plugin><groupId>org.springframework.boot</groupId><artifactId>spring-boot-maven-plugin</artifactId><version>2.4.2</version><configuration><executable>true</executable><jvmArguments>-Dfile.encoding=UTF-8</jvmArguments></configuration></plugin>
替换为下面的打包插件:
<!-- 需要指定启动类,否则报错。--><plugin><groupId>org.apache.maven.plugins</groupId><artifactId>maven-jar-plugin</artifactId><configuration><archive><!-- 生成的项目JAR包中,不要包含pom.xml和pom.properties这两个文件 --><addMavenDescriptor>false</addMavenDescriptor><manifest><!-- 是否要把第三方依赖的JAR包加入到类构建路径 --><addClasspath>true</addClasspath><!-- 外部依赖JAR包的存放路径,为了在MANIFEST.MF文件中指定外部依赖的路径 --><classpathPrefix>lib/</classpathPrefix><!-- 项目主启动类 --><mainClass>cn.hadoopx.servicex.ServicexApplication</mainClass></manifest></archive></configuration></plugin>
②. 新增文件复制插件
<!-- 复制项目依赖的JAR包到指定的lib目录--><plugin><groupId>org.apache.maven.plugins</groupId><artifactId>maven-dependency-plugin</artifactId><executions><execution><id>copy-lib</id><phase>package</phase><goals><goal>copy-dependencies</goal></goals><configuration><!-- 将外部依赖的JAR包复制到target/lib路径下 --><outputDirectory>target/lib</outputDirectory><excludeTransitive>false</excludeTransitive><stripVersion>false</stripVersion><includeScope>runtime</includeScope></configuration></execution></executions></plugin>
③. 按常规方式打包
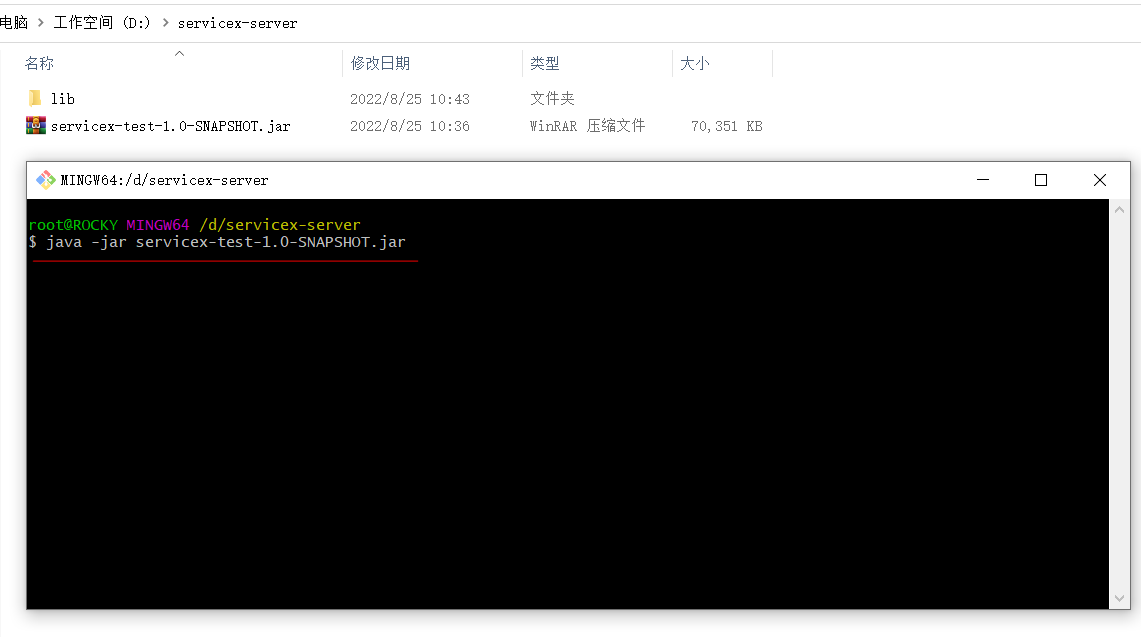
④. 将项目JAR和lib目录复制到项目的部署路径下,执行启动命令
常见问题
①. servicex-test-1.0-SNAPSHOT.jar 中没有主清单属性
由于在打包插件中没有指定项目主启动类导致。
maven-dependency-plugin插件的使用
一、goal
maven-dependency-plugin插件最常用的goal有:copy、copy-dependencies、unpack、unpack-dependencies
copy:拷贝指定jar包到指定目录,与当前工程的依赖没有关系
copy-dependencies:拷贝依赖jar包到指定目录
unpack:解压指定jar包到指定目录,与当前工程的依赖没有关系
unpack-dependencies:解压依赖jar包到指定目录
二、copy
copy可以的配置的项比较多
是必须配置的,指定jar包
默认值${project.build.directory}/dependency
1.pom文件
<?xml version="1.0" encoding="UTF-8"?><project xmlns="http://maven.apache.org/POM/4.0.0"xmlns:xsi="http://www.w3.org/2001/XMLSchema-instance"xsi:schemaLocation="http://maven.apache.org/POM/4.0.0 http://maven.apache.org/xsd/maven-4.0.0.xsd"><modelVersion>4.0.0</modelVersion><groupId>org.example</groupId><artifactId>maven-haha</artifactId><version>1.0-SNAPSHOT</version><build><plugins><plugin><groupId>org.apache.maven.plugins</groupId><artifactId>maven-dependency-plugin</artifactId><version>2.8</version><configuration><artifactItems><artifactItem><groupId>junit</groupId><artifactId>junit</artifactId><version>4.11</version></artifactItem></artifactItems></configuration></plugin></plugins></build></project>
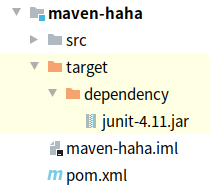
2.使用dependency:copy
mvn clean dependency:copy

结果:
三、copy-dependencies
1.pom文件
<?xml version="1.0" encoding="UTF-8"?><project xmlns="http://maven.apache.org/POM/4.0.0"xmlns:xsi="http://www.w3.org/2001/XMLSchema-instance"xsi:schemaLocation="http://maven.apache.org/POM/4.0.0 http://maven.apache.org/xsd/maven-4.0.0.xsd"><modelVersion>4.0.0</modelVersion><groupId>org.example</groupId><artifactId>maven-haha</artifactId><version>1.0-SNAPSHOT</version><dependencies><dependency><groupId>junit</groupId><artifactId>junit</artifactId><version>4.13</version><scope>test</scope></dependency></dependencies><build><plugins><plugin><groupId>org.apache.maven.plugins</groupId><artifactId>maven-dependency-plugin</artifactId><version>2.8</version></plugin></plugins></build></project>
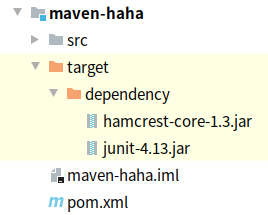
2.使用dependency:copy-dependencies
mvn clean dependency:copy-dependencies
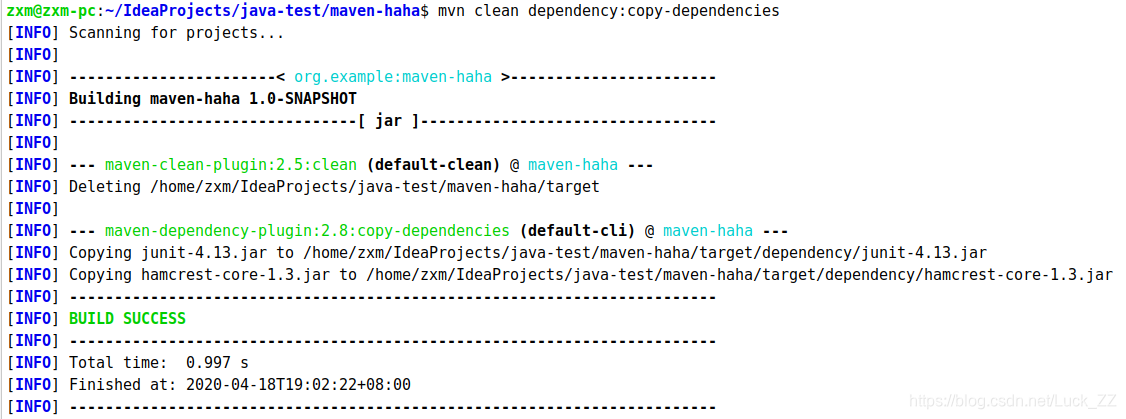
结果:
四、unpack、unpack-dependencies
unpack、unpack-dependencies是解压到指定目录,与copy、copy-dependencies操作类似
spring-boot-maven-plugin 打包分离依赖lib
1. 问题: spring-boot项目,默认生成的pom使用spring-boot-maven-plugin打包,会把所有依赖项都打进jar文件中,在调试阶段需要频繁传输jar包时很痛苦。
先看spring-boot-maven-plugin官文 [https://docs.spring.io/spring-boot/docs/current/maven-plugin/reference/htmlsingle ],其中有一节
5.3.5. Dependency Exclusion
By default, both the
repackageand therungoals will include anyprovideddependencies that are defined in the project. A Spring Boot project should considerprovideddependencies as “container” dependencies that are required to run the application.Some of these dependencies may not be required at all and should be excluded from the executable jar. For consistency, they should not be present either when running the application.
There are two ways one can exclude a dependency from being packaged/used at runtime:
- Exclude a specific artifact identified by
groupIdandartifactId, optionally with aclassifierif needed.- Exclude any artifact belonging to a given
groupId.
简译: spring-boot-maven-plugin默认会把依赖都打进jar包中,如果要使用exclude排除某项/某些依赖有两种方式:1.指定groupId和artifactId, 2.指定排除groupId下的所有项。这证实了spring-boot-maven-plugin的确会把依赖和程序打在一起。但是如果要用exclude排除所有依赖项的话显然不太容易,枚举所所有groupId的工作量就不小,而且笨重,所以排除。
Collection of artifact definitions to include. The
Includeelement defines mandatorygroupIdandartifactIdproperties and an optional mandatorygroupIdandartifactIdproperties and an optionalclassifierproperty.要包含的集合。其中的Include属性定义了groupId和artifactId属性…
这里有点不清晰:includes是要包含没错,但它与“默认值”之间是什么关系?spring-boot-maven-plugin插件默认在打包的时候是将所有依赖一并打包到最终文件的(jar或war),那么如果定义了includes,是只采用includes还是所有依赖+includes还是怎样?
经过实验,含义应该是“以includes定义覆盖默认值”,即显式包含了哪些就只有哪些。如此,就可以利用这个属性实现分离依赖的效果:
<!-- 原有自动生成的pom -->...<plugin><groupId>org.springframework.boot</groupId><artifactId>spring-boot-maven-plugin</artifactId><version>2.4.2</version></plugin>...<!-- 改成 -->...<plugin><groupId>org.springframework.boot</groupId><artifactId>spring-boot-maven-plugin</artifactId><version>2.4.2</version><configuration><includes><!-- 这里只包含一个不存在的项nothing,即代表什么都不包含,当然名字可以随便写 --><include><groupId>nothing</groupId><artifactId>nothing</artifactId></include></includes></configuration></plugin>...
然后再使用maven-dependency-plugin插件把依赖项拷贝到lib文件夹中,最后的pom文件build标签如下:
<build><plugins><plugin><groupId>org.apache.maven.plugins</groupId><artifactId>maven-compiler-plugin</artifactId><configuration><source>1.8</source><target>1.8</target></configuration></plugin><plugin><groupId>org.springframework.boot</groupId><artifactId>spring-boot-maven-plugin</artifactId><version>2.4.2</version><configuration><includes><include><groupId>haha</groupId><artifactId>haha</artifactId></include></includes></configuration></plugin><!--拷贝依赖到lib目录--><plugin><groupId>org.apache.maven.plugins</groupId><artifactId>maven-dependency-plugin</artifactId><executions><execution><id>copy-lib</id><phase>package</phase><goals><goal>copy-dependencies</goal></goals><configuration><outputDirectory>target/lib</outputDirectory><excludeTransitive>false</excludeTransitive><stripVersion>false</stripVersion><includeScope>compile</includeScope></configuration></execution></executions></plugin></plugins></build>
使用maven窗口的package指令打包,target结果如下:

使用java.ext.dirs指定lib路径启动,(我这里使用-Dloader.path没有加载成功)
java -jar -Djava.ext.dirs=lib xxx-0.0.1-SNAPSHOT.jar
注:这里使用java.ext.dirs有一个问题:可能有些java内在的库调用会失败,比如我这里调用到了jce.jar>javax>crypto>Mac>getInstance会失败。参考链接https://blog.csdn.net/w47\_csdn/article/details/80254459 中的一段话:
首先介绍下java.ext.dirs参数的使用和环境变量:java中系统属性java.ext.dirs指定的目录由ExtClassLoader加载器加载,如果您的程序没有指定该系统属性(-Djava.ext.dirs=sss/lib)那么该加载器默认加载 J A V A H O M E / l i b / e x t 目录下的所有 j a r 文件。但如果你手动指定系统属性且忘了把 JAVA_HOME/lib/ext目录下的所有jar文件。但如果你手动指定系统属性且忘了把 JAVAHOME/lib/ext目录下的所有jar文件。但如果你手动指定系统属性且忘了把JAVA_HOME/lib/ext路径给加上,那么ExtClassLoader不会去加载$JAVA_HOME/lib/ext下面的jar文件,这意味着你将失去一些功能,例如java自带的加解密算法实现。
修改上述java指令,加上系统默认的ext路径$JAVA_HOME/jre/lib/ext:
java -jar -Djava.ext.dirs=lib:$JAVA_HOME/jre/lib/ext xxx-0.0.1-SNAPSHOT.jar注意冒号做分隔符是linux,可能不同系统不一样
至此,依赖项在不变动的情况下不用重复传输,修改代码重新编译后只需要传输较小的jar包即可。


...")


还没有评论,来说两句吧...