Java实现微信授权 获取用户OpenID(简单易实现)
接上篇,我们从微信开发文档获取openid后,感觉这种方式有点麻烦,今天给大家推荐更好的一种方法,GitHub - Wechat-Group/WxJava: 微信开发 Java SDK ,支持包括微信支付,开放平台,小程序,企业微信,公众号等的后端开发
一、首先加入依赖,我们这里添加公众号的依赖
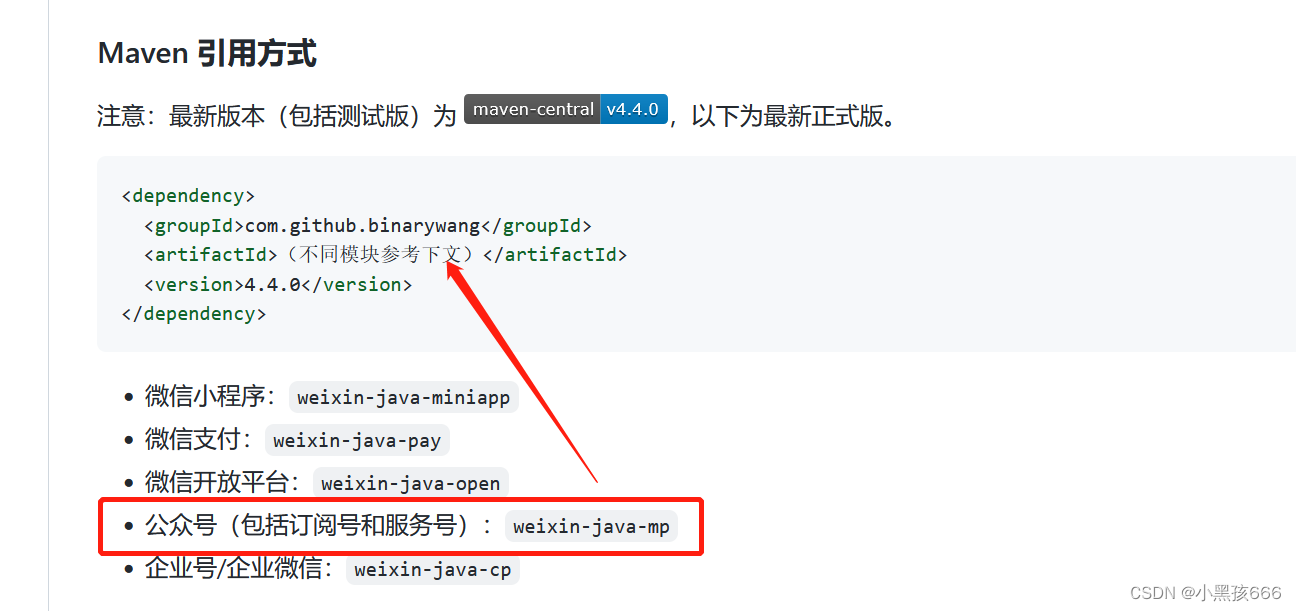
二、打开说明文档,MP_OAuth2网页授权 · Wechat-Group/WxJava Wiki · GitHub
下面这四个步骤和我们之前在微信开发文档中的步骤基本上差不多,话不多说,开始实操吧!
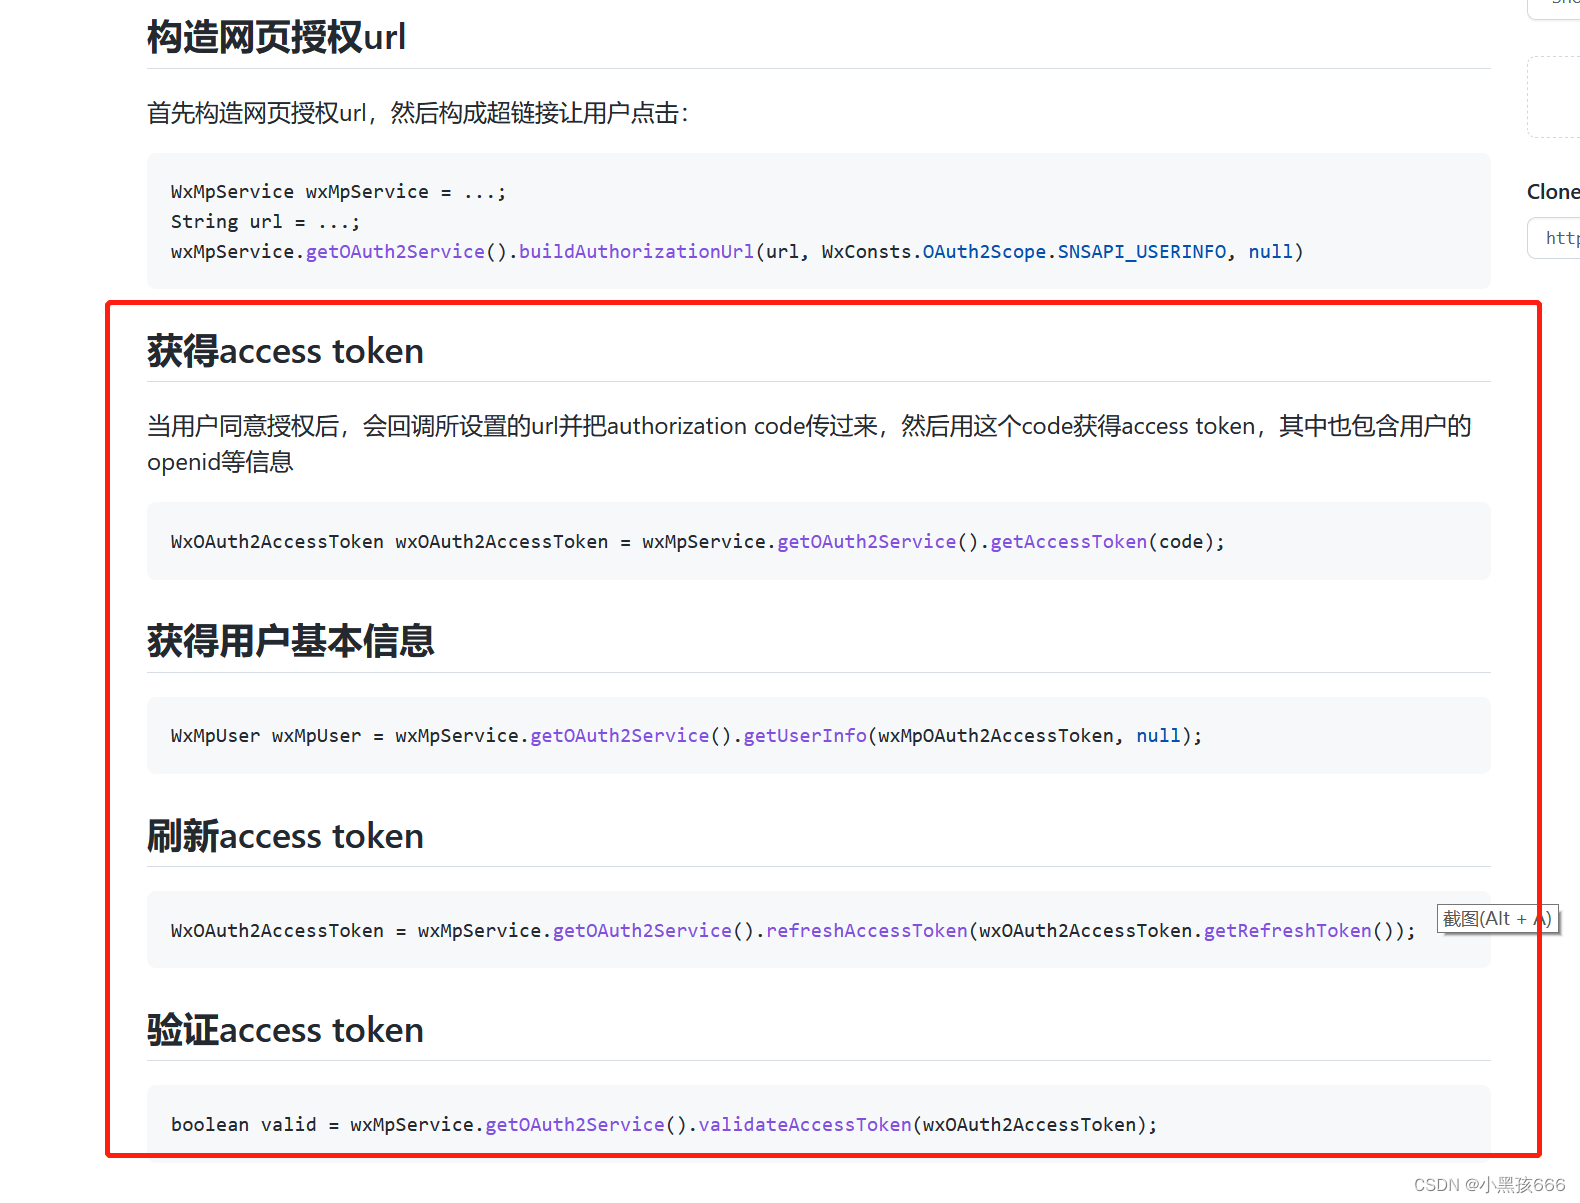
三、首先构造网页授权url,然后构成超链接让用户点击
@Data@Component@ConfigurationProperties(prefix = "wechat")public class WechatAccountConfig {private String mpAppId;private String mpAppSecret;}@Configurationpublic class WeChatMpConfig {@Autowiredprivate WechatAccountConfig accountConfig;@Beanpublic WxMpService wxMpService() {WxMpService wxMpService = new WxMpServiceImpl();wxMpService.setWxMpConfigStorage(wxMpConfigStorage());return wxMpService;}@Beanpublic WxMpConfigStorage wxMpConfigStorage() {WxMpInMemoryConfigStorage wxMpConfigStorage = new WxMpInMemoryConfigStorage();wxMpConfigStorage.setAppId(accountConfig.getMpAppId());wxMpConfigStorage.setSecret(accountConfig.getMpAppSecret());return wxMpConfigStorage;}}
编写我们的控制类,用来获取openId的类
@Controller@RequestMapping("/wechat")@Slf4jpublic class WeChatController {@Autowiredprivate WxMpService wxMpService;@GetMapping("/authorize")public String authorize(@RequestParam("returnUrl") String returnUrl){String url="http://xiaoheihai.natapp1.cc/sell/wechat/userInfo";// 配置// 调用方法String result=wxMpService.oauth2buildAuthorizationUrl(url, WxConsts.OAUTH2_SCOPE_USER_INFO, URLEncoder.encode(returnUrl));log.info("微信网页授权,获取code,result={}",result);return "redirect:"+result;}@GetMapping("/userInfo")public String userInfo(@RequestParam("code") String code,@RequestParam("state") String url) {WxMpOAuth2AccessToken wxMpOAuth2AccessToken=new WxMpOAuth2AccessToken();try {wxMpOAuth2AccessToken = wxMpService.oauth2getAccessToken(code);} catch (WxErrorException e) {log.error("微信网页授权,{}",e);throw new SellException(ResultEnum.WX_MP_ERROR.getCode(),e.getError().getErrorMsg());}String openId = wxMpOAuth2AccessToken.getOpenId();log.info("openId={}",openId);return "redirect:"+url+"?openid="+openId;}}
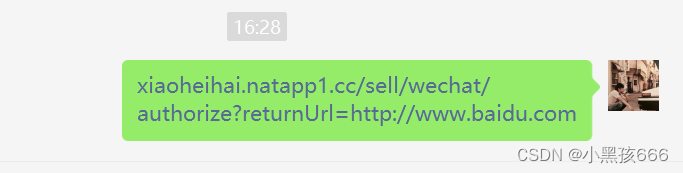
上面代码的url地址可以换成自己的域名,接下来开始测试吧,我们随便访问一个地址,例如: xiaoheihai.natapp1.cc/sell/wechat/authorize?returnUrl=http://www.baidu.com,后面的http://www.baidu.com可以自定义,测试要在微信测试哦
点击后会跳转到百度首页,此时看idea控制台输出以下内容

此时我们就拿到了OpenId,为了验证我们还可以复制此时的百度首页链接
https://www.baidu.com/?openid=oLiOO54bZfDYSSC87zwn7oml9h88
会看到链接地址中也包含了OpenId


-hdfs安装及其一些操作")
-zookeeper的安装和命令行,java操作")
-mapreduce快速入门加yarn的安装")
-scala环境配置及简单使用")
-HBASE的安装和命令行操作和java操作")
-RDD的介绍和常用算子")


还没有评论,来说两句吧...