Centos 7 双网卡绑定,主备工作状态
介绍:
系统版本:[root@localhost ~]# cat /etc/redhat-releaseCentOS Linux release 7.6.1810 (Core)网卡eth0初始配置:[root@localhost ~]# cat /etc/sysconfig/network-scripts/ifcfg-eth0TYPE=EthernetBOOTPROTO=staticNAME=eth0DEVICE=eth0ONBOOT=yesIPADDR=192.168.14.211PREFIX=24GATEWAY=192.168.14.254DNS1=10.1.2.30DNS2=114.114.114.114网卡eth1初始配置:[root@localhost ~]# vi /etc/sysconfig/network-scripts/ifcfg-eth1TYPE=EthernetBOOTPROTO=staticNAME=eth1DEVICE=eth1ONBOOT=yesIPADDR=192.168.14.215PREFIX=24GATEWAY=192.168.14.254DNS1=10.1.2.30DNS2=114.114.114.114
一、配置双网卡主备
1、关闭 NetworkManager服务
[root@localhost ~]# systemctl stop NetworkManager[root@localhost ~]# systemctl disable NetworkManager
2、添加bond0
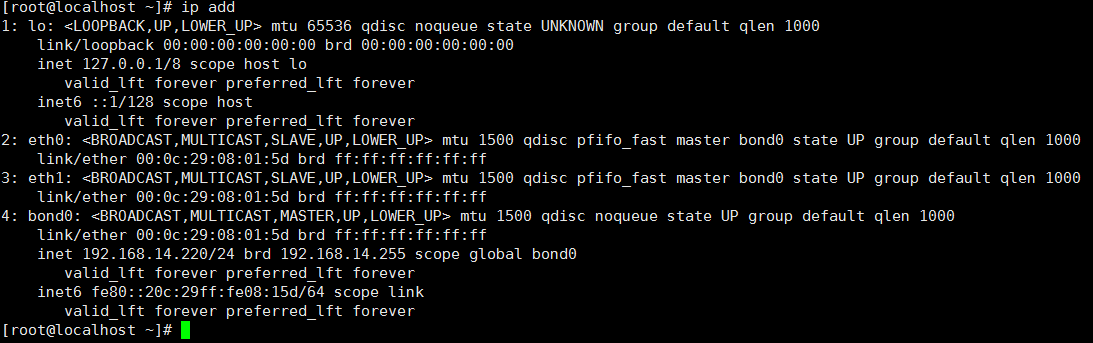
[root@localhost ~]# vi /etc/sysconfig/network-scripts/ifcfg-bond0TYPE=BondDEVICE=bond0IPADDR=192.168.14.220PREFIX=24BONDING_OPTS=mode=active-backupNAME=bond0ONBOOT=yes
3、修改eth0
[root@localhost ~]# cat /etc/sysconfig/network-scripts/ifcfg-eth0TYPE=EthernetBOOTPROTO=staticNAME=eth0DEVICE=eth0ONBOOT=yesIPADDR=192.168.14.211PREFIX=24GATEWAY=192.168.14.254DNS1=10.1.2.30DNS2=114.114.114.114MASTER=bond0 #新增SLAVE=yes #新增
4、修改eth1
[root@localhost ~]# vi /etc/sysconfig/network-scripts/ifcfg-eth1TYPE=EthernetBOOTPROTO=staticNAME=eth1DEVICE=eth1ONBOOT=yesIPADDR=192.168.14.215PREFIX=24GATEWAY=192.168.14.254DNS1=10.1.2.30DNS2=114.114.114.114MASTER=bond0 #新增SLAVE=yes #新增
5、重启网卡
[root@localhost ~]# systemctl restart network
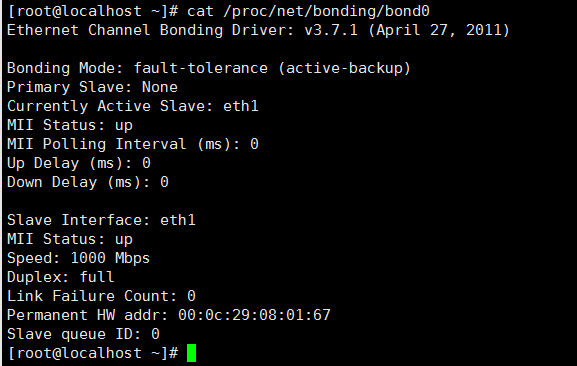
6、查看状态
[root@localhost ~]# cat /proc/net/bonding/bond0Ethernet Channel Bonding Driver: v3.7.1 (April 27, 2011)Bonding Mode: fault-tolerance (active-backup)Primary Slave: NoneCurrently Active Slave: eth0MII Status: upMII Polling Interval (ms): 0Up Delay (ms): 0Down Delay (ms): 0Slave Interface: eth0MII Status: upSpeed: 1000 MbpsDuplex: fullLink Failure Count: 0Permanent HW addr: 00:0c:29:08:01:5dSlave queue ID: 0Slave Interface: eth1MII Status: upSpeed: 1000 MbpsDuplex: fullLink Failure Count: 0Permanent HW addr: 00:0c:29:08:01:67Slave queue ID: 0
7、添加临时默认路由(永久路由自行添加配置文件)
[root@localhost ~]# route add -net 0.0.0.0/0 gw 192.168.14.254 dev bond0
二、模拟生产环境网卡故障
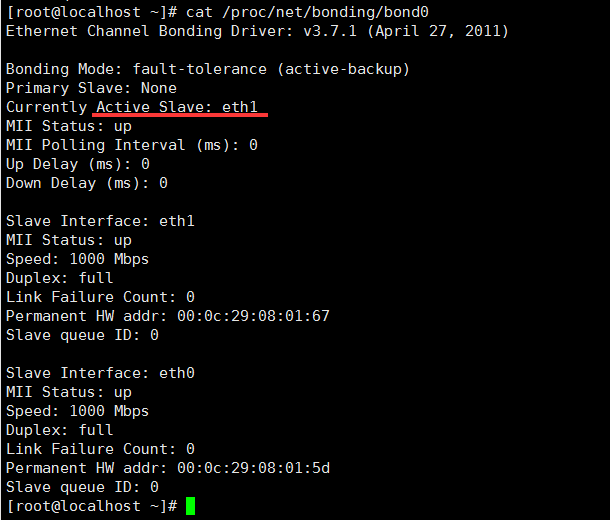
1、关闭eth0主网卡模拟故障,eth1从备转为主
[root@localhost ~]# ifdown eth0
2、故障网卡eth0恢复之后并不会抢占eth1,从而避免网络波动
[root@localhost ~]# ifup eth0


—— 图和会话")
—— 保存和恢复")
—— 开始Python之旅")
—— 变量和数据类型")


还没有评论,来说两句吧...