Android Activity详解
一、Activity概述
Activity,实现程序的交互。
Activity,代表手机或平板中的一屏。
Activity的4种状态:
Activity的生命周期:
更正:OnRestart应该接到Onstart方法。
二、创建、启动和关闭Activity
1、创建Activity
- 创建继承自Activity的Activity
- 重写需要的回调方法
设置要显示的视图
//extends Activity,即步骤一
public class DetailActivity extends Activity {//onCreate(),即步骤二@Overrideprotected void onCreate(Bundle savedInstanceState) {super.onCreate(savedInstanceState);//setContentView,即步骤三setContentView(R.layout.activity_main);}
}
创建了Activity后需要配置才能使用。即要在Manifests中添加此acitivity
<activity android:name=".DetailActivity" > </activity>//在配置name属性时,如果配置的Activity与上面的包路径一样,直接.类名//如果是在上面包的子包中,则.子包序列加上类名
android提供的创建Activity的向导,步骤简单
要在某个包中创建Acitivity,则单击鼠标右键,选择“New”→“Activity”→“Empty Activity”→”Finish”,则完成了Activity的创建,并自动创建了布局文件,并进行了配置。
2、启动和关闭Activity
当创建和配置一个Activity后,它不会自动显示在屏幕上,需要我们启动它。
要启动Activity,分成两种情况:
- 入口Activity
- 其他Activity
① 入口Activity
要在AndroidManifest.xml中进行配置。
<activity android:name=".MainActivity"><!--通过下面4句代码,可把该Acitivity配置成程序的入口--><!--下面4句代码,是用来配置intent过滤器的。--><intent-filter><!--action标记:指定响应的动作名,这条代码把一个activity指定为程序的主体动向--><action android:name="android.intent.action.MAIN" /><!--category标记:指定在什么环境下,动作会响应。这条代码可把某个Activity作为应用程序的启动项--><category android:name="android.intent.category.LAUNCHER" /></intent-filter></activity>
Activity需要通过Intent来表达自己的意图。
② 其他Activity
需要startActivity()方法来启动
例子:
//单击按钮后,启动另一个Activitybutton.setOnClickListener(new View.OnClickListener() {@Overridepublic void onClick(View view) {//此处不能使用this,因为此处使用了匿名内部类,若用this就会指向匿名内部类对象了。Intent intent=new Intent(MainActivity.this,DetailActivity.class);startActivity(intent);}});
关闭Activity
使用finish()方法。
如果通过finish方法关闭的不是主活动,则执行关闭后就会回到调用它的Activity中,否则回到主界面中。
刷新当前的Activity
调用下列代码
onCreate(null);
三、启动和关闭Activity实例——模拟喜马拉雅忘记密码页面跳转功能。
Intent intent =new Intent(MainActivity.this,另一个活动的名.class);
效果如下:
点击忘记密码,跳转至图二;点击×,跳转至图一


activity_main.xml文件
<?xml version="1.0" encoding="utf-8"?><TableLayout xmlns:android="http://schemas.android.com/apk/res/android"xmlns:tools="http://schemas.android.com/tools"android:layout_width="match_parent"android:layout_height="match_parent"android:paddingBottom="@dimen/activity_vertical_margin"android:paddingLeft="@dimen/activity_horizontal_margin"android:paddingRight="@dimen/activity_horizontal_margin"android:paddingTop="@dimen/activity_vertical_margin"tools:context="com.mingrisoft.forgetpassword.MainActivity"><TextViewandroid:layout_width="match_parent"android:layout_height="wrap_content"android:layout_marginBottom="40dp"android:gravity="center_horizontal"android:textSize="25sp"android:text="登录" /><ImageViewandroid:layout_width="wrap_content"android:layout_height="wrap_content"android:src="@drawable/q2"/><TableRowandroid:layout_width="match_parent"android:layout_height="match_parent"android:layout_marginTop="25dp"><TextViewandroid:layout_width="wrap_content"android:layout_height="wrap_content"android:layout_gravity="top"android:layout_marginLeft="10dp"android:textSize="20sp"android:text="账号"/><EditTextandroid:layout_width="wrap_content"android:layout_height="wrap_content"android:layout_marginLeft="10dp"android:hint="邮箱或手机号"/></TableRow><TableRowandroid:layout_width="match_parent"android:layout_height="match_parent"android:layout_marginTop="25dp"><TextViewandroid:layout_width="wrap_content"android:layout_height="wrap_content"android:layout_gravity="top"android:layout_marginLeft="10dp"android:textSize="20sp"android:text="密码"/><EditTextandroid:layout_width="wrap_content"android:layout_height="wrap_content"android:layout_marginLeft="10dp"android:hint="输入6~16位数字或字母"/></TableRow><TableRowandroid:layout_width="match_parent"android:layout_height="match_parent"android:layout_marginTop="25dp"><Buttonandroid:layout_width="match_parent"android:layout_height="match_parent"android:layout_marginLeft="10dp"android:text="注册"/><Buttonandroid:layout_width="match_parent"android:layout_height="match_parent"android:layout_marginLeft="10dp"android:text="登录"android:background="#f4b144"/></TableRow><TextViewandroid:text="忘记密码?"android:gravity="right"android:layout_margin="10dp"android:id="@+id/forget"/></TableLayout>
MainActivity.java文件
package com.mingrisoft.forgetpassword;import android.content.Intent;import android.support.v7.app.ActionBarActivity;import android.os.Bundle;import android.view.View;import android.widget.TextView;public class MainActivity extends ActionBarActivity {@Overrideprotected void onCreate(Bundle savedInstanceState) {super.onCreate(savedInstanceState);//使该布局文件就会跟这个activity绑定在一起setContentView(R.layout.activity_main);TextView textView= (TextView) findViewById(R.id.forget);//设置文本框单击事件监听器textView.setOnClickListener(new View.OnClickListener() {@Overridepublic void onClick(View view) {//Intent表意图Intent intent=new Intent(MainActivity.this,PassWord.class);//启动另一个ActivitystartActivity(intent);}});}}
activity_password.xml文件
<?xml version="1.0" encoding="utf-8"?><TableLayout xmlns:android="http://schemas.android.com/apk/res/android"android:layout_width="match_parent"android:layout_height="match_parent"android:paddingTop="10dp"><TableRow><ImageButtonandroid:id="@+id/close"android:layout_width="15dp"android:layout_height="15dp"android:scaleType="centerCrop"android:layout_marginLeft="20dp"android:layout_marginRight="120dp"android:src="@drawable/close2"android:background="#0000" /><TextViewandroid:layout_width="wrap_content"android:layout_height="match_parent"android:layout_gravity="center_horizontal"android:text="找回密码"android:textColor="#161615"android:textSize="15sp"/></TableRow><TextViewandroid:layout_margin="20dp"android:layout_width="wrap_content"android:layout_height="wrap_content"android:text="你的邮箱或手机号"/><EditTextandroid:layout_margin="20dp"android:layout_width="wrap_content"android:layout_height="wrap_content"android:hint="请输入邮箱或手机号"/><Buttonandroid:layout_margin="20dp"android:layout_width="wrap_content"android:layout_height="wrap_content"android:text="提交"android:background="#ec9640"/></TableLayout>
PassWord.java文件
package com.mingrisoft.forgetpassword;import android.app.Activity;import android.content.Intent;import android.os.Bundle;import android.view.View;import android.widget.ImageButton;/** * Created by Asus on 2020/2/13. */public class PassWord extends Activity{@Overrideprotected void onCreate(Bundle savedInstanceState) {super.onCreate(savedInstanceState);setContentView(R.layout.activity_password);ImageButton imageButton= (ImageButton) findViewById(R.id.close);imageButton.setOnClickListener(new View.OnClickListener() {@Overridepublic void onClick(View view) {//返回上一界面finish();}});}}
不要忘了manifests哦!
<?xml version="1.0" encoding="utf-8"?><manifest xmlns:android="http://schemas.android.com/apk/res/android"package="com.mingrisoft.forgetpassword"><applicationandroid:allowBackup="true"android:icon="@mipmap/ic_launcher"android:label="@string/app_name"android:supportsRtl="true"android:theme="@style/AppTheme"><activity android:name=".MainActivity"><intent-filter><action android:name="android.intent.action.MAIN" /><category android:name="android.intent.category.LAUNCHER" /></intent-filter></activity><activity android:name=".PassWord"></activity></application></manifest>
四、使用Bundle在Activity之间交换数据
什么是Bundle?
Bundle可以理解为键值对的组合,读取时通过key找到value值。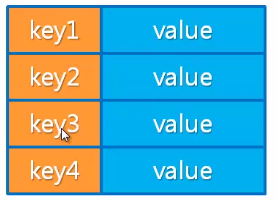
在Android中,我们把数据存放在Bundle当中,把要携带的数据保存到Intent中,再启动Activity。流程图如下:
实例:模拟淘宝的填写并显示收获地址的功能。
效果如下:

activity_main.xml文件
<?xml version="1.0" encoding="utf-8"?><LinearLayout xmlns:android="http://schemas.android.com/apk/res/android"xmlns:tools="http://schemas.android.com/tools"android:layout_width="match_parent"android:layout_height="match_parent"android:orientation="vertical"android:paddingBottom="@dimen/activity_vertical_margin"android:paddingLeft="@dimen/activity_horizontal_margin"android:paddingRight="@dimen/activity_horizontal_margin"android:paddingTop="@dimen/activity_vertical_margin"android:layout_margin="10dp"tools:context="com.mingrisoft.taobaoadress.MainActivity"><TextViewandroid:layout_width="wrap_content"android:layout_height="wrap_content"android:layout_gravity="center_horizontal"android:textSize="20sp"android:text="收货地址管理" /><EditTextandroid:id="@+id/et_site1"android:layout_width="match_parent"android:layout_height="0dp"android:hint="请输入所在地区"android:layout_weight="1" /><EditTextandroid:id="@+id/et_site2"android:layout_width="match_parent"android:layout_height="0dp"android:hint="请输入街道"android:layout_weight="1" /><EditTextandroid:id="@+id/et_site3"android:layout_width="match_parent"android:layout_height="0dp"android:hint="请输入详细地址"android:layout_weight="1" /><EditTextandroid:id="@+id/et_site4"android:layout_width="match_parent"android:layout_height="0dp"android:hint="请输入收件人姓名"android:layout_weight="1" /><EditTextandroid:id="@+id/et_site5"android:layout_width="match_parent"android:layout_height="0dp"android:hint="请输入收件人联系电话"android:layout_weight="1" /><EditTextandroid:id="@+id/et_site6"android:layout_width="match_parent"android:layout_height="0dp"android:hint="请输入邮箱"android:layout_weight="1" /><Buttonandroid:id="@+id/button"android:layout_width="wrap_content"android:layout_height="0dp"android:layout_gravity="right"android:layout_marginTop="30dp"android:text="保存"android:background="#f1a945"android:layout_weight="1" /></LinearLayout>
MainActivity.java文件
package com.mingrisoft.taobaoadress;import android.content.Intent;import android.support.v7.app.ActionBarActivity;import android.os.Bundle;import android.view.View;import android.widget.Button;import android.widget.EditText;import android.widget.Toast;public class MainActivity extends ActionBarActivity {@Overrideprotected void onCreate(Bundle savedInstanceState) {super.onCreate(savedInstanceState);setContentView(R.layout.activity_main);//获取保存按钮Button button= (Button) findViewById(R.id.button);//设置单击事件监听器button.setOnClickListener(new View.OnClickListener() {@Overridepublic void onClick(View view) {//获取数据String site1=((EditText)findViewById(R.id.et_site1)).getText().toString();String site2=((EditText)findViewById(R.id.et_site2)).getText().toString();String site3=((EditText)findViewById(R.id.et_site3)).getText().toString();String name=((EditText)findViewById(R.id.et_site4)).getText().toString();String phone=((EditText)findViewById(R.id.et_site5)).getText().toString();String email=((EditText)findViewById(R.id.et_site6)).getText().toString();//判断信息是否填完整if(!"".equals(site1)&&!"".equals(phone)&&!"".equals(site3)&&!"".equals(name)&&!"".equals(phone)&&!"".equals(email)){//若完整,创建一个Intent对象Intent intent=new Intent(MainActivity.this,ShowAdress.class);//创建一个Bundle对象,将数据放入Bundle中Bundle bundle=new Bundle();bundle.putCharSequence("name",name);bundle.putCharSequence("phone",phone);bundle.putCharSequence("site1",site1);bundle.putCharSequence("site2",site2);bundle.putCharSequence("site3",site3);//将Bundle给intentintent.putExtras(bundle);//启动另一个活动。startActivity(intent);}else {Toast.makeText(MainActivity.this, "请将收货地址填写完整", Toast.LENGTH_SHORT).show();}}});}}
ShowAdress.xml文件
package com.mingrisoft.taobaoadress;import android.content.Intent;import android.support.v7.app.ActionBarActivity;import android.os.Bundle;import android.widget.TextView;public class ShowAdress extends ActionBarActivity {@Overrideprotected void onCreate(Bundle savedInstanceState) {super.onCreate(savedInstanceState);setContentView(R.layout.activity_show_adress);//获取IntentIntent intent=getIntent();//通过Intent获取BundleBundle bundle=intent.getExtras();//提取Bundle中的数据String name=bundle.getString("name");String phone=bundle.getString("phone");String site=bundle.getString("site1")+bundle.getString("site2")+bundle.getString("site3");//获取xml中的文本框TextView tv_name= (TextView) findViewById(R.id.name);TextView tv_phone= (TextView) findViewById(R.id.phone);TextView tv_site= (TextView) findViewById(R.id.site);//将数据放入文本框中tv_name.setText(name);tv_phone.setText(phone);tv_site.setText(site);}}
activity_showadress.xml文件
<?xml version="1.0" encoding="utf-8"?><RelativeLayout xmlns:android="http://schemas.android.com/apk/res/android"xmlns:tools="http://schemas.android.com/tools"android:layout_width="match_parent"android:layout_height="match_parent"android:paddingBottom="@dimen/activity_vertical_margin"android:paddingLeft="@dimen/activity_horizontal_margin"android:paddingRight="@dimen/activity_horizontal_margin"android:paddingTop="@dimen/activity_vertical_margin"android:layout_margin="10dp"tools:context="com.mingrisoft.taobaoadress.ShowAdress"><TextViewandroid:id="@+id/top"android:layout_width="wrap_content"android:layout_height="wrap_content"android:layout_gravity="center_horizontal"android:textSize="20sp"android:text="收货地址管理" /><TextViewandroid:layout_width="wrap_content"android:layout_height="wrap_content"android:id="@+id/name"android:layout_below="@+id/top"/><TextViewandroid:layout_width="wrap_content"android:layout_height="wrap_content"android:layout_alignParentRight="true"android:id="@+id/phone"android:layout_below="@+id/top"/><TextViewandroid:layout_width="wrap_content"android:layout_height="wrap_content"android:id="@+id/site"android:layout_below="@id/name"/></RelativeLayout>
别忘了manifests哦!
五、调用另一个Activity并返回结果
使用startActivityForResult()方法,启动另一个Activity,在另一个Activity中选择一些内容之后,关闭新启动的Activit时,将选择结果返回到原来的Activity中。
方法的基本格式:
public void startActivityForResult(Intent intent,int requestCode)//intent用来指定想启动的Activity,第二个参数为指定请求码,标识请求的来源。如0x007。
实例:模拟喜马拉雅FM选择头像功能。
android:horizontalSpacing:用于控制字体之间的水平间距。
效果如下:


activity_main.xml文件
<?xml version="1.0" encoding="utf-8"?><LinearLayout xmlns:android="http://schemas.android.com/apk/res/android"xmlns:tools="http://schemas.android.com/tools"android:layout_width="match_parent"android:layout_height="match_parent"android:orientation="vertical"android:paddingBottom="@dimen/activity_vertical_margin"android:paddingLeft="@dimen/activity_horizontal_margin"android:paddingRight="@dimen/activity_horizontal_margin"android:paddingTop="@dimen/activity_vertical_margin"android:background="@drawable/timg"tools:context="com.mingrisoft.changetou.MainActivity"><ImageViewandroid:id="@+id/imageView"android:layout_width="80dp"android:layout_height="80dp"android:layout_gravity="center_horizontal"android:src="@drawable/t1" /><Buttonandroid:id="@+id/btn"android:layout_width="wrap_content"android:layout_height="40dp"android:layout_gravity="center_horizontal"android:text="选择头像"/></LinearLayout>
MainActivity.java文件
package com.mingrisoft.changetou;import android.content.Intent;import android.support.v7.app.ActionBarActivity;import android.os.Bundle;import android.view.View;import android.widget.Button;import android.widget.ImageView;public class MainActivity extends ActionBarActivity {@Override//活动返回protected void onActivityResult(int requestCode, int resultCode, Intent data) {super.onActivityResult(requestCode, resultCode, data);if(requestCode==0x11&&resultCode==0x11) //如果返回{//获取BundleBundle bundle=data.getExtras();//获取此时头像int imageId=bundle.getInt("imageId");//获取xml中的ImageViewImageView imageView= (ImageView) findViewById(R.id.imageView);//将数据放入ImageView框中imageView.setImageResource(imageId);}}@Overrideprotected void onCreate(Bundle savedInstanceState) {super.onCreate(savedInstanceState);setContentView(R.layout.activity_main);Button button= (Button) findViewById(R.id.btn);button.setOnClickListener(new View.OnClickListener() {@Overridepublic void onClick(View view) {Intent intent=new Intent(MainActivity.this,Choose.class);//请求码为0x11startActivityForResult(intent,0x11);}});}}
activity_choose.xml文件
<?xml version="1.0" encoding="utf-8"?><RelativeLayout xmlns:android="http://schemas.android.com/apk/res/android"xmlns:tools="http://schemas.android.com/tools"android:layout_width="match_parent"android:layout_height="match_parent"android:paddingBottom="@dimen/activity_vertical_margin"android:paddingLeft="@dimen/activity_horizontal_margin"android:paddingRight="@dimen/activity_horizontal_margin"android:paddingTop="@dimen/activity_vertical_margin"tools:context="com.mingrisoft.changetou.choose"><!-- 网格布局管理器 --><GridViewandroid:layout_width="match_parent"android:layout_height="match_parent"android:id="@+id/gridView"android:layout_marginTop="10dp"android:horizontalSpacing="3dp"android:numColumns="4"></GridView></RelativeLayout>
Choose.java文件
package com.mingrisoft.changetou;import android.content.Intent;import android.support.v7.app.ActionBarActivity;import android.os.Bundle;import android.view.View;import android.view.ViewGroup;import android.widget.AdapterView;import android.widget.BaseAdapter;import android.widget.GridView;import android.widget.ImageView;public class Choose extends ActionBarActivity {public int imageId[]=new int[]{R.drawable.t2,R.drawable.t3,R.drawable.t4,R.drawable.t5};@Overrideprotected void onCreate(Bundle savedInstanceState) {super.onCreate(savedInstanceState);setContentView(R.layout.activity_choose);//获取网格布局管理器GridView gridView= (GridView) findViewById(R.id.gridView);//设置适配器BaseAdapter adapter=new BaseAdapter() {@Overridepublic int getCount() {return imageId.length;}@Overridepublic Object getItem(int i) {return i;}@Overridepublic long getItemId(int i) {return i;}@Overridepublic View getView(int position, View view, ViewGroup viewGroup) {ImageView imageView;//如果没有选择if(view==null){imageView=new ImageView(Choose.this);imageView.setAdjustViewBounds(true);imageView.setMaxWidth(158);imageView.setMaxHeight(150);imageView.setPadding(5,5,5,5);}else{imageView=(ImageView)view;}//改变图片imageView.setImageResource(imageId[position]);return imageView;}};gridView.setAdapter(adapter);gridView.setOnItemClickListener(new AdapterView.OnItemClickListener() {@Overridepublic void onItemClick(AdapterView<?> adapterView, View view, int i, long l) {Intent intent=getIntent();Bundle bundle=new Bundle();bundle.putInt("imageId",imageId[i]);intent.putExtras(bundle);setResult(0x11,intent);//返回上一级finish();}});}}


Deep Multi-instance Networks with Sparse Label Assignment for Whole Mammogram Classific")


")


还没有评论,来说两句吧...