Zabbix系列之二:zabbix监控快速搭建
#
一、初始化系统配置
- 关闭防火墙
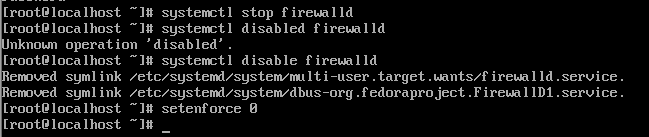
- 禁用SELINUX

- 开启网卡


- 替换yum源


二、安装LAMP环境
- yum -y install mariadb mariadb-server httpd php php-mysql
- systemctl start httpd 、systemctl start mariadb 、systemctl enable httpd 、systemctl enable mariadb
- 初始化数据库mysql_secure_installation(一路输入y即可),使用mysql -uroot -p 验证,可登录表示成功
三、安装Zabbix环境
- 安装官方yum源: rpm -ivh https://repo.zabbix.com/zabbix/3.2/rhel/7/x86\_64/zabbix-release-3.2-1.el7.noarch.rpm
- 导入密钥: rpm —import /etc/pki/rpm-gpg/RPM-GPG-KEY-ZABBIX
- 下载: yum -y install zabbix-server-mysql zabbix-web-mysql zabbix-agent
初始化数据库
mysql -u root -pcreate database zabbix default character set utf8 collate utf8_bin;grant all privileges on zabbix.* to zabbix@localhost identified by 'zabbix';
读入数据库
cd /usr/share/doc/zabbix-server-mysql-3.2.11/zcat create.sql.gz |mysql -uroot -p zabbix
启动zabbix服务
vim /etc/zabbix/zabbix_server.confDBHost=localhostDBName=zabbixDBUser=zabbixDBPassword=zabbixsystemctl start zabbix-serversystemctl enable zabbix-server
编辑zabbix前端php配置
vi /etc/httpd/conf.d/zabbix.confphp_value date.timezone Asia/Shanghai
调整时间同步
yum -y install ntpdatentpdate cn.pool.ntp.org
- 重启apache服务: systemctl restart httpd
这个时候登录web地址: 

如何直接输入IP地址,不添加zabbix,也可以打开此界面,那么需要修改/etc/httpd/conf/httpd.conf文件,修改为:DocumentRoot “/usr/share/zabbix/“,之后重启apache服务。
正式开始平面化安装:


登录成功界面是:

需要将其修改为中文:


地址再重新访问,便改为中文。
10.配置zabbix_agentd.conf启动agentd
vi /etc/zabbix/zabbix_agentd.confServer=192.168.1.171ServerActive=192.168.1.171Hostname=192.168.1.171systemctl start zabbix-agentsystemctl enable zabbix-agent
查看10050是否处于监听状态


还没有评论,来说两句吧...