工作日志4(用户换主题,一键换肤)
业务需求
- vue-i18n国际化时,发现表单,table等的
label和placeholder等无法使用$t('') - 增加一键换肤功能
解决方法
1.只需要用v-bind动态绑定label把label :改成:label="$t('user.oldPasswd')"就可以了
一键换肤
首先,先看一下目录和主要文件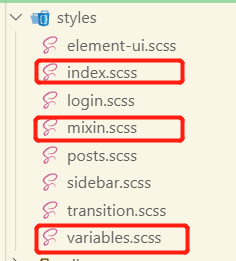
index.scss: 一些通用样式文件,入口文件,引入mixin.scss和varibale.scss等。
mixin.scss: 定义mixin方法的文件。
varibale.scss: 颜色,字体,背景的配置文件
Navbar.vue
<style rel="stylesheet/scss" lang="scss" scoped>@import "@/styles/index.scss"; //注意要引用index.scss入口文件.navbar {height: 50px;line-height: 50px;border-radius: 0px !important;@include bg_color($background-color-theme);@include font_color($font-color-theme);.hamburger-container {line-height: 58px;height: 50px;float: left;padding: 0 10px;}}</style>
重点是这两句话
@include bg_color($background-color-theme);@include font_color($font-color-theme);
需要把设置背景颜色封装成一个mixin方法(包括字体大小,字体颜色,都需要进行封装)所以mixin.scss需要定义这两个方法
mixin.scss
@mixin font_color($color){ /*通过该函数设置字体颜色,后期方便统一管理;*/color:$color;[data-theme="theme1"] & {color:$font-color-theme1;}[data-theme="theme2"] & {color:$font-color-theme2;}[data-theme="theme3"] & {color:$font-color-theme3;}}@mixin bg_color($color){ /*通过该函数设置主题颜色,后期方便统一管理;*/background-color:$color;[data-theme="theme1"] & {background-color:$background-color-theme1;}[data-theme="theme2"] & {background-color:$background-color-theme2;}[data-theme="theme3"] & {background-color:$background-color-theme3;}}
changeTheme.vue
<template><div class="system-list wrapper"><span> 主题切换</span><div class="theme-edit"><div class="content"><p @click="changeTheme('theme1')">默认</p><p @click="changeTheme('theme2')">粉白</p><p @click="changeTheme('theme3')">天蓝</p></div></div></div></template><script>export default {name: 'System',data() {return {}},created() {let skin = localStorage.getItem("theme")window.document.documentElement.setAttribute('data-theme', skin)},methods: {changeTheme(theme) {window.document.documentElement.setAttribute('data-theme', theme)localStorage.setItem("theme", theme)this.$message({message: '切换成功',type: 'success'})}}}</script><style lang="scss" scoped>.system-list {border: 1px solid #fff;background-color: #fff;height: 300px;span {float: left;padding: 15px 0 0 20px;}.theme-edit {width: 500px;height: 100px;margin-top: 35px;margin-bottom: 40px;.content {p {width: 50px;height: 50px;margin: 20px;float: left;text-align: center;line-height: 50px;}p:first-child {background-color: #fff;border: 1px solid #ccc;}p:nth-child(2) {background-color: rgba(252, 208, 232, 0.877);}p:last-child {background-color: rgb(190, 233, 248);}}}.font-edit {display: block;// margin-top: 100px;margin-bottom: 40px;float: left;}}</style>
这个思路是看到别人博主得来的:
通过设置html的attribute属性在封装的函数中进行判断,进行相应的设置不同的颜色
css中 [ ] 可以识别到在html标签上设置的属性,所以在html上对应属性发生变化时,就会执行相应的样式,
这一步有点类似于平时给div添加一个.active属性,css自动执行相应样式。
window.document.documentElement.setAttribute('data-theme', theme)
另外,如果要记住上一次换的皮肤,我使用的是localStorage,将每次点击换肤的主题记录下来,然后再页面渲染之前判断是否有这个主题就可以了。
created() {let skin = localStorage.getItem("theme")window.document.documentElement.setAttribute('data-theme', skin)},methods: {changeTheme(theme) {window.document.documentElement.setAttribute('data-theme', theme)localStorage.setItem("theme", themename)}}
varibale.scss
//颜色定义规范$background-color-theme: #fff; //背景主题颜色默认$background-color-theme1: #fff; //背景主题颜色1$background-color-theme2: rgba(252, 208, 232, 0.877); //背景主题颜色2$background-color-theme3: rgb(190, 233, 248); //背景主题颜色3$font-color-theme : #000; //字体主题颜色默认$font-color-theme1 : #000; //字体主题颜色1$font-color-theme2 : #fff; //字体主题颜色2$font-color-theme3 : #fff; //字体主题颜色3
index.scss
@import './element-ui.scss';@import './mixin.scss';@import './transition.scss';@import './sidebar.scss';@import './login.scss';body {-moz-osx-font-smoothing: grayscale;-webkit-font-smoothing: antialiased;text-rendering: optimizeLegibility;font-family: Helvetica Neue, Helvetica, PingFang SC, Hiragino Sans GB, Microsoft YaHei, Arial, sans-serif;}html, body {box-sizing: border-box;width: 100%;height: 100%;}*,*:before,*:after {box-sizing: inherit;}a:focus,a:active {outline: none;}a,a:focus,a:hover {cursor: pointer;color: inherit;text-decoration: none;}// ul, li{// list-style-type: none;// padding: 0;// }.clearfix {&:after {visibility: hidden;display: block;font-size: 0;content: " ";clear: both;height: 0;}}//main-container全局样式.app-main{min-height: 100%}.app-container {background-color: #fff;}.app-container.wrapper{padding: 20px;}.svg-icon {width: 1em;height: 1em;vertical-align: -0.15em;fill: currentColor;overflow: hidden;}input:-webkit-autofill {box-shadow: 0 0 0px 1000px #fff inset !important;//关于解决输入框背景颜色-webkit-text-fill-color: #696969 !important;//关于接输入框文字颜色}


还没有评论,来说两句吧...