java spring 注解教程,Spring高级注解,Spring注解
Spring高级注解,Spring注解
目录:
1、使用限定注解;
2、自定义限定注解;
3、自定义bean的生命周期;
开发环境:IntelliJ IDEA 2019.2.2
Spring Boot版本:2.1.8
新建一个名称为demo的Spring Boot项目。
一、限定注解
当存在多个同类型的bean时,可以使用Primary注解指定优先注入的bean。如果对bean的注入选择做进一步的控制,则可以使用限定注解。
限定注解可以与特定的参数关联起来,缩小类型匹配的范围,最后选择一个符合条件的bean来注入。
1、新建类 MyBean.java
packagecom.example.demo;public classMyBean {publicMyBean(String id){this.id =id;
}privateString id;publicString getId() {returnid;
}public voidsetId(String id) {this.id =id;
}
}
2、新建类 MyConfig.java
packagecom.example.demo;importorg.springframework.context.annotation.Bean;importorg.springframework.context.annotation.Configuration;
@Configurationpublic classMyConfig {
@BeanpublicMyBean bean1(){return new MyBean(“1”);
}
@BeanpublicMyBean bean2(){return new MyBean(“2”);
}
}
3、新建一个控制器 DemoController.java
packagecom.example.demo;importorg.springframework.beans.factory.annotation.Autowired;importorg.springframework.beans.factory.annotation.Qualifier;importorg.springframework.web.bind.annotation.RequestMapping;importorg.springframework.web.bind.annotation.RestController;
@RestControllerpublic classDemoController {
@Autowired
@Qualifier(“bean1”)
MyBean bean;
@RequestMapping(value= “/“)publicString index(){returnbean.getId();
}
}
运行项目后,浏览器访问:http://localhost:8080/,页面显示:
1
二、自定义限定注解
如果需要根据特定的属性来指定注入的bean,则可以自定义限定注解。
1、继续使用上面例子的类 MyBean.java
2、新建一个接口 MyBeanQualifier.java
packagecom.example.demo;importorg.springframework.beans.factory.annotation.Qualifier;importjava.lang.annotation.ElementType;importjava.lang.annotation.Retention;importjava.lang.annotation.RetentionPolicy;importjava.lang.annotation.Target;
@Target({ElementType.FIELD, ElementType.METHOD})
@Retention(RetentionPolicy.RUNTIME)
@Qualifierpublic @interfaceMyBeanQualifier {
String type();
}
3、修改上面例子代码 MyConfig.java
在配置bean时,需要为相应的bean设置不同的类型。
packagecom.example.demo;importorg.springframework.context.annotation.Bean;importorg.springframework.context.annotation.Configuration;
@Configurationpublic classMyConfig {
@Bean
@MyBeanQualifier(type= “bean1”)publicMyBean bean1(){return new MyBean(“1”);
}
@Bean
@MyBeanQualifier(type= “bean2”)publicMyBean bean2(){return new MyBean(“2”);
}
}
4、修改上面例子控制器代码 DemoController.java
packagecom.example.demo;importorg.springframework.beans.factory.annotation.Autowired;importorg.springframework.web.bind.annotation.RequestMapping;importorg.springframework.web.bind.annotation.RestController;
@RestControllerpublic classDemoController {
@Autowired
@MyBeanQualifier(type= “bean2”)
MyBean bean;
@RequestMapping(value= “/“)publicString index(){returnbean.getId();
}
}
运行项目后,浏览器访问:http://localhost:8080/,页面显示:
2
三、自定义bean的生命周期
Scope注解主要用于配置bean在容器中的生命周期,除了可以配置为singleton和prototype,在Web环境还可以配置为request、session等
值,表示容器会为一次请求或一个会话分配一个bean的实例。
如果对bean的生命周期有特殊需求,可以使用自定义的Scope。
例子:一个bean被使用3次后,就获取新的bean实例。
1、继续使用上面例子的类 MyBean.java
2、新建一个自定义的Scope类 MyScope.java
packagecom.example.demo;importorg.springframework.beans.factory.ObjectFactory;importorg.springframework.beans.factory.config.Scope;importjava.util.HashMap;importjava.util.Map;public class MyScope implementsScope {//记录bean的使用次数
private Map beanCounts = new HashMap();//保存实例
private Map beans = new HashMap();
@Overridepublic Object get(String s, ObjectFactory>objectFactory) {if(beanCounts.get(s) == null){
beanCounts.put(s,0);
}//第一次使用,放到实例的Map中
Integer beanCount =beanCounts.get(s);if(beanCount == 0){
Object newObject=objectFactory.getObject();
beans.put(s, newObject);
}
Object bean=beans.get(s);//计数器加1
Integer newBeanCount = beanCount + 1;if(newBeanCount >= 3){
newBeanCount= 0;
}//设置新的次数
beanCounts.put(s, newBeanCount);returnbean;
}
@OverridepublicObject remove(String s) {return null;
}
@Overridepublic voidregisterDestructionCallback(String s, Runnable runnable) {
}
@OverridepublicObject resolveContextualObject(String s) {return null;
}
@OverridepublicString getConversationId() {return null;
}
}
3、修改上面例子代码 MyConfig.java
将自定义Scope注册到容器中。
packagecom.example.demo;importorg.springframework.beans.factory.BeanFactory;importorg.springframework.beans.factory.annotation.Autowired;importorg.springframework.beans.factory.config.ConfigurableListableBeanFactory;importorg.springframework.beans.factory.config.CustomScopeConfigurer;importorg.springframework.context.annotation.Bean;importorg.springframework.context.annotation.Configuration;importorg.springframework.context.annotation.Scope;importjavax.annotation.PostConstruct;
@Configurationpublic classMyConfig {
@Autowired
BeanFactory factory;
@PostConstructpublic voidcustomScopeConfigurer(){
CustomScopeConfigurer config= newCustomScopeConfigurer();
config.addScope(“three”, newMyScope());
config.postProcessBeanFactory((ConfigurableListableBeanFactory)factory);
}
@Bean
@Scope(scopeName= “three”)publicMyBean bean1(){return new MyBean(“1”);
}
}
4、修改上面例子控制器代码 DemoController.java
packagecom.example.demo;importorg.springframework.beans.factory.annotation.Autowired;importorg.springframework.context.ApplicationContext;importorg.springframework.web.bind.annotation.RequestMapping;importorg.springframework.web.bind.annotation.RestController;
@RestControllerpublic classDemoController {
@Autowired
ApplicationContext ctx;
@RequestMapping(value= “/“)publicString index(){for(int i=0;i<5;i++){
System.out.println(ctx.getBean(“bean1”));
}return “”;
}
}
运行项目后,浏览器访问:http://localhost:8080/,IDEA控制台输出:
com.example.demo.MyBean@61f13a02
com.example.demo.MyBean@61f13a02
com.example.demo.MyBean@61f13a02
com.example.demo.MyBean@54094334
com.example.demo.MyBean@54094334
可见前3次得到同一个bean实例。
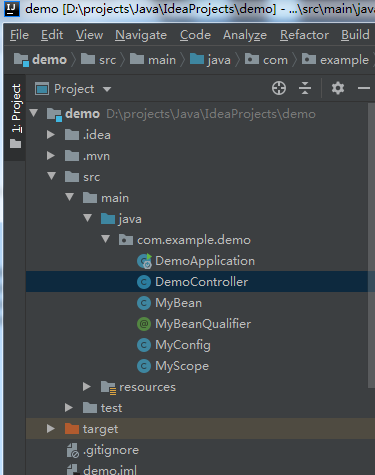
附,项目结构图
相关文章暂无相关文章


还没有评论,来说两句吧...