SpringBoot整合MybatisPlus【超详细】
SpringBoot整合MybatisPlus【超详细】
- 创建个SpringBoot项目
- 写个HelloController测试下
- 使用代码生成器生成代码
- 添加所需的依赖
- CodeGenerator
- 运行代码生成器,在控制台输入想要生成的表
创建个SpringBoot项目
勾选生所需的依赖: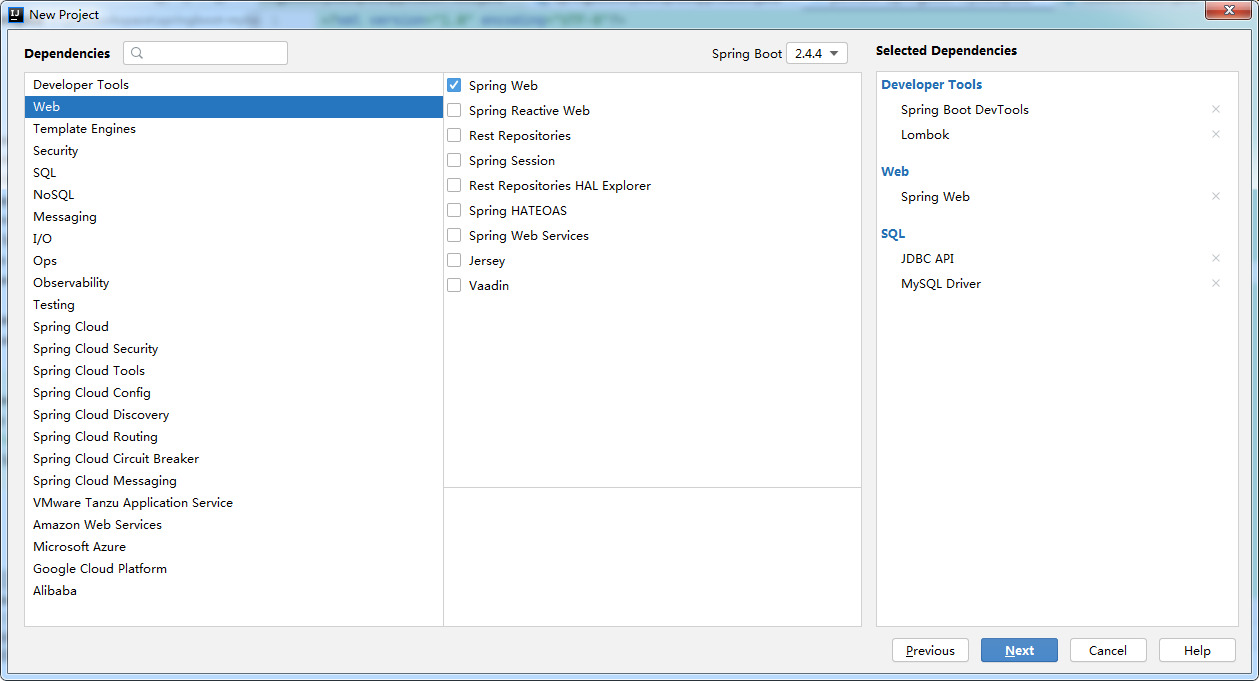
我把application的后缀改为.yml了,方便些。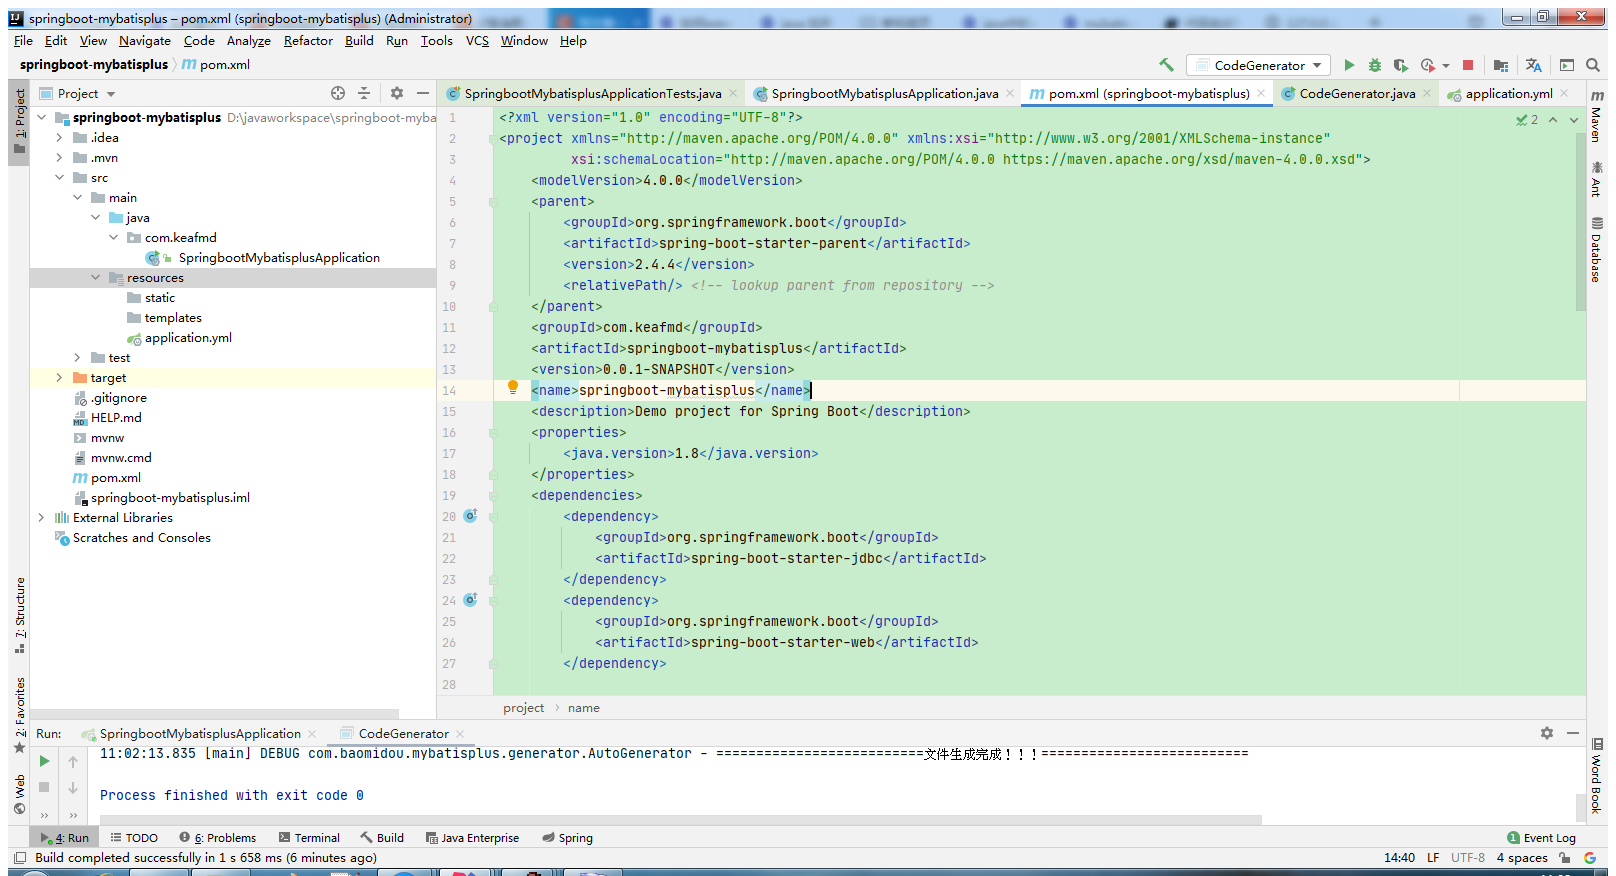
pom.xml:
<?xml version="1.0" encoding="UTF-8"?><project xmlns="http://maven.apache.org/POM/4.0.0" xmlns:xsi="http://www.w3.org/2001/XMLSchema-instance"xsi:schemaLocation="http://maven.apache.org/POM/4.0.0 https://maven.apache.org/xsd/maven-4.0.0.xsd"><modelVersion>4.0.0</modelVersion><parent><groupId>org.springframework.boot</groupId><artifactId>spring-boot-starter-parent</artifactId><version>2.4.4</version><relativePath/> <!-- lookup parent from repository --></parent><groupId>com.keafmd</groupId><artifactId>springboot-mybatisplus</artifactId><version>0.0.1-SNAPSHOT</version><name>springboot-mybatisplus</name><description>Demo project for Spring Boot</description><properties><java.version>1.8</java.version></properties><dependencies><dependency><groupId>org.springframework.boot</groupId><artifactId>spring-boot-starter-jdbc</artifactId></dependency><dependency><groupId>org.springframework.boot</groupId><artifactId>spring-boot-starter-web</artifactId></dependency><dependency><groupId>org.springframework.boot</groupId><artifactId>spring-boot-devtools</artifactId><scope>runtime</scope><optional>true</optional></dependency><dependency><groupId>mysql</groupId><artifactId>mysql-connector-java</artifactId><scope>runtime</scope></dependency><dependency><groupId>org.projectlombok</groupId><artifactId>lombok</artifactId><optional>true</optional></dependency><dependency><groupId>org.springframework.boot</groupId><artifactId>spring-boot-starter-test</artifactId><scope>test</scope></dependency></dependencies><build><plugins><plugin><groupId>org.springframework.boot</groupId><artifactId>spring-boot-maven-plugin</artifactId><configuration><excludes><exclude><groupId>org.projectlombok</groupId><artifactId>lombok</artifactId></exclude></excludes></configuration></plugin></plugins></build></project>
因为我们配置了数据源,所以需要在application.yml中配置下数据源,不然会起不来,我顺便也改了下端口。
application.yml:
server:port: 80spring:datasource:url: jdbc:mysql://127.0.0.1:3306/ssm-java1?useSSL=false&&characterEncoding=UTF-8driver-class-name: com.mysql.cj.jdbc.Driverusername: rootpassword: 18044229
写个HelloController测试下
HelloController:
package com.keafmd.controller;import org.springframework.web.bind.annotation.RequestMapping;import org.springframework.web.bind.annotation.RestController;/** * Keafmd * * @ClassName: HelloController * @Description: * @author: 牛哄哄的柯南 * @Date: 2021-04-09 11:11 * @Blog: https://keafmd.blog.csdn.net/ */@RestControllerpublic class HelloController {@RequestMapping("/hello")public String hello(){return "keafmd";}}
运行启动类,访问:http://127.0.0.1/hello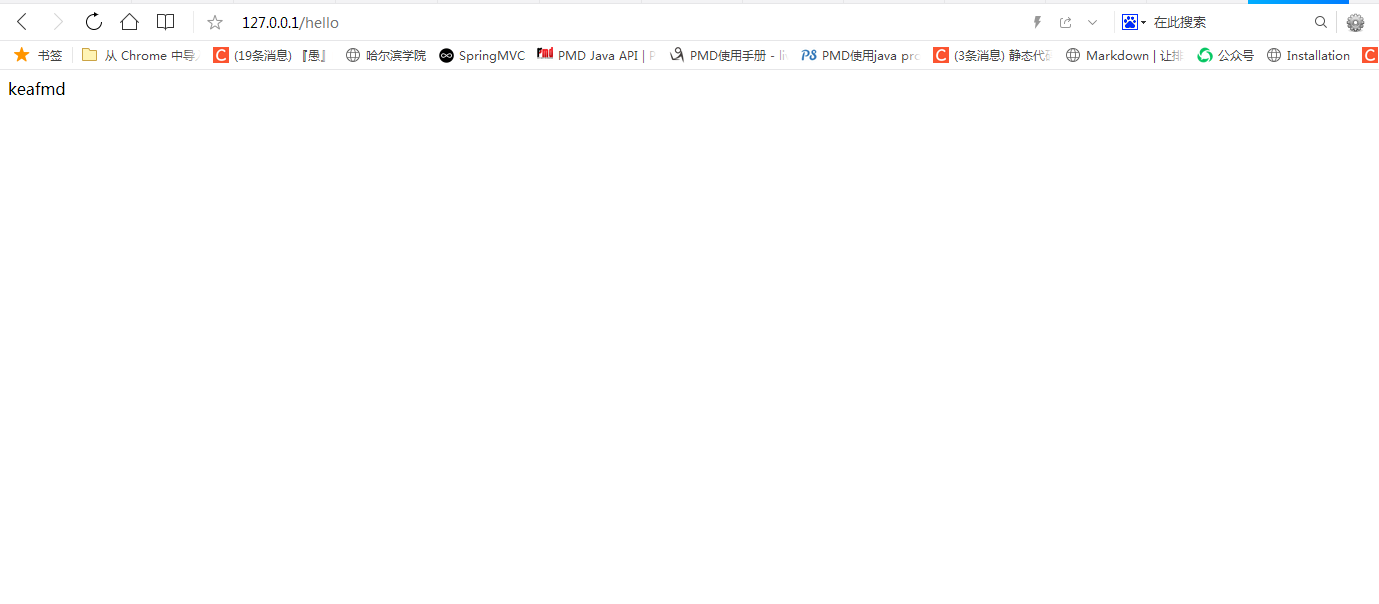
到此证明SpringBoot没有问题。
使用代码生成器生成代码
添加所需的依赖
pom.xml中添加以下依赖:
<dependency><groupId>com.baomidou</groupId><artifactId>mybatis-plus-generator</artifactId><scope>test</scope><version>3.4.0</version></dependency><dependency><groupId>org.freemarker</groupId><artifactId>freemarker</artifactId><scope>test</scope><version>2.3.31</version></dependency>
由于代码生成器并不会在生产环境使用,只是在开发环境中使用了下。所以我们把代码生成器写在test包中即可,依赖的使用场景也定义成test即可。
CodeGenerator
CodeGenerator:
package com.keafmd.mp;import com.baomidou.mybatisplus.core.exceptions.MybatisPlusException;import com.baomidou.mybatisplus.core.toolkit.StringPool;import com.baomidou.mybatisplus.core.toolkit.StringUtils;import com.baomidou.mybatisplus.generator.AutoGenerator;import com.baomidou.mybatisplus.generator.InjectionConfig;import com.baomidou.mybatisplus.generator.config.*;import com.baomidou.mybatisplus.generator.config.po.TableInfo;import com.baomidou.mybatisplus.generator.config.rules.NamingStrategy;import com.baomidou.mybatisplus.generator.engine.FreemarkerTemplateEngine;import java.util.ArrayList;import java.util.List;import java.util.Scanner;/** * Keafmd * * @ClassName: CodeGenerator * @Description: * @author: 牛哄哄的柯南 * @date: 2021-03-23 21:47 */// 演示例子,执行 main 方法控制台输入模块表名回车自动生成对应项目目录中public class CodeGenerator {/** * <p> * 读取控制台内容 * </p> */public static String scanner(String tip) {Scanner scanner = new Scanner(System.in);StringBuilder help = new StringBuilder();help.append("请输入" + tip + ":");System.out.println(help.toString());if (scanner.hasNext()) {String ipt = scanner.next();if (StringUtils.isNotBlank(ipt)) {return ipt;}}throw new MybatisPlusException("请输入正确的" + tip + "!");}public static void main(String[] args) {// 代码生成器AutoGenerator mpg = new AutoGenerator();// 全局配置GlobalConfig gc = new GlobalConfig();String projectPath = System.getProperty("user.dir");// System.out.println("projectPath = " + projectPath);gc.setOutputDir(projectPath + "/src/main/java");// gc.setOutputDir("D:\\test");gc.setAuthor("关注公众号:牛哄哄的柯南");gc.setOpen(false);// gc.setSwagger2(true); 实体属性 Swagger2 注解gc.setServiceName("%sService");mpg.setGlobalConfig(gc);// 数据源配置DataSourceConfig dsc = new DataSourceConfig();dsc.setUrl("jdbc:mysql://localhost:3306/ssm-java1?useUnicode=true&useSSL=false&characterEncoding=utf8&serverTimezone=UTC");// dsc.setSchemaName("public");dsc.setDriverName("com.mysql.cj.jdbc.Driver");dsc.setUsername("root");dsc.setPassword("18044229");mpg.setDataSource(dsc);// 包配置PackageConfig pc = new PackageConfig();pc.setModuleName(null);pc.setParent("com.keafmd");mpg.setPackageInfo(pc);// 自定义配置InjectionConfig cfg = new InjectionConfig() {@Overridepublic void initMap() {// to do nothing}};// 如果模板引擎是 freemarkerString templatePath = "/templates/mapper.xml.ftl";// 如果模板引擎是 velocity// String templatePath = "/templates/mapper.xml.vm";// 自定义输出配置List<FileOutConfig> focList = new ArrayList<>();// 自定义配置会被优先输出focList.add(new FileOutConfig(templatePath) {@Overridepublic String outputFile(TableInfo tableInfo) {// 自定义输出文件名 , 如果你 Entity 设置了前后缀、此处注意 xml 的名称会跟着发生变化!!return projectPath + "/src/main/resources/mapper/"+ "/" + tableInfo.getEntityName() + "Mapper" + StringPool.DOT_XML;}});cfg.setFileOutConfigList(focList);mpg.setCfg(cfg);// 配置模板TemplateConfig templateConfig = new TemplateConfig();templateConfig.setXml(null);mpg.setTemplate(templateConfig);// 策略配置StrategyConfig strategy = new StrategyConfig();strategy.setNaming(NamingStrategy.underline_to_camel);strategy.setColumnNaming(NamingStrategy.underline_to_camel);strategy.setEntityLombokModel(true);strategy.setRestControllerStyle(true);strategy.setInclude(scanner("表名,多个英文逗号分割").split(","));strategy.setControllerMappingHyphenStyle(true);strategy.setTablePrefix("m_");mpg.setStrategy(strategy);mpg.setTemplateEngine(new FreemarkerTemplateEngine());mpg.execute();}}
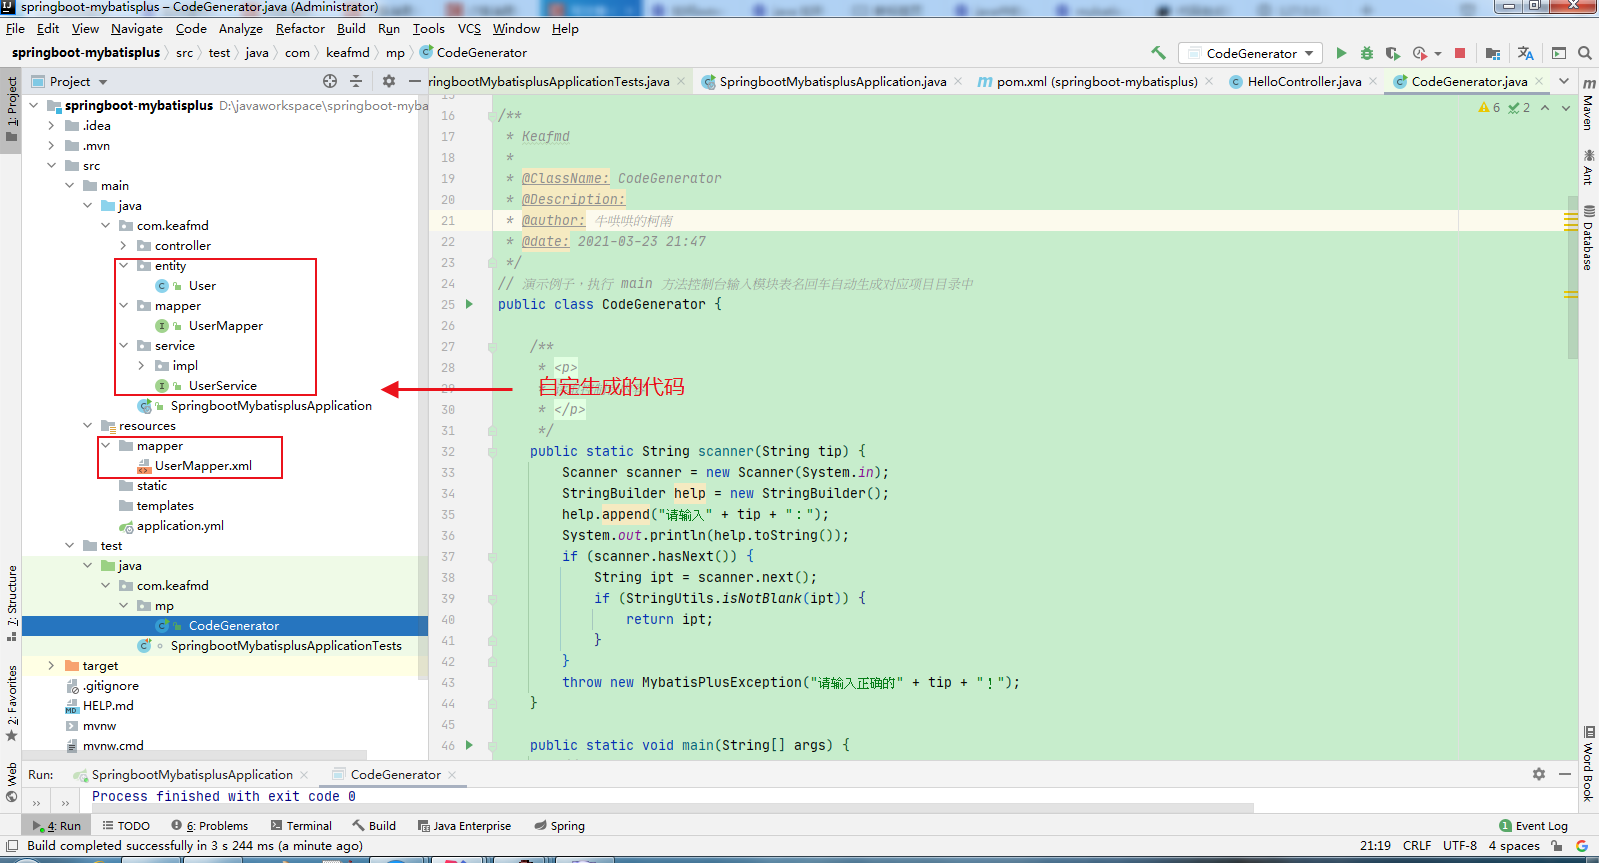
运行代码生成器,在控制台输入想要生成的表

这样就会生成一些包及相应的代码,注意CodeGenerator中的相关代码(如数据库的,包名的)需要该成你们需要的。
以上就是SpringBoot整合MybatisPlus【超详细】的全部内容。
看完如果对你有帮助,感谢点赞支持!
如果你是电脑端的话,看到右下角的 “一键三连” 了吗,没错点它[哈哈]
加油!
共同努力!
Keafmd


-- volatile关键字解析")


还没有评论,来说两句吧...