SpringBoot项目实战,附源码
SpringBoot2.0笔记
(一)SpringBoot基本操作——环境搭建及项目创建(有demo)
(二)SpringBoot基本操作——使用IDEA打war包发布及测试
(三)SpringBoot基本操作——SpringBoot整合SpringDataJpa(有demo)
(四)SpringBoot基本操作——SpringBoot使用RedisTemplate整合Redis(有demo)
(五)SpringBoot基本操作——SpringBoot使用Jedis整合Redis(有demo)
(六)SpringBoot基本操作——SpringBoot使用Junit4单元测试(有demo)
(七)SpringBoot基本操作——SpringBoot整合Shiro权限管理(完整demo+界面)
本文使用idea工具构建Springboot2.0+SpringMvc+Thymeleaf+SpringDataJPA+MySql+Redis项目
GitHub地址:https://github.com/jwwam/springbootDemo.git
此demo可直接下载运行,以下为具体创建项目过程步骤说明和遇到问题解决方法。
一、构建SpringBoot项目
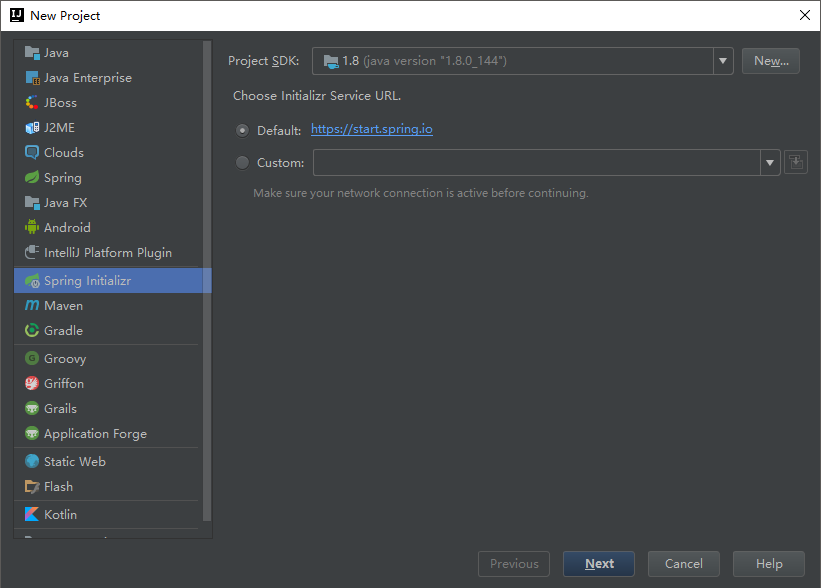
1.使用idea创建Springboot项目,选择SpringInitializr选好jdk版本点击下一步
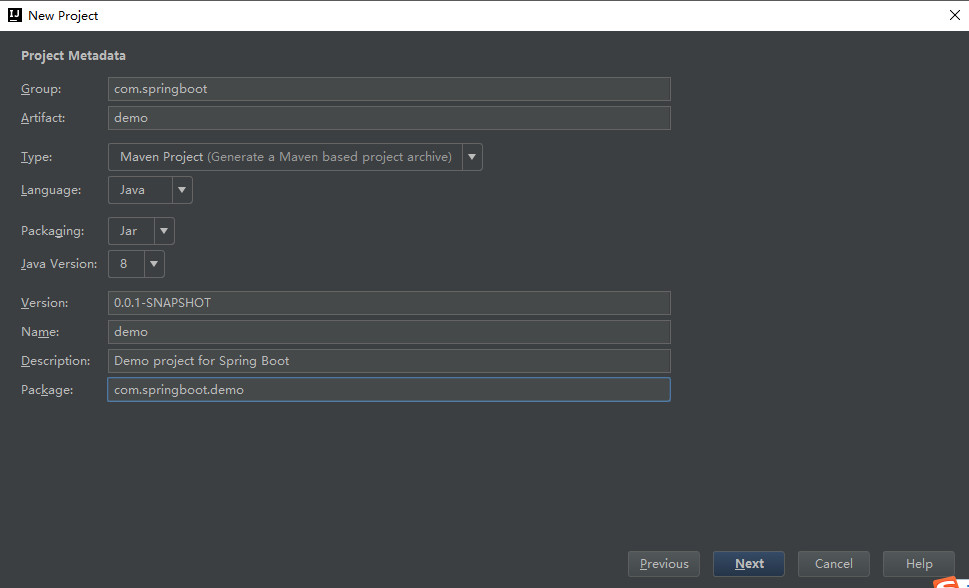
2.填写项目包名及java版本
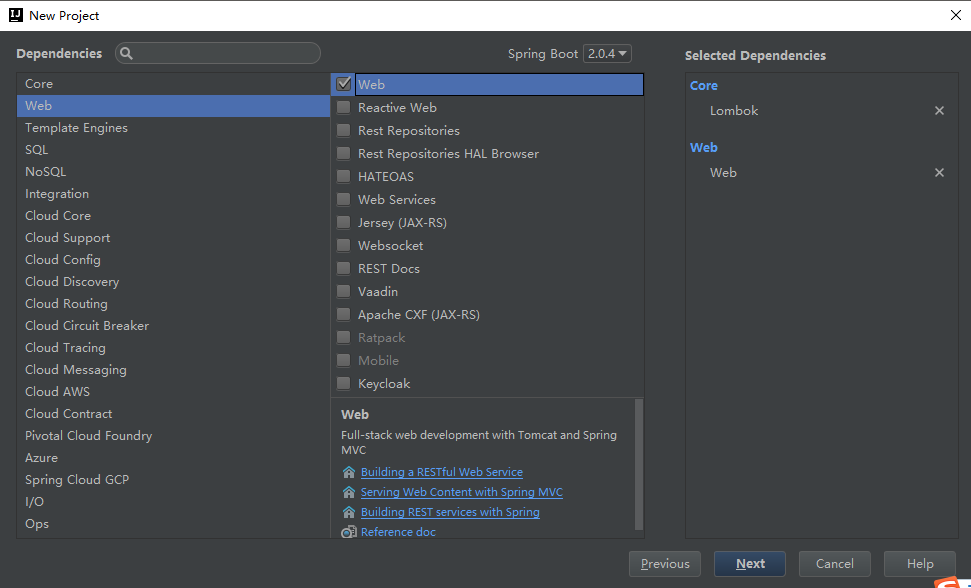
3.勾选你需要的项目组件,Springboot版本我使用2.0
Lombok可以简化代码量,提供注解方式代替重复性代码,非必须,用不用看情况,有时候很方便,新手不建议用
 4.创建web项目所以勾选Web
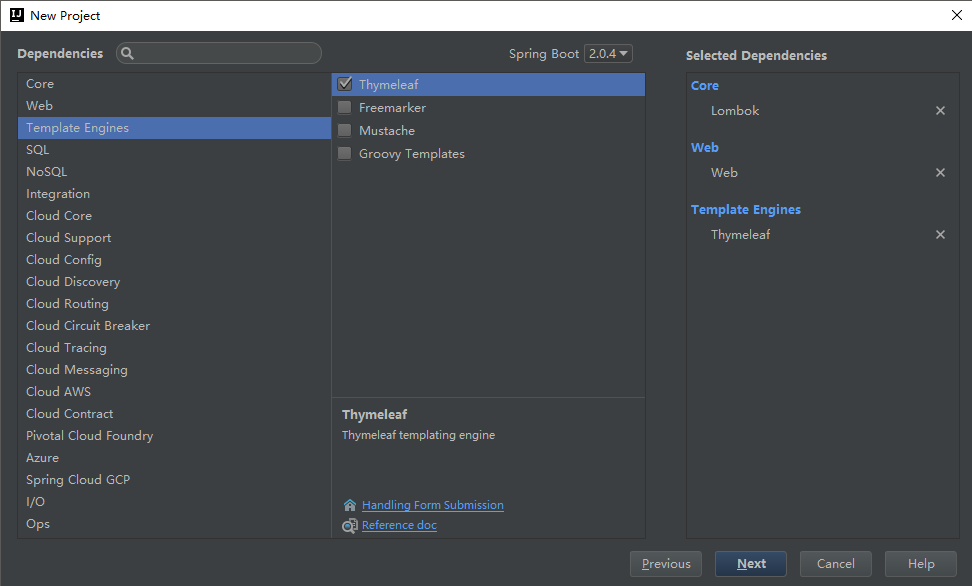
5.模板语言勾选Thymeleaf,这个没得说,springboot官方推荐,确实很好用,当然是指3.0版本,老版本性能有短板
6.数据库持久化推荐使用JPA方式,MySQL看情况选择
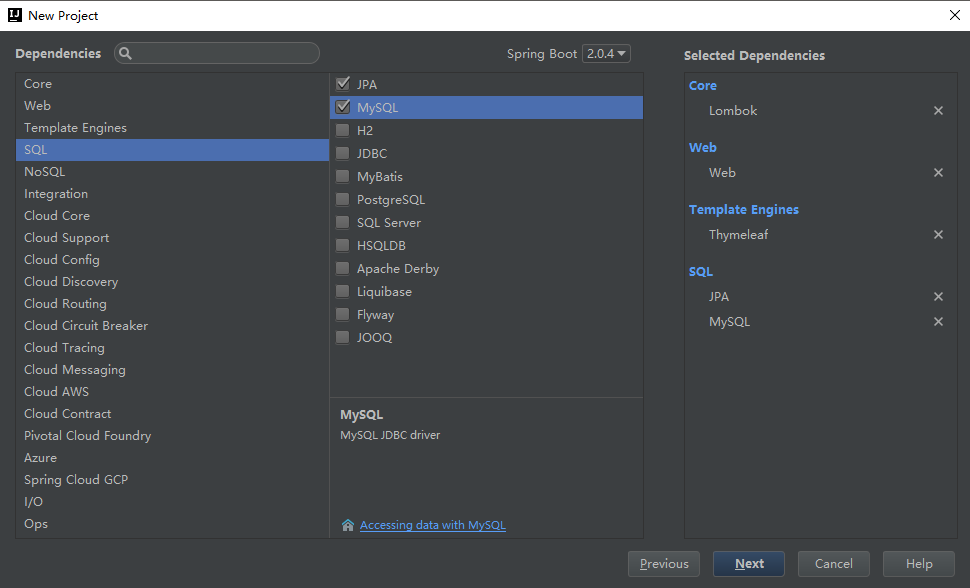
7.Nosql我这里使用Redis,看你需要,可不勾选,后续需要时再引入

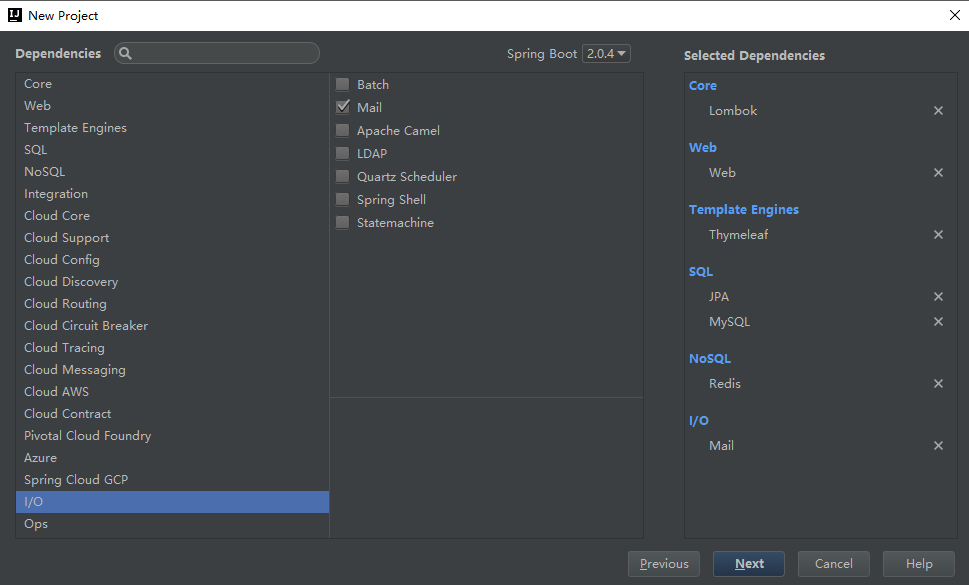
8.MQ可根据自己情况选择,我这里不需要,最后I/O需要一个发邮件的服务,不用的话也不需要勾选,可后续再引入
9.下一步填写项目文件名称
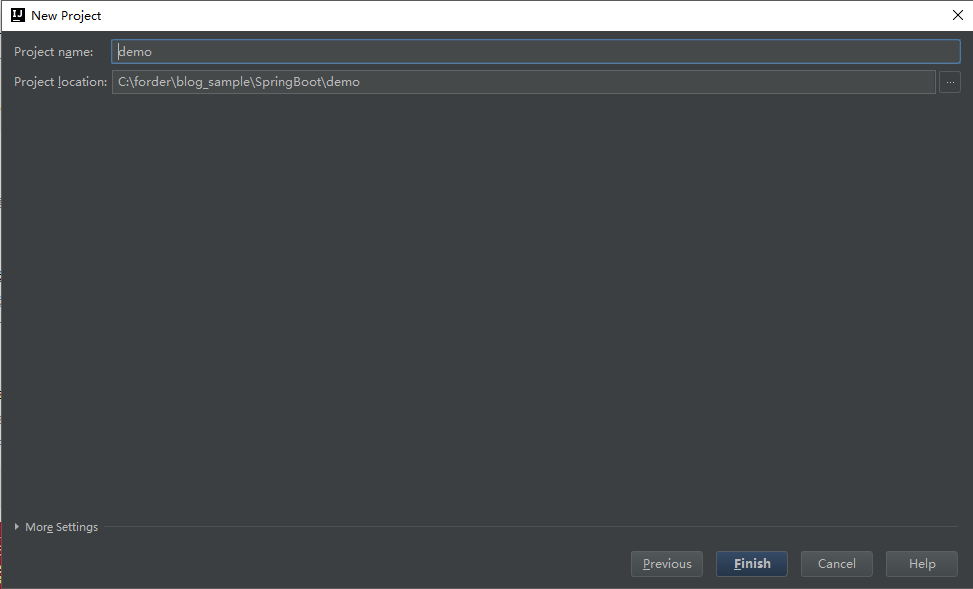
10.Finish后进入项目,然后漫长的等待一段时间后项目会构建完成
二、启动SpringBoot项目
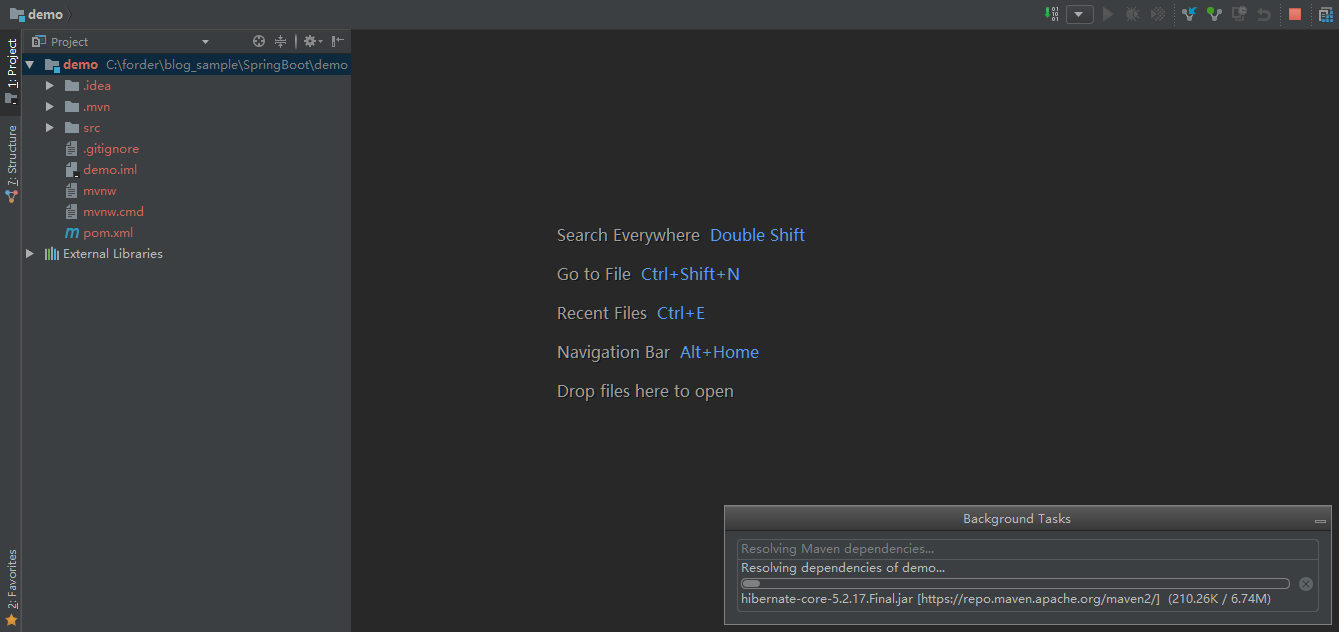
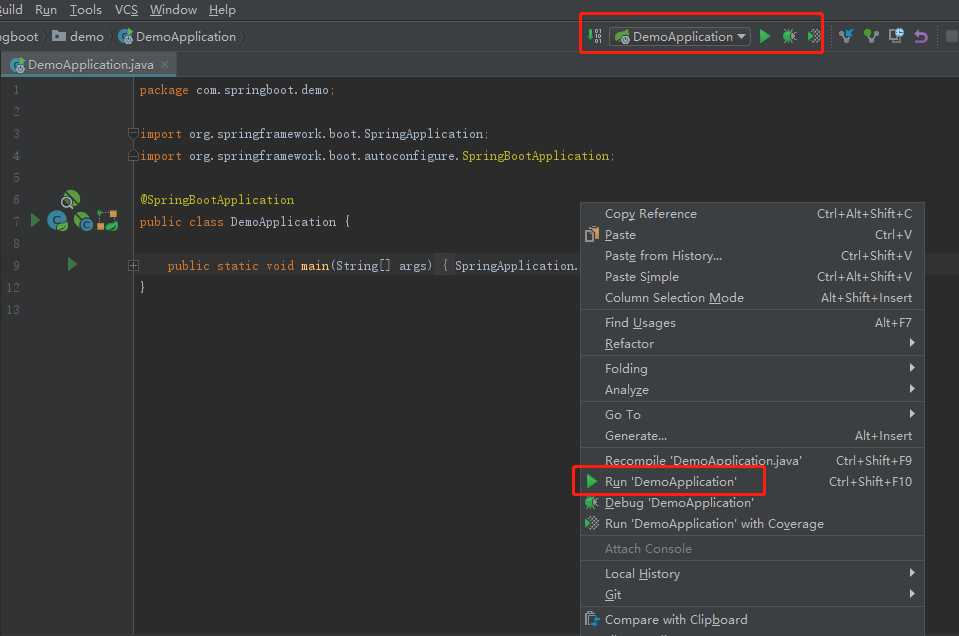
1.项目加载完毕之后打开启动器DemoApplication右键run可直接启动项目,或者右上方直接启动DemoApplication
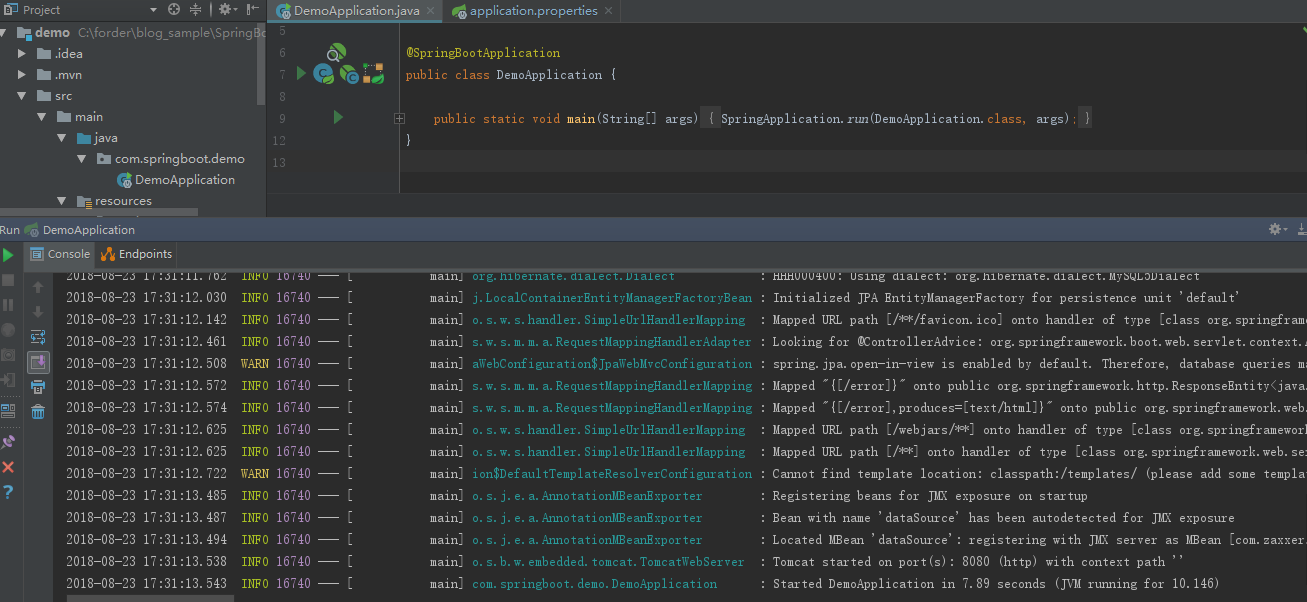
2.不出意外的话可以直接启动不会报错,没啥好说的,我列一下可能会出现的问题,这些问题基本都是由于前面勾选项目组件(即jpa,mysql等)时引入了需要启动注入的一些依赖或数据源缺失引起的,和Springboot版本也有很大的关系,以下报错不一定会出现。
(1)启动报错:Failed to configure a DataSource: ‘url’ attribute is not specified and no embedd
问题原因:新项目未做相关数据源配置, 启动springboot找不到配置引起
解决办法(选一即可):
① 启动类DemoApplication加入注解@SpringBootApplication(exclude = DataSourceAutoConfiguration.class)
禁止自动加载数据源配置
② 手动添加数据源,在application.properties加入以下配置:
#数据源spring.datasource.url=jdbc:mysql://localhost:3306/demo_test?useUnicode=true&zeroDateTimeBehavior=convertToNull&autoReconnect=truespring.datasource.username=rootspring.datasource.password=1234spring.datasource.driver-class-name=com.mysql.jdbc.Driver
(2)启动报错:At least one JPA metamodel must be present!
问题原因:Springboot自动加载持久化bean,即自动加载jpa的bean造成
解决办法(选一即可):
① 启动类DemoApplication加上以下注解
@EnableAutoConfiguration(exclude={JpaRepositoriesAutoConfiguration.class //禁止springboot自动加载持久化bean})
② pom加入或更改jpa启动包,按照以下格式
<dependency><groupId>org.springframework.boot</groupId><artifactId>spring-boot-starter-data-jpa</artifactId><exclusions><exclusion><groupId>org.hibernate</groupId><artifactId>hibernate-entitymanager</artifactId></exclusion><exclusion><groupId>org.hibernate</groupId><artifactId>hibernate-core</artifactId></exclusion></exclusions></dependency><dependency><groupId>org.hibernate</groupId><artifactId>hibernate-core</artifactId><version>5.2.10.Final</version></dependency>
pom重新导入就好了,启动项目也不再报错。
三、Hello World页面显示及Json数据回传
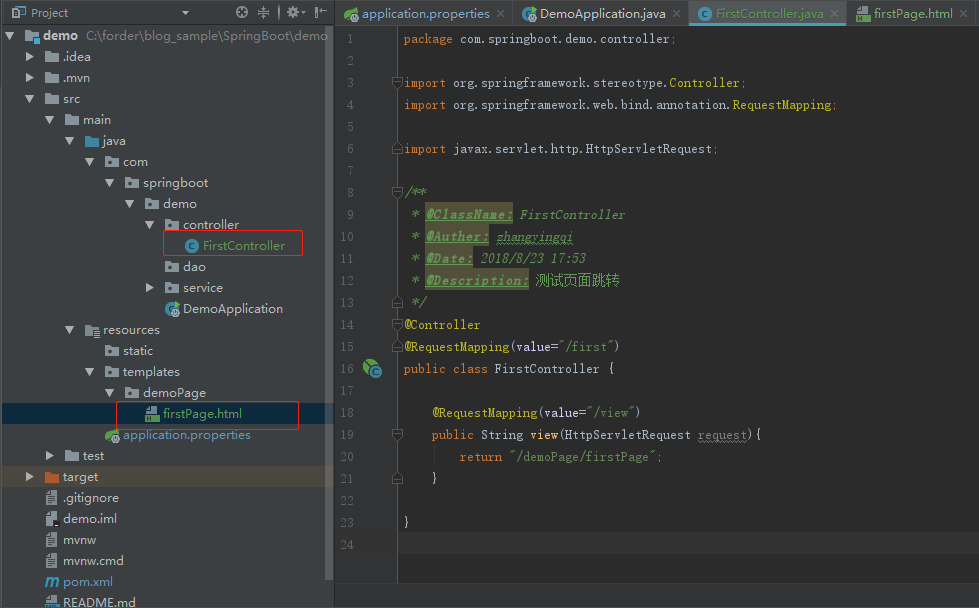
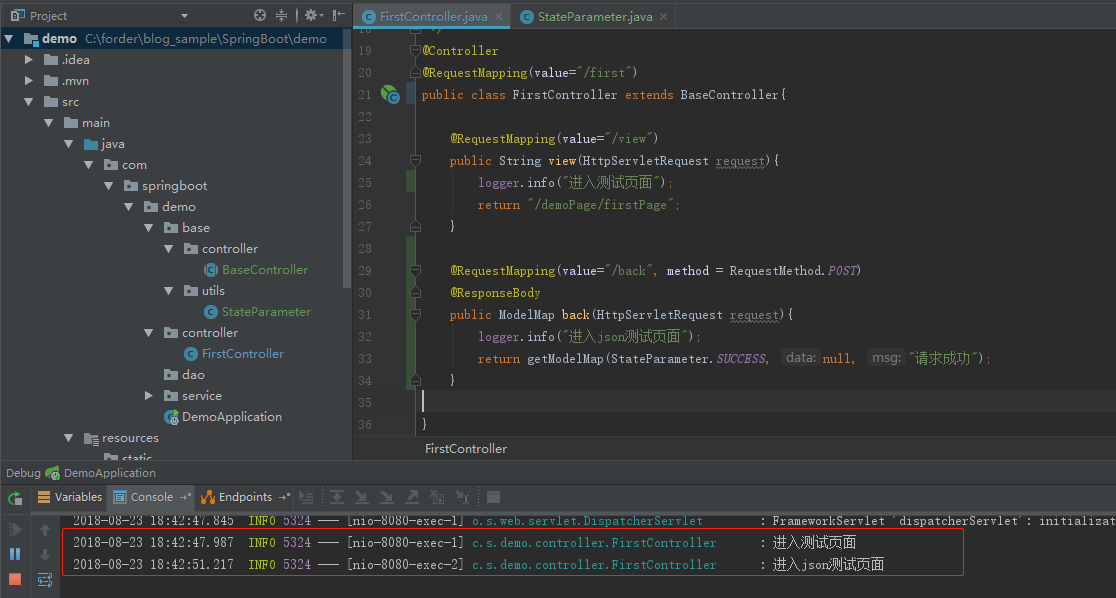
1.增加一个测试控制层和页面,添加测试类FirstController.java
package com.springboot.demo.controller;import org.springframework.stereotype.Controller;import org.springframework.web.bind.annotation.RequestMapping;import javax.servlet.http.HttpServletRequest;/** * @ClassName: FirstController * @Auther: zhangyingqi * @Date: 2018/8/23 17:53 * @Description: 测试页面跳转 */@Controller@RequestMapping(value="/first")public class FirstController {@RequestMapping(value="/view")public String view(HttpServletRequest request){return "/demoPage/firstPage";}}
2.添加测试页面 firstPage.html
<!DOCTYPE html><html lang="zh-CN" xmlns:th="http://www.thymeleaf.org"><head><title>Hello</title><meta http-equiv="Content-Type" content="text/html; charset=utf-8" /></head><body><div>Hello World!</div></body></html>
3.目录结构
4.到这里启动后就能访问到测试页面了,后面我需要加入统一日志和统一返回格式处理,都是在真实开发环境下必须的,所以我也列出来
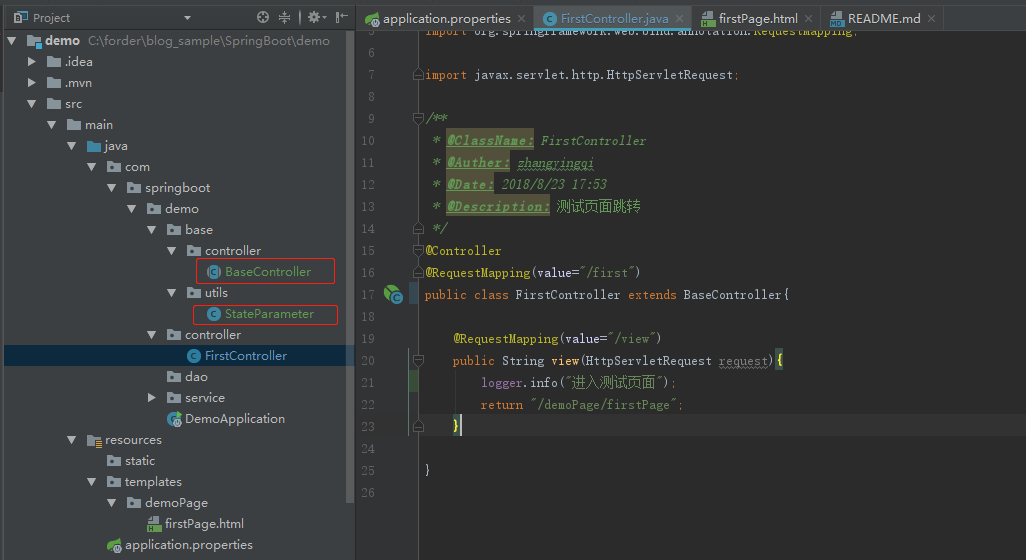
在com.springboot.demo.base.controller包下新建BaseController.java,用来提供日志接口以及返回model的固定参数格式
package com.springboot.demo.base.controller;import com.springboot.demo.base.utils.StateParameter;import org.slf4j.Logger;import org.slf4j.LoggerFactory;import org.springframework.ui.ModelMap;public abstract class BaseController{protected final String success = StateParameter.SUCCESS;protected final String fail = StateParameter.FAULT;protected final Logger logger = LoggerFactory.getLogger(this.getClass());public ModelMap getModelMap(String status,Object data,String msg){ModelMap modelMap=new ModelMap();modelMap.put("status", status);modelMap.put("data", data);modelMap.put("msg", msg);return modelMap;}}
在com.springboot.demo.base.utils包下新建StateParameter.java
package com.springboot.demo.base.utils;public class StateParameter {public final static String SUCCESS="1";public final static String FAULT="0";public final static String DATA="data";public final static String STATE="state";}
目录结构如图:
5.添加简单日志记录,修改控制层代码,加入logger日志记录,添加back方法返回json数据,返回getModelMap传入状态值一般页面js接收用来判断操作成功或失败,data参数下方为null,一般传入想返回的数据内容如对象等,最后一个参数msg为提示信息。
@Controller@RequestMapping(value="/first")public class FirstController extends BaseController{@RequestMapping(value="/view")public String view(HttpServletRequest request){logger.info("进入测试页面");return "/demoPage/firstPage";}@RequestMapping(value="/back", method = RequestMethod.POST)@ResponseBodypublic ModelMap back(HttpServletRequest request){logger.info("进入json测试页面");return getModelMap(StateParameter.SUCCESS, null, "请求成功");}}
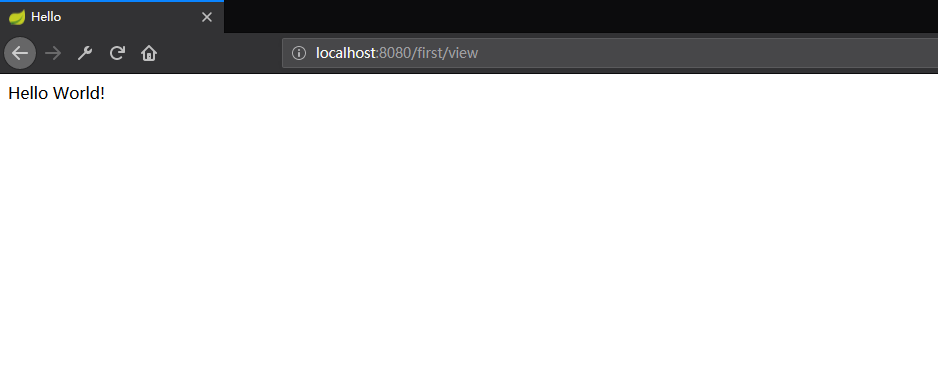
打开浏览器输入:localhost:8080/first/view 测试页面正常跳转
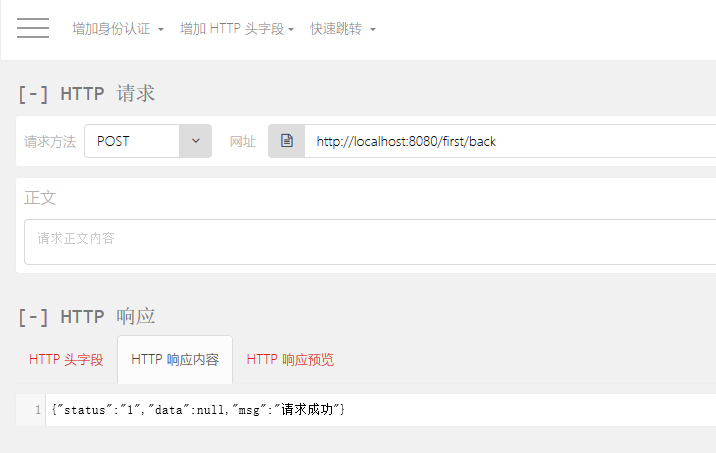
打开RESTClient浏览器插件测试json数据返回正常(如没有插件可更改请求为get接收,直接在浏览器请求back路径即可返回json数据),输入 http://localhost:8080/first/back 返回我们设定的 msg:请求成功
查看控制台输出日志,关于Springboot项目结合AOP和logback日志持久化入库可以查看我的这篇文章。
全文完,2018/8/23
写博文不易,转载请注明出处。


还没有评论,来说两句吧...