Spring 注解开发
1、@Component组件
第一步:指定扫描的包,这个包下的注解就会生效
<?xml version="1.0" encoding="UTF-8"?><beans xmlns="http://www.springframework.org/schema/beans"xmlns:xsi="http://www.w3.org/2001/XMLSchema-instance"xmlns:context="http://www.springframework.org/schema/context"xsi:schemaLocation="http://www.springframework.org/schema/beanshttps://www.springframework.org/schema/beans/spring-beans.xsdhttp://www.springframework.org/schema/contexthttps://www.springframework.org/schema/context/spring-context.xsd"><!--指定扫描的包,这个包下的注解就会生效--><context:component-scan base-package="com.lxc.domain" /><context:annotation-config/> <!--注解的支持--><bean id="user" class="com.lxc.domain.User"/></beans>
第二步:添加 @Component 注解
package com.lxc.domain;import org.springframework.stereotype.Component;//@Component 组件 【等于】 <bean id="user" class="com.lxc.domain.User"/>@Componentpublic class User {public String name = "123";}
第三部:测试
public class Test {public static void main(String[] args) {ApplicationContext ctx = new ClassPathXmlApplicationContext("beans2.xml");User user = (User) ctx.getBean("user");System.out.println(user.name);}}

属性如何注入 @Value(“value”)
package com.lxc.domain;import org.springframework.beans.factory.annotation.Value;import org.springframework.stereotype.Component;/**@Component 组件 【等于】 <bean id="user" class="com.lxc.domain.User"/>@Value("name值~~~") 【等于】<bean id="user" class="com.lxc.domain.User"><property name="name" value="name值~~~"></property></bean>*/@Componentpublic class User {@Value("name值~~~")public String name;}
2、衍生注解
@Component 有几个衍生注解,我们在web开发中,会按照mvc三层架构分层
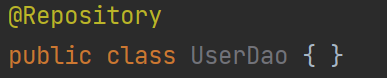
dao 层【@Repository】
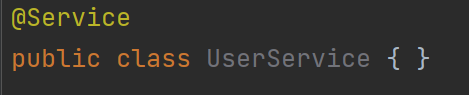
service层 【@Service】
controller层 【Controller】

这是个注解功能都是一样的,都是将某个类注册到spring中,装配Bean。
3、@scope
作用域
/**@Scope("singleton") 等于 <bean id="user" class="" scope="singleton" />*/@Scope("singleton")public class User {@Value("name值~~~")public String name;}
总结:
(1)xml更加万能,适用于任何场景!维护简单。
(2)注解开发,维护起来相对复杂。
(3)一般开发中,xml来管理bean,注解实现属性的注入。
(4)使用直接之前一定要开启注解支持:
<?xml version="1.0" encoding="UTF-8"?><beans xmlns="http://www.springframework.org/schema/beans"xmlns:xsi="http://www.w3.org/2001/XMLSchema-instance"xmlns:context="http://www.springframework.org/schema/context"xsi:schemaLocation="http://www.springframework.org/schema/beanshttps://www.springframework.org/schema/beans/spring-beans.xsdhttp://www.springframework.org/schema/contexthttps://www.springframework.org/schema/context/spring-context.xsd"><!--指定扫描的包,这个包下的注解就会生效--><context:component-scan base-package="com.lxc.domain" /><!--注解的支持--><context:annotation-config/></beans>


盒子模型,边框,内外边距,盒子模型布局,ps基本操作,列表样式,圆角边框,盒子阴影")


还没有评论,来说两句吧...