(五)SpringCloud代码实战之zuul网关
本文任务:
1、搭建zuul网关
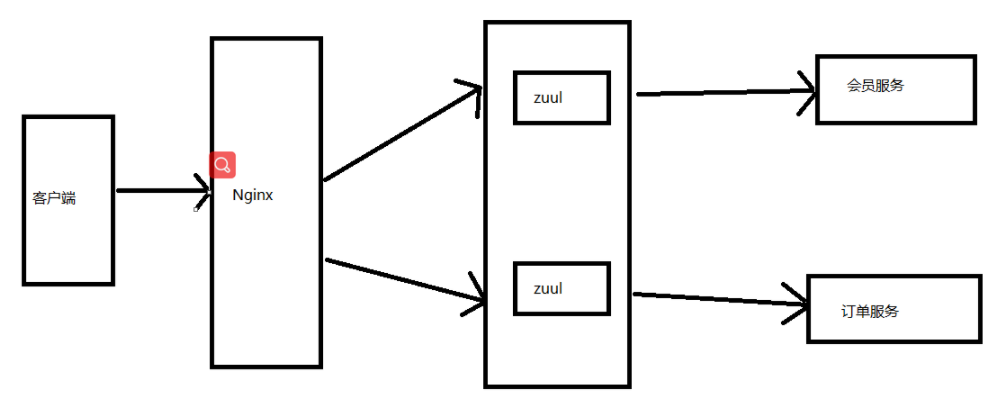
2、nginx+zuul,可以实现网关集群
本文是在前文搭建的项目基础上构建的:
(一)springcloud实战代码之eureka注册中心
(二)springcloud实战之config配置中心
(三)SpringCloud实战之openfeign服务调用
(四)SpringCloud代码实战之hystrix熔断器
本文新建项目结构:
模块zuulServer-8060,启动类ZuulApplication,配置文件application.yml,过滤器类MyZuulFilter(继承ZuulFilter类)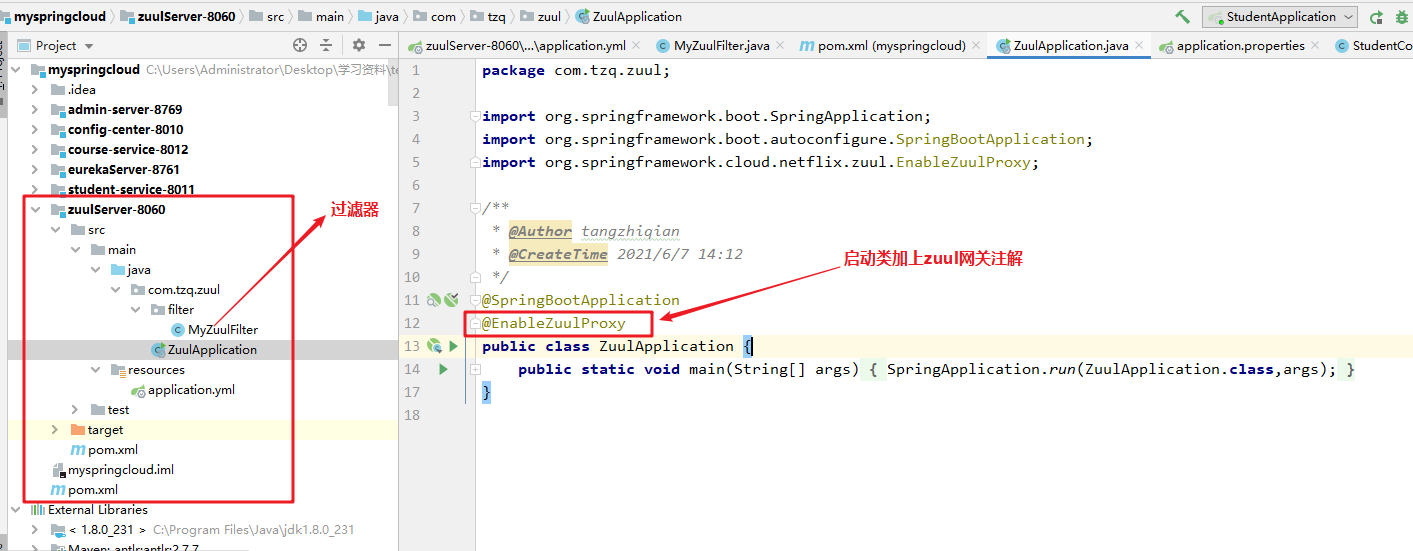
一、搭建zuul网关
1.1、引入依赖
zuul网关依赖spring-cloud-starter-netflix-zuul,
<dependency><groupId>org.springframework.cloud</groupId><artifactId>spring-cloud-starter-netflix-zuul</artifactId></dependency>
因为在父工程中声明了spring-cloud-dependencies(Hoxton.SR11)所以这里zuul的依赖不用写版本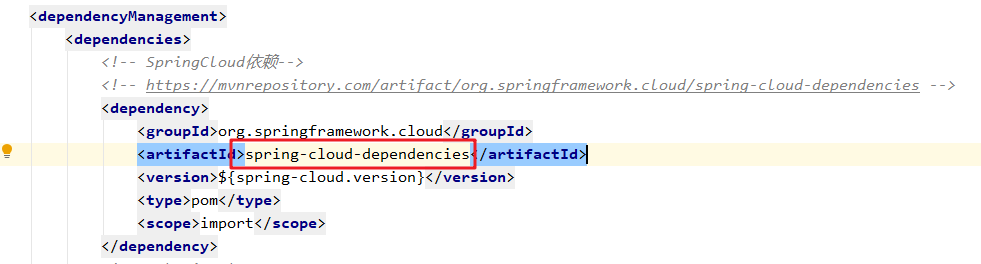
其他依赖: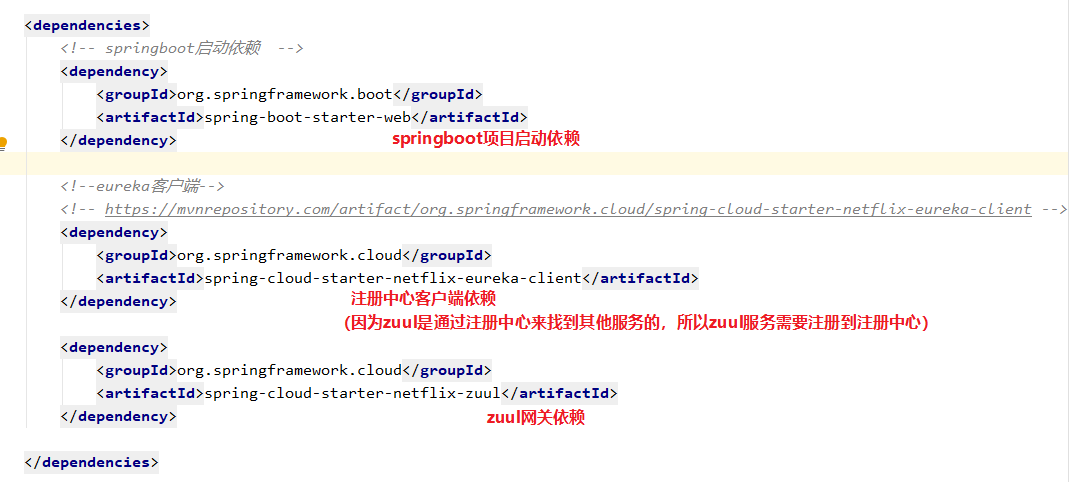
1.2、启动类
启动类上面加注解@EnableZuulProxy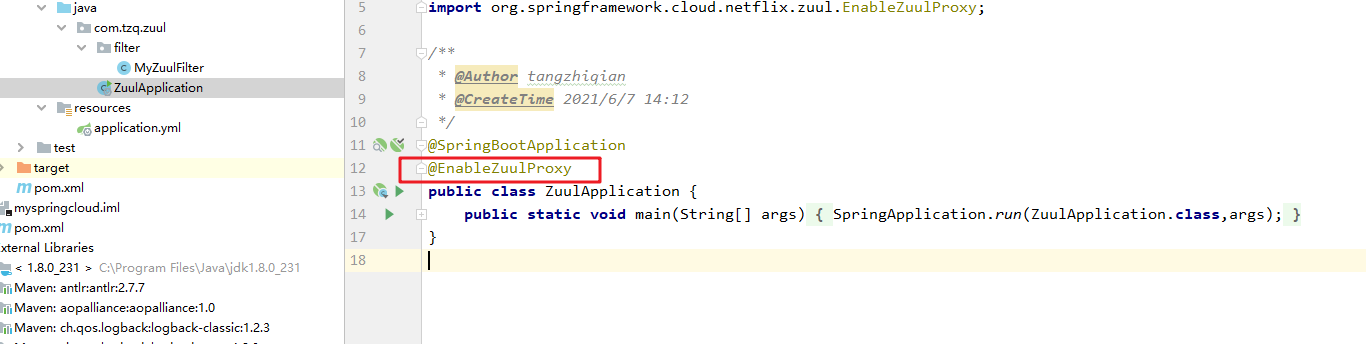
1.3、zuul过滤器
新建过滤器类:MyZuulFilter,继承ZuulFilter,重写ZuulFilter的四个方法.。
参考:Zuul入门实战(完整版)
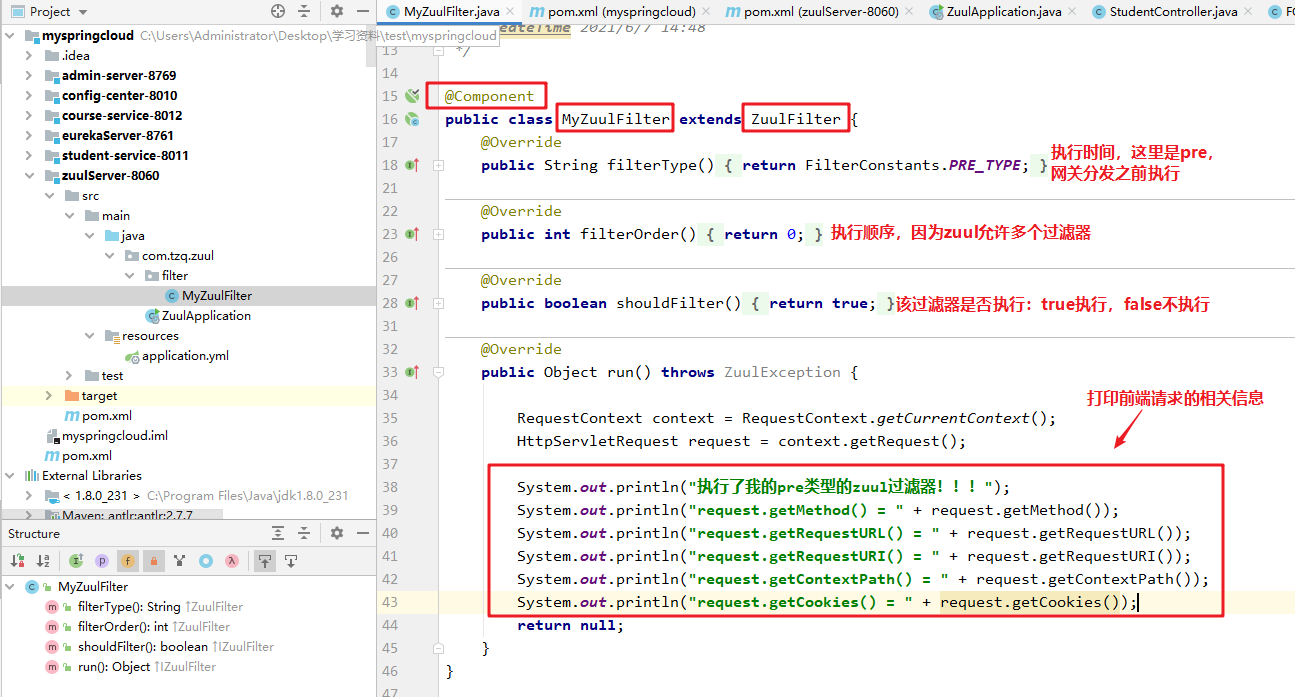
MyZuulFilter.class:
package com.tzq.zuul.filter;import com.netflix.zuul.ZuulFilter;import com.netflix.zuul.context.RequestContext;import com.netflix.zuul.exception.ZuulException;import org.springframework.cloud.netflix.zuul.filters.support.FilterConstants;import org.springframework.stereotype.Component;import javax.servlet.http.HttpServletRequest;/** * @Author tangzhiqian * @CreateTime 2021/6/7 14:48 */@Componentpublic class MyZuulFilter extends ZuulFilter {@Overridepublic String filterType() {return FilterConstants.PRE_TYPE;}@Overridepublic int filterOrder() {return 0;}@Overridepublic boolean shouldFilter() {return true;}@Overridepublic Object run() throws ZuulException {RequestContext context = RequestContext.getCurrentContext();HttpServletRequest request = context.getRequest();System.out.println("执行了我的pre类型的zuul过滤器!!!");System.out.println("request.getMethod() = " + request.getMethod());System.out.println("request.getRequestURL() = " + request.getRequestURL());System.out.println("request.getRequestURI() = " + request.getRequestURI());System.out.println("request.getContextPath() = " + request.getContextPath());System.out.println("request.getCookies() = " + request.getCookies());return null;}}
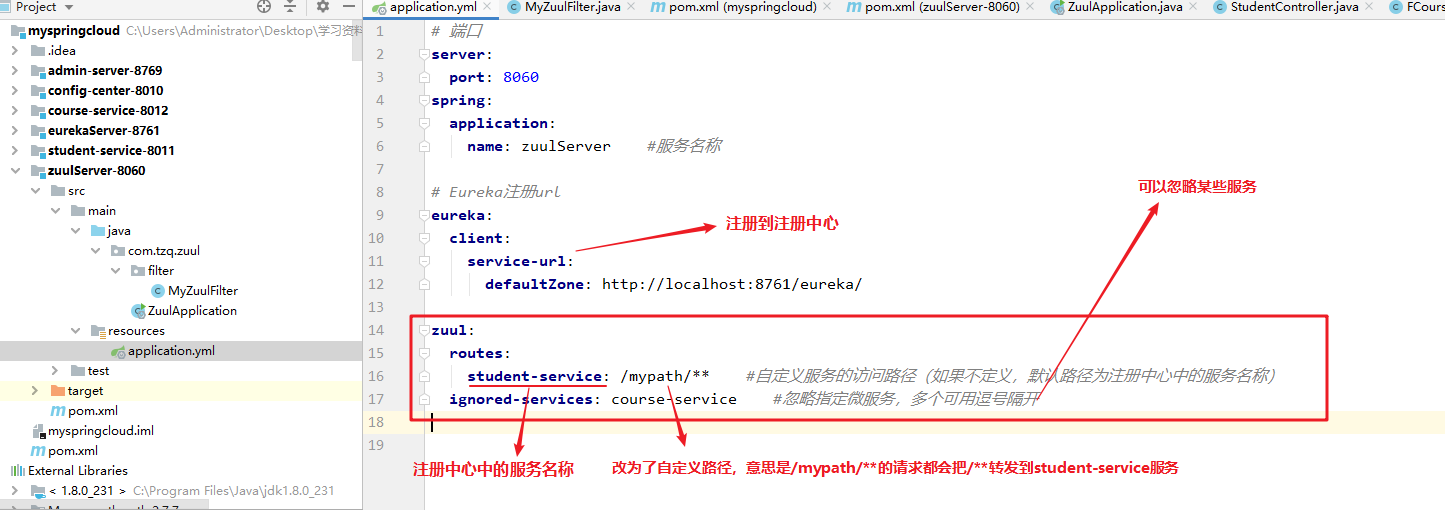
1.4、配置文件
到这里,zuul网关已经搭建完成!
启动:注册中心,配置中心,stundent-service,zuulServer
打开浏览器:访问http://localhost:8060/mypath/student/selectAll
(zuulServer在8060端口跑)
转发成功: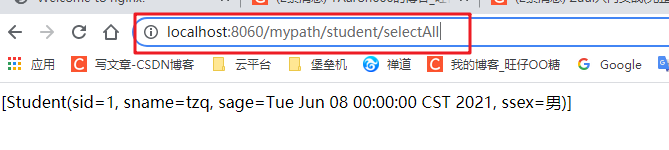
与此同时,控制台输出: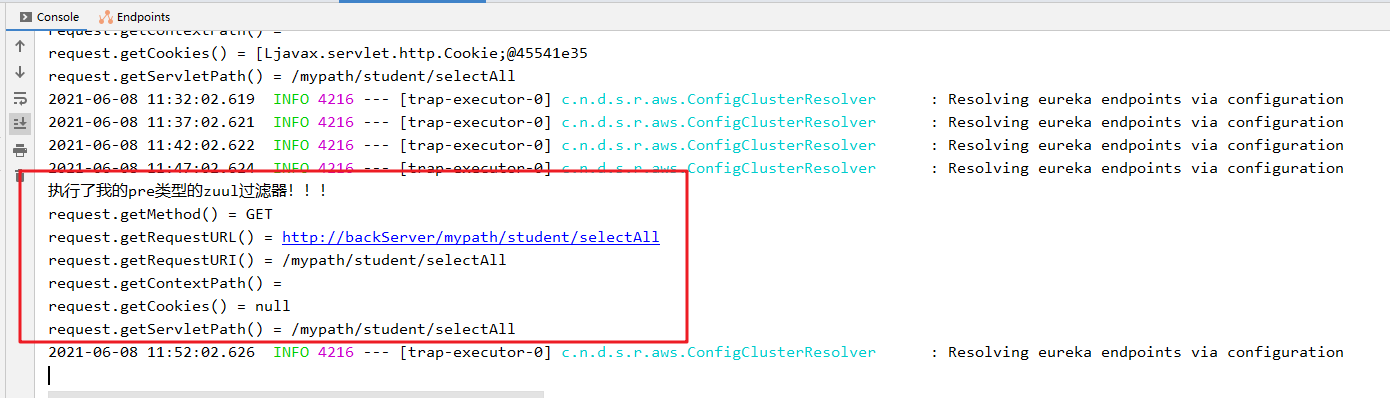
说明过滤器也生效了!
二、nginx+zuul
2.1、安装nginx(此处是window版)
下载地址:http://nginx.org/en/download.html 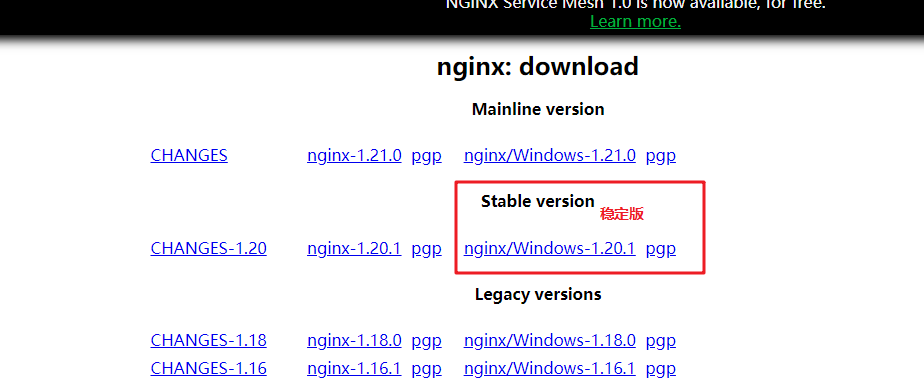
解压后,一定要用cmd启动nginx!!!!!
启动是没有任何反应的,打开浏览器:http://localhost:80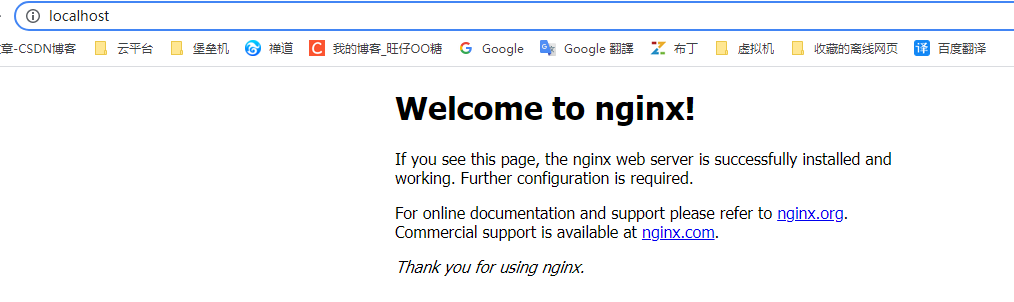
说明安装成功。
2.2、配置nginx
在刚刚解压的nginx文件夹中:conf文件夹—>nginx.conf文件
其中weight表示权重,谁的权重大访问到的几率就大(多个服务权重可相同)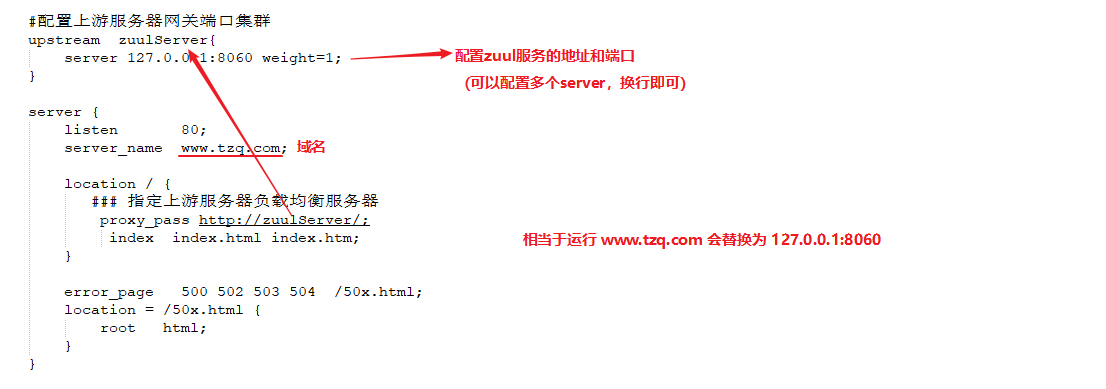
nginx.conf文件:
#user nobody;worker_processes 1;#error_log logs/error.log;#error_log logs/error.log notice;#error_log logs/error.log info;#pid logs/nginx.pid;events {worker_connections 1024;}http {include mime.types;default_type application/octet-stream;#log_format main '$remote_addr - $remote_user [$time_local] "$request" '# '$status $body_bytes_sent "$http_referer" '# '"$http_user_agent" "$http_x_forwarded_for"';#access_log logs/access.log main;sendfile on;#tcp_nopush on;#keepalive_timeout 0;keepalive_timeout 65;#gzip on;server {listen 80;server_name localhost;#charset koi8-r;#access_log logs/host.access.log main;location / {root html;index index.html index.htm;}#error_page 404 /404.html;# redirect server error pages to the static page /50x.html#error_page 500 502 503 504 /50x.html;location = /50x.html {root html;}# proxy the PHP scripts to Apache listening on 127.0.0.1:80##location ~ \.php$ {# proxy_pass http://127.0.0.1;#}# pass the PHP scripts to FastCGI server listening on 127.0.0.1:9000##location ~ \.php$ {# root html;# fastcgi_pass 127.0.0.1:9000;# fastcgi_index index.php;# fastcgi_param SCRIPT_FILENAME /scripts$fastcgi_script_name;# include fastcgi_params;#}# deny access to .htaccess files, if Apache's document root# concurs with nginx's one##location ~ /\.ht {# deny all;#}}# another virtual host using mix of IP-, name-, and port-based configuration##server {# listen 8000;# listen somename:8080;# server_name somename alias another.alias;# location / {# root html;# index index.html index.htm;# }#}# HTTPS server##server {# listen 443 ssl;# server_name localhost;# ssl_certificate cert.pem;# ssl_certificate_key cert.key;# ssl_session_cache shared:SSL:1m;# ssl_session_timeout 5m;# ssl_ciphers HIGH:!aNULL:!MD5;# ssl_prefer_server_ciphers on;# location / {# root html;# index index.html index.htm;# }#}#配置上游服务器网关端口集群upstream zuulServer{server 127.0.0.1:8060 weight=1;}server {listen 80;server_name www.tzq.com;location / {### 指定上游服务器负载均衡服务器proxy_pass http://zuulServer/;index index.html index.htm;}error_page 500 502 503 504 /50x.html;location = /50x.html {root html;}}}
配置完,重新加载一下nginx:
nginx -s reload
2.3、运行
http://www.tzq.com/mypath/student/selectAll
成功!!!


")


还没有评论,来说两句吧...