Hibernate环境搭建和配置
hibernate是一个ORM(对象关系映射)框架,将实体类对象和数据库数据关系做了映射,使我们操作数据库时,方便简单。hibernate对JDBC重复的操作做了封装,而且使用hibernate开发的项目,不管数据库怎么改变,都不用修改代码,是需要将配置文件中的信息修改为对应的数据库信息即可。
今天我们开始学习hibernate,下面介绍一下hibernate的环境搭建和配置:
先看一下hibernate4_hello项目的整体架构
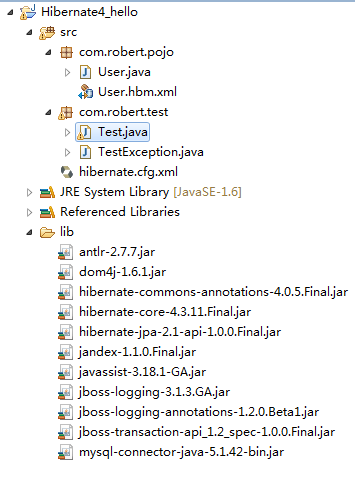
一、新建一个java工程,取名为hibernate4_hello,
右键项目名,新建一个floder文件,取名为lib
二、导入hibernate的jar包
从hibernate官网上([http://hibernate.org/orm/downloads/][http_hibernate.org_orm_downloads])下载hibernate.final文件,
我下载的是hibernate的4.3.11.final,如图:
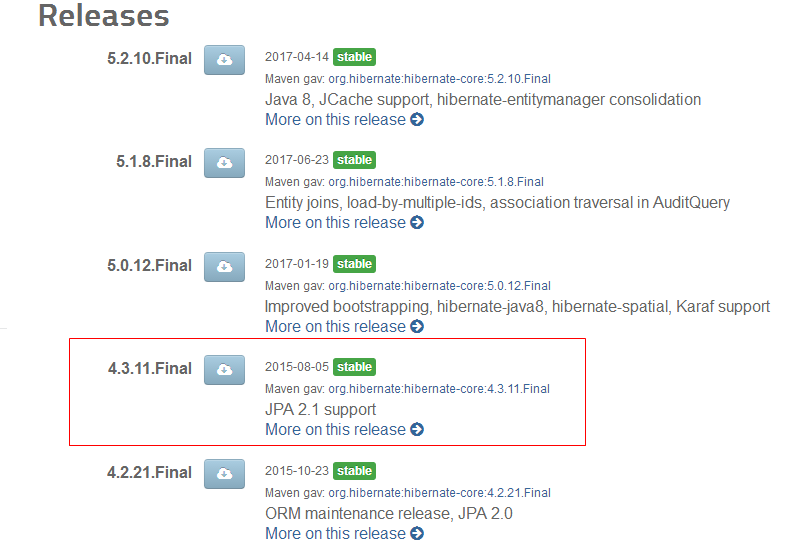
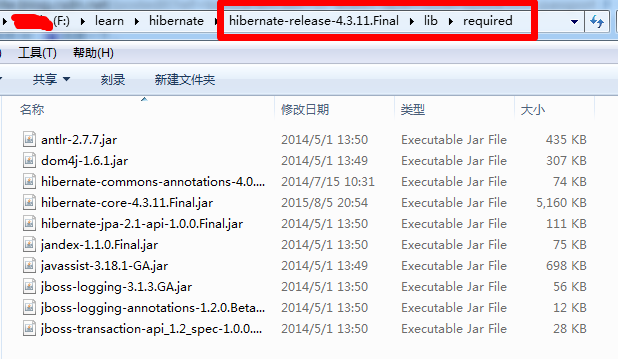
解压后,找到hibernate-release-4.3.11.Final\lib\required这个地址,将里面的jar包拷贝一份到hibernate4_hello中的lib文件夹中
三、新建hibernate.cfg.xml配置文件
从解压的hibernate final文件中,找到如下路径:hibernate-release-4.3.11.Final\\project\\etc
里面有一个hibernate.cfg.xml文件,如图:

将hibernate.cfg.xml文件拷贝一份到hibernate4_hello项目的src文件夹下,
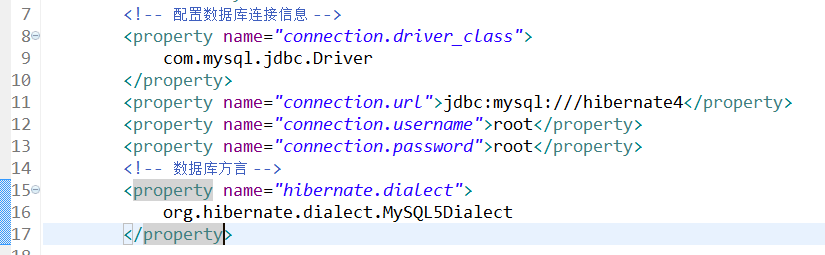
修改成如下:
<!DOCTYPE hibernate-configuration PUBLIC"-//Hibernate/Hibernate Configuration DTD 3.0//EN""http://www.hibernate.org/dtd/hibernate-configuration-3.0.dtd"><hibernate-configuration><session-factory><!-- 配置数据库连接信息 --><property name="connection.driver_class">com.mysql.jdbc.Driver</property><property name="connection.url">jdbc:mysql:///hibernate4</property><property name="connection.username">root</property><property name="connection.password">root</property><!-- 数据库方言 --><property name="hibernate.dialect">org.hibernate.dialect.MySQL5Dialect</property></session-factory></hibernate-configuration>
其中,配置数据库的连接信息和方言,可以从 hibernate-release-4.3.11.Final\project\etc这个路径下的hibernate.properties文件中寻找,
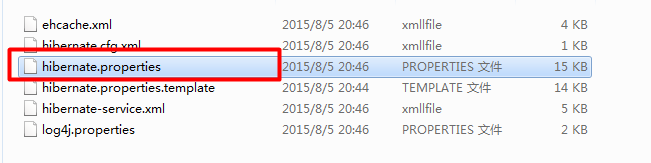
在hibernate.properties文件中有很多配置信息,我的项目是使用的mysql数据库,因此我找到了mysql的连接配置信息,如图:
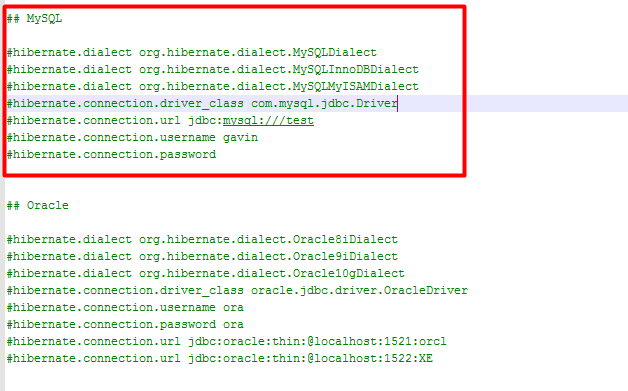
配置到hibernate.cfg.xml中后如图:
四、新建实体类User
package com.robert.pojo;public class User {private int id ;private String name ;private String pwd ;public int getId() {return id;}public void setId(int id) {this.id = id;}public String getName() {return name;}public void setName(String name) {this.name = name;}public String getPwd() {return pwd;}public void setPwd(String pwd) {this.pwd = pwd;}}
五、配置实体类User对应的配置文件User.hbm.xml
代码如下:
<?xml version="1.0"?><!DOCTYPE hibernate-mapping PUBLIC"-//Hibernate/Hibernate Mapping DTD 3.0//EN""http://www.hibernate.org/dtd/hibernate-mapping-3.0.dtd"><!-- This mapping demonstrates content-based discrimination for the table-per-hierarchymapping strategy, using a formula discriminator. --><hibernate-mapping><class name="com.robert.pojo.User" table="user"><id name="id"><!-- 主键生成策略 --><generator class="native" /></id><property name="name" /><property name="pwd" /></class></hibernate-mapping>
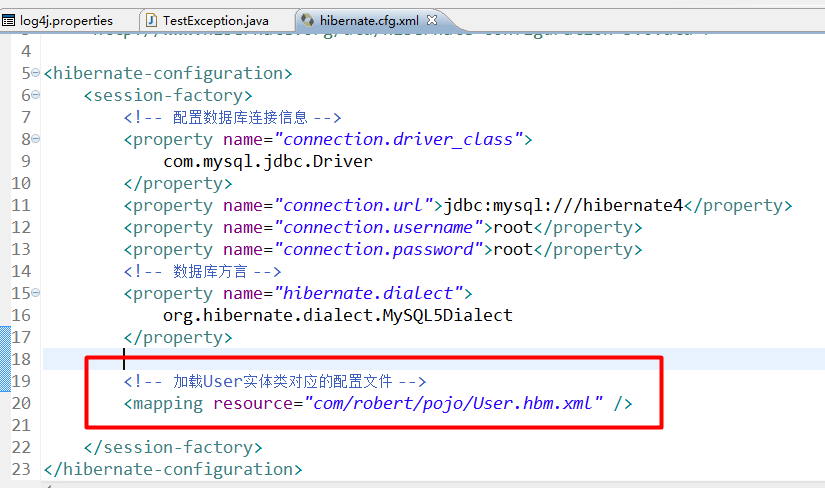
将User.hbm.xml配置文件放到hibernate.cfg.xml中,如图:
六、完成测试类
测试类的代码如下:
package com.robert.test;import org.hibernate.Session;import org.hibernate.SessionFactory;import org.hibernate.Transaction;import org.hibernate.boot.registry.StandardServiceRegistryBuilder;import org.hibernate.cfg.Configuration;import org.hibernate.service.ServiceRegistry;import org.hibernate.service.ServiceRegistryBuilder;import com.robert.pojo.User;public class Test {public static void main(String[] args) {// 1.新建Configuration对象Configuration cfg = new Configuration().configure();// 2.通过Configuration创建sessionFactory对象/** --在hibernate3中的写法* SessionFactory sf = cfg.buildSessionFactory() ;* --在hibernate4.0~hibernate4.2使用* ServiceRegistry sRegistry = new ServiceRegistryBuilder().* applySettings(cfg.getProperties())* .buildServiceRegistry() ;*/// 在hibernate4.3中的用法ServiceRegistry sr = new StandardServiceRegistryBuilder().applySettings(cfg.getProperties()).build();SessionFactory sf = cfg.buildSessionFactory(sr);// 3.通过SessionFactory得到session对象Session session = sf.openSession() ;// 4.通过session对象,得到Transaction对象,开启事务Transaction tx = session.beginTransaction() ;// 5.保存数据User user = new User() ;user.setName("罗伯特") ;user.setPwd("12345") ;session.save(user) ;// 6.提交事务tx.commit();// 7.关闭sessionsession.close();}}
补充:
增加一个有事务回滚和异常处理的测试类,代码如下:
package com.robert.test;import org.hibernate.Session;import org.hibernate.SessionFactory;import org.hibernate.Transaction;import org.hibernate.boot.registry.StandardServiceRegistryBuilder;import org.hibernate.cfg.Configuration;import org.hibernate.service.ServiceRegistry;import com.robert.pojo.User;public class TestException {public static void main(String[] args) {Configuration cfg = null ;SessionFactory sf = null ;Session session = null ;Transaction tx = null ;try {cfg = new Configuration().configure();ServiceRegistry sr = new StandardServiceRegistryBuilder().applySettings(cfg.getProperties()).build();sf = cfg.buildSessionFactory(sr);session = sf.openSession() ;tx = session.beginTransaction() ;User user = (User) session.get(User.class, 1);System.out.println("name="+user.getName());tx.commit();} catch (Exception e) {tx.rollback();}finally{if(session!=null && session.isOpen()) {session.close();}}}}


![洛谷 P1169 [ZJOI2007]棋盘制作](https://image.dandelioncloud.cn/images/20230808/72ba490c52904facb1bad28940d1f12a.png "洛谷 P1169 [ZJOI2007]棋盘制作")


还没有评论,来说两句吧...