ubuntu16.04 搭建 dns 服务器
具体需求:部门管理中,有git服务器,部门管理系统的服务器,vpn 服务器等等,每一个访问都是用ip,这样很烦,不高大上,我想整成这样:git服务器:git.com 管理系统的服务器:mag.com… 的形式。
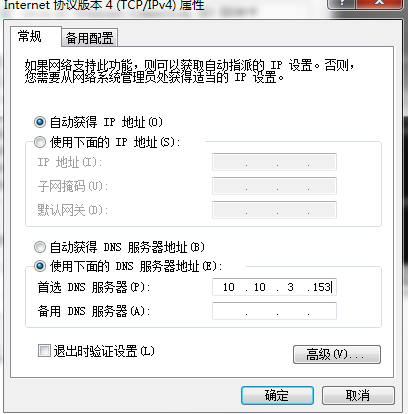
解决方法:新建一个虚拟机(这里是ubuntu 16.04 64位),搭建成一个dns服务器,然后让部门的每一台电脑的dns指向dns服务器,就可以了。
环境(都是ubuntu16.04 64位):我的git服务器: 10.10.3.155
管理系统所在的服务器:10.10.3.154
新建的dns服务器:10.10.3.153
现在开始搭建dns服务器(10.10.3.153)
1.更新环境,切换成root用户
su rootapt-get update
2.安装bind9
apt-get install bind9
3.配置/etc/bind/named.conf.local 文件(服务器域解析文件)
zone "mag.com"{type master;file "db.mag.com";};zone "git.com"{type master;file "db.git.com";};
4.步骤3中的db.mag.com和db.git.com是域解析文件,默认在/etc/var/cache/bind,它们的格式与bind9自带的模板db.local格式一致,我们把/etc/bind/db.local文件copy到/etc/var/cache/bind下,并命名为db.mag.com 和 db.git.com
cp /etc/bind/db.local /var/cache/bind/db.mag.comcp /etc/bind/db.local /var/cache/bind/db.git.com
5.编辑域解析文件
vim /var/cache/bind/db.mag.com
在末尾加:@ IN A 10.10.3.154
即:
;; BIND data file for local loopback interface;$TTL 604800@ IN SOA localhost. root.localhost. (2 ; Serial604800 ; Refresh86400 ; Retry2419200 ; Expire604800 ) ; Negative Cache TTL;@ IN NS localhost.@ IN A 127.0.0.1@ IN AAAA ::1@ IN A 10.10.3.154
db.git.com 的配置同理,在/var/cache/bind/db.git.com 最后面加一句@ IN A 10.10.3.155 即可。
6.配置/etc/bind/named.conf.options 文件
在中间加入下面的代码,dns服务器就可以访问外网了
forwarders { 8.8.8.8; };
完整的文件如下:
options {directory "/var/cache/bind";// If there is a firewall between you and nameservers you want// to talk to, you may need to fix the firewall to allow multiple// ports to talk. See http://www.kb.cert.org/vuls/id/800113// If your ISP provided one or more IP addresses for stable// nameservers, you probably want to use them as forwarders.// Uncomment the following block, and insert the addresses replacing// the all-0's placeholder.// forwarders {// 0.0.0.0;// };forwarders {8.8.8.8;};//========================================================================// If BIND logs error messages about the root key being expired,// you will need to update your keys. See https://www.isc.org/bind-keys//========================================================================dnssec-validation auto;auth-nxdomain no; # conform to RFC1035listen-on-v6 { any; };};
7.重启bind9服务
/etc/init.d/bind9 restart
8.测试
在浏览器输入:git.com 回车

9.就这样成功了。


还没有评论,来说两句吧...