CentOS7.3 64位,搭建Zabbix3.4
新版本的zabbix4.4使用docker-compose部署:https://blog.csdn.net/tladagio/article/details/103046823
一、系统环境
[root@ecs-5c78-0001 ~]# cat /etc/redhat-releaseCentOS Linux release 7.3.1611 (Core)
为了方便测试,停止并且开机不启动防火墙,生产环境根据需要进行调整
[root@ecs-5c78-0001 ~]# systemctl stop firewalld.service[root@ecs-5c78-0001 ~]# systemctl disable firewalld.service
关闭selinux
[root@ecs-5c78-0001 ~]# sed -i 's/SELINUX=enforcing/SELINUX=disabled/' /etc/selinux/config[root@ecs-5c78-0001 ~]# grep SELINUX=disabled /etc/selinux/configSELINUX=disabled[root@ecs-5c78-0001 ~]# setenforce 0setenforce: SELinux is disabled
二、数据库的安装和配置
1、安装之前检查系统中是否存在使用rpm安装的MySQL或者MariaDB
[root@ecs-5c78-0001 ~]# rpm -qa | grep mysql[root@ecs-5c78-0001 ~]# rpm -qa | grep mariadbmariadb-libs-5.5.52-1.el7.x86_64
2、如果需要卸载,执行命令:rpm -e 软件名,执行失败的时候可以使用:rpm -e —nodeps 软件名强制卸载,卸载之后再使用
rpm -qa | grep mysql 或者rpm -qa | grep mariadb查看结果。
[root@ecs-5c78-0001 ~]# rpm -e mariadb-libs-5.5.52-1.el7.x86_64error: Failed dependencies:libmysqlclient.so.18()(64bit) is needed by (installed) postfix-2:2.10.1-6.el7.x86_64libmysqlclient.so.18(libmysqlclient_18)(64bit) is needed by (installed) postfix-2:2.10.1-6.el7.x86_64[root@ecs-5c78-0001 ~]# rpm -e --nodeps mariadb-libs-5.5.52-1.el7.x86_64
安装mariadb
[root@ecs-5c78-0001 ~]# yum install mariadb-server mariadb –y
启动数据库并设置为开机启动
[root@ecs-5c78-0001 ~]# systemctl start mariadb[root@ecs-5c78-0001 ~]# systemctl enable mariadbCreated symlink from /etc/systemd/system/multi-user.target.wants/mariadb.service to /usr/lib/systemd/system/mariadb.service.
#数据库其他操作命令
[root@ecs-5c78-0001 ~]# systemctl restart mariadb #重启[root@ecs-5c78-0001 ~]# systemctl stop mariadb #停止
三、Zabbix3.4安装和配置
1、安装zabbix(这里的http://链接注意会更新,可以直接打开网站查询最新的RPM包链接,然后使用rpm -ivh安装即可)
[root@ecs-5c78-0001 ~]# rpm -ivh http://repo.zabbix.com/zabbix/3.4/rhel/7/x86_64/zabbix-release-3.4-1.el7.centos.noarch.rpmRetrieving http://repo.zabbix.com/zabbix/3.4/rhel/7/x86_64/zabbix-release-3.4-1.el7.centos.noarch.rpmPreparing... ################################# [100%]Updating / installing... 1:zabbix-release-3.4-1.el7.centos ################################# [100%][root@ecs-5c78-0001 ~]# yum install zabbix-server-mysql zabbix-web-mysql -y
2、创建数据库
[root@ecs-5c78-0001 ~]# mysqlWelcome to the MariaDB monitor. Commands end with ; or \g.Your MariaDB connection id is 2Server version: 5.5.56-MariaDB MariaDB ServerCopyright (c) 2000, 2017, Oracle, MariaDB Corporation Ab and others.Type 'help;' or '\h' for help. Type '\c' to clear the current input statement.MariaDB [(none)]> create database zabbix character set utf8 collate utf8_bin;Query OK, 1 row affected (0.00 sec)MariaDB [(none)]> grant all privileges on zabbix.* to zabbix@localhost identified by 'zabbix';Query OK, 0 rows affected (0.00 sec)MariaDB [(none)]> exitBye
3、导入数据库(这里的zabbix-mysql-3.4.5注意版本号会更新)
[root@ecs-5c78-0001 ~]# zcat /usr/share/doc/zabbix-server-mysql-3.4.5/create.sql.gz |mysql -uzabbix -pzabbix zabbix
4、配置数据库用户及密码
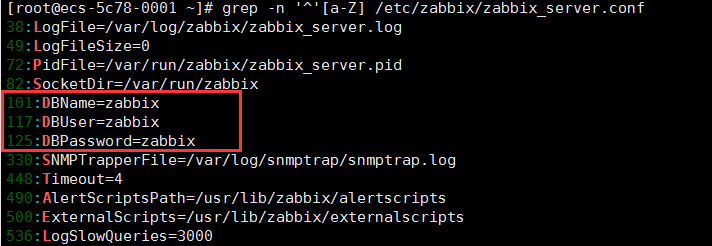
[root@ecs-5c78-0001 ~]# vim /etc/zabbix/zabbix_server.conf
5、修改如下配置
DBName=zabbix
DBUser=zabbix
#DBPassword= 改为》》DBPassword=zabbix
保存退出:wq
6、启动zabbix server 并设置开机启动
[root@ecs-5c78-0001 ~]# systemctl start zabbix-server.service[root@ecs-5c78-0001 ~]# systemctl enable zabbix-server.serviceCreated symlink from /etc/systemd/system/multi-user.target.wants/zabbix-server.service to /usr/lib/systemd/system/zabbix-server.service.
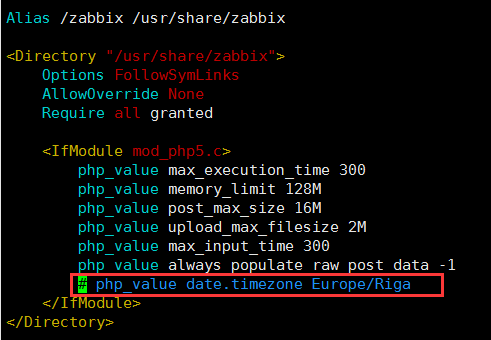
7、编辑zabbix前端PHP配置,更改时区
[root@ecs-5c78-0001 ~]# vim /etc/httpd/conf.d/zabbix.conf
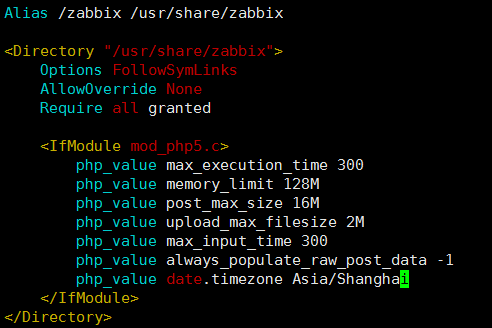
# php_value date.timezone Europe/Riga 改为》》 php_value date.timezone Asia/Shanghai
保存退出:wq
更改为如下
8、Selinux配置
[root@ecs-5c78-0001 ~]# setsebool -P httpd_can_connect_zabbix onsetsebool: SELinux is disabled.[root@ecs-5c78-0001 ~]# setsebool -P httpd_can_cetwork_connect_db onsetsebool: SELinux is disabled.
9、启动httpd并且设置开机启动
[root@ecs-5c78-0001 ~]# systemctl start httpd[root@ecs-5c78-0001 ~]# systemctl enable httpdCreated symlink from /etc/systemd/system/multi-user.target.wants/httpd.service to /usr/lib/systemd/system/httpd.service.
四、配置Zabbix Web信息
1.浏览器登录本机IP:http://192.168.2.216/zabbix/
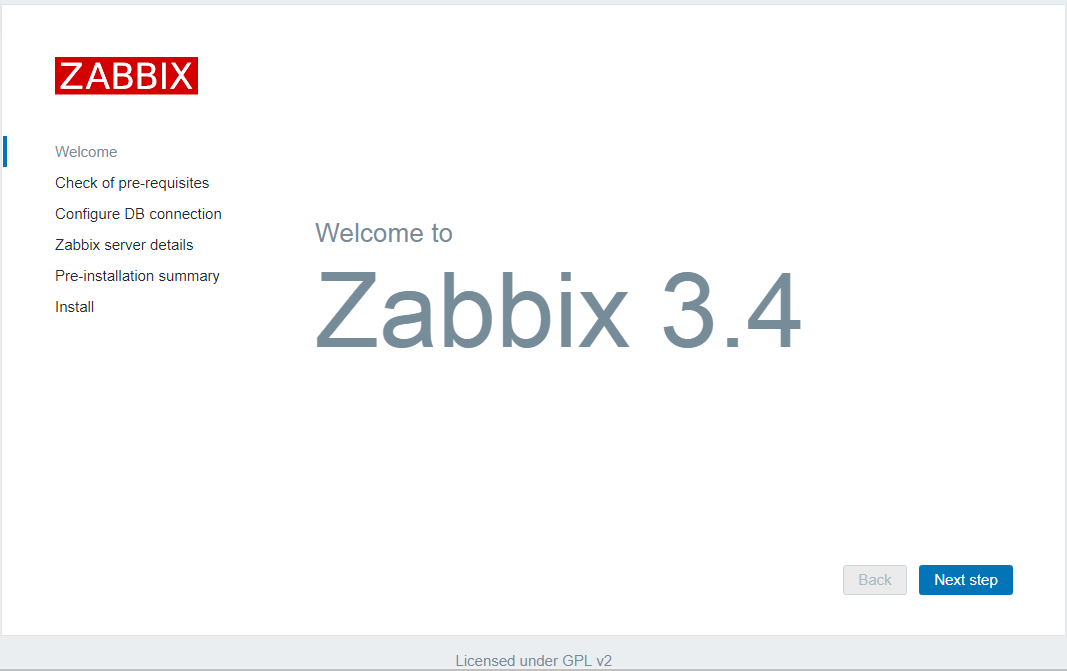
2.点击:Next step
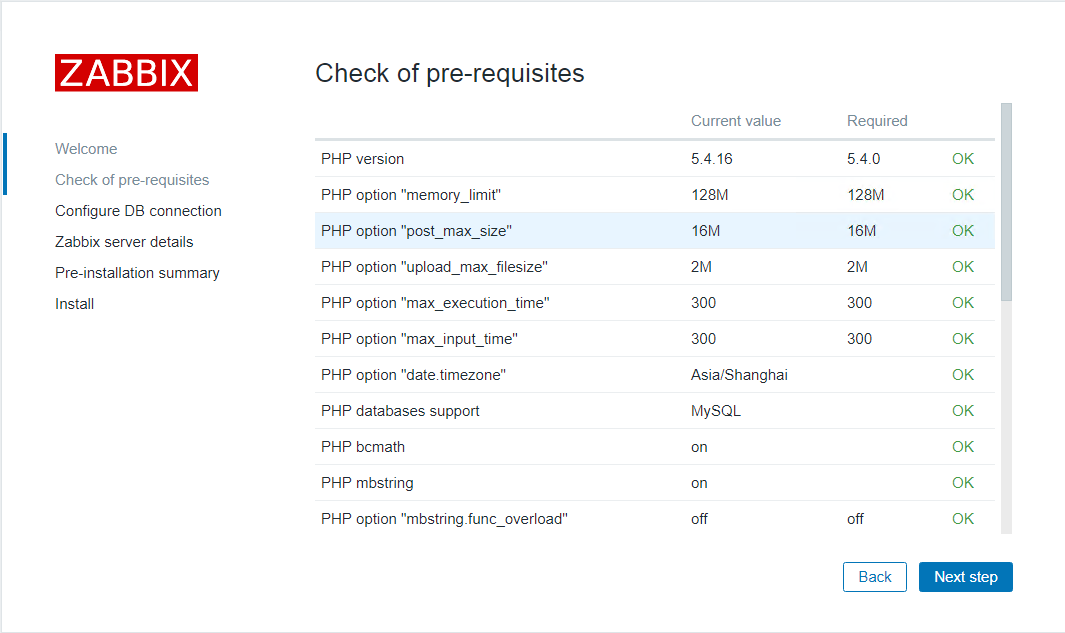
3.点击:Next step
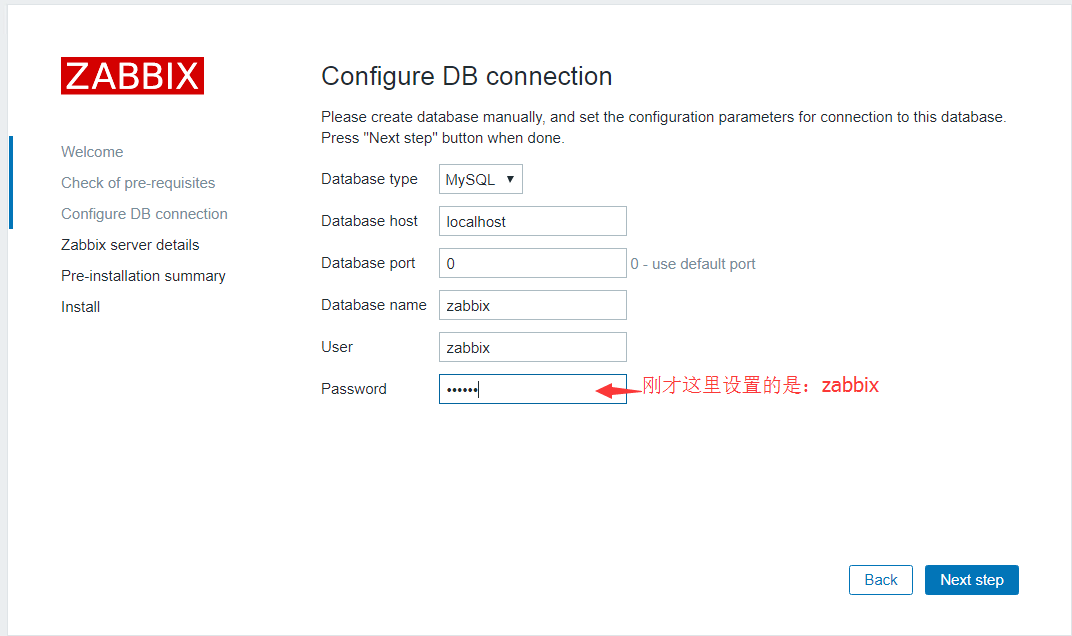
4.点击:Next step
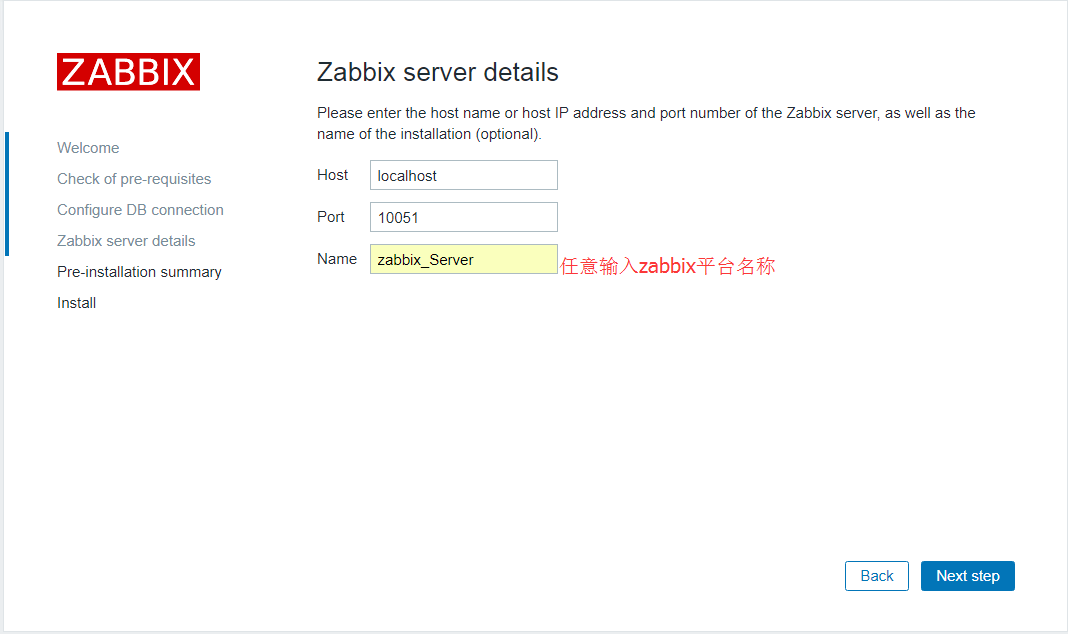
5.确认输入信息,点击Next step

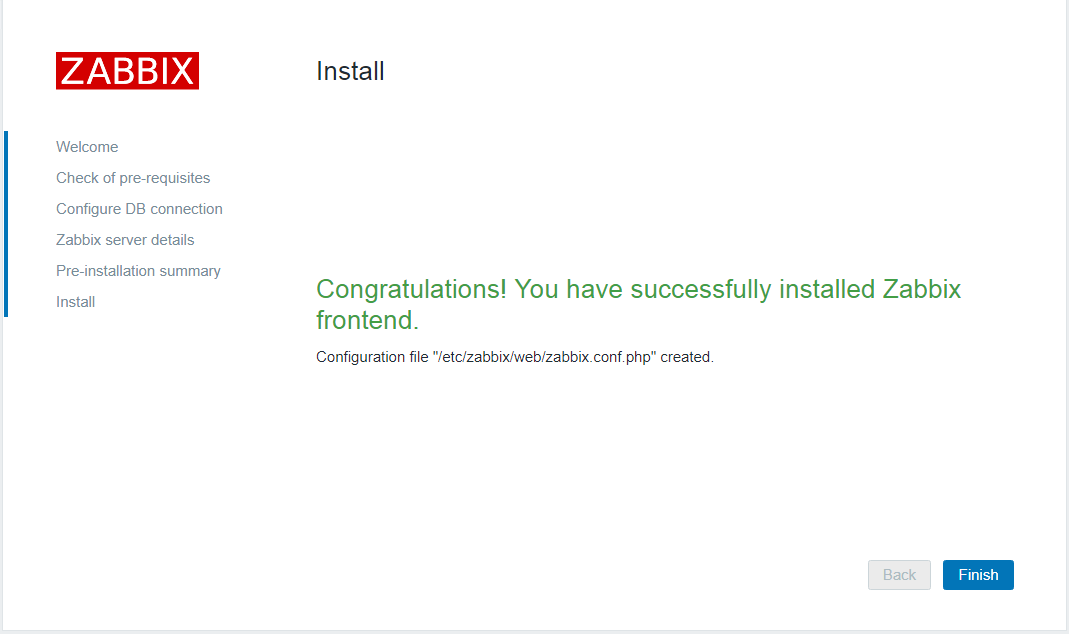
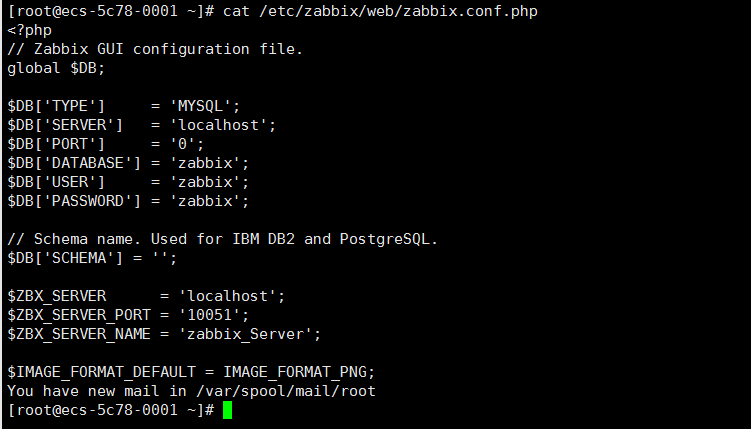
6.点击Finish,生成配置文件在:/etc/zabbix/web/zabbix.conf.php
查看配置文件:
cat /etc/zabbix/web/zabbix.conf.php
登录Zabbix3.4,默认用户名:Admin 默认密码:zabbix
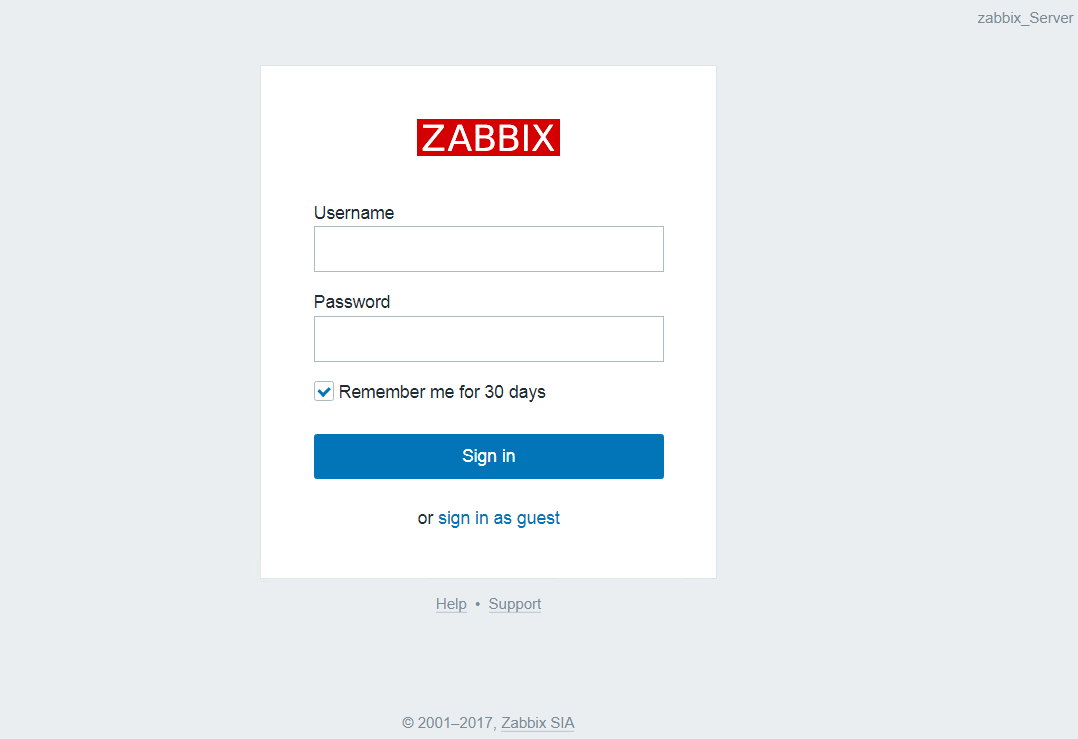
登录页面
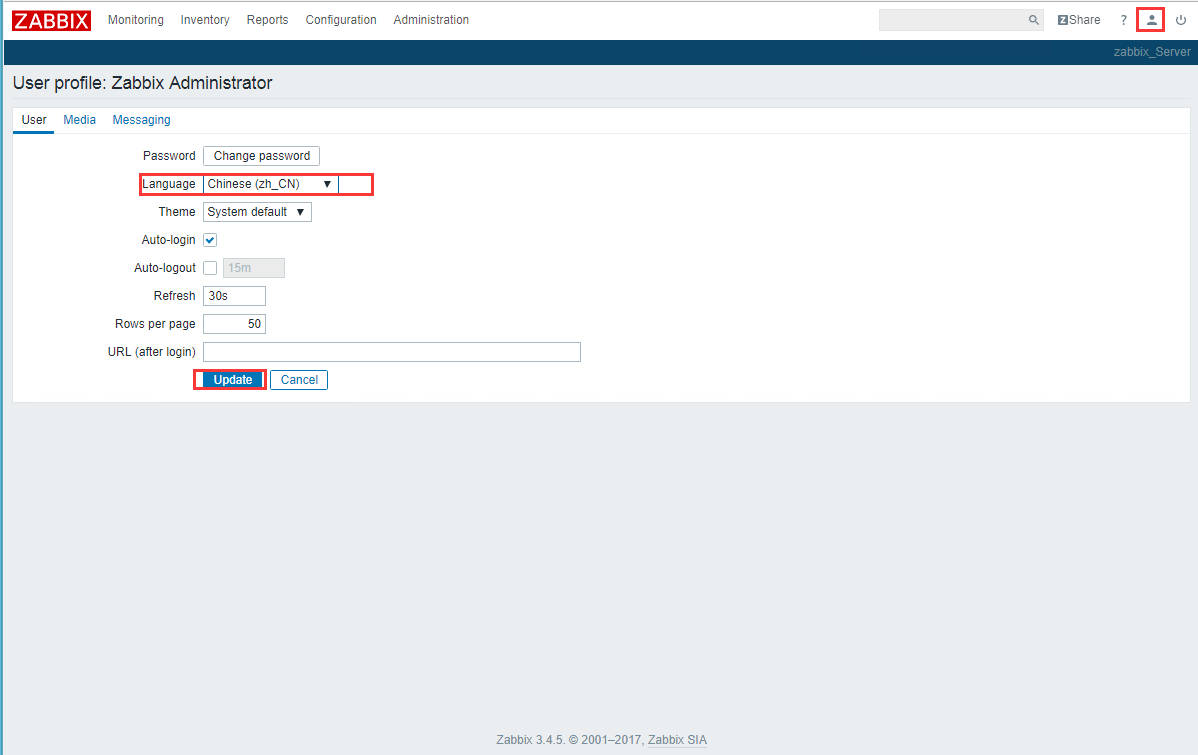
更换为中文
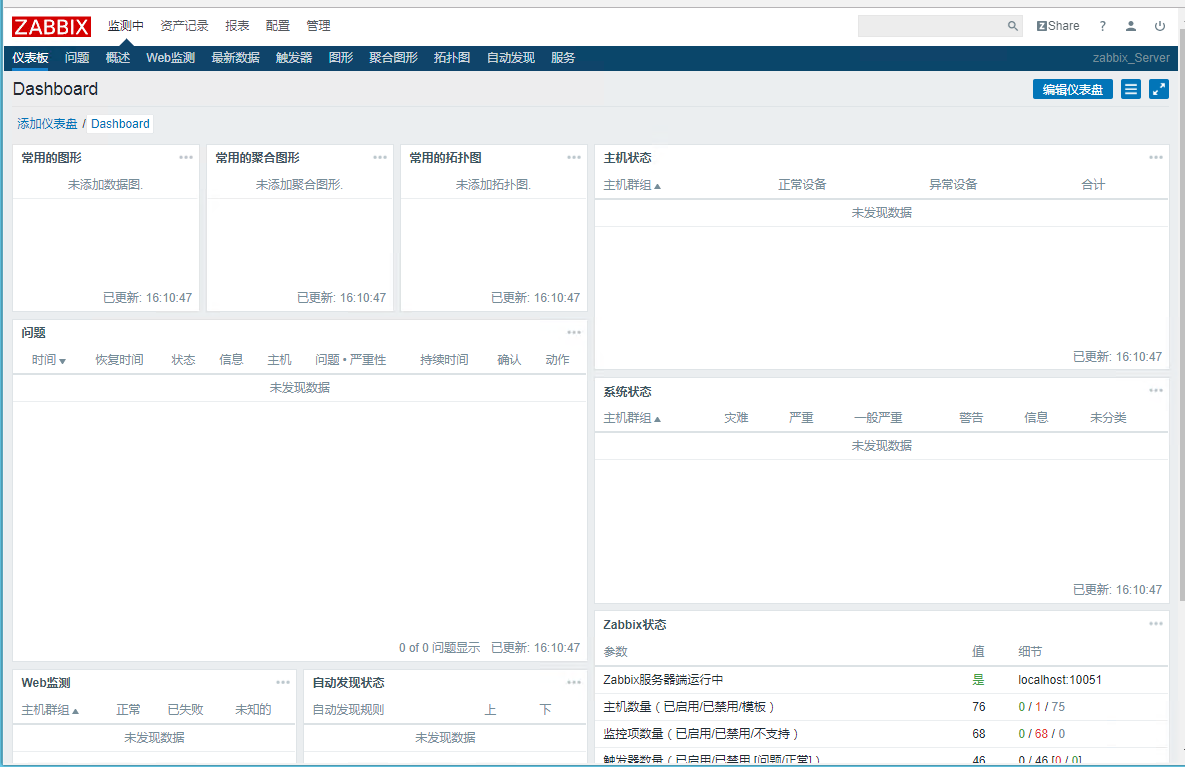
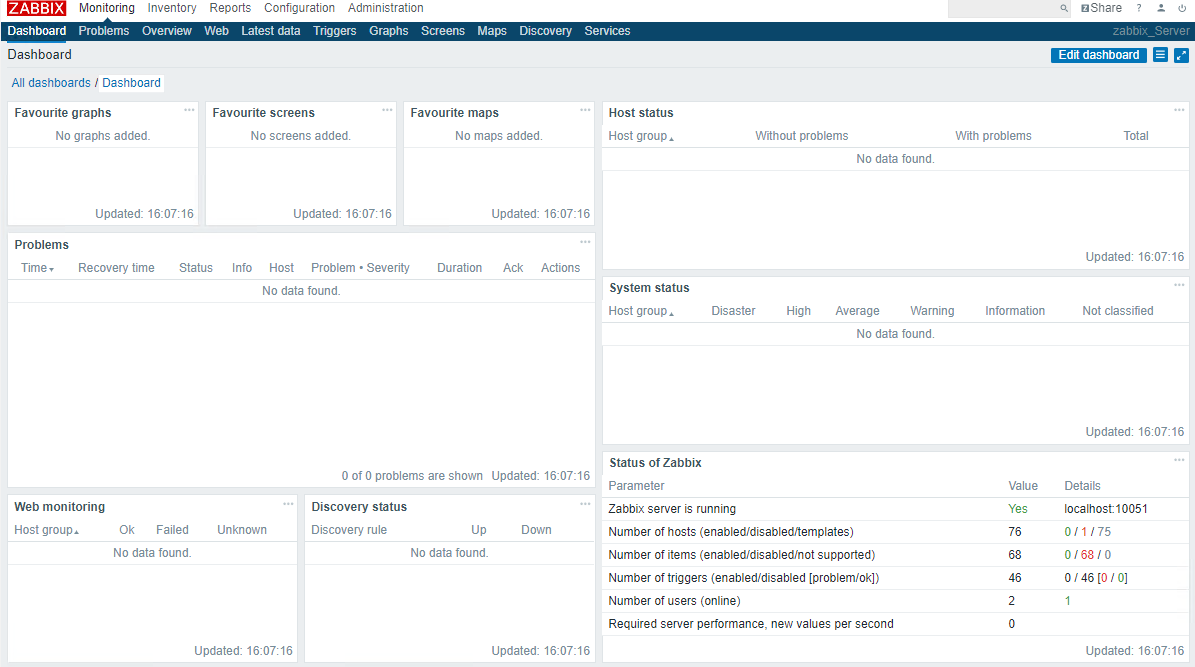
Zabbix服务器端安装完成!
五、安装及设置Zabbix-agent
安装zabbix-agent
[root@ecs-5c78-0002 ~]# rpm -ivh https://mirrors.aliyun.com/zabbix/zabbix/3.4/rhel/7/x86_64/zabbix-release-3.4-1.el7.centos.noarh.rpmRetrieving https://mirrors.aliyun.com/zabbix/zabbix/3.4/rhel/7/x86_64/zabbix-release-3.4-1.el7.centos.noarch.rpmPreparing... ################################# [100%]Updating / installing...1:zabbix-release-3.4-1.el7.centos ################################# [100%][root@ecs-5c78-0002 ~]# yum install zabbix-agent –y
或者使用官网提供的链接,然后rpm -ivh进行安装:rpm -ivh http://repo.zabbix.com/zabbix/3.4/rhel/7/x86\_64/zabbix-agent-3.4.0-1.el7.x86\_64.rpm
配置zabbix-agent
[root@ecs-5c78-0002 ~]# vim /etc/zabbix/zabbix_agentd.conf
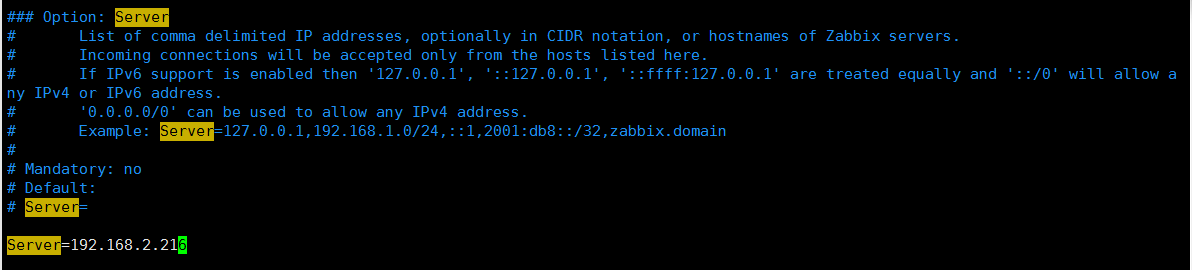
修改server IP地址
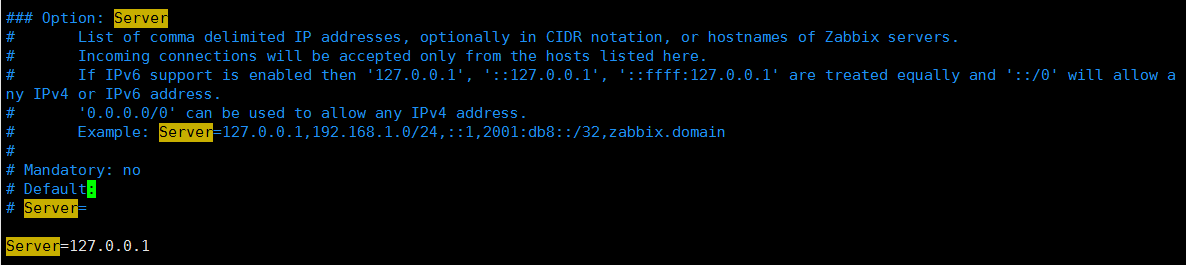
修改为zabbix-server服务端的IP地址
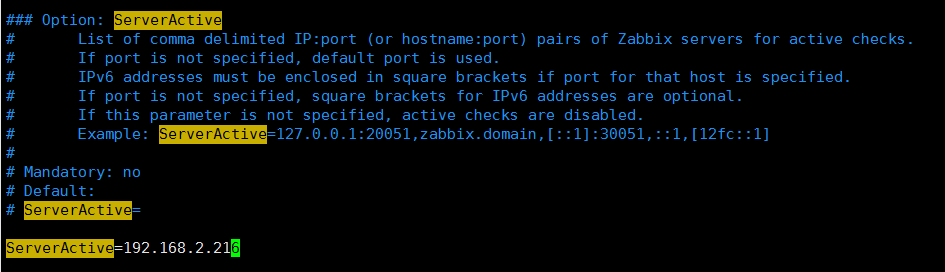
修改ServerActive IP地址
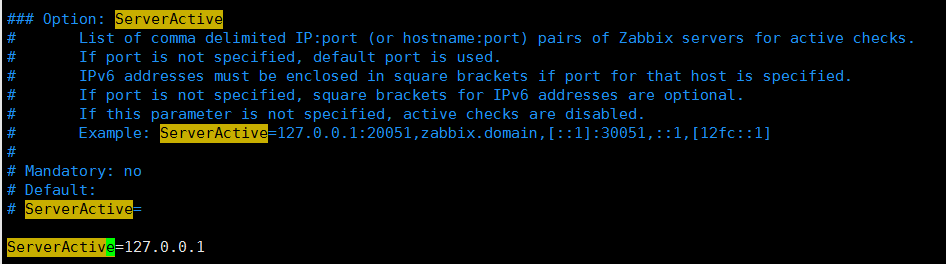
修改为zabbix-server服务器端的IP地址
启动zabbix-agent并设置开机启动
[root@ecs-5c78-0002 ~]# systemctl start zabbix-agent.service[root@ecs-5c78-0002 ~]# systemctl enable zabbix-agent.serviceCreated symlink from /etc/systemd/system/multi-user.target.wants/zabbix-agent.service to /usr/lib/systemd/system/zabbix-agent.service.
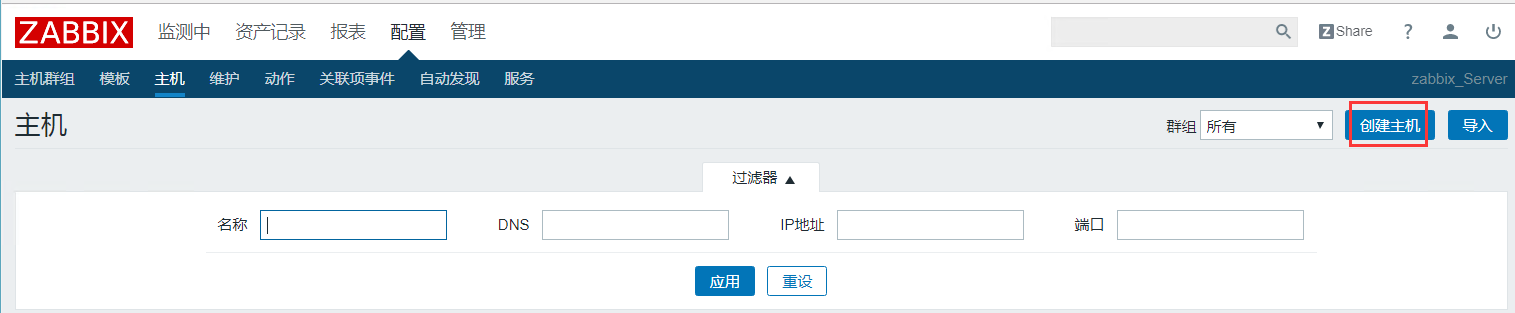
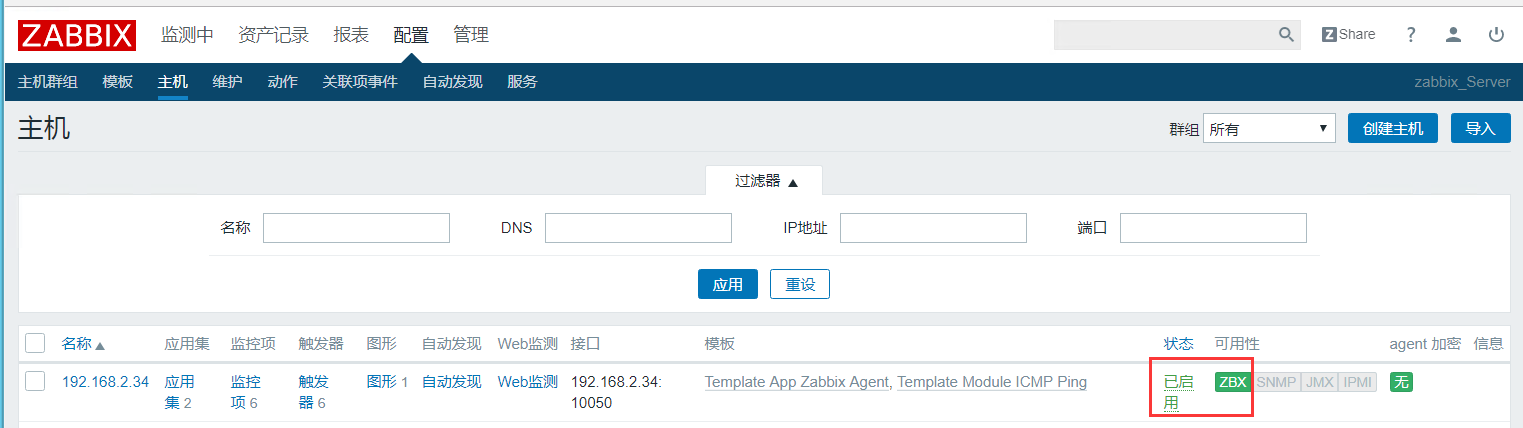
六、Zabbix-server添加监控主机
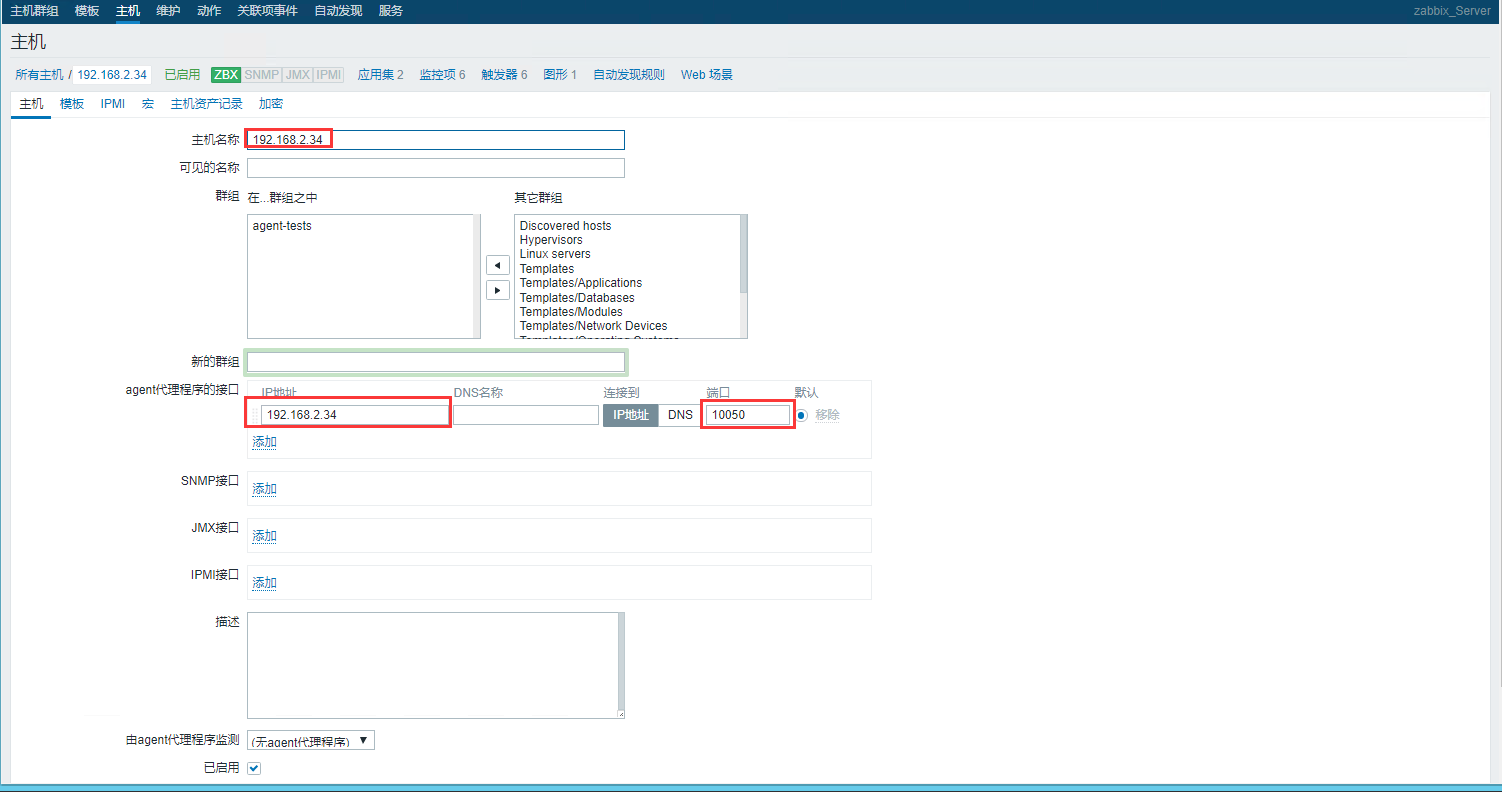
手动添加监控主机
指定zabbix-agent机器IP
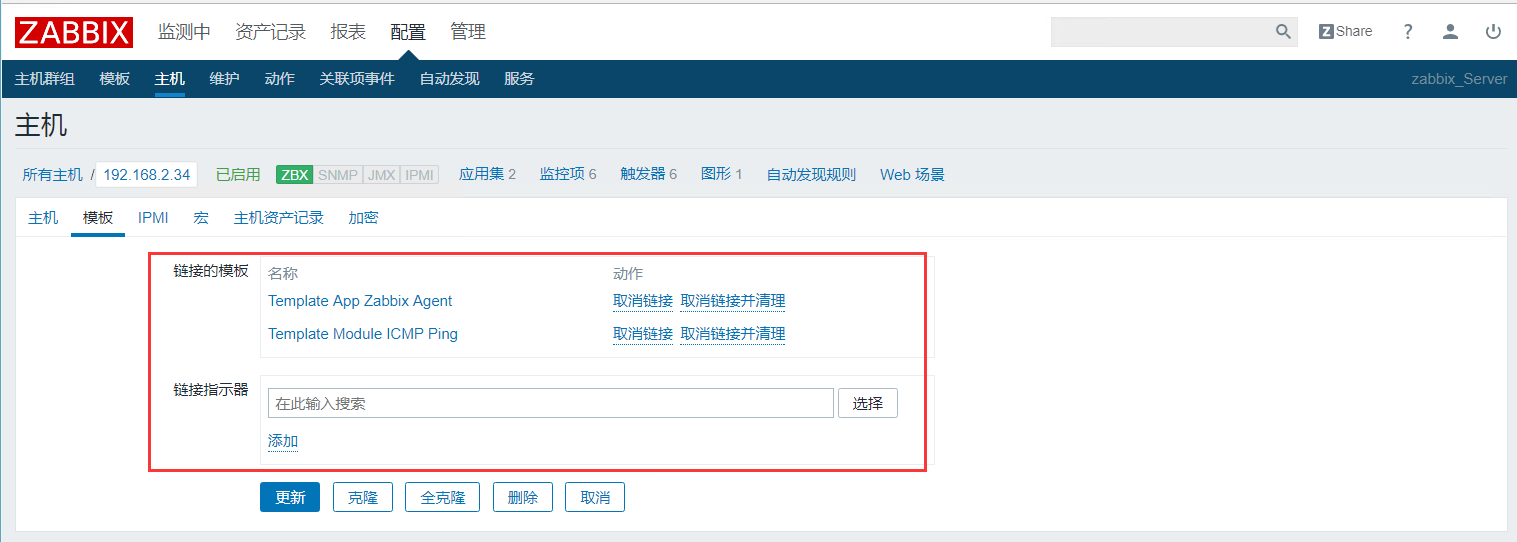
增加监控模板,只有添加了模板才会真正监控到主机
添加图形,以便观察数据
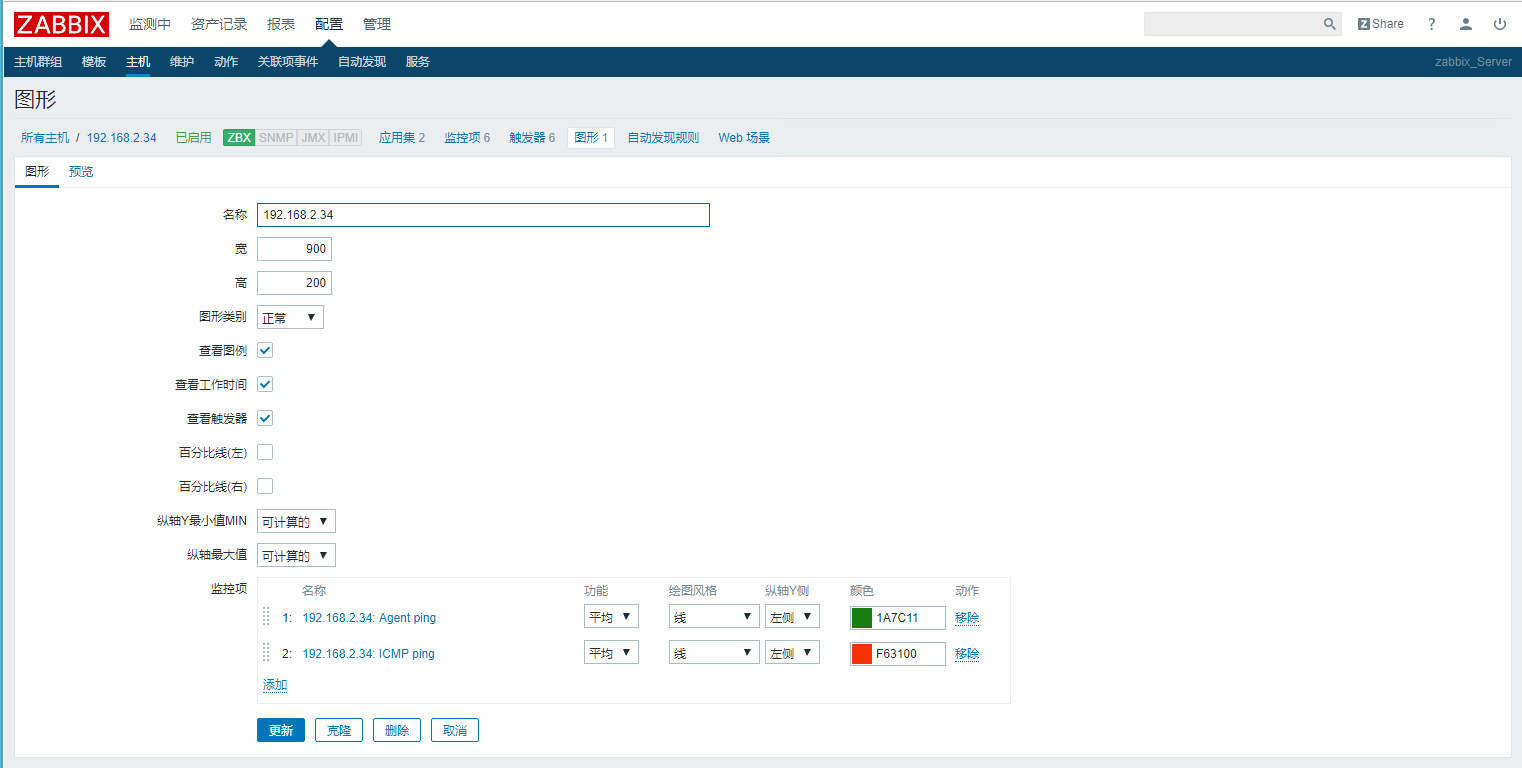
监控成功(客户端要关闭防火墙或者放通端口,要不ZBX图标会红色报错)
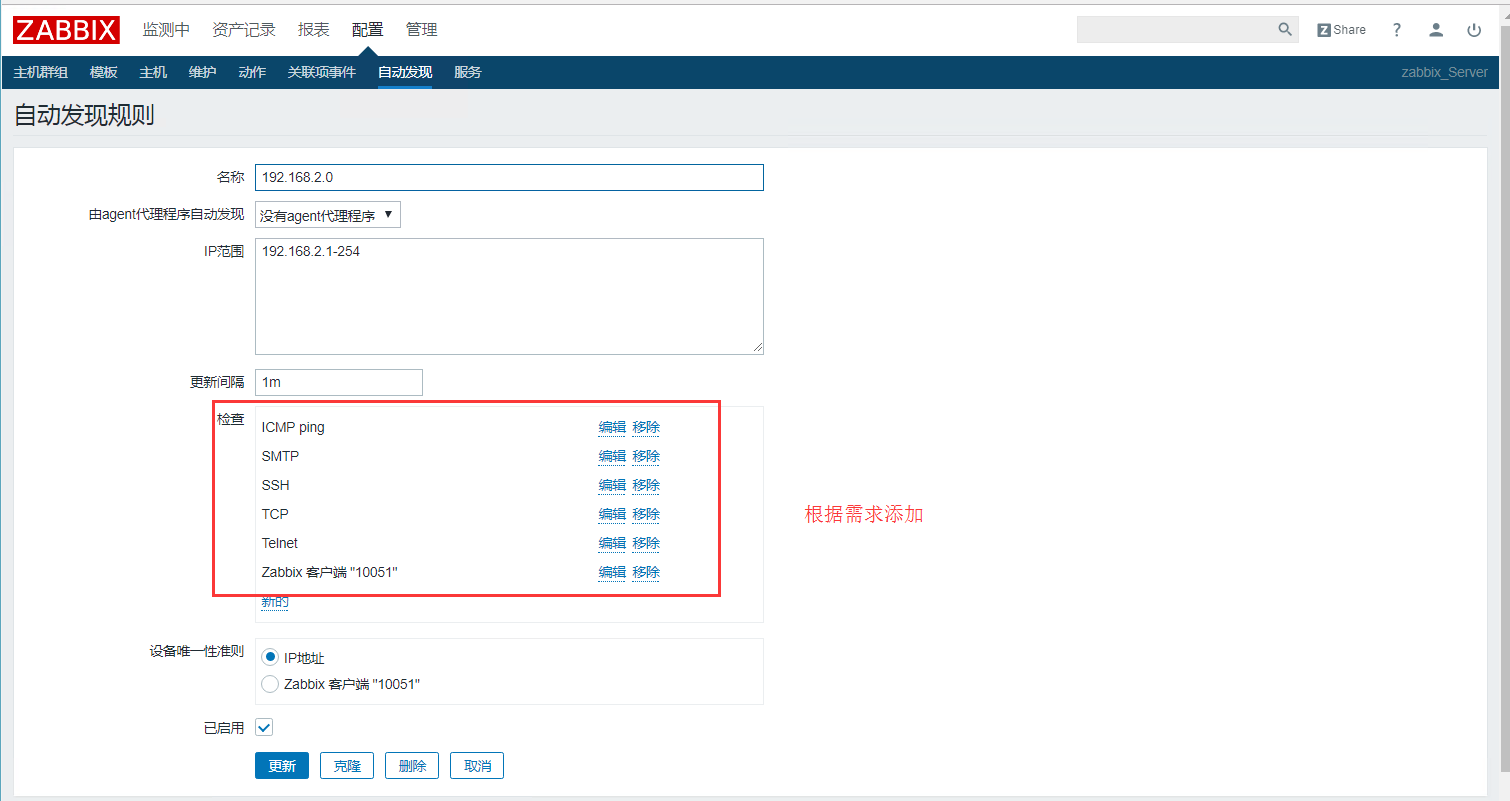
自动发现主机

添加发现规则
查看自动发现的主机
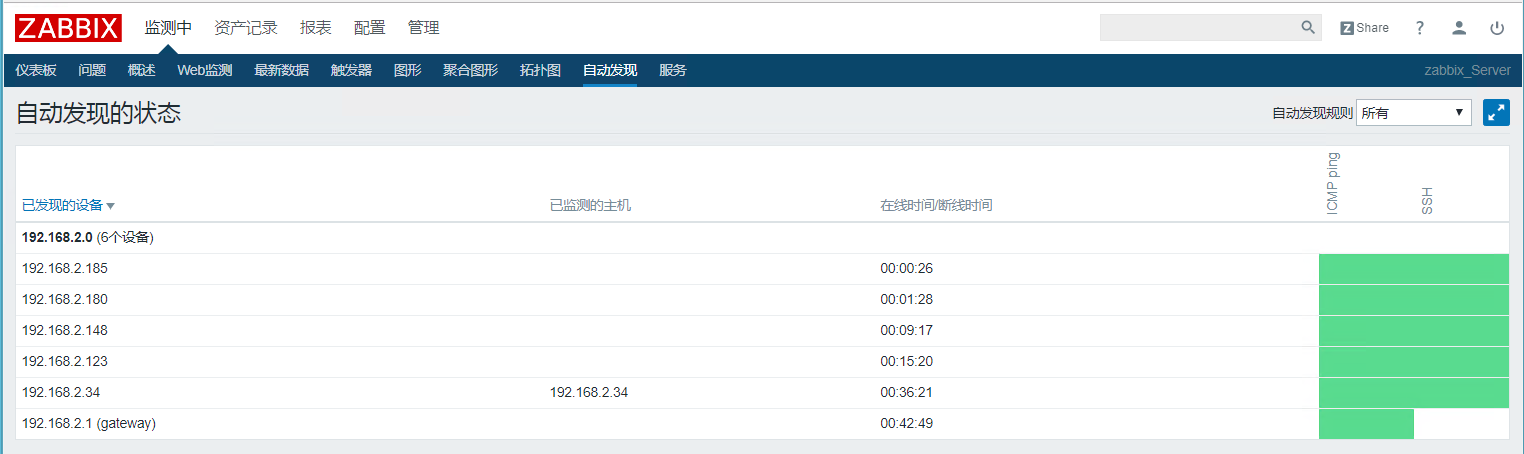
到此,zabbix简单监控就部署好了


还没有评论,来说两句吧...