SpringBoot之项目打war包和jar包-yellowcong
这一章,介绍关于SpringBoot如何打成war包和jar包的,具体步骤:1、配置pom.xml的tomcat,2、在pom.xml配置springboot的启动类,3、配置打包方式,4、配置启动类情况。我这个地方是吃了一个亏啊,就是打包的时候,仓库出问题了,导致死活打不了,后来将本地仓库地址修改了一下,就可以打上包了,这算误伤啊,坑爹。
打war包
1、删除pom.xml的内置tomcat
删除内置的tomcat,不然打成war包,tomcat和springboot内置的tomcat搞一起,会打架的。
<!--把内置的tomcat给注释掉 --><dependency><groupId>org.springframework.boot</groupId><artifactId>spring-boot-starter-tomcat</artifactId><scope>provided</scope></dependency>
2、配置pom.xml的启动类
配置Springboot的启动类
<build><plugins><!-- 添加spring的插件, 就可以直接通过 mvn spring-boot:run 运行了 --><plugin><groupId>org.springframework.boot</groupId><artifactId>spring-boot-maven-plugin</artifactId><configuration><mainClass>com.yellowcong.ConfigMain</mainClass></configuration><executions><execution><goals><goal>repackage</goal></goals></execution></executions><!--在这里添加 springloader plugin,热部署 --><dependencies><dependency><groupId>org.springframework</groupId><artifactId>springloaded</artifactId><version>1.2.4.RELEASE</version></dependency></dependencies></plugin><plugin><groupId>org.apache.maven.plugins</groupId><artifactId>maven-compiler-plugin</artifactId><configuration><source>1.7</source><target>1.7</target></configuration></plugin></plugins></build>
3、修改打包方式
修改打包的方式为<packaging>war</packaging>方式。
<groupId>yelllowcong.com</groupId><artifactId>springboot-sso</artifactId><version>0.0.1-SNAPSHOT</version><packaging>war</packaging><name>springboot-yellowcong</name><url>http://maven.apache.org</url>
4、修改启动类,继承SpringBootServletInitializer
添加继承的类为SpringBootServletInitializer ,然后复写里面的configure方法,设定启动类。
@SpringBootApplication@EnableAutoConfigurationpublic class ConfigMain extends SpringBootServletInitializer {@Overrideprotected SpringApplicationBuilder configure(SpringApplicationBuilder application) {return application.sources(ConfigMain.class);}public static void main(String[] args) {SpringApplication.run(ConfigMain.class, args);}}
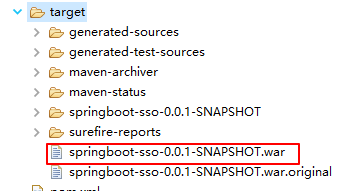
5、打包测试
通过命令mvn clean package 打包
打jra包
1、添加内置tomcat
添加内置的tomcat
<dependency><groupId>org.springframework.boot</groupId><artifactId>spring-boot-starter-tomcat</artifactId><scope>provided</scope></dependency>
2、配置启动类
配置启动类
<build><plugins><!-- 添加spring的插件, 就可以直接通过 mvn spring-boot:run 运行了 --><plugin><groupId>org.springframework.boot</groupId><artifactId>spring-boot-maven-plugin</artifactId><configuration><mainClass>com.yellowcong.ConfigMain</mainClass></configuration><executions><execution><goals><goal>repackage</goal></goals></execution></executions><!--在这里添加 springloader plugin,热部署 --><dependencies><dependency><groupId>org.springframework</groupId><artifactId>springloaded</artifactId><version>1.2.4.RELEASE</version></dependency></dependencies></plugin><plugin><groupId>org.apache.maven.plugins</groupId><artifactId>maven-compiler-plugin</artifactId><configuration><source>1.7</source><target>1.7</target></configuration></plugin></plugins></build>
3、配置打包方式
修改打包的方式为 <packaging>jar</packaging> ,这样打包的方式就是jar了
<groupId>yellowcong.com</groupId><artifactId>springboot-sso</artifactId><version>0.0.1-SNAPSHOT</version><packaging>jar</packaging><name>springboot-test</name><url>http://maven.apache.org</url>
4、设定启动类
启动类,比较的简洁,没有啥继承的类,就是一个普通的main函数。
@SpringBootApplication@EnableAutoConfigurationpublic class ConfigMain{public static void main(String[] args) {SpringApplication.run(ConfigMain.class, args);}}
5、测试
通过命令mvn clean package 打包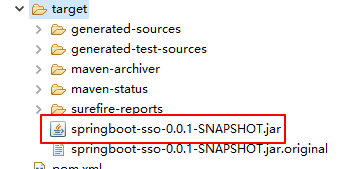
常见错误
出现这个问题,多半是本地仓库有问题,解决的办法,就是修改本地仓库的 <localRepository>D:/maven/apache-maven-3.5.0/storage2</localRepository>路径
ERROR] 28054java.lang.ArrayIndexOutOfBoundsException: 28054at org.codehaus.plexus.util.xml.pull.MXParser.parsePI(MXParser.java:2502)at org.codehaus.plexus.util.xml.pull.MXParser.parseEpilog(MXParser.java:1604)at org.codehaus.plexus.util.xml.pull.MXParser.nextImpl(MXParser.java:1434)at org.codehaus.plexus.util.xml.pull.MXParser.next(MXParser.java:1131)


")


还没有评论,来说两句吧...