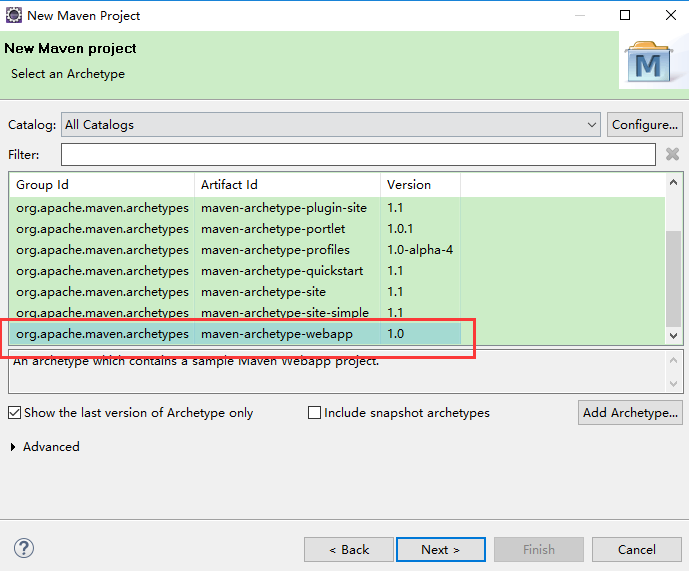
eclipse中创建springboot项目(maven)
讲述一下,关于创建简单的springboot项目,使用maven方式。下篇会说下使用spring插件(sts)方式,以及二者的区别,学习摸索阶段,欢迎大家指正。**首先,在eclipse中创建一个maven项目**,File>>new>>Maven Project。

如果没有搜索到maven project,说明你的eclipse中没有安装maven,需要在eclipse中配置下maven。不清楚的话可以查阅关于eclipse配置maven的相关资料。然后选择webapp点next,
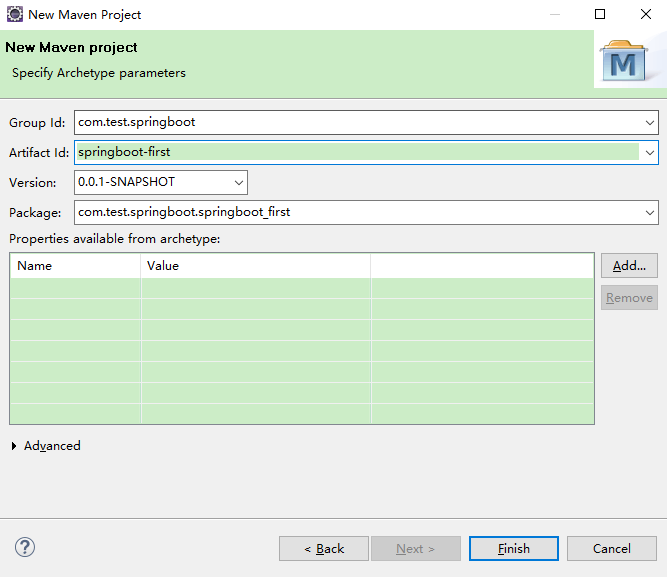
然后填写项目名称和包名,点击finish即可。
**修改pom.xml文件**,修改后的pom.xml文件为以下代码。<?xml version="1.0" encoding="UTF-8"?><project xmlns="http://maven.apache.org/POM/4.0.0" xmlns:xsi="http://www.w3.org/2001/XMLSchema-instance"xsi:schemaLocation="http://maven.apache.org/POM/4.0.0 http://maven.apache.org/xsd/maven-4.0.0.xsd"><modelVersion>4.0.0</modelVersion><groupId>com.test.springboot</groupId><artifactId>springboot-apply</artifactId><version>0.0.1-SNAPSHOT</version><name>springboot-apply</name><url>http://www.example.com</url><parent><groupId>org.springframework.boot</groupId><artifactId>spring-boot-starter-parent</artifactId><version>1.5.2.RELEASE</version><relativePath/> <!-- lookup parent from repository --></parent><properties><project.build.sourceEncoding>UTF-8</project.build.sourceEncoding><project.reporting.outputEncoding>UTF-8</project.reporting.outputEncoding><java.version>1.8</java.version></properties><dependencies><dependency><groupId>org.springframework.boot</groupId><artifactId>spring-boot-starter-web</artifactId></dependency><dependency><groupId>org.springframework.boot</groupId><artifactId>spring-boot-starter-test</artifactId><scope>test</scope></dependency><dependency><groupId>junit</groupId><artifactId>junit</artifactId><version>4.11</version><scope>test</scope></dependency></dependencies><build><pluginManagement><!-- lock down plugins versions to avoid using Maven defaults (may be moved to parent pom) --><plugins><plugin><groupId>org.springframework.boot</groupId><artifactId>spring-boot-maven-plugin</artifactId></plugin></plugins></pluginManagement></build></project>
添加两个Java类:一个SpringBootApplicationFirst,为SpringBoot程序的入口类
package com.test.springboot.springboot_first;import org.springframework.boot.SpringApplication;import org.springframework.boot.autoconfigure.SpringBootApplication;/*** Hello world!**/@SpringBootApplicationpublic class SpringBootApplicationFirst {public static void main(String[] args) {SpringApplication.run(SpringBootApplicationFirst.class, args);}}
一个Controller,用于页面返回结果。
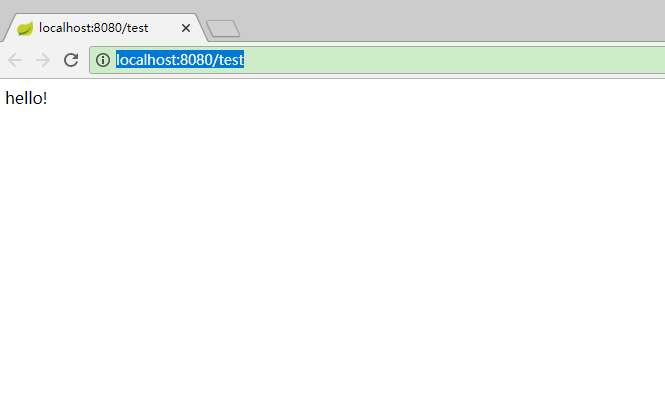
package com.test.springboot.springboot_first;import org.springframework.web.bind.annotation.RequestMapping;import org.springframework.web.bind.annotation.RestController;@RestControllerpublic class TestController {@RequestMapping("test")public String test(){return "hello!";}}
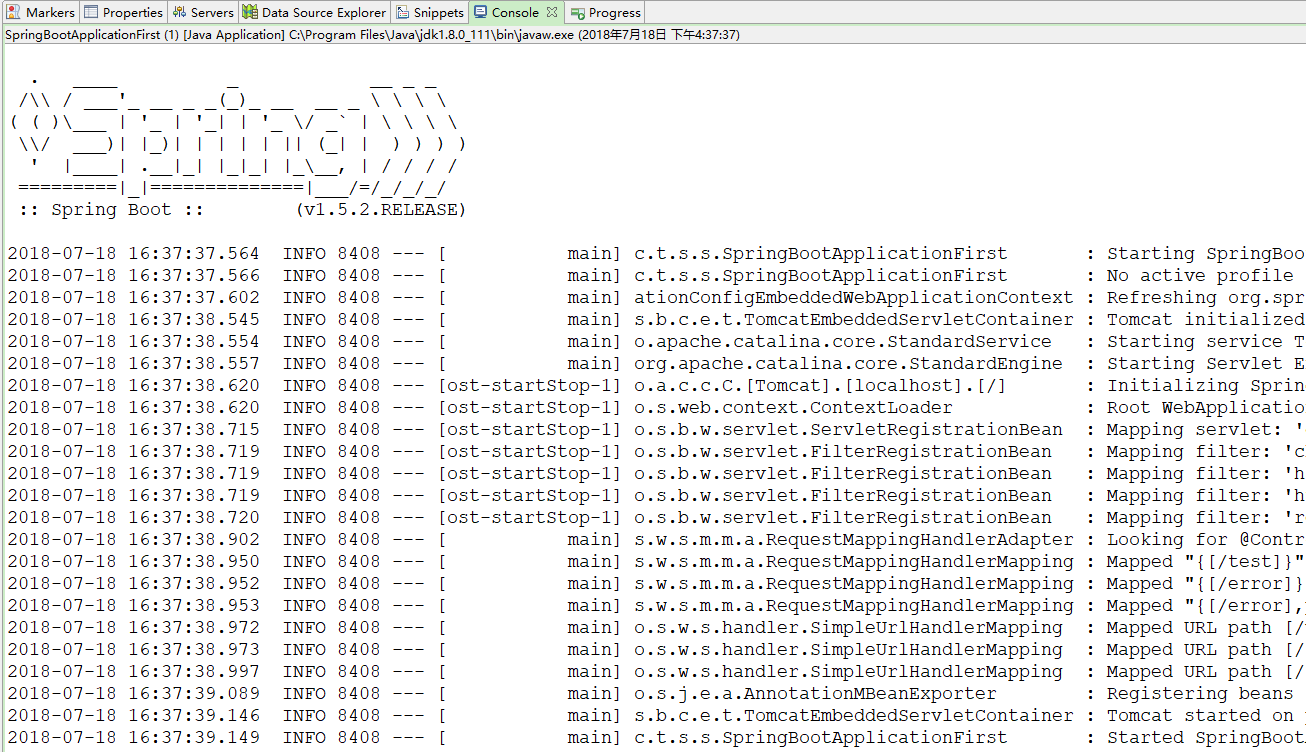
之后在SpringBootApplicationFirst类的eclipse界面中,右键Run As >> Java Application ,运行即可
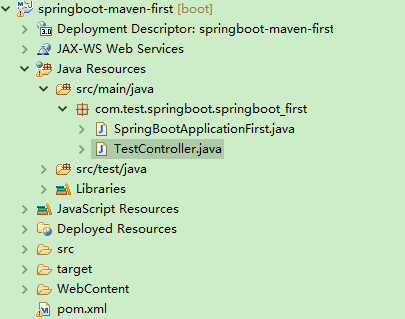
项目结构目录截图如下
运行之后,在console窗口,就能看到启动的springboot程序。
浏览器页面访问,即可看到访问成功,返回controller的文字。


还没有评论,来说两句吧...