Android低功耗蓝牙(BLE)使用详解
代码地址如下:
http://www.demodashi.com/demo/13390.html与普通蓝牙相比,低功耗蓝牙显著降低了能量消耗,允许Android应用程序与具有更严格电源要求的BLE设备进行通信,如接近传感器、心率传感器等低功耗设备。
声明蓝牙权限
和使用普通蓝牙一样,在使用低功耗蓝牙时也需要在AndroidManifest声明蓝牙权限,声明蓝牙权限的代码如下
<uses-permission android:name="android.permission.BLUETOOTH"/><uses-permission android:name="android.permission.BLUETOOTH_ADMIN"/>
如果想让你的App只适用于BLE设备,可以在AndroidManifest中继续添加以下代码
<uses-feature android:name="android.hardware.bluetooth_le" android:required="true"/>
如果想让你的App适用于不支持BLE的设备,只需要将required="true"改为required="false"然后在代码中通过以下方法来判断设备是否支持BLE,
private void checkIsSupportBLE() {if (!getPackageManager().hasSystemFeature(PackageManager.FEATURE_BLUETOOTH_LE)) {Toast.makeText(this, R.string.ble_not_supported, Toast.LENGTH_SHORT).show();finish();}}
注:
LE信标往往与位置有关,如果想要通过
`BluetoothLeScanner方法来获取正确的扫描结果,需要在AndroidManifest中声明位置权限,声明位置权限可以使用ACCESS_COARSE_LOCATION或则ACCESS_FINE_LOCATION,如过不声明位置权限,将不会返回蓝牙的扫描结果。
开启BLE
开启BLE只需要以下两步
拿到BluetoothAdapter。
在Android系统中只有一个
BluetoothAdapter,可以通过以下方法来获取private void obtainBluetoothAdapter() {final BluetoothManager bluetoothManager =(BluetoothManager) getSystemService(Context.BLUETOOTH_SERVICE);mBluetoothAdapter = bluetoothManager.getAdapter();}
开启蓝牙。
通过
isEnabled()可以判断是否已经开启BLE,如果没有开启则可以通过以下方法来开启//注册广播接受者
private void initReceiver() {IntentFilter filter = new IntentFilter();filter.addAction(BluetoothAdapter.ACTION_STATE_CHANGED);registerReceiver(mReceiver, filter);}
//新建监听蓝牙状态变化的广播
private final BroadcastReceiver mReceiver = new BroadcastReceiver() {@Overridepublic void onReceive(Context context, Intent intent) {final String action = intent.getAction();if (action.equals(BluetoothAdapter.ACTION_STATE_CHANGED)) {final int state = intent.getIntExtra(BluetoothAdapter.EXTRA_STATE,BluetoothAdapter.ERROR);switch (state) {case BluetoothAdapter.STATE_OFF:mBluetoothState.setText("Bluetooth off");break;case BluetoothAdapter.STATE_TURNING_OFF:mBluetoothState.setText("Turning Bluetooth off...");break;case BluetoothAdapter.STATE_ON:mBluetoothState.setText("Bluetooth on");break;case BluetoothAdapter.STATE_TURNING_ON:mBluetoothState.setText("Turning Bluetooth on...");break;}}}};
此广播包含额外字段
EXTRA_STATE和EXTRA_PREVIOUS_STATE,二者分别包含新的和旧的蓝牙状态。 这些额外字段可能的值包括STATE_TURNING_ON、STATE_ON、STATE_TURNING_OFF和STATE_OFF。侦听此广播适用于检测在您的应用运行期间对蓝牙状态所做的更改。
扫描BLE设备
扫描蓝牙设备可以通过 startLeScan(BluetoothAdapter.LeScanCallback)和startLeScan(UUID[], BluetoothAdapter.LeScanCallback)方法,这两种扫描BLE设备的区别如下。
startLeScan(BluetoothAdapter.LeScanCallback)方法扫描的是周围所有的BLE设备。startLeScan(UUID[], BluetoothAdapter.LeScanCallback)只扫描和UUID相匹配的设备。
可以发现无论通过哪种方式扫描蓝牙都必须要实现LeScanCallback回调方法,此方法是用来获取蓝牙扫描结果。
通过以上两种方式实现扫描BLE设备的代码如下:
通过
startLeScan(BluetoothAdapter.LeScanCallback)方法扫描蓝牙的代码如下//扫描BLE设备private void scanLeDevice(final boolean enable) {if (enable) {// Stops scanning after a pre-defined scan period.mHandler.postDelayed(new Runnable() {@Overridepublic void run() {mScanning = false;mBluetoothAdapter.stopLeScan(mLeScanCallback);}}, SCAN_PERIOD);mScanning = true;mBluetoothAdapter.startLeScan(mLeScanCallback);} else {mScanning = false;mBluetoothAdapter.stopLeScan(mLeScanCallback);}}//扫描结果回调private BluetoothAdapter.LeScanCallback mLeScanCallback = new BluetoothAdapter.LeScanCallback() {@Overridepublic void onLeScan(final BluetoothDevice device, int rssi,byte[] scanRecord) {runOnUiThread(new Runnable() {@Overridepublic void run() {mLeDeviceListAdapter.addDevice(device);mLeDeviceListAdapter.notifyDataSetChanged();}});}};
通过
startLeScan(UUID[], BluetoothAdapter.LeScanCallback)方法扫描蓝牙的代码如下private void scanLeDeviceByUUID() {mBluetoothAdapter.startLeScan(new UUID[]{RX_SERVICE_UUID}, mLeScanCallback);}
再次声明:
LE信标往往与位置有关,如果想要通过
BluetoothLeScanner方法来获取正确的扫描结果,需要在AndroidManifest中声明位置权限,声明位置权限可以使用ACCESS_COARSE_LOCATION或则ACCESS_FINE_LOCATION,如过不声明位置权限,将不会返回蓝牙的扫描结果。
连接BLE设备
要进行BLE设备之间的通讯,首先应该进行设备之间的连接,可以通过device.connectGatt (Context context,boolean autoConnect, BluetoothGattCallback callback)方法来连接设备。
autoConnect是设置当BLE设备可用时是否自动进行连接。device就是通过扫描BLE设备获得的。callback则是连接指定设备后的回掉,可以在回掉中知道是否建立连接、连接断开、以及获取设备之间传输的数据。以下是
BluetoothGattCallback类中具体的方法
下面我会介绍几个比较常用的方法:
onConnectionStateChange此方法的作用是可以获得设备连接的状态,如“成功连接”、“断开连接”。onServicesDiscovered当远程设备的服务,特性和描述符列表已更新时(即发现新服务),调用此方法。onCharacteristicChanged远程特征变化会调用此方法,即BLE设备的状态发生了变化会调用此方法。
onCharacteristicChanged方法就是相当于BLE设备对你操作的回应,如打开BLE设备成功等,然后在此方法回掉之后,便可以继续下一步操作了。
操作BLE设备
在设备连接之后,就可以向BLE设备发送命令来操作BLE设备了,向BLE写数据的代码如下
public boolean writeByteToBleDevice(byte[] data) {BluetoothGattService mBluetoothGattService = mBluetoothGatt.getService(RX_SERVICE_UUID);if (mBluetoothGattService == null) {return false;}BluetoothGattCharacteristic characteristic = mBluetoothGattService.getCharacteristic(RX_SERVICE_UUID);if (characteristic == null) {return false;}boolean b = characteristic.setValue(data);return b && mBluetoothGatt.writeCharacteristic(characteristic);}
在向BLE设备发送数据之后,就可以在onCharacteristicChanged方法中获得BLE设备的状态了。
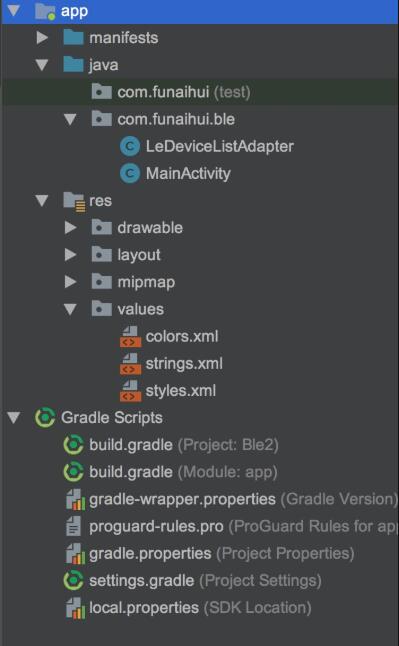
项目结构
项目代码结构图截图
结束语
这篇文章拖了这么久,总算写完了,本来打算在上一篇蓝牙文章写完后就写这篇,结果中间公司忙着上线新的项目,加班加点将近一个月,就没时间写这篇文章了,在项目上线之后就立马开始写这篇文章,希望这篇文章能帮到想要学习蓝牙的朋友。
Android低功耗蓝牙(BLE)使用详解
代码地址如下:
http://www.demodashi.com/demo/13390.html注:本文著作权归作者,由demo大师发表,拒绝转载,转载需要作者授权


")


还没有评论,来说两句吧...