SpringBoot整合Mybaitis-使用mapper注解
上一篇博文已经详细介绍了SpringBoot环境搭建过程,这一节介绍一下SpringBoot整合Mybatis。
SpringBoot整合Mybatis
方式1:mapper使用注解
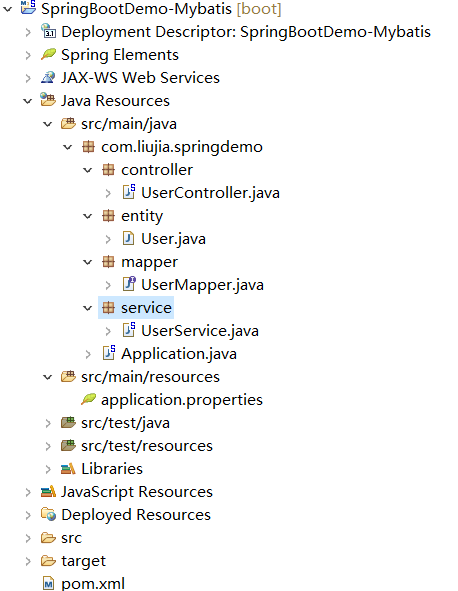
项目结构
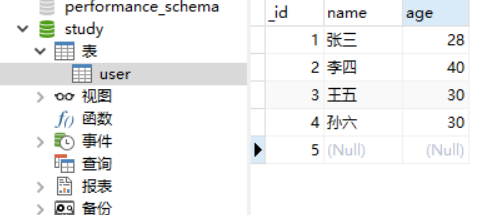
1:准备数据库数据和配置数据源
| #数据源必填项 spring.datasource.driver-class-name= com.mysql.jdbc.Driver spring.datasource.url = jdbc:mysql://localhost:3306/study?useUnicode=true&characterEncoding=utf-8 spring.datasource.username = root spring.datasource.password = 123456
#选填 # Number of ms to wait before throwing an exception if no connection is available. spring.datasource.tomcat.max-wait=10000 # Maximum number of active connections that can be allocated from this pool at the same time. spring.datasource.tomcat.max-active=50 # Validate the connection before borrowing it from the pool. spring.datasource.tomcat.test-on-borrow=true |
2:加maven依赖
| <!— Spring-Mybatis —> <dependency> <groupId>org.mybatis.spring.boot</groupId> <artifactId>mybatis-spring-boot-starter</artifactId> <version>1.3.2</version> </dependency> <!— MySQL驱动 —> <dependency> <groupId>mysql</groupId> <artifactId>mysql-connector-java</artifactId> </dependency> |
3:编写实体类
| public class User implements Serializable {
private static final long serialVersionUID = 1L;
private int id;// id
private String name;// 姓名
private int age;// 年龄
public int getId() { return id; }
public void setId(int id) { this.id = id; }
public String getName() { return name; }
public void setName(String name) { this.name = name; }
public int getAge() { return age; }
public void setAge(int age) { this.age = age; }
@Override public String toString() { return “User [id=” + id + “, name=” + name + “, age=” + age + “]”; }
} |
4:编写mapper
| import java.util.List;
import org.apache.ibatis.annotations.Mapper; import org.apache.ibatis.annotations.Select;
import com.liujia.springdemo.entity.User;
//@Mapper 这里可以使用@Mapper注解,但是每个mapper都加注解比较麻烦,所以统一配置@MapperScan在扫描路径在application类中 public interface UserMapper {
/* 获取所有的user对象
@return / @Select(“SELECT FROM user”) List<User> getAll(); } |
5:编写service层
| import java.util.List;
import org.springframework.beans.factory.annotation.Autowired; import org.springframework.stereotype.Service;
import com.liujia.springdemo.entity.User; import com.liujia.springdemo.mapper.UserMapper;
@Service public class UserService { @Autowired private UserMapper userMapper;
public List<User> getAll() { return userMapper.getAll(); }; } |
6:编写Copntroller层
| import java.util.List;
import org.springframework.beans.factory.annotation.Autowired; import org.springframework.web.bind.annotation.RequestMapping; import org.springframework.web.bind.annotation.RestController;
import com.liujia.springdemo.entity.User; import com.liujia.springdemo.service.UserService;
@RestController public class UserController {
@Autowired private UserService userService;
@RequestMapping(“/getallusers”) public List<User> getAllUsers() { return userService.getAll(); } } |
7:增加包扫描和运行程序
| @SpringBootApplication @MapperScan(basePackages = { “com.liujia.springdemo.mapper”}) public class Application {
public static void main(String[] args) { SpringApplication.run(Application.class, args); }
@Bean public CommandLineRunner commandLineRunner(ApplicationContext ctx) { return args -> { System.out.println(“Let’s inspect the beans provided by Spring Boot:”); String[] beanNames = ctx.getBeanDefinitionNames(); Arrays.sort(beanNames); for (String beanName : beanNames) { System.out.println(beanName); } }; } } |
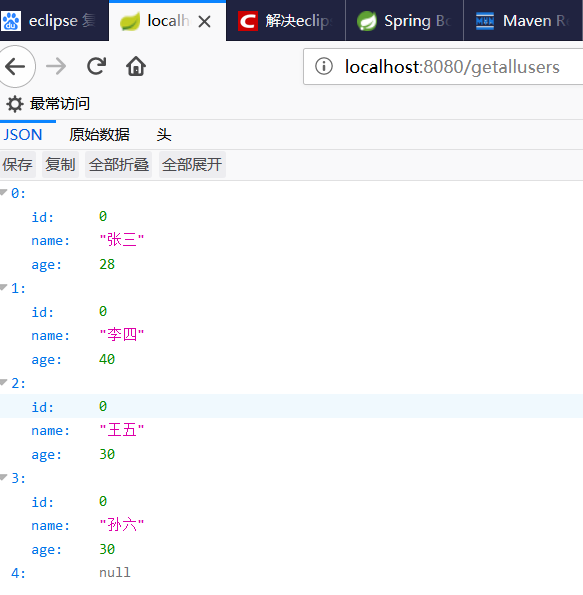
运行结果
参考文献
https://docs.spring.io/spring-boot/docs/2.0.5.RELEASE/reference/htmlsingle/#boot-features-using-jdbc-template
遇到问题
SLF4J: Failed to load class “org.slf4j.impl.StaticLoggerBinder”
解决办法
参见https://blog.csdn.net/liuxiangke0210/article/details/77892564
缺少jar包依赖
| <dependency> <groupId>org.slf4j</groupId> <artifactId>slf4j-simple</artifactId> </dependency> |
源码下载地址为:
https://download.csdn.net/download/caoshangfeidie000/10670695


还没有评论,来说两句吧...