Docker搭建私有Nexus-maven仓库
本文使用docker镜像实现nexus的一键部署,并且进行相关配置,测试完成maven工程的打包上传
文章目录
- 一 利用Docker镜像搭建Nexus仓库
- 1 建立 nexus-data 数据卷
- 2 启动镜像
- 二 完成Nexus设置
- 修改密码
- 添加用户
- 获取仓库url
- 三 配置本地Maven
- 0 maven 配置文件基础知识
- 1 配置 servers
- 2 配置profile
- 3 配置activeProfiles
- 4 配置镜像
- 四 配置pom文件
- 五 测试
- 六 其他
一 利用Docker镜像搭建Nexus仓库
这部分直接参考 https://hub.docker.com/r/sonatype/nexus3/ 就好
启动大概需要两三分钟,默认的 用户/密码 是:admin / admin123
1 建立 nexus-data 数据卷
docker volume create --name nexus-data
2 启动镜像
docker run -d -p 8081:8081 --name nexus -v nexus-data:/nexus-data sonatype/nexus3
二 完成Nexus设置
输入对应的ip:port进入主页,点右上角的 Sign in 按钮用默认账号登录,看到的界面大致如下
左边的选项写得很清楚,分别是检索、浏览、上传功能。
修改密码
建议新用户登录立即修改密码
点击右上角的admin进入账户管理,点击Change password按钮,输入旧密码验证通过后即可修改密码
添加用户
点击上面齿轮图标进入系统设置,选择Security下的Users,Create local user创建一个本地用户,如下
这里我将所有的角色都赋予了LinShen,使其拥有最大的权限,要定制合理角色权限的话到 Roles 选项设置
获取仓库url
默认的仓库列表如下,主要用到的有 maven-public(共有仓库,不区分snapshots和releases),maven-snapshots(snapshots私有仓库),maven-releases(relsases私有仓库)
复制出url,下面配置仓库url要用到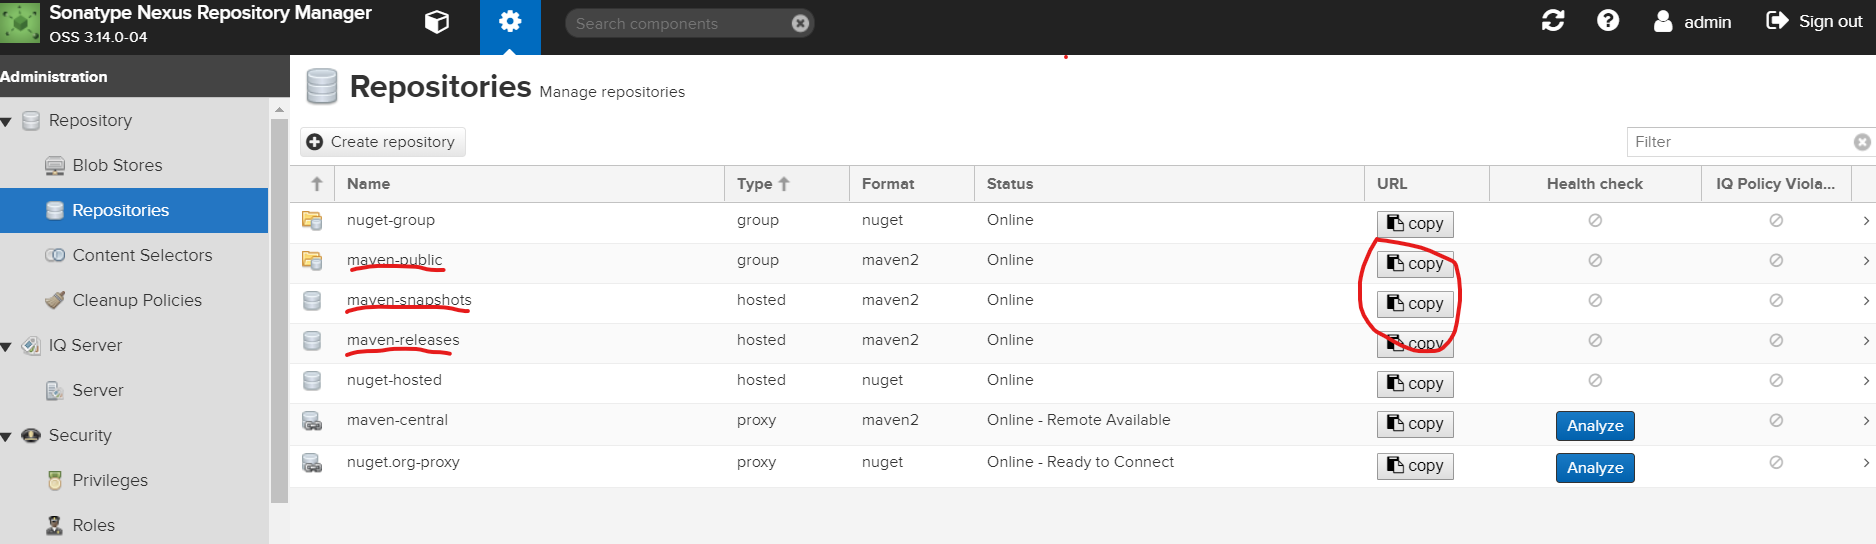
三 配置本地Maven
配置本地Maven安装目录下的 conf/settings.xml 文件,建议先把原文件备份
这里settings.xml的写法主要参考阿里云私有仓库给的配置文件
0 maven 配置文件基础知识
首先根据activeProfiles找到对应id的profile,profile下管理了repositories和pluginRepositories两大模块,其下有各个具体仓库,仓库配置了id,url,releases和snapshots支持信息等。根据id寻找仓库url的时候会根据mirror下的mirrorOf规则匹配到对应的镜像仓库url,并用镜像仓库url代替原仓库url
1 配置 servers
配置servers节点如下
<servers><server><id>lin-releases</id><username>LinShen</username><password>密码</password></server><server><id>lin-snapshots</id><username>LinShen</username><password>密码</password></server></servers>
2 配置profile
配置 id为nexus的 profile节点,profile节点下有id,repositories和pluginRepositories三个主要部分,repositories和pluginRepositories下有各自有releases、snapshots版本的共有仓库和releases、snapshots版本的私有仓库,私有仓库的id和servers的id统一即可
这里将私有仓库的url根据releases、snapshots配置,其他的统一用共有仓库的url即可
<profiles><profile><id>nexus</id><repositories><repository><id>central</id><url>http://120.79.168.114:9081/repository/maven-public/</url><releases><enabled>true</enabled></releases><snapshots><enabled>false</enabled></snapshots></repository><repository><id>snapshots</id><url>http://120.79.168.114:9081/repository/maven-public/</url><releases><enabled>false</enabled></releases><snapshots><enabled>true</enabled></snapshots></repository><repository><id>lin-releases</id><url>http://120.79.168.114:9081/repository/maven-releases/</url><releases><enabled>true</enabled></releases><snapshots><enabled>false</enabled></snapshots></repository><repository><id>lin-snapshots</id><url>http://120.79.168.114:9081/repository/maven-snapshots/</url><releases><enabled>false</enabled></releases><snapshots><enabled>true</enabled></snapshots></repository></repositories><pluginRepositories><pluginRepository><id>central</id><url>http://120.79.168.114:9081/repository/maven-public/</url><releases><enabled>true</enabled></releases><snapshots><enabled>false</enabled></snapshots></pluginRepository><pluginRepository><id>snapshots</id><url>http://120.79.168.114:9081/repository/maven-public/</url><releases><enabled>false</enabled></releases><snapshots><enabled>true</enabled></snapshots></pluginRepository><pluginRepository><id>lin-releases</id><url>http://120.79.168.114:9081/repository/maven-releases/</url><releases><enabled>true</enabled></releases><snapshots><enabled>false</enabled></snapshots></pluginRepository><pluginRepository><id>lin-snapshots</id><url>http://120.79.168.114:9081/repository/maven-snapshots/</url><releases><enabled>false</enabled></releases><snapshots><enabled>true</enabled></snapshots></pluginRepository></pluginRepositories></profile></profiles>
3 配置activeProfiles
使上文的profile生效
<activeProfiles><activeProfile>nexus</activeProfile></activeProfiles>
4 配置镜像
这个其实是很关键的,下面的作用就是给id为 lin-releases 和 lin-snapshots 之外的仓库配置镜像地址,所以,其实上面可以不用配置那么多的…
<mirrors><mirror><id>mirror</id><mirrorOf>!lin-releases,!lin-snapshots</mirrorOf><name>mirror</name><url>http://120.79.168.114:9081/repository/maven-public</url></mirror></mirrors>
四 配置pom文件
在pom文件添加如下内容即可
<distributionManagement><repository><id>lin-releases</id><url>http://120.79.168.114:9081/repository/maven-releases/</url></repository><snapshotRepository><id>lin-snapshots</id><url>http://120.79.168.114:9081/repository/maven-snapshots</url></snapshotRepository></distributionManagement>
五 测试
在pom文件所在目录下执行mvn clean deploy即可,注意,不要使用deploy:deploy,否则容易出错
前者将在每个循环中运行所有步骤(除非你自己选择跳过),包括安装(如编译,打包,测试等)。后者甚至不会编译或打包你的代码,它只会运行那一个目标。
运行输出应该如下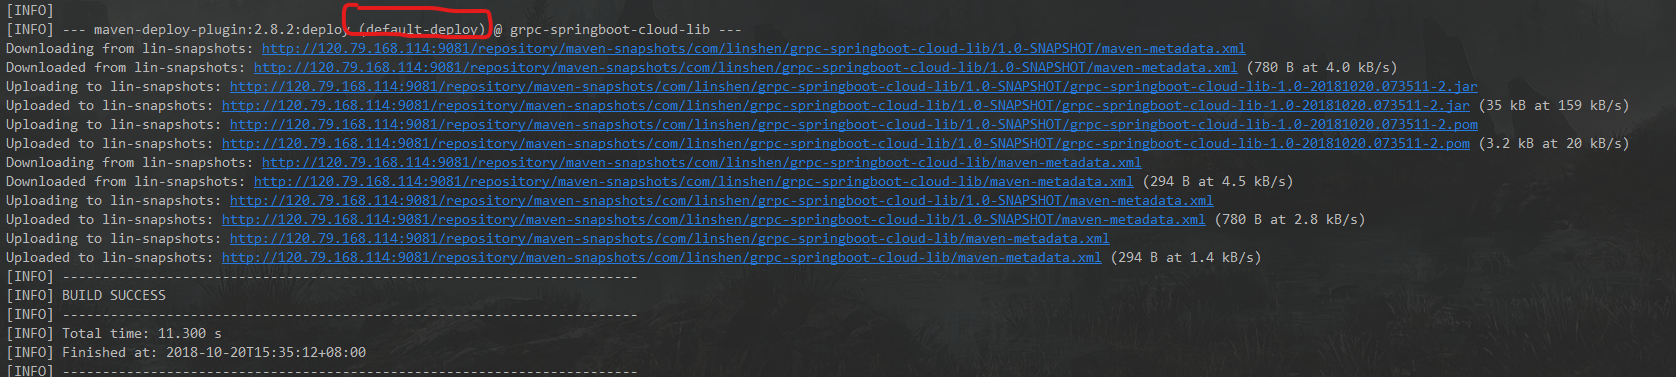
这个时候去Nexus看一下,先点Browse,再选择maven-snapshots仓库,可以看到如下
如果是去看maven-central内容会更多
六 其他
其实,搭这个东西本身不难,只是体验一下而已,生产开发我还是推荐直接使用阿里云 云效 的私有仓库
https://repomanage.rdc.aliyun.com/my/repo ,方便快捷,直接使用阿里云镜像仓库服务
如果工程开发中想跳过上传步骤,可以在pom文件中添加如下配置
<build><plugins><plugin><groupId>org.apache.maven.plugins</groupId><artifactId>maven-deploy-plugin</artifactId><configuration><skip>true</skip></configuration></plugin></plugins></build>


")


还没有评论,来说两句吧...