SpringMVC框架(1)之(1.2 入门程序—处理器映射器和处理器适配器(注解方式))
1.DispatcherServlet加载时会默认加载 DispatcherServlet.properties 文件,目的是为了加载里面的处理器映射器、处理器适配器、视图解析器等各个组件;(所以 springmvc.xml 中 两种处理器适配器、两种处理器适配器、视图解析器都可以省略;)
2.如果在 springmvc.xml中配置了以上组件,则以 springmvc.xml优先(即覆盖掉默认的);
DispatcherServlet.properties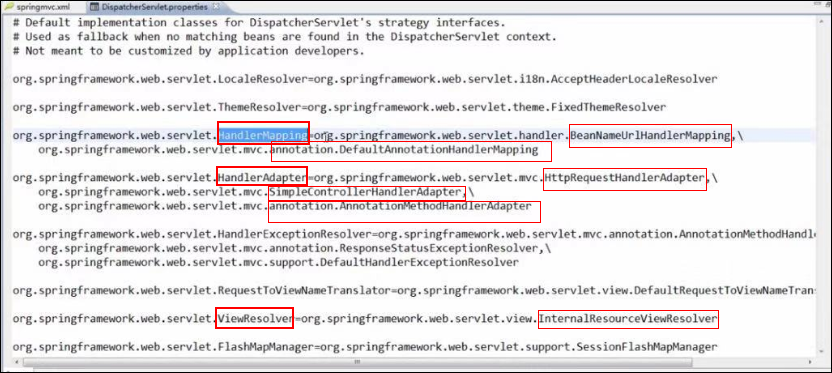
1. 注解映射器:
3.1 之前使用 DefaultAnnotationHandlerMapping 注解映射器
3.1 之后使用 RequestMappingInfoHandlerMapping 注解映射器:
**1. 需要在 Handler使用 @Controller标识这是一个控制器;
2. 使用 @RequestMapping注解指定 Handler方法对应的 URL(URL可以与方法名不一致,但建议一致,方便开发维护);**
2. 注解适配器:
3.1 之前使用 AnnotationMethodHandlerAdapter 注解适配器
3.1 之后使用 RequestMappingHandlerAdapter 注解适配器(不要求Handler(即 Controller)实现接口了,但要求注解映射器和注解适配器配对使用;)
要求注解映射器和注解适配器要一起配对使用;
3. 注解开发的 Handler:
springmvc.xml 中配置注解映射器、注解适配器后,开发注解 Handler:
1. 创建 3. ItemListController3.java 类,使用 @Controller、@RequestMapping注解;
2. 再在 springmvc.xml 文件中配置注解开发的 Handler(即添加对应Handler(即 Controller)类的 bean);
3. 如果有多个 Controller类,则在 springmvc.xml 文件中直接开启注解扫描方式:
<context:component-scan base-package="com.asd"></context:component-scan>
4. 视图解析器 ViewResolver:
根据逻辑视图名解析成真正的视图:
1. ItemListController3.java 类中
modelAndView.setViewName(“/WEB-INF/jsp/itemsList.jsp”)不写全名,改为 modelAndView.setViewName(“itemsList”);
2. springmvc.xml 文件中视图解析器中的 bean添加< prperty>属性标签配置前后缀 (前缀+逻辑视图名+后缀);
2. springmvc.xml(使用注解后)
<beans xmlns="http://www.springframework.org/schema/beans" xmlns:p="http://www.springframework.org/schema/p" xmlns:xsi="http://www.w3.org/2001/XMLSchema-instance" xmlns:context="http://www.springframework.org/schema/context" xmlns:tx="http://www.springframework.org/schema/tx" xmlns:aop="http://www.springframework.org/schema/aop" xsi:schemaLocation="http://www.springframework.org/schema/beans http://www.springframework.org/schema/beans/spring-beans.xsd http://www.springframework.org/schema/context http://www.springframework.org/schema/context/spring-context.xsd http://www.springframework.org/schema/tx http://www.springframework.org/schema/tx/spring-tx.xsd http://www.springframework.org/schema/aop http://www.springframework.org/schema/aop/spring-aop.xsd"><!-- 3.注解开发的Handler -->//单个类时:<bean class="com.asd.ItemListController3"></bean><context:component-scan base-package="com.asd"></context:component-scan><!-- 1.注解映射器 --><bean name="" class="org.springframework.web.servlet.mvc.method.annotation.RequestMappingInfoHandlerMapping"></bean><!-- 2.注解适配器 --><bean class="org.springframework.web.servlet.mvc.method.annotation.RequestMappingHandlerAdapter"></bean><!-- 4.视图解析器 --><bean class="org.springframework.web.servlet.view.InternalResourceViewResolver"><property name="prefix" value="/WEB-INF/jsp"></property><property name="suffix" value=".jsp"></property></bean></beans>
2. springmvc.xml(使用注解前)
<beans xmlns="http://www.springframework.org/schema/beans" xmlns:p="http://www.springframework.org/schema/p" xmlns:xsi="http://www.w3.org/2001/XMLSchema-instance" xmlns:context="http://www.springframework.org/schema/context" xmlns:tx="http://www.springframework.org/schema/tx" xmlns:aop="http://www.springframework.org/schema/aop" xsi:schemaLocation="http://www.springframework.org/schema/beans http://www.springframework.org/schema/beans/spring-beans.xsd http://www.springframework.org/schema/context http://www.springframework.org/schema/context/spring-context.xsd http://www.springframework.org/schema/tx http://www.springframework.org/schema/tx/spring-tx.xsd http://www.springframework.org/schema/aop http://www.springframework.org/schema/aop/spring-aop.xsd"><!-- 3.配置Handler(因为使用BeanNameUrlHandlerMapping处理器映射器,name配置是url) --><bean id="itemsListController1" name="/itemsList.action" class="com.asd.ItemListController"></bean><bean id="itemsListController2" class="com.asd.ItemListController2"></bean><!-- 1.处理器映射器 --> //可以省略<!-- 法一:根据bean的name(自定义)查找handler,将action的url配置在bean的name中 --><bean class="org.springframework.web.servlet.handler.BeanNameUrlHandlerMapping"></bean><!-- 法二:根据bean的name(自定义)查找handler,将action的url配置在bean的name中 --><bean class="org.springframework.web.servlet.handler.SimpleUrlHandlerMapping"><property name="mapping"><props> <!-- < prop>标签中 key:url;值:handler的id --><prop key="/items1.action">itemsListController1</prop>//<prop key="/items2.action">itemsListController1</prop><prop key="/items2.action">itemsListController2</prop></props></property></bean><!-- 2.处理器适配器 --> //可以省略<bean class="org.springframework.web.servlet.mvc.SimpleControllerHandlerAdapter"></bean><bean class="org.springframework.web.servlet.mvc.HttpRequestHandlerAdapter"></bean><!-- 4.视图解析器 --> //可以省略<bean class="org.springframework.web.servlet.view.InternalResourceViewResolver"></bean></beans>
3. ItemListController3.java
(不需要实现接口了,需要在 Handler即 Controller使用 @Controller 标识这是一个控制器;使用 @RequestMapping指定 Handler方法对应的 URL(URL可以与方法名不一致,但建议一致,方便开发维护);
@Controllerpublic class ItemListController3 {@RequestMapping("/queryItems")public ModelAndView handleRequest(HttpServletRequest request,HttpServletResponse response)throws Exception{//静态数据(商品列表)List<Items> itemsList=new ArrayList<Items>();Items item1=new Items();item1.setName("笔记本");item1.setPrice(5000);item1.setDetail("笔记本电脑");Items item2=new Items();item2.setName("手机");item2.setPrice(5000);item2.setDetail("华为手机");itemsList.add(item1);itemsList.add(item2);ModelAndView modelAndView=new ModelAndView();//填充数据到 request域中modelAndView.addObject("items",itemsList);//视图//指定转发的jsp页面//真正视图名:modelAndView.setViewName("/WEB-INF/jsp/itemsList.jsp");modelAndView.setViewName("itemsList"); //逻辑视图名return modelAndView;}}
运行结果:
(URL:http: // localhost8080/项目名/queryItems.action)
(queryItems即为 Controller中 @ResultMapping注解指定的 url;)


")


还没有评论,来说两句吧...