线程通信实现方式
第一种方式是wait和(notify)notifyAll的方式,一个线程负责变量的新增,一个线程负责变量的相减,一个线程操作完,另一个线程等待,具体操作请看下面的代码
这里需要注意的是一定尽量要用while判断,不要用if判断
第一消除notifyAll() 引起的并发问题,第二在while循环里而不是if语句下使用wait。这样,循环会在线程睡眠前后都检查wait的条件,并在条件实际上并未改变的情况下处理唤醒通知。
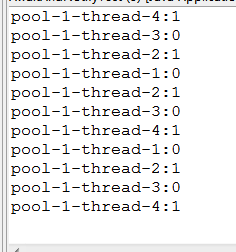
/****/package demo2;import java.util.concurrent.ExecutorService;import java.util.concurrent.Executors;/*** @author liuchaojun* @date 2018-12-13 下午06:50:25*/public class AwaitAndNotifyTest {private int i;public void end() {System.out.println(Thread.currentThread().getName() + ":所有线程执行完毕!");}public synchronized void add() {try {while(i==1){wait();// 做完本线程等待Thread.sleep(10);}} catch (InterruptedException e) {e.printStackTrace();}System.out.println(Thread.currentThread().getName() + ":" + (i++));notifyAll();// 释放其他线程}public synchronized void remove() {try {while(i==0){wait();// 做完本线程等待Thread.sleep(10);}} catch (InterruptedException e) {e.printStackTrace();}System.out.println(Thread.currentThread().getName() + ":" + (i--));notifyAll();// 释放其他线程}public static void main(String[] args) {AwaitAndNotifyTest c = new AwaitAndNotifyTest();ExecutorService t = Executors.newFixedThreadPool(4);for (int i = 0; i < 25; i++) {t.execute(new Task1(c));t.execute(new Task2(c));}}}class Task1 implements Runnable {private AwaitAndNotifyTest awaitAndNotifyTest;public Task1(AwaitAndNotifyTest awaitAndNotifyTest) {super();this.awaitAndNotifyTest = awaitAndNotifyTest;}/** (non-Javadoc)** @see java.lang.Runnable#run()*/@Overridepublic void run() {awaitAndNotifyTest.add();}}class Task2 implements Runnable {private AwaitAndNotifyTest awaitAndNotifyTest;public Task2(AwaitAndNotifyTest awaitAndNotifyTest) {super();this.awaitAndNotifyTest = awaitAndNotifyTest;}/** (non-Javadoc)** @see java.lang.Runnable#run()*/@Overridepublic void run() {awaitAndNotifyTest.remove();}}
第二种方式使用ReentrantLock的锁,Condition等待和释放,具体操作看下面代码
这里excute和submit的方法在于
- 接收的参数不一样;
2.submit有返回值,而execute没有(返回一个future。可以用这个future来判断任务是否成功完成)
例如,有个validation的task,希望该task执行完后告诉我它的执行结果,是成功还是失败,然后继续下面的操作。
3.submit方便Exception处理
例如,如果task里会抛出checked或者unchecked exception,而你又希望外面的调用者能够感知这些exception并做出及时的处理,那么就需要用到submit,通过对Future.get()进行抛出异常的捕获,然后对其进行处理。
/****/package demo2;import java.util.concurrent.ExecutorService;import java.util.concurrent.Executors;import java.util.concurrent.locks.Condition;import java.util.concurrent.locks.ReentrantLock;/*** @author liuchaojun* @date 2018-12-14 上午08:34:09*/public class ReentrantLockAndConditionTest {private int i;private ReentrantLock reentrantLock = new ReentrantLock();private Condition condition = reentrantLock.newCondition();public void end() {System.out.println(Thread.currentThread().getName() + ":所有线程执行完毕!");}public void add() {try {reentrantLock.lock();while (i != 0) {condition.await();}System.out.println(Thread.currentThread().getName() + ":" + (i++));condition.signalAll();} catch (InterruptedException e) {e.printStackTrace();} finally {reentrantLock.unlock();}}public void remove() {try {reentrantLock.lock();while (i != 1) {condition.await();}System.out.println(Thread.currentThread().getName() + ":" + (i--));condition.signalAll();} catch (InterruptedException e) {e.printStackTrace();} finally {reentrantLock.unlock();}}public static void main(String[] args) {ReentrantLockAndConditionTest c = new ReentrantLockAndConditionTest();ExecutorService t = Executors.newFixedThreadPool(4);for (int i = 0; i < 5; i++) {t.execute(new Task3(c));t.execute(new Task4(c));}t.shutdown();}}class Task3 implements Runnable {private ReentrantLockAndConditionTest reentrantLockAndConditionTest;public Task3(ReentrantLockAndConditionTest reentrantLockAndConditionTest) {super();this.reentrantLockAndConditionTest = reentrantLockAndConditionTest;}/** (non-Javadoc)** @see java.lang.Runnable#run()*/@Overridepublic void run() {reentrantLockAndConditionTest.add();}}class Task4 implements Runnable {private ReentrantLockAndConditionTest reentrantLockAndConditionTest;public Task4(ReentrantLockAndConditionTest reentrantLockAndConditionTest) {super();this.reentrantLockAndConditionTest = reentrantLockAndConditionTest;}/** (non-Javadoc)** @see java.lang.Runnable#run()*/@Overridepublic void run() {reentrantLockAndConditionTest.remove();}}
" class="reference-link">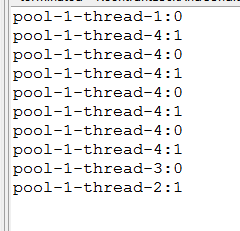
第三种方式使用队列LinkedBlockingQueue
java.util.concurrent包下的新类。LinkedBlockingQueue就是其中之一,是一个阻塞的线程安全的队列,底层采用链表实现。
LinkedBlockingQueue构造的时候若没有指定大小,则默认大小为Integer.MAX\_VALUE,当然也可以在构造函数的参数中指定大小。LinkedBlockingQueue不接受null。添加元素的方法有三个:add,put,offer,且这三个元素都是向队列尾部添加元素的意思。区别:add方法在添加元素的时候,若超出了度列的长度会直接抛出异常:put方法,若向队尾添加元素的时候发现队列已经满了会发生阻塞一直等待空间,以加入元素。offer方法在添加元素时,如果发现队列已满无法添加的话,会直接返回false。从队列中取出并移除头元素的方法有:poll,remove,take。poll: 若队列为空,返回null。remove:若队列为空,抛出NoSuchElementException异常。take:若队列为空,发生阻塞,等待有元素。
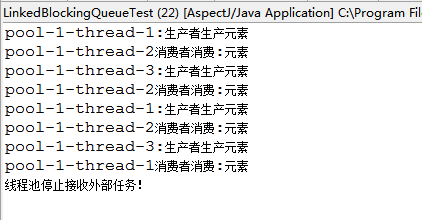
我们这里使用的是put和take方法,下面就是实现的代码。
/****/package demo2;import java.util.concurrent.ExecutorService;import java.util.concurrent.Executors;import java.util.concurrent.LinkedBlockingQueue;import java.util.concurrent.TimeUnit;/*** @author liuchaojun* @date 2018-12-14 上午09:01:48*/public class LinkedBlockingQueueTest {public static void main(String[] args) {LinkedBlockingQueue<String> blockingQueue = new LinkedBlockingQueue<String>();ExecutorService t = Executors.newFixedThreadPool(4);for (int i = 0; i < 5; i++) {t.execute(new Task5(blockingQueue));t.execute(new Task6(blockingQueue));}if (!t.isShutdown()) {t.shutdown();System.out.println("线程池停止接收外部任务!");try {boolean flag = t.awaitTermination(300, TimeUnit.SECONDS);if (flag) {System.out.println("线程池已经停止!");}} catch (InterruptedException e) {e.printStackTrace();}}}}class Task5 implements Runnable {private LinkedBlockingQueue blockingQueue;public Task5(LinkedBlockingQueue blockingQueue) {super();this.blockingQueue = blockingQueue;}/** (non-Javadoc)** @see java.lang.Runnable#run()*/@Overridepublic void run() {try {while (blockingQueue.size() < 1) {System.out.println(Thread.currentThread().getName()+ ":生产者生产元素");blockingQueue.put("元素");}} catch (InterruptedException e) {e.printStackTrace();}}}class Task6 implements Runnable {private LinkedBlockingQueue blockingQueue;public Task6(LinkedBlockingQueue blockingQueue) {super();this.blockingQueue = blockingQueue;}/** (non-Javadoc)** @see java.lang.Runnable#run()*/@Overridepublic void run() {try {while (true) {System.out.println(Thread.currentThread().getName() + "消费者"+ "消费:" + blockingQueue.take());}} catch (InterruptedException e) {e.printStackTrace();}}}


")

实践篇 动手理解RabbitMQ五种模式 两小时搞定Rabbit应用 摸清路由器的的路由、广播、Topic 类型 了解Comfirm Return的过程")
:构建下一代基础设施 PDN")


还没有评论,来说两句吧...