Docker搭建MySQL服务
Docker开源镜像
前面我们已经安装好了Docker,也简单了解了Docker。那么我们可以尝试搭建一个MySQL服务。
要搭建服务就要启动服务容器,要创建容易就要有镜像,Docker提供了一个类似Github的开源平台,提供开源镜像,放心可靠。(毕竟大家都看着源码呢)
Docker开源镜像传送门
大概步骤
1. 下载MySQL镜像
2. 创建运行容器
好像很简单是吧?
详细步骤
第零步,查看Docker MySQL文档
MySQL文档地址:
https://hub.docker.com/_/mysql/
第一步,拉取MySQL镜像
$ sudo docker pull mysql
之后docker会自动拉取(下载)MySQL镜像。
等待同样是漫长的。。。
注意,若提示拉取失败就重复几次,总有一次会成功的。。。没办法,墙内的人民很辛苦
拉取成功后我们查看一下:
$ sudo docker images

第二步,创建并启动一个MySQL容器
输入以下命令:
$ sudo docker run --name pwc-mysql -e MYSQL_ROOT_PASSWORD=123456 -p 3306:3306 -d mysql

- –name:给新创建的容器命名,此处命名为
pwc-mysql - -e:配置信息,此处配置
mysql的root用户的登陆密码 - -p:端口映射,此处映射
主机3306端口到容器pwc-mysql的3306端口 - -d:成功启动容器后输出容器的完整ID,例如上图
73f8811f669ee... - 最后一个
mysql指的是mysql镜像名字
到这里我们查看容器运行状态:
$ sudo docker ps

上图可以看到容器的简写ID,容器的源镜像,创建时间,状态,端口映射信息,容器名字等。
第三步,测试连接MySQL
这里我使用navicat远程连接,连接MySQL前需要防火墙开放端口或者关闭防火墙。
开放端口:
$ sudo firewall-cmd --add-port=3306/tcp
关闭防火墙:
$ sudo systemctl stop firewalld
接着使用navicat连接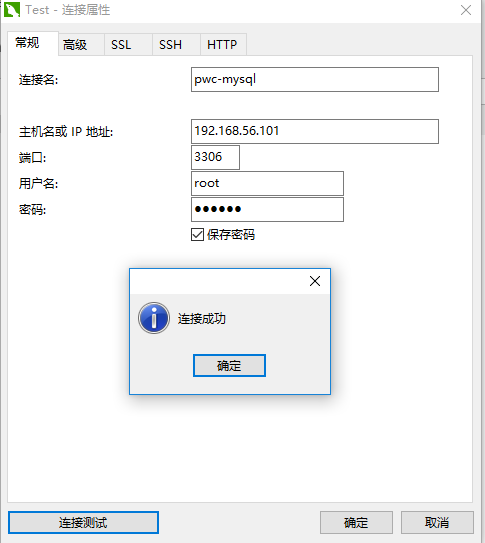
连接成功,也可以进行相关数据库操作,因此MySQL服务搭建成功!
其他
1.可以启动多个MySQL服务,因为我们启动的是容器,容器可以有多个,只要容器名字映射段端口不一样就可以了,例如:
$ sudo docker run --name dbdb -e MYSQL_ROOT_PASSWORD=123456 -p 6666:3306 -d mysql
2.查看所有容器(启动状态或者关闭状态)
$ sudo docker ps -a
3.启动和关闭容器
启动命令:
$ sudo docker start pwc-mysql //通过指定容器名字$ sudo docker start 73f8811f669e //通过指定容器ID
关闭命令:
$ sudo docker stop pwc-mysql //通过指定容器名字$ sudo docker stop 73f8811f669e //通过指定容器ID
3.修改MySQL配置文件有两种方法:
一是进入容器,修改容器里的MySQL的配置文件,然后重新启动容器,例如:
$ sudo docker exec -it pwc-mysql /usr/bin/bash
然后可以进入容器的命令行模式,接着修改
/etc/mysql/my.cnf文件即可二是挂载主机的mysql配置文件,官方文档如下:
The MySQL startup configuration is specified in the file
/etc/mysql/my.cnf, and that file in turn includes any files found in the/etc/mysql/conf.ddirectory that end with .cnf. Settings in files in this directory will augment and/or override settings in/etc/mysql/my.cnf. If you want to use a customized MySQL configuration, you can create your alternative configuration file in a directory on the host machine and then mount that directory location as/etc/mysql/conf.dinside the mysql container.If
/my/custom/config-file.cnfis the path and name of your custom configuration file, you can start your mysql container like this (note that only the directory path of the custom config file is used in this command):$ docker run --name some-mysql -v /my/custom:/etc/mysql/conf.d -e MYSQL_ROOT_PASSWORD=my-secret-pw -d mysql:tag
This will start a new container some-mysql where the MySQL instance uses the combined startup settings from
/etc/mysql/my.cnfand/etc/mysql/conf.d/config-file.cnf, with settings from the latter taking precedence.
我大概可以看懂,相信大家都可以的


")
实现")

算法")
之python实现")


还没有评论,来说两句吧...