Spring Cloud 配置Eureka Server高可用集群之吊打拦路虎
Spring Cloud 配置Eureka Server高可用集群之吊打拦路虎
源码地址:https://download.csdn.net/download/qq_33624284/10923226
案例:工具采用 idea + 项目结构采用maven多module的结构 + spring boot 版本为 2.1.2
创建空模板Maven项目 eureka
pom.xml依赖:<?xml version=”1.0” encoding=”UTF-8”?>
4.0.0
com.ztw
eureka
1.0-SNAPSHOT
pom
org.springframework.boot
spring-boot-starter-parent
2.1.2.RELEASE
eureka-server
UTF-8
UTF-8
1.8
Finchley.RELEASE
org.springframework.cloud
spring-cloud-dependencies
${spring-cloud.version}
pom
import
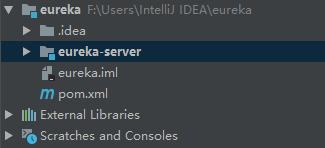
在eureka下创建module eureka-server,目录结构如下:
pom.xml依赖:<?xml version=”1.0” encoding=”UTF-8”?>
4.0.0
com.ztw
eureka-server
0.0.1-SNAPSHOT
jar
eureka-server
Demo project for Spring Boot
com.ztw
eureka
1.0-SNAPSHOT
1.8
org.springframework.cloud
spring-cloud-starter-netflix-eureka-server
org.springframework.boot
spring-boot-starter-test
test
org.springframework.boot
spring-boot-maven-plugin
application.yml配置:
server:port: 4001eureka:instance:hostname: localhostclient:###因为是单个服务,不需要注册#fetch-registry: false#register-with-eureka: falsefetch-registry: falseregister-with-eureka: falseserviceUrl:defaultZone: http://${eureka.instance.hostname}:${server.port}/eureka/
EurekaServerApplication.class:
package com.ztw;import org.springframework.boot.SpringApplication;import org.springframework.boot.autoconfigure.SpringBootApplication;import org.springframework.cloud.netflix.eureka.server.EnableEurekaServer;@SpringBootApplication@EnableEurekaServerpublic class EurekaServerApplication {public static void main(String[] args) {SpringApplication.run(EurekaServerApplication.class, args);}}
http://localhost:4001/ 圈起来的为空,是因为我们还没有客户注册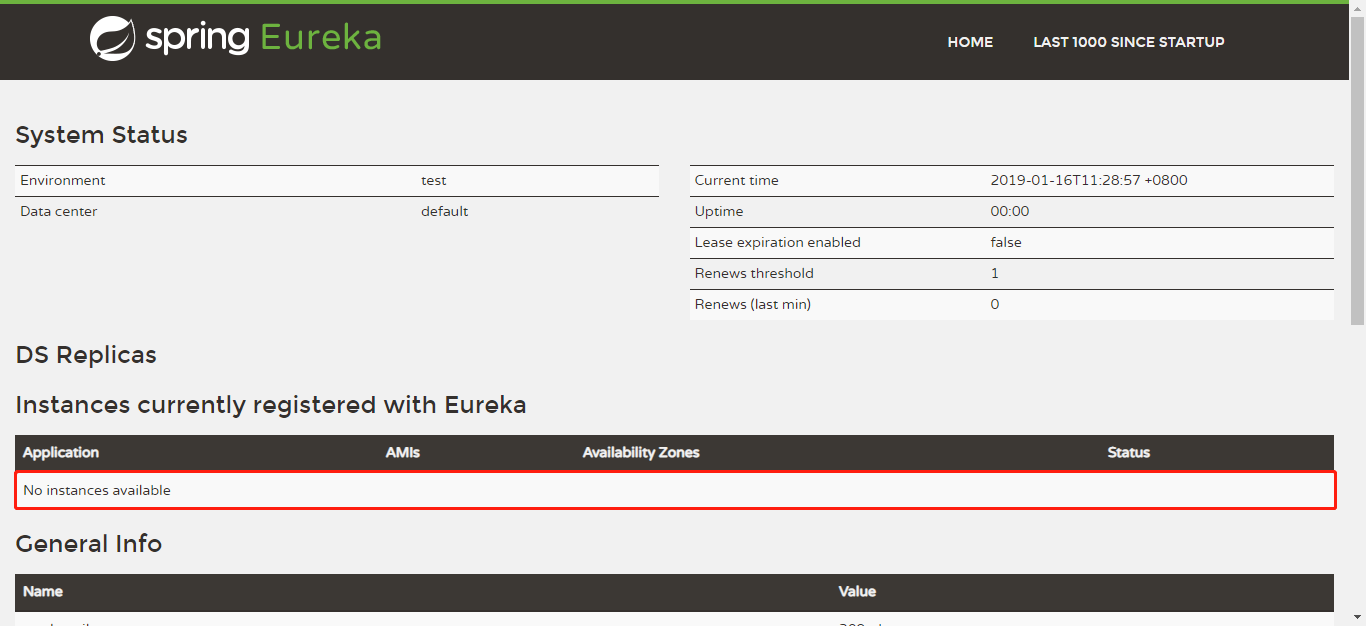
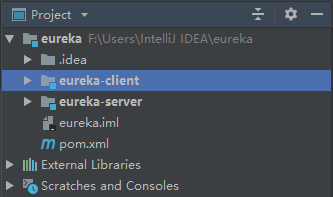
在eureka下创建module eureka-client,目录结构如下:
pom.xml依赖:<?xml version=”1.0” encoding=”UTF-8”?>
4.0.0
com.ztw
eureka-client
0.0.1-SNAPSHOT
jar
eureka-client
Demo project for Spring Boot
com.ztw
eureka
1.0-SNAPSHOT
1.8
org.springframework.cloud
spring-cloud-starter-netflix-eureka-client
org.springframework.boot
spring-boot-starter-web
org.springframework.boot
spring-boot-starter-test
test
org.springframework.boot
spring-boot-maven-plugin
application.yml配置:
server:port: 4002eureka:instance:hostname: localhostclient:###需要注册#fetch-registry: false#register-with-eureka: falseserviceUrl:###服务地址,注册defaultZone: http://${eureka.instance.hostname}:4001/eureka/spring:application:name: eureka-client
EurekaClientApplication.class:
package com.ztw;import org.springframework.boot.SpringApplication;import org.springframework.boot.autoconfigure.SpringBootApplication;import org.springframework.cloud.netflix.eureka.EnableEurekaClient;@SpringBootApplication@EnableEurekaClientpublic class EurekaClientApplication {public static void main(String[] args) {SpringApplication.run(EurekaClientApplication.class, args);}}
http://localhost:4001/ 圈起来的地方已经有eureka-client 证明注册成功了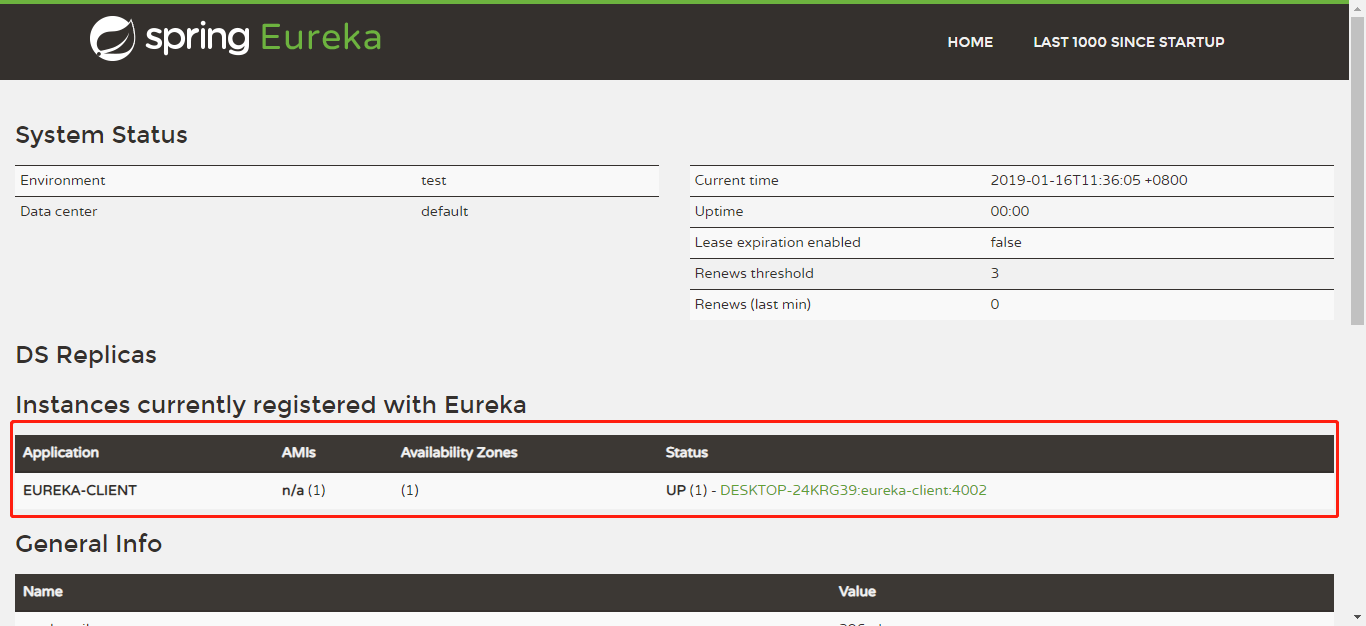
拓展:
eureka:instance:###续约心跳时间30秒# lease-renewal-interval-in-seconds: 30###服务剔除时间90秒# lease-expiration-duration-in-seconds: 90server:###响应缓存30秒,不会立即注册# response-cache-update-interval-ms: 30###Eureka自我保护,#Eureka Serve接收到的服务续约低于为该值配置的百分比(默认为 15 分钟 内低于 85% ),#则服务器开启自我保护模式,即不再剔除注册列表的信息。# enable-self-preservation: false
配置eureka 高可用集群(两个为例)
hosts文件配置:C:\Windows\System32\drivers\etc
hosts
127.0.0.1 peer7
127.0.0.1 peer8
eureka-server application.yml文件配置:
---spring:profiles: peer7server:port: 4007eureka:instance:###实际应用配服务地址,这里为本地开发环境,已"peer7"参数直观代替hostname: peer7client:###因为是多个服务集群,需要注册#fetch-registry: false#register-with-eureka: falseserviceUrl:defaultZone: http://peer8:4008/eureka/---spring:profiles: peer8server:port: 4008eureka:instance:hostname: peer8client:serviceUrl:defaultZone: http://peer7:4007/eureka/
eureka-client application.yml文件配置:
server:port: 4002eureka:instance:hostname: localhostclient:###需要注册#fetch-registry: false#register-with-eureka: falseserviceUrl:###服务地址,向一个服务注册defaultZone: http://${eureka.instance.hostname}:4007/eureka/spring:application:name: eureka-client
- 分别启动对应服务(idea)两次服务启动,需要配置步骤如下:
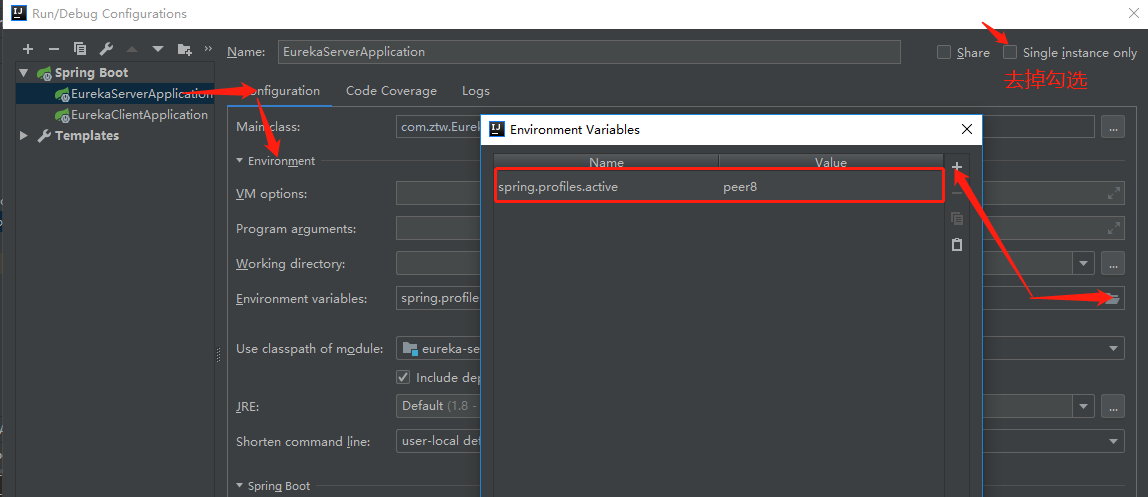
eureka-client 选择main方法启动即可。 - 验证结果
http://peer7:4007/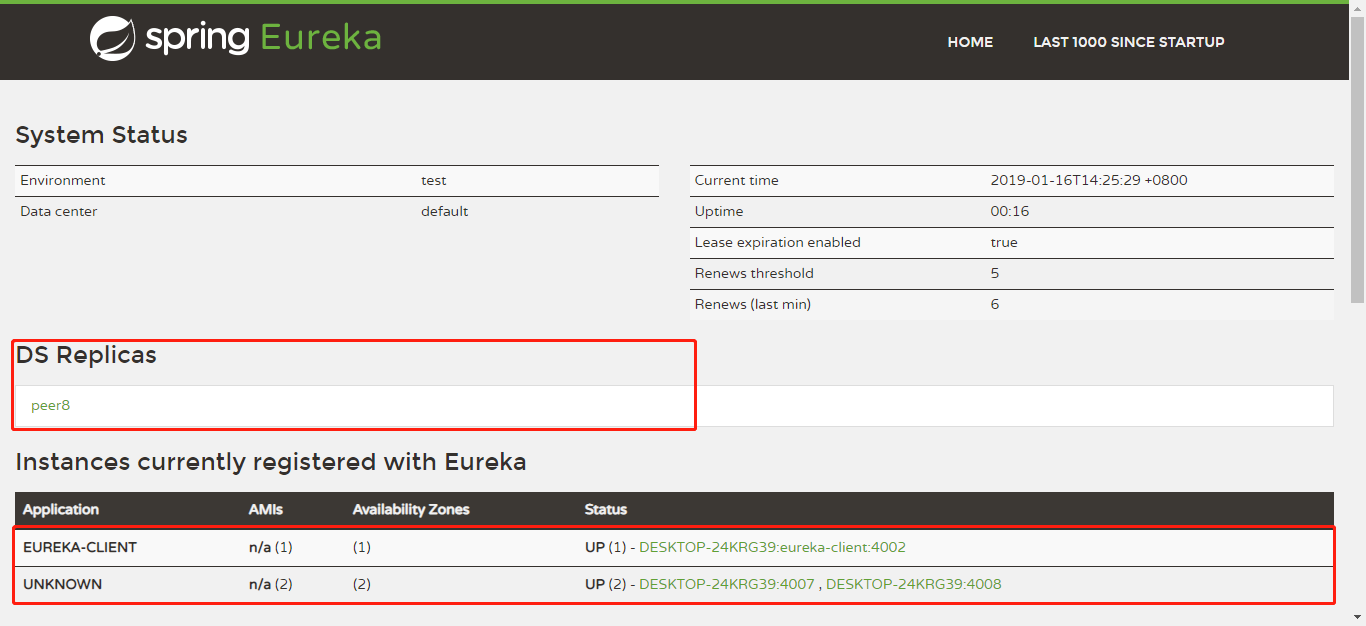
http://peer8:4008/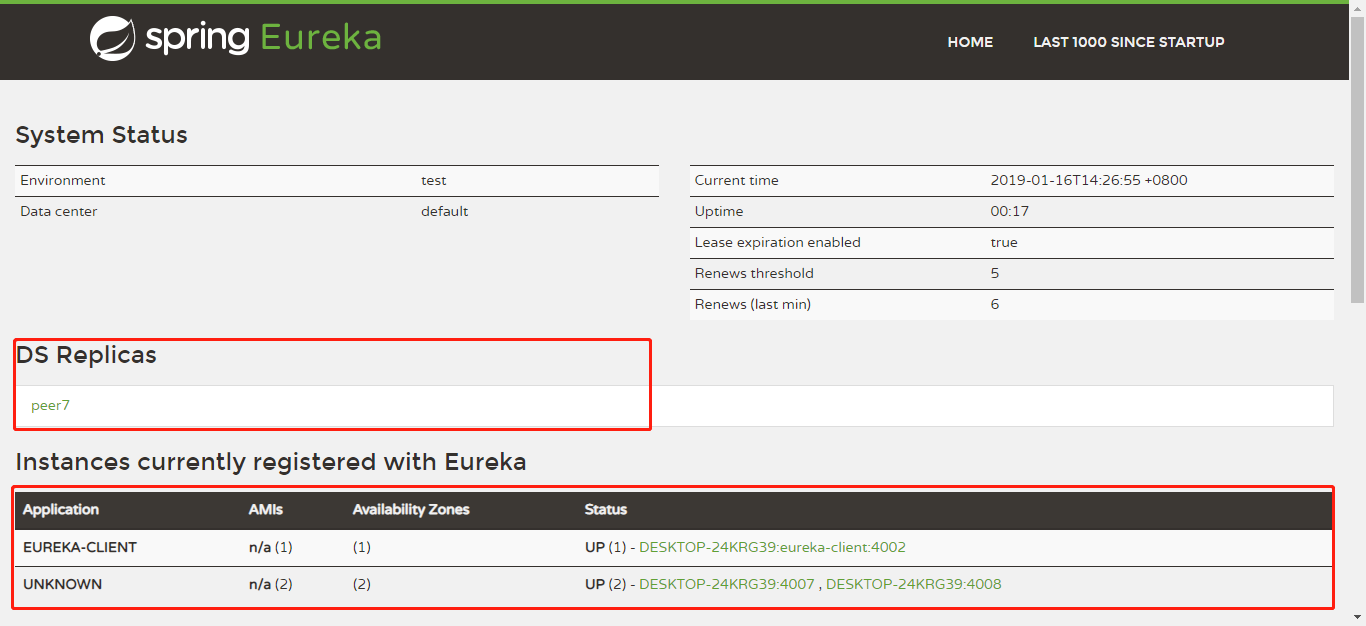
通过访问两个eureka 服务,得到界面的结果来看,都有我们的eureka-client,而我们在client只向peer7:4007/这个服务中注册过,结论明显:两个服务共享了,实现了eureka server集群。
以上是详细的eureka 配置过程,(eclipse 的搭建未写,可以自己尝试)搭建项目过程中报错的过程都省略了,对应的解决方法都在上面,可以自己动手配置,一步一步走,遇到问题对照博文修改。


显示堆内存使用情况(show heap status)")
 整合Nacos实现配置管理、服务注册与发现")

")


还没有评论,来说两句吧...