spring-03 IOC注解相关
文章目录
- 1.基于注解的IOC配置
- 1.1 applicationContext.xml
- 1.2 类添加注解
- 1.2.1 @Component
- 1.2.2 Spring中提供了@Component的衍生注解
- 1.3 测试方法
- 2.注解配置-依赖注入
- 2.1 @Autowired
- 2.2 @Qualifier
- 2.3 @Resource
- 2.4 @Value
- 2.4.1 @Value(“#{}“)与@Value(“${}“)的区别
- 3.注解配置-作用域
- 3.1 @Scope
- 4.注解配置-初始化和销毁(单例)
- 5.配置文件引用
- 6.使用spring的注解配置,去掉applicationContext.xml中所有配置(springboot基础)
- 6.1 配置类
- 6.1.1 @Configuration注解
- 6.1.2 @ComponentScan
- 6.1.3 @Bean
- 6.2 测试
- 6.3 @Import注解
- 6.4 @PropertySource
- 6.5 @Qualifier
- 7.使用spring整合Junit
- 7.1 添加maven依赖
- 7.2 使用
1.基于注解的IOC配置
1.1 applicationContext.xml
<!--告知spring在创建容器时要扫描的包,配置所需要的标签不是在beans的约束中,而是一个名称为context名称空间和约束中--><!--<context:annotation-config> 和 <context:component-scan>的区别--><!--<context:annotation-config> 是用于激活那些已经在spring容器里注册过的bean(无论是通过xml的方式还是通过package sanning的方式)上面的注解。--><!--<context:component-scan>除了具有<context:annotation-config>的功能之外,<context:component-scan>还可以在指定的package下扫描以及注册javabean 。--><!--<context:annotation-config/>--><context:component-scan base-package="com.myx"></context:component-scan>
1.2 类添加注解
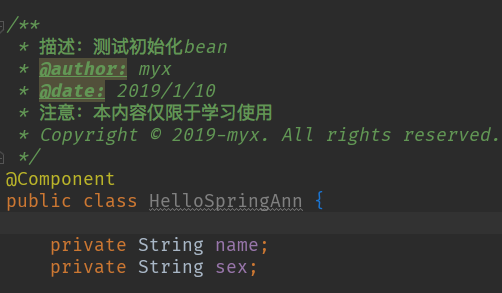
1.2.1 @Component
用于把当前类对象存入spring容器中
属性:value:用于指定bean的id。当我们不写时,它的默认值是当前类名,且首字母改小写。
1.2.2 Spring中提供了@Component的衍生注解
- @Controller:用来修饰WEB层类(控制层)(springMVC延用了该注解)
- @Service:用来修饰service层类(业务层)
- @Repository:用来修饰DAO层类(持久层)
以上三个注解他们的作用和属性与Component是一模一样。
他们三个是spring框架为我们提供明确的三层使用的注解,使我们的三层对象更加清晰。
1.3 测试方法
import org.springframework.context.support.ClassPathXmlApplicationContext;/** * 描述:测试注解bean * @author: myx * @date: 2019/1/10 * 注意:本内容仅限于学习使用 * Copyright © 2019-myx. All rights reserved. */public class Test {public static void main(String[] args) {/** * 【ApplicationContext 接口的实现类 】 (1)ClassPathXmlApplicationContext: 它是从类的根路径下加载配置文件 推荐使用这种 (2)FileSystemXmlApplicationContext: 它是从磁盘路径上加载配置文件,配置文件可以在磁盘的任意位置。注意磁盘的权限 (3)AnnotationConfigApplicationContext: 当我们使用注解配置容器对象时,需要使用此类来创建spring 容器。它用来读取注解。 */ClassPathXmlApplicationContext ac = new ClassPathXmlApplicationContext("applicationContext.xml");HelloSpringAnn bean = ac.getBean(HelloSpringAnn.class);System.out.println(bean);}}
2.注解配置-依赖注入
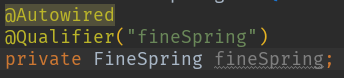
2.1 @Autowired
自动按照类型注入。只要容器中有唯一的一个bean对象类型和要注入的变量类型匹配,就可以注入成功,如果ioc容器中没有任何bean的类型和要注入的变量类型匹配,则报错,如果Ioc容器中有多个类型匹配时:
先按照类型匹配,如果不能匹配上,会按照属性的名称进行匹配
- 出现位置:可以是变量上,也可以是set方法上
- 细节:在使用注解注入时,set方法就不是必须的了。
注入集合
第一步:@BeanPublic List<User> createList(){// 组织数据List<User> list = new ArrayList<User>();return list;}第二步:@Autowiredprivate List<User> list;
2.2 @Qualifier
在按照类中注入的基础之上再按照名称注入。
属性:value:用于指定注入bean的id。
2.3 @Resource
直接按照bean的id注入。如果id属性不存在,可以再按照类型注入。它可以独立使用
属性:name:用于指定bean的id,如果指定name,只能按照bean的id注入,不能按照类型注入。
以上三个注入都只能注入其他bean类型的数据,而基本类型和String类型无法使用上述注解实现(使用@Value)
2.4 @Value
用于注入基本类型和String类型的数据
属性:value:用于指定数据的值。使用${表达式}可以读取配置文件(.properties文件)的信息
@Value(value = "myx")private String name;@Value(value = "18")private Integer age;
2.4.1 @Value(“#{}“)与@Value(“${}“)的区别
区别
3.注解配置-作用域
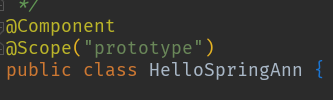
3.1 @Scope
用于指定bean的作用范围
属性:value:指定范围的取值。常用取值:singleton prototype
4.注解配置-初始化和销毁(单例)
@PostConstructpublic void init(){System.out.println("初始化方法执行了");}@PreDestroypublic void destroy(){System.out.println("销毁方法执行了");}
5.配置文件引用
使用import加载多个applicationContext.xml
让程序加载多个spring的配置文件,对spring的配置文件细分
- applicationContext.xml:加载第三方的配置(数据源、QueryRunner)
- applicationContext-dao.xml:加载自己创建的Dao对象
applicationContext-service.xml:加载自己创建的Service对象
6.使用spring的注解配置,去掉applicationContext.xml中所有配置(springboot基础)
6.1 配置类
表示该类是一个配置类,它的作用和applicationContext.xml是一样的
@Configuration@ComponentScan(value = {"com.myx"})public class SpringConfiguration {}
6.1.1 @Configuration注解
作用:指定当前类是一个配置类,如同applicationContext.xml中的配置
细节:当配置类作为AnnotationConfigApplicationContext对象创建的参数时,该注解可以不写。
6.1.2 @ComponentScan
用于通过注解指定spring在创建容器时要扫描的包
属性:value:它和basePackages的作用是一样的,都是用于指定创建容器时要扫描的包的范围。
我们使用此注解就等同于在xml中配置了:
<context:component-scan base-package="com.itheima"></context:component-scan>
6.1.3 @Bean
用于把当前方法的返回值作为bean对象存入spring的ioc容器中.
属性用于指定bean的id。当不写时,默认值是当前方法的名称
依赖注入细节:
我们使用注解配置方法时,如果方法有参数,spring框架会去容器中查找有没有可用的bean对象,如果有bean对象,将对象通过方法的形参注入到方法中使用。查找的方式和Autowired注解的作用是一样的
/*** 创建数据源对象* @return*/@Bean(name="ds")public DataSource createDataSource(){try {ComboPooledDataSource ds = new ComboPooledDataSource();ds.setDriverClass("com.mysql.jdbc.Driver");ds.setJdbcUrl("jdbc:mysql://localhost:3306/itcastspring");ds.setUser("root");ds.setPassword("root");return ds;}catch (Exception e){throw new RuntimeException(e);}}
6.2 测试
public class AccountServiceTest {@Testpublic void testFindAll() {ApplicationContext ac = new AnnotationConfigApplicationContext(SpringConfiguration.class);HelloSpringAnn bean = ac.getBean(HelloSpringAnn.class);System.out.println(bean);}}
6.3 @Import注解
用于导入其他的配置类
属性:value:用于指定其他配置类的字节码。
当我们使用Import的注解之后,有Import注解的类就父配置类,而导入的都是子配置类
相当于:
applicationContext.xml中的<import resource=””>public class JdbcConfig {/*** 用于创建一个QueryRunner对象* @param dataSource* @return*/@Bean(name="runner")@Scope("prototype")public QueryRunner createQueryRunner(DataSource dataSource){return new QueryRunner(dataSource);}/*** 创建数据源对象* @return*/@Bean(name="ds")public DataSource createDataSource(){try {ComboPooledDataSource ds = new ComboPooledDataSource();ds.setDriverClass("com.mysql.jdbc.Driver");ds.setJdbcUrl("jdbc:mysql://localhost:3306/itcastspring");ds.setUser("root");ds.setPassword("root");return ds;}catch (Exception e){throw new RuntimeException(e);}}}@ComponentScan(value = {"com.nyx"})@Import(value= JdbcConfig.class)public class SpringConfiguration {}
6.4 @PropertySource
用于指定properties文件的位置
属性:value:指定文件的名称和路径。关键字:classpath,表示类路径下
@ComponentScan(value = {"com.myx"})@Import(value= JdbcConfig.class)@PropertySource("classpath:jdbcConfig.properties")public class SpringConfiguration {}
6.5 @Qualifier
如果spring容器中出现了多个数据源类型,使用该注解指定注入的数据源。
@Bean(name="runner")@Scope("prototype")public QueryRunner createQueryRunner(@Qualifier(value = "ds2") DataSource dataSource){return new QueryRunner(dataSource);}
7.使用spring整合Junit
7.1 添加maven依赖
<dependency><groupId>org.springframework</groupId><artifactId>spring-test</artifactId><version>5.0.2.RELEASE</version></dependency><dependency><groupId>junit</groupId><artifactId>junit</artifactId><version>4.12</version></dependency>
7.2 使用
/*** 使用Junit单元测试:测试我们的配置* Spring整合junit的配置* 1、导入spring整合junit的jar(坐标)* 2、使用Junit提供的一个注解把原有的main方法替换了,替换成spring提供的* @Runwith* 3、告知spring的运行器,spring和ioc创建是基于xml还是注解的,并且说明位置* @ContextConfiguration* locations:指定xml文件的位置,加上classpath关键字,表示在类路径下* classes:指定注解类所在地位置** 当我们使用spring 5.x版本的时候,要求junit的jar必须是4.12及以上*/@RunWith(SpringJUnit4ClassRunner.class)@ContextConfiguration(classes = SpringConfiguration.class)public class AccountServiceTest {@Autowiredprivate AccountService as;@Testpublic void testFindAll() {//3.执行方法List<Account> accounts = as.findAllAccount();for(Account account : accounts){System.out.println(account);}}}


")
浅谈控制反转(IOC)与依赖注入(DI)")


还没有评论,来说两句吧...