Spring中bean的生命周期
Spring 中bean 的生命周期短暂吗?
生命周期源码解析
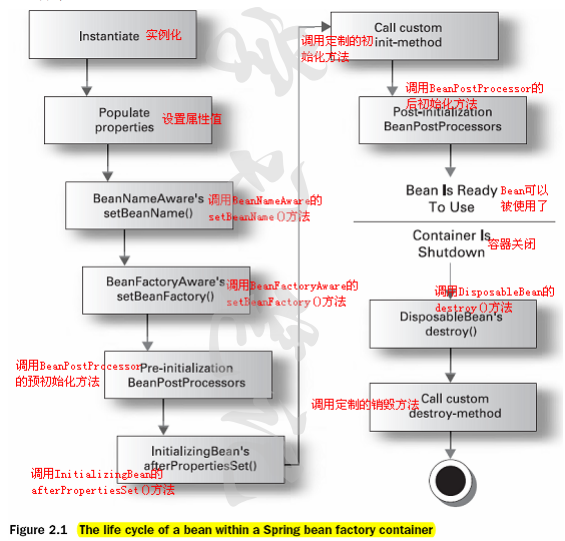
在spring中,从BeanFactory或ApplicationContext取得的实例为Singleton,也就是预设为每一个Bean的别名只能维持一个实例,而不是每次都产生一个新的对象使用Singleton模式产生单一实例,对单线程的程序说并不会有什么问题,但对于多线程的程序,就必须注意安全(Thread-safe)的议题,防止多个线程同时存取共享资源所引发的数据不同步问题。然而在spring中可以设定每次从BeanFactory或ApplicationContext指定别名并取得Bean时都产生一个新的实例:例如:在spring中,singleton属性默认是true,只有设定为false,则每次指定别名取得的Bean时都会产生一个新的实例一个Bean从创建到销毁,如果是用BeanFactory来生成,管理Bean的话,会经历几个执行阶段(如图1.1):
Spring bean 实现初始化、销毁方法的方式
Spring 允许 Bean 在初始化完成后以及销毁前执行特定的操作,常用方法有三种:
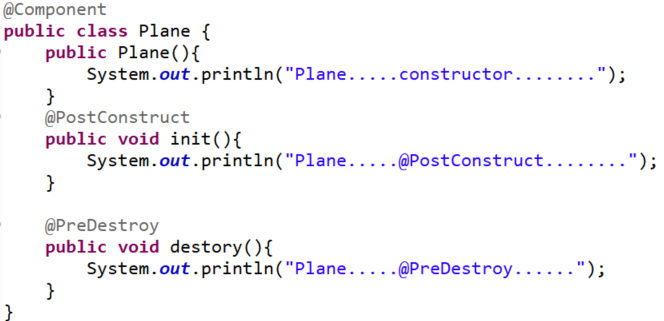
使用注解,在指定方法上加上@PostConstruct或@PreDestroy注解来制定该方法是在初始化之后还是销毁之前调用;
- 使用xml配置或注解Bean(initMethod=“方法名”,destoryMethod=“方法名”),通过
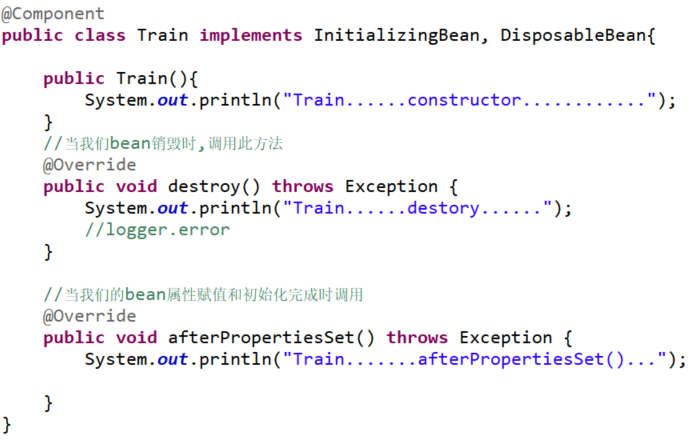
元素的 init-method/destroy-method属性指定初始化之后 /销毁之前调用的操作方法; 实现InitializingBean/DisposableBean 接口来定制初始化之后/销毁之前的操作方法。
找工作的时候有些人会被问道Spring中Bean的生命周期,其实也就是考察一下对Spring是否熟悉,工作中很少用到其中的内容,那我们简单看一下。
在说明前可以思考一下Servlet的生命周期:实例化,初始init,接收请求service,销毁destroy;Spring上下文中的Bean也类似,如下
- 1、实例化一个Bean--容器寻找Bean的定义信息并将其实例化,也就是我们常说的new;
- 2、按照Spring上下文对实例化的Bean进行配置--使用依赖注入,Spring按照Bean定义信息配置Bean所有属性,也就是IOC注入;
- 3、如果这个Bean已经实现了BeanNameAware接口,会调用它实现的setBeanName(String)方法,此处传递的就是Spring配置文件中Bean的id值;
- 4、如果这个Bean已经实现了BeanFactoryAware接口,会调用它实现的setBeanFactory(setBeanFactory(BeanFactory)传递的是Spring工厂自身(可以用这个方式来获取其它Bean,只需在Spring配置文件中配置一个普通的Bean就可以);
- 5、如果这个Bean已经实现了ApplicationContextAware接口,会调用setApplicationContext(ApplicationContext)方法,传入Spring上下文(同样这个方式也可以实现步骤4的内容,但比4更好,因为ApplicationContext是BeanFactory的子接口,有更多的实现方法);
- 6、前置处理器:如果这个Bean实现了BeanPostProcessor接口,将会调用postProcessBeforeInitialization(Object obj, String s)方法,BeanPostProcessor经常被用作是Bean内容的更改,并且由于这个是在Bean初始化结束时调用那个的方法,也可以被应用于内存或缓存技术;
7、如果Bean在Spring配置文件中配置了init-method属性会自动调用其配置的初始化方法。
<bean id="demoBean" class="com.yangsq.bean.DemoBean" init-method="initMethod" destory-method="destoryMethod">.......</bean>
![20190414111907368.png][]
- 8、后置处理器:如果这个Bean实现了BeanPostProcessor接口,将会调用postProcessAfterInitialization(Object obj, String s)方法、;
- 注:以上工作完成以后就可以应用这个Bean了,那这个Bean是一个Singleton的,所以一般情况下我们调用同一个id的Bean会是在内容地址相同的实例,当然在Spring配置文件中也可以配置非Singleton,这里我们不做赘述。
- 9、当Bean不再需要时,会经过清理阶段,如果Bean实现了DisposableBean这个接口,会调用那个其实现的destroy()方法;
- 10、最后,如果这个Bean的Spring配置中配置了destroy-method属性,会自动调用其配置的销毁方法。
以上10步骤可以作为面试或者笔试的模板,另外我们这里描述的是应用Spring上下文Bean的生命周期,如果应用Spring的工厂也就是BeanFactory的话去掉第5步就Ok了。
实例:
package com.linjie.cycle;import org.springframework.beans.factory.BeanNameAware;/*** @author LinJie* @Description:一个学生类(Bean),能体现其生命周期的Bean*/public class Student implements BeanNameAware {private String name;//无参构造方法public Student() {super();}/** 设置对象属性* @param name the name to set*/public void setName(String name) {System.out.println("设置对象属性setName()..");this.name = name;}//Bean的初始化方法public void initStudent() {System.out.println("Student这个Bean:初始化");}//Bean的销毁方法public void destroyStudent() {System.out.println("Student这个Bean:销毁");}//Bean的使用public void play() {System.out.println("Student这个Bean:使用");}/* 重写toString* @see java.lang.Object#toString()*/@Overridepublic String toString() {return "Student [name = " + name + "]";}//调用BeanNameAware的setBeanName()//传递Bean的ID。@Overridepublic void setBeanName(String name) {System.out.println("调用BeanNameAware的setBeanName()..." );}}
XML注册:
<?xml version="1.0" encoding="UTF-8"?><beans xmlns="http://www.springframework.org/schema/beans"xmlns:xsi="http://www.w3.org/2001/XMLSchema-instance"xsi:schemaLocation="http://www.springframework.org/schema/beans http://www.springframework.org/schema/beans/spring-beans.xsd"><!-- init-method:指定初始化的方法destroy-method:指定销毁的方法 --><bean id="student" class="com.linjie.cycle.Student" init-method="initStudent" destroy-method="destroyStudent"><property name="name" value="LINJIE"></property></bean></beans>
测试类:
package com.linjie.cycle;import org.junit.Test;import org.springframework.context.ApplicationContext;import org.springframework.context.support.AbstractApplicationContext;import org.springframework.context.support.ClassPathXmlApplicationContext;public class CycleTest {@Testpublic void test() {ApplicationContext context = new ClassPathXmlApplicationContext("applicationContext.xml");Student student = (Student) context.getBean("student");//Bean的使用student.play();System.out.println(student);//关闭容器((AbstractApplicationContext) context).close();}}
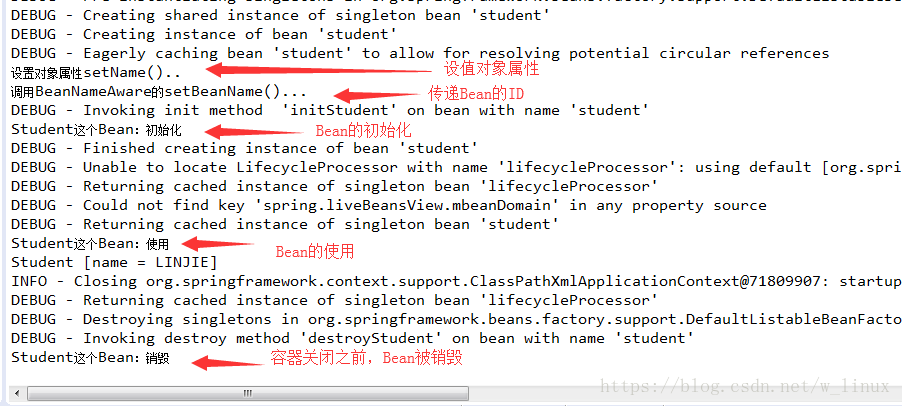
显示结果
Bean的后置处理器
上面bean的一生其实已经算是对bean生命周期很完整的解释了,然而bean的后置处理器,是为了对bean的一个增强。分别在Bean的初始化前后对Bean对象提供自己的实例化逻辑- 实现BeanPostProcessor接口- postProcessBeforeInitialization方法- postProcessAfterInitialization方法
实例:MyBeanPostProcessor.java(实现BeanPostProcessor接口)
package com.linjie.cycle;import org.springframework.beans.BeansException;import org.springframework.beans.factory.config.BeanPostProcessor;/*** bean的后置处理器* 分别在bean的初始化前后对bean对象提供自己的实例化逻辑* postProcessAfterInitialization:初始化之后对bean进行增强处理* postProcessBeforeInitialization:初始化之前对bean进行增强处理*/public class MyBeanPostProcessor implements BeanPostProcessor {//对初始化之后的Bean进行处理//参数:bean:即将初始化的bean//参数:beanname:bean的名称//返回值:返回给用户的那个bean,可以修改bean也可以返回一个新的bean@Overridepublic Object postProcessAfterInitialization(Object bean, String beanname) throws BeansException {Student stu = null;System.out.println("对初始化之后的Bean进行处理,将Bean的成员变量的值修改了");if("name".equals(beanname) || bean instanceof Student) {stu = (Student) bean;stu.setName("Jack");}return stu;}//对初始化之前的Bean进行处理//参数:bean:即将初始化的bean//参数:beanname:bean的名称//返回值:返回给用户的那个bean,可以修改bean也可以返回一个新的bean@Overridepublic Object postProcessBeforeInitialization(Object bean, String beanname) throws BeansException {System.out.println("对初始化之前的Bean进行处理,此时我的名字"+bean);return bean;}}
XML注册组件
<?xml version="1.0" encoding="UTF-8"?><beans xmlns="http://www.springframework.org/schema/beans"xmlns:xsi="http://www.w3.org/2001/XMLSchema-instance"xsi:schemaLocation="http://www.springframework.org/schema/beans http://www.springframework.org/schema/beans/spring-beans.xsd"><!-- init-method:指定初始化的方法destroy-method:指定销毁的方法 --><bean id="student" class="com.linjie.cycle.Student" init-method="initStudent" destroy-method="destroyStudent"><property name="name" value="LINJIE"></property></bean><!-- 配置bean的后置处理器,不需要id,IoC容器自动识别是一个BeanPostProcessor --><bean class="com.linjie.cycle.MyBeanPostProcessor"></bean></beans>
测试:
package com.linjie.cycle;import org.junit.Test;import org.springframework.context.ApplicationContext;import org.springframework.context.support.AbstractApplicationContext;import org.springframework.context.support.ClassPathXmlApplicationContext;public class CycleTest {@Testpublic void test() {ApplicationContext context = new ClassPathXmlApplicationContext("applicationContext.xml");Student student = (Student) context.getBean("student");//Bean的使用student.play();System.out.println(student);//关闭容器((AbstractApplicationContext) context).close();}}
结果:

可以在applicationContext.xml中看到配置Bean后置处理器,不需要ID,只需要其全类名,因为IoC容器自动识别一个BeanPostProcessor。是对所有组件进行增强。
参考:https://blog.csdn.net/w_linux/article/details/80086950


还没有评论,来说两句吧...